Cycling Events Near Colorado Springs this Fall 2022

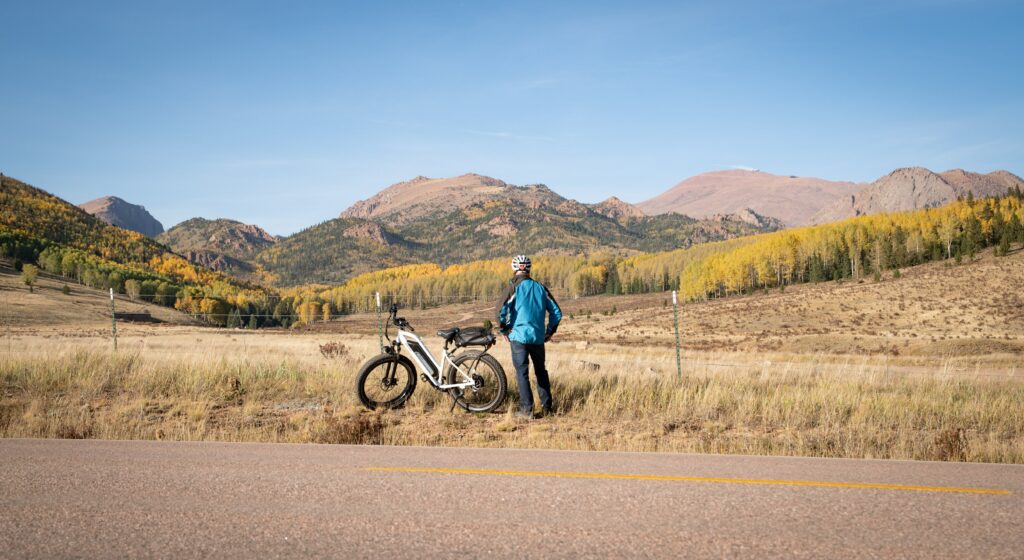
If you are looking forward to hopping on your bike this fall, you’re going to want to check out these awesome cycling events near Colorado Springs. Colorado is known for its gorgeous landscape, and the fall is the absolute best time to take advantage and explore the state’s natural beauty. 

Within a couple hours of Colorado Springs, you can find tons of fun and exciting opportunities to ride with other cycling enthusiasts. There are plenty of courses available for beginnings, youngsters, and competitive riders alike. Here are just a few of the best Colorado cycling events you can enjoy this fall in 2022. 

CU Boulder Buffalo Bicycle Classic

When: Sunday, September 11, 2022

Where: Boulder, CO

Register Here

This historical ride is celebrating its 20th year this September, and now is a great time for you to try it out. There are nine different courses for riders of all ages and abilities, ranging from 14 to 100 miles, and all riders are welcome, even those with e-bikers and trailers. The longer routes head west to the foothills of the Rockies and take you to Nederland, then up to Allenspark. If you haven’t been cycling in Boulder, it is a beautiful place!

Aside from how fun the courses look, this cycling event is also the largest scholarship fundraising event in Colorado. Registration and donations support local “scholars” – Colorado residents attending CU Boulder. At less than two hours driving from Colorado Springs, this cycling event is a great opportunity to challenge yourself.

Pikes Peak APEX 

When: Thursday, September 22, 2022

Where: Colorado Springs, CO

Register Here

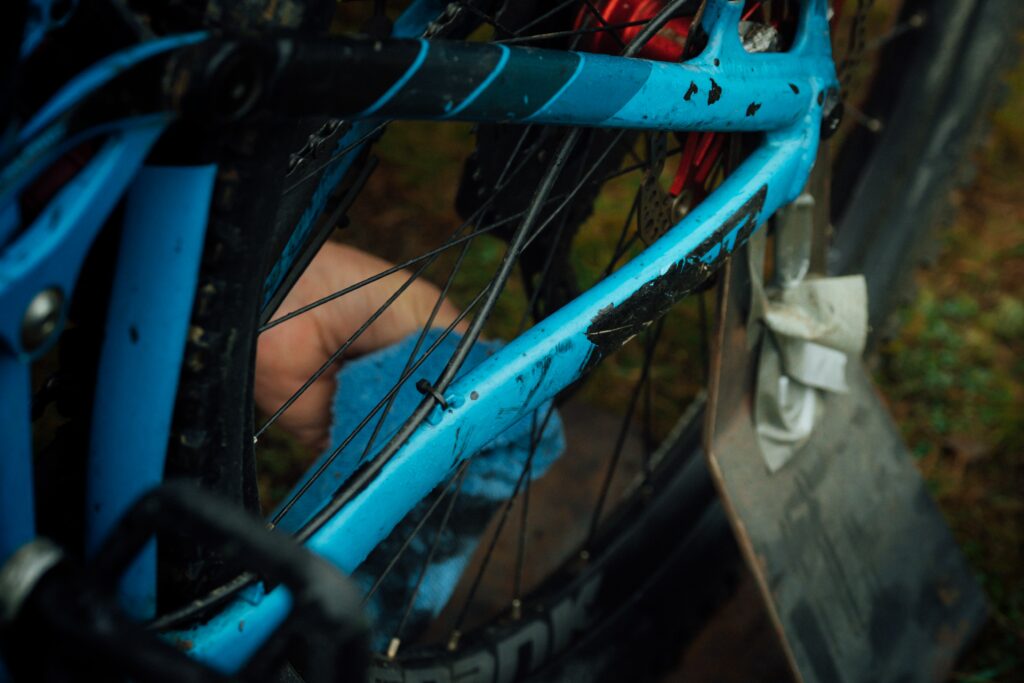
This epic cycling event is something you do not want to miss. It is a four-day mountain biking challenge with a total of $25,000 in prize money. The course is, on average, about 30 miles and 3,000 feet elevation per day and takes you cycling through all the must-see locations near Colorado Springs. You will get to explore Gold Camp Road, Palmer Park, Pikes Peak, Cheyenne Cañon, Royal Gorge Park (including biking over the Bridge!), and so much more. It is not too challenging on technical biking abilities, though it will certainly challenge your endurance. If you have checked out the Pikes Peak Cog Up Bike Down tour, then you might have some idea of what to expect.

There are also two options for folks looking for something a little less intense. You can sign up to cycle for just one day – either Thursday or Sunday – and complete the route without worrying about the competition. This option is perfect for beginner cyclists looking to get started in more formal events as it follows USA Cycling regulations and will give you a great feel for the spirit of the competition. If you are considering signing up, don’t wait: because of permit and preservation limitations, there are only 370 slots available, so get yours today.

Photo by Axel Brunst on Unsplash

Denver Century Ride 

When: Saturday, September 24, 2022

Where: Denver, CO

Register Here

This Colorado cycling event is a really unique opportunity. All of the courses are urban and take you through the streets of Denver. Not only is this a really cool way to explore the city, but also it will get you used to street cycling and show you all the ways the bike-safe streets of Denver connect. If you are considering commuting to work or cycling more in urban areas, this is a great way to get started and learn how to stay safe as a biker on the road.

The routes are 25 to 100 miles long and open to riders of all ages on all types of bikes: tandem, e-bikes, trailers, and more. The shorter routes take you through downtown, City Park, and the Denver Botanical Garden for what is surely a quaint, scenic ride. The longer rides will give you a tour through the greater Denver area, all the way down to Chatfield State Park and up to Golden. This supportive cycling event is a fun way to see Denver and get comfortable with cycling on urban roads. 

Gravel Locos 

When: Saturday, October 1, 2022

Where: Pueblo, CO

Register Here

The Gravel Locos cycling events happening on October 1 are epic. There are four race options, the shortest (La Pequeña) being a non-competitive 30-mile course and the longest (La Loca) a ridiculous 170-mile race with a 13,242-ft elevation gain. The three competitive, timed races will give you the chance to compete against some high-profile cyclists and see how you match up. 

Just an hour south of Colorado Springs, this event is a great day trip during a consistently beautiful time of year. You will enjoy a picturesque ride through Pueblo and the front range of the Rockies. One nice plus is that the ride is for a good cause: the event is supporting the Red Creek Volunteer Fire and Rescue to help them expand their firehouse.

The ‘Rad Dirt Fest

When: Saturday, October 8, 2022

Where: Trinidad, CO

Register Here

In a beautiful part of Southern Colorado, just two hours south of Colorado Springs, you can enjoy one of three invigorating cycling events. These races are wonderfully scenic, as you will bike past the Spanish Peaks, mesas, and plateaus and surely see some interesting wildlife. The roads are maintained but gravel and dirt, so it is definitely a different feel than biking on paved city streets.

The course options are The Frijole, at 38 miles, the Anteloop at 99 miles, and the longest Stubborn Delores at a killer 166-mile race with an 11,213-ft elevation gain. The longer two races will take you west from Trinidad toward the Spanish Peaks Wildlife Area and San Isabel National Forest. The races may be tough, but the views will surely make it worth it. 

Final Thoughts

There are so many fantastic cycling events near Colorado Springs, not just in the fall but year-round. If you are thinking about getting into cycling or mountain biking and are not sure where to start, you can check out a guided mountain biking tour. This will allow you to see if you like it, learn some helpful safety tips and techniques, and learn more about Colorado’s cycling community.

E-Bike Classes – What to Know

Did you know that there are different laws that apply to the various classes of electric bikes? Did you know that e-bikes are now grouped into three classes? Depending on what state you live in and what type of e-bike you have, you may have to follow one rule or another in order to avoid a citation. We’ll help you figure out your e-bike’s class and understand what important rules apply to your riding.

What’s Going on with E-Bike Classes?

When e-bikes first became popular, there were no laws governing how they could be used. What speed limit should apply? Can you ride an e-bike in designated bike-only spaces? Some states applied laws to e-bikes as if they were mopeds or other motor vehicles, enacting confusing licensing and equipment regulations that made no sense.


In 2015, California adopted a 3-Class approach to regulating e-bike use, where different laws apply based on the type of e-bike. So far 35 other states have followed suit with this standardized PeopleForBikes model law. The remaining states have laws regulating e-bikes as well, with some considering e-bikes to be motor vehicles and some regulating them as bicycles.

Photo by Himiway Bikes on Unsplash

A Primer on E-Bike Mechanics

Before we get into the specific classes of e-bikes, there are a couple of quick details about e-bikes you need to know. The point of an electric bicycle is that it uses a motor to turn the bike wheels so you don’t have to pedal, either as hard or at all. There are two ways that e-bikes can achieve this: pedal assistance and throttle. 

Pedal assistance means that the bike monitors the level of work you are putting in and responds in kind by providing power to the motor. This allows you to get further and go faster without as much work as a traditional bicycle. However, the motor will not turn on or stay on if you are not pedaling. 

In contrast, a throttle allows the e-bike motor to turn on even if you are not pedaling. Typically located on the handlebar, this device is similar to an electric scooter or a motorcycle. This distinction is important for the different classes of e-bikes, and you will see why below.  

What Are the Three E-Bike Classes?

The three classes of e-bikes are very straightforward, and it will not be hard for you to figure out which type of e-bike you own. You can either review these descriptions or do a quick search in your e-bike’s user manual. 

Class 1

Class 1 e-bikes provide only pedal assistance. This assistance stops once the bike has reached 20 miles per hour (mph). These are most likely to be regulated like traditional bicycles, as they have the lowest capability. Without a throttle, the user must keep pedaling in order to activate the motor and continue getting assistance. Keep in mind, though, as with all classes of e-bikes, it is possible to exceed the 20 mph limit by pedaling or when going down a hill.

Class 2

Class 2 e-bikes have a throttle-operated motor. This makes it possible to ride without pedaling at all. Similar to Class 1 e-bikes, the motor stops providing assistance at 20 mph; however, you can still pedal to achieve higher speeds.

Class 3

Similar to Class 1 e-bikes, Class 3 e-bikes provide pedal assistance. But unlike other classes, they have a pedal assistance limit of 28 mph. Depending on the state, some Class 3 e-bikes also are allowed to have a throttle (usable up to 20 mph), whereas some states ban Class 3 throttles altogether. 

If you are not sure which class your e-bike fits in, you can easily find out with a quick Google search of your e-bike brand and model or by reading over your bike’s user manual. Once you know what type of e-bike you have, you can move on to learning more about the specific rules governing your e-bike usage.

Photo by Himiway Bikes on Unsplash

What Are the Rules for the Three E-bike Classes?

We will go over the model laws provided by PeopleForBikes since this has been widely accepted and applies to two-thirds of states. However, these will only give you an idea of the main regulations since many states have additional laws on top of these. Therefore, regardless of where you live, double-check your state and local laws. Also keep an eye out for additional regulations for, say, biking in your neighborhood parks. 

The major issues that the e-bike regulations cover relate to access (to bike lanes, parks, etc) and usage (wearing helmets, age restrictions, etc). Some states have further restrictions on the classes of e-bikes. For example, California does not allow Class 3 e-bikes to have throttles. Meanwhile, Colorado and Washington do not allow e-bikes to have electric motors above 750 watts, effectively limiting speed. You should learn more about the restrictions in your state before investing in an e-bike of your own.

Class 1

Generally closest to traditional bicycles, Class 1 e-bikes have the fewest restrictions. They typically can be ridden wherever traditional bikes are allowed. This includes bike lanes on roads and bike paths in parks. Most states do not have regulations for Class 1 riders specifically, though people under 16 are required in many states to wear helmets while riding any class of bicycle or electric bike.

Class 2

Class 2 e-bikes are typically regulated the same as Class 1 e-bikes. However, some states have more regulations because of the addition of the throttle. This is a safety issue because the throttle can continue to power the motor without user input, making it more dangerous for riders and passersby alike. Regarding usage on mountain biking trails, for example, Class 2 e-bikes may be banned altogether from singletrack and downhill-only mountain biking trails. 

Class 3

The most highly regulated, Class 3 e-bikes are generally not allowed on bike trails or multi-use trails. This is another safety concern because of the maximum pedal assistance speed of 28 mph, which has been deemed too fast for multi-use trails in many states. Most states do allow Class 3 e-bikes to be used on roads and trails open to motorized public use (for ATVs and other off-road vehicles). 

Photo by Himiway Bikes on Unsplash

State-Specific Restrictions

Some states also restrict Class 3 e-bike riders to people over 16 years old and require all users, regardless of age, to wear helmets on these e-bikes. You should consult your state and local laws to make sure you do not unknowingly break any that apply to your class of e-bike.

You can find your state’s guidelines by searching your state government website for e-bike regulations. Keep in mind that almost every state gives local governments the authority to add restrictions if they want. So don’t forget to check the guidelines for your city or town. Finally, if you are planning an e-biking trip to a park or forest, you should look up the trail guidelines before you go. 

Rules of the Road

No matter what state you live in or what class of e-bike you have, there are certain common courtesies and best practices you should follow. First and foremost, please always wear a helmet when riding a bicycle or e-bike of any class. Even if it is not a legal requirement, it is a minimal effort that can save your life in the event of a crash. 

E-bike riders should also keep in mind that speed limits and other driving laws still apply to them. If you are riding on a road, say in a residential area, there is a good chance your e-bike has the ability to exceed the posted speed limit. Despite being on an electric bicycle, it is possible to get a speeding ticket, citation, or fine, so obey the law. 

The Sidewalk Question

Bicyclists should avoid biking on sidewalks, as it is dangerous to pedestrians. Instead, use designated bike lanes where available or share the road with cars where legal. When riding an e-bike on a road, be sure to behave like a car and follow the rules of traffic. Stop at stop signs and red lights, and always give pedestrians in the crosswalk the right of way. This is especially true for e-bikes as they can go faster than traditional bicycles and therefore cause more potential injury in a collision.

Right of way is an important rule to know as an e-bike rider. What’s more, this rule applies to both the road and the trail. On multi-use trails, bicyclists must yield to hikers and people on horseback. As horses and other pack animals can get startled by the noises e-bikes make, it is important to give them space and let them pass you before continuing your ride. Finally, downhill riders should yield to uphill riders (since pedaling uphill is obviously harder).

Final Thoughts

Once you know all the state and local rules for your particular e-bike class, you can enjoy your ride, and rest assured that you will not violate any obscure laws. E-biking is a fun and effective way to commute to work, conquer a longer ride, or summit a steeper trail. If you are considering buying an e-bike and wondering if e-bikes are worth it, there are certainly many advantages to consider. You can also take a test ride on an exciting e-bike tour near Colorado Springs to learn more about the techniques and rules for riding an electric bike.

Tips for Hiking in Rain

Are you headed out for a hike and worried about the weather? It’s important to always be prepared for any conditions, so we’ve got some tips for hiking in rain. First, make sure you know how to pack for a day hike in general, and then we’ll discuss specific gear for hiking in rain and other considerations for staying safe and dry.

Image by Drew Tadd from Pixabay 

Do Your Research

First things first, always check weather reports before you head out. There is a difference between a drizzle and a thunderstorm, both in terms of comfort and safety. If there are severe weather warnings or if your hike includes a potential flashflood area like a canyon, consider postponing your trip. Either way, be sure to tell a friend about your planned whereabouts in case the weather becomes hazardous. Lastly, pack the ten essentials to be prepared for every situation.

Pack a Hot Drink

When packing for a day hike, you should always bring plenty of water and snacks. When packing for a rainy day hike, you may want to add a nice warm beverage to the mix. You can prepare a thermos ahead of time and leave it in the car for when you finish the hike. If you are backpacking for a couple of days, drink mixes like hot cocoa can be a real treat to warm you up. 

Wear the Right Rain Gear

As is best practice for every hiking trip, you should wear moisture-wicking inner layers. Dry-fit shirts and wool socks will keep you dry even when you sweat or get caught in the rain. These proper layers insulate body heat, help prevent blisters, and can be the difference between a safe rainy hike and a dangerous wet one. 

Rain Jacket

For outer layers, a waterproof rain jacket is a must. Something light that fits in a day pack is a smart choice to avoid bulk in good weather. The most important thing to note is the distinction between water-resistant and waterproof materials. A water-resistant jacket might stay dry if you spill your drink or walk through a sprinkler. However, it is not suitable for hiking in the rain. After a while, the material gets bogged down with water and can become extremely uncomfortable. To avoid being cold, wet, and miserable, a certified waterproof raincoat is an absolute necessity.

Rain Pants and Proper Footwear

Waterproof pants and hiking shoes are the two other essential pieces to stay dry on a rainy day. Waterproof boots are my go-to even on clear days. If I happen to step in a puddle or hop a small stream, my feet stay dry. The one downside with waterproof shoes is that they are not breathable. If rain does get in, it will be extremely hard to get them dry, and you will find yourself walking in puddles the rest of the day. The main concern with wet feet is blisters. When skin gets wet, it is more susceptible to breaking and forming blisters. This is why waterproof pants and shoes (that don’t have a gap at the ankle) are the best way to keep dry.

Two other helpful pieces of gear are a towel and an extra pair of socks. You may choose to leave these in the car to dry off when you return. Having a towel for wet hair and drying off wet skin is really helpful, and there is nothing as comforting as putting on warm, dry socks after a wet hike.

Photo by Andy Køgl on Unsplash

Waterproof Your Gear

Next, unless your day pack is truly waterproof, you will want to make sure the stuff inside is well protected. Your phone, cash, food, and other personal items can be kept dry by putting them in dry bags or plastic baggies. A waterproof phone case will help make sure you always have access to navigation tools and emergency services.

If you are backpacking for a couple of days, rather than just on a day hike, you will especially want to ensure your sleeping bag, clothes, and toilet paper do not get wet. One great way to keep all your gear dry at once is with garbage bags. Rather than put each item individually in small plastic bags, you can line your entire pack with a garbage bag and then pack everything like normal. As long as you secure the bag shut and get the water off before you open it, you should be able to keep your important belongings free from the rain. 

Know Safety Protocols

There are a few important rules to keep in mind for hiking in dangerous weather conditions. First, assume everything will be slippery. Rocks, wooden steps, mossy tree roots: everything is easy to slip on when wet. Be sure to keep your eyes on the trail and tread carefully.

If you find yourself caught in a thunderstorm, seek shelter, head to lower elevation, avoid the tallest trees, and avoid open meadows. If you are with a group, you should spread out to reduce the number of injuries in the event that there is a lightening strike.

Finally, if you were planning on crossing a stream on your hike, remember that it will be larger in the rain. You should always have an established path with branches or rocks to hold onto for safety. Added water means added current, so be extra careful not to get your feet swept out from under you. Check the National Park Serivce advice for river crossings for more information.

Dry Out After a Wet Hike

If you head home after your day of hiking in the rain, you can throw your clothes right in the wash. If you’re out for a couple of days, hang everything to dry. Put your hiking shoes in the sun or near a fire (not too close!). It is easy for mold to develop in gear that does not dry properly, so dry out your boots to extend their life. 

Photo by Yann Allegre on Unsplash

Consider a Guided Hike

One great way to avoid the hassle and confusion of preparing for hiking in the rain is to book a guided hike. You can learn so much from professional hiking guides on how to prepare and navigate a rainy hike, and you’ll also benefit from someone bringing along those essential first aid supplies.

If you are feeling dispirited that the rain ruined your hiking trip, know that it is very possible to have a great time in any weather. With a little preparation and the right gear for hiking in rain, you can ensure a comfortable experience with Mother Nature’s wetter side. Be sure to check out the Colorado Springs trail guide to find your next great adventure, and enjoy your time outdoors! 

Tips for Planning a Corporate Event

Tips for Planning a Corporate Event with Broadmoor Outfitters

Corporate events are great opportunities for staff to bond and get to know one another better. If your team is struggling with poor communication or lackluster morale, planning a corporate event where colleagues can spend quality time together outside the office is a great solution to help your team feel more connected.

The Benefits of Outdoor Adventure Events

Outdoor adventures are among the best corporate events. They give employees time in nature and the fresh air to recover from the stress of work. It has been proven that spending time outdoors relaxes us and promotes positive mental health. If you know your team has been struggling with working overtime, a project gone wrong, or office conflict, an afternoon outside could be just the ticket to getting a fresh start. The benefits of holding a corporate event for your team are near endless; Let’s get started on your Broadmoor event by reviewing some corporate event ideas.

The Best Times for a Corporate Event

It is not always easy to know the best time for planning a corporate event. For some outdoor events, you might want to schedule an early spring activity, so your team can enjoy and celebrate the coming of warmer weather. If you have a big project going on, planning a corporate event or happy hour to celebrate its conclusion is a great way to show your staff you appreciate their hard work. If your team is undergoing stressful changes like a merger or new office procedures, a half-day guided event can make a huge difference in morale.

Photo by Alex Guillaume on Unsplash

Top Corporate Event Ideas

If you are planning a corporate event and need a novel alternative to boring trust falls, outdoor adventures in beautiful Colorado Springs provide infinitely more excitement and engagement. There are so many options to choose from, like zip lining, falconry, firewalks, and scavenger hunts. These activities challenge colleagues to work in new ways and create fun memories that your staff will remember for years. Let’s go through the different corporate event ideas and explain the benefits you can expect for your team.

Happy Hour Events

To start with some more relaxed corporate event ideas, these cocktail hours are perfect options for staff to hang out and chat. It’s just like inviting your team to grab drinks at a bar, but with a thrilling twist. These happy hours will surely give your employees something to talk about for weeks and build your company’s reputation for having fun social events for staff.

– Falconry

Ready to meet the stunning birds of prey cared for by The Falconry and Raptor Education Foundation? This is a cocktail hour your staff will never forget. A professional falconer introduces you to hawks, falcons, and owls at the Broadmoor’s flying field. You’ll learn about these amazing creatures and maybe even have one perch on your arm!

– Tomahawk Toss

Challenge your colleague to see who has the best aim! This fun happy hour event lets staff throw a traditional tomahawk and practice hitting the target. Your team will enjoy seeing each other in this new light and finding out who has a hidden talent!

– Archery

This archery cocktail event is a great way to get staff out of the office and trying a new skill. Instructors teach archery basics, and the portable equipment can be brought to almost any location. If you are planning a corporate event in a specific venue, this is one of the most convenient ways to spice up a happy hour.

– Outdoor Movie

With this inflatable 26-foot outdoor movie screen, you can throw a corporate event like no other. This can serve as a unique way to give a presentation or a larger-than-life alternative to a standard staff movie night.

Photo by Andre Klimke on Unsplash

Guided Adventures

Adventure-based corporate events are an amazing way to expand your team’s understanding of one another, not just as colleagues but as people and friends. Joining together on a challenging and sometimes scary (but always safe) guided adventure will build trust, cooperation, and mutual respect among team members. Sharing these unique experiences translates to better camaraderie and communication in the office. In turn, these skills can then boost productivity and get those difficult projects finished.

– Zip Lines

Zip lining is a thrilling activity in stark opposition to the confines of a desk. Between the Woods and Fins Courses, your staff can experience eight zip lines up to 1,800 feet long and heights up to 500 feet. These awesome courses, which are among the best Colorado Springs attractions, include rope bridges, hikes, and rappels. This is a unique corporate event idea with tons of adrenaline and laughs to bring your team closer together.

– Team Firewalk

The difficulties of office life will pale in comparison to the test of the firewalk! If your team needs a morale boost, overcoming a firewalk will certainly do the trick. If you are planning a corporate event and looking for something edgy and memorable, a guided firewalk with an expert trainer will leave your staff feeling empowered and connected like never before.

– Hiking

This may be one of the more standard corporate event ideas on this list. However, a guided hiking tour is still an awesome experience in Colorado Springs. Choose between a relaxed nature walk or a challenging hike to the top of Seven Falls. Either way, your team will enjoy fresh air, beautiful scenery, and stunning local flora and fauna.

– Mountain Biking

This half-day corporate event is perfect for teams with a need for speed. There’s no better way to shake off work stress than to hit the trail, dodging obstacles and pushing yourself to the limit. The Gold Camp and Garden of the Gods trails are some of the most picturesque rides in Colorado Springs. Your team will surely finish the day feeling mentally refreshed.

– Caving

If you are looking to unite and empower your team by overcoming struggle, a four-hour trip down into the caverns under Pikes Peak is a stellar way to do it. This guided tour abandons the beaten path in lieu of private, undeveloped sections of the cave. Your team will surely bond over this unforgettable foray into the dark and spooky depths.

– Rock Climbing

One of our favorite corporate event ideas, rock climbing, is a great way to bring people together. In this half-day adventure at one of Colorado Springs’ best climbing spots, colleagues watch each other learn new skills and overcome obstacles. The sense of camaraderie builds as teammates support one another with advice and encouragement. 

Team-Building Competitions 

Nothing brings people together like a little friendly competition. If your team needs some cohesion and communication, these activities will encourage coworkers to face and overcome these problem areas as a group.

Building challenges invite staff to work together to design and build. The first event features building bridges to withstand the Atomic Pulverizer (Battle of the Bridges). The second allows teams to build small houses that other teams later try to destroy (Domestic Demolition). Out of the Park requires team problem solving, as groups must decipher clues and collect the materials needed to build a water-powered rocket that can reach up to 200 feet in the air! Similarly, Firequest stresses the importance of collaboration, as teams must find all the materials necessary to build a small fire. These challenges force teams to work on communication skills, negotiation, compromise, and trust in one another.

Your staff could also compete against each other in a two-hour paintball challenge or a scavenger hunt. These events span the Broadmoor property and promote healthy competition via a live leaderboard. A more in-depth competition called The Amazing Race combines brain teasers, physical games, and problem-solving. Here, teams work together to acquire clues and race to find checkpoints around the city. A woodsier version, the Cheyenne Canyon Quest, requires teams to navigate a woods course that traverses the gorgeous Cheyenne Canyon using orienteering, communication, and leadership skills. 

These unique challenges create friends and enemies of coworkers, all in the name of good fun. While staff may think it’s just a random competition, your team will actually be learning important skills, taking turns leading and listening, compromising and collaborating. If they don’t, they’ll fail the challenge and face defeat by another team. 

Why Outdoors?

Similar activities could easily be set up indoors, so why work on getting your team outdoors? Well, in short, practicing team-building skills in beautiful Colorado Springs is a much more rejuvenating and memorable activity! Why put your team in a plain hotel conference room when you could utilize the beautiful backdrop of nature that’s all around us? At the end of the day, your staff will go back to work with new skills and fun memories to recall over the water cooler.

Planning a Corporate Event Activity for Your Staff

The key to choosing the best corporate event is to understand your team’s passions and abilities. You can do a poll to gauge staff interest in building challenges, athletic adventures, or happy hour entertainment. Then, consider the team’s areas for improvement to ensure the corporate event activity is also a fun way to develop and cultivate important team-building skills. For example, if your staff tends to work individually, a building challenge will force all hands on deck. Or, if you have new members on board, an engaging cocktail hour can help them make new office friends.

These corporate event ideas are all unique opportunities to help teams cooperate and bond through shared experiences. Each one is designed to be a rewarding experience in itself and also to facilitate team building, communication, and mutual respect. Whether you choose a relaxing, guided nature hike or a full-blown battle, your staff will surely benefit from the time outdoors and come away feeling refreshed and closer together.

Zip Lining Colorado Springs – How to Do It

How to Get Started Zip Lining Colorado Springs

Beginning as a way to transport goods and materials across rough terrain and rivers, ziplines quickly became a safer alternative for the workers, too. Nowadays, the sport has become more and more popular, with zip lines popping up in tourist areas all over the world. Zip lining is a great summer activity, a way to see awesome views of the surrounding area, and a thrilling ride for those looking for a rush of adrenaline.

What Is Zip Lining?

In zip lining, riders sit in a harness and hang under a long cable that starts higher on a slope and ends somewhere in the distance. You are connected to the cable via a pulley, whose wheels coast seamlessly along the cable, allowing you to fly through the air at awesome speeds, upwards of 40 miles per hour. 

Ziplines are often set up in forests or jungles, high in the trees. You may also find a zipline across a river or canyon or going down a mountain. In addition to a harness, zipliners must wear helmets. It is also suggested to wear pants and gloves to protect yourself from scratches by rogue branches. 

Image by AaronHM from Pixabay 

Why You Should Try Zip Lining

If you’re not already thrilled at the opportunity to fly through the air, there are plenty of other reasons to try ziplining. First, it’s a great way to experience nature. Ziplines often start at great heights – Broadmoor’s highest point is more than 500 feet in the air. You’ll get amazing views of the Front Range as you soar over the trees on this upside-down roller coaster. 


Next, zip lines immerse you in nature. These courses, which are among the best Colorado Springs attractions, include rope bridges, hikes, and rappels. While you’re on the zip line, you’ll get views of the forest canopy like you’ve never seen before. Colorado Springs has some amazing wildlife and scenery, and these zipline courses are unique and thrilling ways to experience that nature.

Is Zip Lining Safe?

All outdoor and adventure activities come with some risks, but zip lines in the United States are certified by an agency that notes a one-in-a-billion chance of one breaking. When properly constructed and run by trained professionals, ziplines are one of the safest ways for adrenaline seekers to get that rush.


The Broadmoor’s ziplines also have a minimum weight requirement of ninety pounds to make sure that riders can properly wear their safety equipment. All this is to say that a zipline course is an awesome family-friendly activity, and you can rest assured that ziplines are safe for kids.

Image by sebastian del val from Pixabay 

Zipline Courses in Colorado Springs

Now that you’re convinced to try it, let’s discuss the best zip line courses Colorado Springs has to offer. Between the Woods and Fins Courses, the Broadmoor property has eight zip lines of up to 1,800 feet in length and heights up to 500 feet.

The Woods Course

The first and more beginner-friendly course offered at Broadmoor for zip lining Colorado Springs, the Woods Course, travels over Midnight Falls and includes 5 zip lines ranging from 250 to 1500 feet long. The tallest starts 150 ft high in the air, and you’ll reach speeds upwards of 45 miles per hour. 

This thrilling course starts with two shorter zip lines to allow riders to get used to the experience. After a short walk, the third zip line takes you over a beautiful granite canyon and creek 150 feet down below. The fourth zip line leads riders to the top of Seven Falls, and the final 1,500-foot ride brings you back to the hiking trail. 

The Fins Course

If you want something a little more blood-pumping, the Fins Course is the way to go. This extreme ziplining adventure takes you to high altitudes, steep drops, and an experience in the Front Range like you’ve never had before. 

This half-day adventure has 5 zip lines of 250 to 1800 feet long and heights up to 500 feet. The course also involves two rope bridges, and a 180-foot assisted rappel. This awesome journey is definitely not for those who fear heights!

The course has two introductory zip lines, just like the Woods Course, before the third zipline takes you to Seven Falls Canyon and its rock fins. You’ll walk across two rope bridges and enjoy views of Colorado Springs before the fourth zipline takes you over the canyon to the south side of Mt. Cutler. Being 500 feet above the canyon road provides stunning view and an experience you’ll never forget. Finally, the last zip line leads back to the canyon, where you will rappel 180 feet down to the canyon floor.

The Combo Course

If you can’t choose between these awesome options, you’ll be relieved to know that you don’t have to! The Broadmoor’s combo course allows you to experience both the best zip lines in Colorado Springs. 

This four-hour day starts with the Woods Course, including the introductory zip lines and the awesome Midnight and Seven Falls rides, then all of the Fins Course, from the rope bridges to the thrilling ziplines to the assisted rappel. All in all, this exciting course has 8 zip lines and a 25-minute hike between the two courses. This great half-day adventure introduces you to the world of ziplining and provides other unique experiences in nature.

Photo by Anthony DELANOIX on Unsplash

When Is the Best Time to Go Ziplining In Colorado Springs?

If you are wondering when you can go zip lining here in Colorado Springs, Broadmoor’s courses are open year-round. While it is fun to go zip lining anytime, there are definitely better months and some weather tips to keep in mind. Summer is the best time for zip lining Colorado Springs. With the sunny, hot weather, the relief of wind and fast speeds will feel great. Spring and fall are also beautiful times to enjoy the weather from a zip line, and don’t forget about the gorgeous foliage you’ll see.

If you choose to go zip lining in the winter or colder weather, be aware of the temperature drops. On top of the mountains, it will be colder and windier. And with the ziplines propelling you to speeds greater than 40 miles per hour, you will want warm clothes and wind protection. Gloves and face protection are necessary for certain conditions to prevent frostbite. The only other risk is storms or lightning, which might result in closed courses until the bad weather passes.

Final Thoughts

Zip lining is an invigorating way to experience nature and see the stunning vistas of Colorado’s Front Range. This family-friendly activity is accessible from downtown, where you’ll have access to some of the best ziplines in Colorado. Simply make a reservation, dress well, and you’ll be all set. At Broadmoor, we include all the gear and instruction from trained guides. So all you need to do is show up and you’re sure to have a memorable time zip lining Colorado Springs – Enjoy!

Colorado Springs Trail Guide – Best Hiking Trails in Colorado Springs

The city and area surrounding Colorado Springs have gorgeous scenery and ample ways to enjoy the great outdoors, perhaps one of the best parts of Colorful Colorado. Whether you are looking for a quick walk or a long, tiring trek, there are plenty of hiking trails in Colorado Springs at every difficulty level. And for those just getting started, be sure to check out our guided hiking tours.

If you are looking for the absolute best trails in Colorado Springs, we have an in-depth review of our top 5 favorite hikes near Colorado Springs. You’ll also see them on this list along with many other excellent options for hikers of all abilities. This list is organized roughly by difficulty level, as determined based on reviews from fellow hikers, length, and elevation gain. So if you are wondering where to hike in Colorado Springs, look no further. 

Easy Hikes

Memorial Park Prospect Lake Loop Trail

Parking: 280 S Union Blvd, Colorado Springs, CO 80910 (Tons of parking available in the park along Memorial Dr)

Elevation Gain: 26 feet

Round Trip Mileage: 1.3 miles

Highlights:

  • Paved loop, very accessible for wheelchairs, strollers, etc.
  • Great views of mountains and scenic lake
  • Beach area and playground

Palmer Park Cheyenne and Grandview Trail Loop

Parking: Palmer Park Trail Cave Outlook, 3120 N Chelton Rd, Colorado Springs, CO 80909

Elevation Gain: 183 feet

Round Trip Mileage: 1.8 miles

Highlights:

  • So much to see here including a botanical reserve, horse stables, canyons, ravines, bluffs, and more
  • Tons of wildlife: Palmer Park is popular among birdwatchers

Stratton Open Space The Chutes, Laveta, and Chamberlain Trail Loop

Parking: North Cheyenne Cañon Park & Stratton Open Space Trailhead, N Cheyenne Canyon Rd, Colorado Springs, CO 80906 (on the right, just past the Starsmore Visitors Center)

Elevation Gain: 705 feet

Round Trip Mileage: 3.8 miles miles

Highlights:

  • Most popular hiking trail in Stratton Open Space
  • Excellent wildflowers and wildlife
  • Beautiful views of the Gold Camp Reservoirs

Garden of the Gods The Palmer, Buckskin-Charley, Niobrara, and Bretag Trail Loop

Parking: 3105 Gateway Rd, Colorado Springs, CO 80904

Elevation Gain: 449 feet

Round Trip Mileage: 4.0 miles

Highlights:

  • Gorgeous views of the National Natural Landmark that is Garden of the Gods
  • Combines four popular trails around the park
  • Access to horseback riding, rock climbing, and biking trails
  • A Top 5 Pick! Learn More.

Ute Valley Park Ute Valley Park Trail

Parking: Ute Valley Trail Head, Ute Vly Trl, Colorado Springs, CO 80919

Elevation Gain: 488 feet

Round Trip Mileage: 4.3 miles

Highlights: 

  • Excellent views of Pikes Peak
  • Plenty of side trails to explore
Photo by Bailey Galindo on Unsplash

Moderate Hikes

North Cheyenne Cañon Park Mount Buckhorn Peak

Parking: Upper Gold Camp parking lot, 4415 Gold Camp Rd, Colorado Springs, CO 80906

Elevation Gain: 859 feet

Round Trip Mileage: 3.9 miles

Highlights:

  • Beautiful views along the way 
  • Boulders to climb at the summit (the tallest offers panoramic views)
  • A Top 5 Pick! Learn More.

North Cheyenne Cañon Park Seven Bridges Trail

Parking: Seven Bridges Trailhead, N Cheyenne Canyon Rd, Colorado Springs, CO 80906 (right before Helen Hunt Falls)

Elevation Gain: 912 feet

Round Trip Mileage: 3.5 miles

Highlights:

  • Very popular trail due to its history and uniqueness
  • Meanders alongside a creek and crosses over via seven charming bridges
  • Close to Helen Hunt Falls and Silver Cascade Falls

Pike National Forest The Crags Trail

Parking: Crags/Devil’s Playground Trailhead, 615 Teller Co Rd 62, Divide, CO 80814

Elevation Gain: 820 feet

Round Trip Mileage: 4.8 miles

Highlights:

  • Awesome views of unique geological features
  • Well marked trail
  • Challenging, but a good introduction for beginner hikers
  • A Top 5 Pick! Learn More.

North Cheyenne Cañon Park Mount Muscoco Trail

Parking: Mount Cutler and Muscoco Trailhead, N Cheyenne Canyon Rd, Colorado Springs, CO 80906 (on the left, 1.5 miles past Starsmore Visitors Center)

Elevation Gain: 1,292 feet

Round Trip Mileage: 4.0 miles

Highlights:

  • Includes a fun scramble at the summit
  • Outstanding views of the surrounding mountains
  • Well marked and well maintained
  • A Top 5 Pick! Learn More.

North Slope Recreation Area North Catamount Reservoir Trail

Parking: Pikes Peak Toll Rd, Woodland Park, CO 80863 (just past the Crystal Reservoir Visitors Center)

Elevation Gain: 262 feet 

Round Trip Mileage: 2.7 miles

Highlights:

  • Short but steep (15% grade around the 1.5-mile marker), so you’ll get a good workout
  • Beautiful views of meadows and wildflowers along the way
Photo by Jonathan Chaves on Unsplash

Hard Hikes

Red Rock Canyon Open Space Sand Canyon, Mesa, Greenlee, Red Rock Canyon Loop

Parking: 3550 W High St, Colorado Springs, CO 80904

Elevation Gain: 882 feet

Round Trip Mileage: 5.4 miles

Highlights:

  • Varied terrain and interesting geology
  • Lots of sun as shade is limited
  • Good views without too difficult an elevation gain

Pike National Forest The Incline Trail

Parking: Barr Trailhead, 98 Hydro St, Manitou Springs, CO 80829

Elevation Gain: 1,978 feet

Round Trip Mileage: 4.0 miles

Highlights:

  • The most popular trail in the Pike National Forest
  • All the elevation is in the first mile – at the hardest point, it’s an extremely challenging 61% grade!

North Slope Recreation Area Limber Pine, Mule Deer, Mackinaw, and Ridge Trails Loop

Parking: Catamount Recreation Area, 3168 Co Rd 28, Woodland Park, CO 80863

Elevation Gain: 1,036 feet

Round Trip Mileage: 8.4 miles

Highlights:

  • Challenging trek around the North Catamount Reservoir with a bunch of elevation changes
  • At times follows the water, and at other times, you’ll be in the forest

North Cheyenne Cañon Park Columbine Trail

Parking: Starsmore Discovery Center, 2120 S Cheyenne Canyon Rd, Colorado Springs, CO 80906

Elevation Gain: 1,607 feet

Round Trip Mileage: 7.6 miles

Highlights:

  • Great views of the surrounding mountains
  • Plenty of wildlife (don’t forget to check out the Starsmore Discovery Center at the trailhead
  • Gradually inclining slope, no huge scrambles
  • A Top 5 Pick! Learn More.

Pike National Forest The DeCaLiBron: Mounts Democrat, Cameron, Lincoln and Bross Trail

Parking: Kite Lake Trailhead, Co Rd 8, Alma, CO 80420

Elevation Gain: 3,136 feet

Round Trip Mileage: 7.0 miles

Highlights:

  • Ability to summit three 14-ers, the highest being Mount Lincoln at 14,295’ (Note that Mount Bross is private property and illegal to summit)
  • Real right of passage for serious Colorado hikers

Final Thoughts

Before you hit one of these awesome hiking trails in Colorado Springs, be sure that you are well prepared for your trip. Bring plenty of water, sunscreen, and other essentials that we cover in how to pack for a day hike. Happy trails!

Bike Maintenance Basics – How to Clean Your Bike

When you think about hitting the trails with a mountain bike or e-bike, maintenance is never top of mind. However, bike maintenance is a very important part of any ride, and in fact, every ride. Skipping the bike maintenance basics not only leads to more wear and tear, but it can even be dangerous to you as the rider. 

That’s why we’re here to discuss bike maintenance basics to make sure you keep your gear in peak condition. It might seem hard, but taking a little time to learn how to clean your bike and how to complete a pre-ride inspection will save you a lot of hassle down the line. So let’s get to it.

Don’t want to worry about bike maintenance? Join our Cog Up/Bike Down Pikes Peak experience or a guided mountain bike tour in Colorado Springs to reap the benefits of our perfectly maintained bikes and expert guides. Or alternatively, utilize our bike rentals in Colorado Springs to use for your own adventure.

Photo by Tim Foster on Unsplash

How to Do a Pre-Ride Bike Inspection 

A quick check before each ride is essential bike maintenance to keep you safe and keep your bike functioning optimally. Many people call this the ABCs of bike maintenance. If you remember that, you’ll be able to keep track of these critical steps of the pre-ride inspection.

Air in the Tires 

Look closely at the sidewall of your bike tires, and you will find a range of recommended tire pressures (PSI). There are a lot of factors that go into deciding what pressure within this range you want. You can begin at a pressure in the middle of the specified range to start, and learn your preferred tire pressure by feel as you get more experience. But in short, a more inflated tire will have less resistance and allow you to go faster (best for road cyclists), while a less inflated tire will absorb more shock (best for trail riders) and achieve better grip (safest for riding in wet conditions).

While you are inflating your bike tires to the desired pressure, be sure to inspect the tires for damage or deformities, and make sure the quick release lever or thru-axle (depending on your bike) are securely tightened. Finally, don’t forget to bring your pump and tire repair kit or patch kit on the ride with you in case of emergencies.

Brake Check

Your bike’s manufacturer can tell you how often you need to replace your brake pads and rotors, but it is also important to use your own judgment and look for excessive wear. In addition to a visual check, be sure to spin the tires and apply the brake mechanisms. 

Here, you want to make sure they move smoothly, don’t get stuck anywhere, and clamp down strong on the tires. If you feel a hitch or resistance, you may need to lubricate the parts. These cables and assemblies need lubrication to function correctly, and that’s ongoing maintenance we’ll discuss in the post-ride section covering how to clean your bike.

Chain Inspection

Bike chains are one of the most important pieces on the entire bike, and unfortunately, they’re also one of the most fragile. Before every ride, you should turn the pedals slowly and examine every chain link. 

Check to make sure the bike chain is not dirty or rusted, that there is no gunk or other impediment, and that the chain moves smoothly. Also, check the gears and the drivetrain, making sure the bike shifts without a hitch. 

The Nuts and Bolts of Bike Maintenance Basics

The last thing to do pre-ride is to ensure that the bike’s many nuts and bolts are tight and secure. Especially with mountain biking, it is normal for these to loosen over time as you maneuver the bike over obstacles and force different stressors on it. 

With hex keys and a Torx wrench, a decent bike tool will allow you to tighten all these pieces and make sure your bike is ready for the next adventure. This multi-tool is a great piece to bring with you on the ride, too, in case something loosens mid-ride. Loosening parts are all potential sources of problems that you do not want to learn about while on the trail, so invest a few minutes pre-ride in this important bike inspection.

Photo by Anastasia Shuraeva from Pexels

How to Clean Your Bike Post-Ride

After every ride, it pays to give your bike a quick wash. Especially if you have been hitting trails on a mountain biking tour, you don’t want to leave your bike dirty. Over time, dirt and grime accumulate and impact the smooth functioning of the bike’s fragile mechanisms. It causes rust and leads pieces to break earlier than they would otherwise.

Rinse and Dry

So, one of the most critical bike maintenance basics is also the easiest. Using good old soap and water (or bike wash cleaner), carefully wipe down the bike frame, handlebars, seat post, and brake mechanisms. You want to be gentle with these sensitive pieces, so don’t use a pressure washer. 

It’s also harmful to get soap on the brake pads themselves. Instead, use rubbing alcohol or rotor cleaner to degrease the rotors and brake pads. As noted above, you do not want to leave the bike to air dry as that can cause rusting, so use clean rags to get the bike nice and dry. 

Degreasing

For the chain and drivetrain, you want to really get in there and clean out any debris and grease. Especially for mountain bikes, these parts can get very dirty quickly, and you will find debris stuck in hard-to-reach areas. Cleaning out these parts is essential bike maintenance for preventing your bike from wearing out too rapidly and also ensuring future rides will be smooth and safe. 

You can clean the drivetrain with a rag and degreaser if it is not too dirty, or use a toothbrush to scrub off built-up grime. A bike chain cleaner is a good investment for thoroughly cleaning your chain without making a mess. Be sure to go through a couple of full rotations of the chain and shift gears a couple of times to make sure no dirt or grease remains. You can then use a clean rag to wipe away any leftover muck and clean the degreaser from the bike.

Lubrication

Once your bike is clean and dry, it is time to apply lubrication. You should lubricate your bike after cleanings, anytime it starts to squeak, and after wet rides to prevent rust. Keeping all these parts well lubricated will ensure a smooth and safe ride and keep the bike from unnecessary wear and tear. Depending on how frequently you ride, you might end up doing this weekly or more, but it is an essential step of bike maintenance and well worth the effort. 

Lubricate the drivetrain, chain, brake cables, and assemblies. When you lubricate your bike, you really only need a few drops for each component. Give the lubrication a few minutes to soak in and work it around by turning the pedals and moving the mechanisms. Then, be sure to use a clean rag to wipe away the excess. After it has soaked in, wipe down the parts gently, so it is not dripping with lubricant. Overlubricating your bike can actually hurt it, as dirt and debris are attracted to and accumulate in the excess lubrication.

Storage

Now that we’ve covered how to clean your bike, you’re ready to store your bike until the next ride. You might not have considered it, but there are actually better and worse ways to store a bike. First, don’t store a bike outdoors where it will be exposed to the elements. This will increase rust and corrosion, not to mention the fading of the paint job and increased risk of theft! 

Regarding positioning, storing a bike by hanging it with hooks or a wall mount is the best way to keep your bike in peak condition. If you are storing your bike upright, be sure to put rugs under the wheels and make sure to keep the tires inflated. Otherwise, you could find the tires have bulged or cracked over long periods of disuse.

Photo by Jan Kopřiva on Unsplash

Extra Notes for Electric Bike Maintenance Basics

On top of everything we’ve covered, e-bikes have some extra maintenance steps. Once you understand how electric bikes work, these extra maintenance requirements make sense since there are additional parts to consider. Specifically, we’re concerned about the e-bike’s battery and motor. 

E-Bike Battery Maintenance

Just like any battery, good maintenance procedures help extend the battery’s lifespan and optimize its capacity. First, top off your electric bike’s battery after every ride. It’s not good for batteries to sit empty for extended periods. However, it is equally bad for a battery to sit fully charged for too long as it puts excessive stress on the battery’s components. 

Therefore, if you don’t plan to ride for a while, put your electric bike’s battery in storage, so to speak, by unplugging the battery and hooking it up to a charge tender. Battery tenders allow batteries to naturally discharge and then recharge in a cycle. This keeps the battery in optimal condition no matter how long you leave it. 

E-Bike Component Maintenance

The other main consideration with e-bikes is the extra wear and tear on the drivetrains and chains. Because of this, it is important to clean, dry, and relubricate your electric bike more frequently than you would a non-electric model. 

When cleaning, be sure to avoid using high-pressure water to rinse off your e-bike. While the batteries and electrical components are sealed and waterproofed against rain, pressurized water can prove too much and cause damage. 

Final Thoughts

With a little investment in time spent cleaning and lubricating your bike, you can rest assured that it will last longer and give you a smooth, safe ride. If you struggle with any of these bike maintenance basics or feel like your bike is still not riding right, be sure to bring it to a bike repair shop for more expert repair. Also, if you are thinking about switching to an e-bike, check out e-bike guided tours in the Colorado Springs area. Finally, don’t forget that our bike rentals in Colorado Springs and mountain bike tours in CO Springs are both fantastic avenues to ride a clean and perfectly maintained bike. Happy riding!

How To Get In To Rock Climbing

As a fun and challenging all-body workout, it is no surprise that rock climbing is such a popular sport. With indoor gyms popping up in cities all over the country, you might be wondering how to get into rock climbing.

We will explore the different types of rock climbing that you can try as a beginner, whether you plan to climb indoors or outdoors, as well as the gear you will need to get started. With some of the best beginner rock climbing routes right here in Colorado Springs, outdoor climbing is a fun way to explore nature, get access to some beautiful views, and learn a new athletic skill.

Also, don’t forget that a Guided Rock Climbing Trip with Broadmoor can also be an excellent introduction to this exciting sport.

Photo by Patrick Hendry on Unsplash

Types of Rock Climbing

Top-Rope Climbing

There are two types of climbing that are suitable for beginners, top-rope climbing and bouldering. In top-rope, as the name suggests, a rope hangs down from above, and as you climb, a belayer takes in the excess slack to keep the rope taut in case you fall. In an indoor gym, ropes hang from anchors like large pulleys. If you climb outdoors, a guide or qualified friend will create an anchor system using ropes and trees or rocks. 

Top-rope climbing routes range in difficulty from 5.0 to 5.15d, with 5.10s and above using a, b, c, and d to further distinguish difficulty. Where a 5.10a is easier than a 5.10d. Based on strength and athleticism, beginner climbers can generally climb up to a 5.4 or 5.6 on their first go. Climbers who are tall or strong might get away with these higher routes upfront, but as you move into intermediate climbs, technique and precision become more important than brute force.

Bouldering

Bouldering is a rope-free experience, with climbs typically up to fifteen feet maximum. If you are at a gym, the bouldering area will be padded to keep you safe when you jump down or fall. Learning how to fall correctly (stay loose and bend your knees!) will keep you safe from injuries. I generally downclimb to protect my knees, but it’s still important to know how to fall safely. If you are climbing outdoors, crash pads are essential for rock climbing safety.

The bouldering rating system is different from top-rope. Bouldering routes go from V0 to V17, with V2 being the hardest I’ve seen first-timers accomplish. Not only are these ratings different from top-rope, but they also don’t translate easily. Some people are much better at the big, power moves that many bouldering problems have. Others are more skilled with finesse and balance – challenges that are also more common to top-rope. Top-rope climbs at indoor gyms also range from 30 to 60 feet, making them a lot more of a cardio workout than bouldering climbs.

Photo by yns plt on Unsplash

Advanced Climbing Options

For more advanced climbers, lead climbing, sport climbing, and trad climbing are fun options that you can look forward to after learning to climb. Once you know what type of climbing you are looking to start with, you can get out there and take the first step.

Getting Started with Rock Climbing

The Gear

Whether you decide to top-rope or boulder, you’ll need rock climbing shoes and a chalk bag. The shoes are crucial for proper technique and movement while the chalk keeps your hands dry and grip secure. Rock climbing shoes are meant to be snug; generally one size below the sneakers you wear. Keep in mind that climbing shoes should not be worn anywhere but for climbing. Their extra snug fit emphasizes this point and generally makes them uncomfortable to walk around in. Also, you will stretch out the shoes and ruin the grippy soles if you wear them for non-climbing activities. 

If you are top-rope climbing, you will also need a belaying harness to be properly tied in and secured to the rope. You can take a belay class to learn how to belay a partner, and then you can switch climbs with a friend. To belay, you’ll need a carabiner and a belay device. Many climbing companies sell beginner-friendly packages with harnesses and belay equipment together.

If you are climbing outdoors, you should always wear a helmet to protect your head in the event of a fall or a rock tumbling down from above you. It’s also common to be so focused on your climbing that you forget to look up and climb right into a rock sticking out of the wall. It has certainly happened to me! Other outdoor equipment involves crash pads for bouldering, as mentioned above, a first aid kit, sunscreen, and maybe fingerless gloves if it’s a cold day.

Indoor Rock Climbing

If you want to get started at a gym, most have classes on rock climbing basics. Most also have rental gear available, so you don’t need to buy everything up front before trying rock climbing. You can also head to the gym and start bouldering right away; no help needed. Watch other people do the routes and even ask for “beta” if you need advice on how to get up.

If you’re interested in trying top rope climbing but don’t yet have a belay partner – no need to worry! Many gyms have several auto-belays. These devices clip into your harness and function just like a human belayer, allowing you to test out top-rope climbing as a beginner.

You can easily search for local climbing gyms in your area online, or take a look at this gym directory on Mountain Project to find a place to visit.

Outdoor Rock Climbing

In order to get started with climbing outdoors, you need a guide or, as mentioned above, a qualified friend. The most surefire way to have a fun and safe adventure is with a guided rock climbing tour, which will take you rock climbing in Colorado Springs at a popular local spot. On a guided trip, you’ll learn climbing techniques and safety and have a chance to try different climbs. 

If you want to get into rock climbing via a more DIY style, you’ll need to find a friend who has the necessary gear and know-how to set up climbs. You’ll also want to research the different climbs available in your area to find the best sites for outdoor bouldering or top rope spots with anchor points.

Photo by Ben Kitching on Unsplash

Rock Climbing Basics

The best way to learn how to rock climb is to get on a route and give it a try. It’s easier to learn rock climbing techniques once you experience the grips and movements. Rock climbing also involves using your forearms, wrists, and hands in ways that most people haven’t developed through other athletics, so it takes time to build these muscles.

My favorite advice for beginner rock climbers is to remember to use their legs and hips. Beginners often overuse their arms and tire quickly. Using all limbs available will help your endurance and give you a good leg workout. My general rule is to make sure I move my legs just as much as I move my arms. There are enough holds on a beginner indoor climbing route to climb a route almost like a ladder.

Similarly, if you find yourself in a tough spot, pivot your feet and move your hips. These small adjustments can get you more reach and flexibility to find that next hold. Keeping your hips closer to the wall also brings your center of gravity closer to minimize the strain on your arms.

Now that you know how to get into rock climbing, I hope you’ll give it a try! Even people who are nervous of heights can overcome this fear by learning belay safety or bouldering. Outdoor rock climbing is a truly unique way to experience nature, and the views from the top of a climb are like nothing else. Enjoy!

Paddleboarding Near Colorado Springs

There are so many bodies of water in Colorful Colorado. If you’re willing to make just a short drive, you can find many places to enjoy aquatic activities like stand up paddleboarding near Colorado Springs. Whether you’re renting a stand up paddleboard (SUP) or have your own, we’ve got some great places to explore – all within an hour’s drive of Colorado Springs.

This list has all the best reservoirs and lakes for paddleboarding in the heart of Colorado. It includes prices, availability, and what is best for beginners. We’ve also organized these spots by distance from Colorado Springs, and you’ll note that options for larger lakes tend to be outside of the city proper. 

But before we get into the top spots for paddleboarding in Colorado Springs, let’s make sure you know what you are doing! First, you can check out the comprehensive Beginner’s Guide to Stand Up Paddleboarding. This guide covers all the gear you need and some basic techniques for staying on the board. If you think you might need more help, consider a SUP Tour at a Colorado Springs lake for in-person instruction. These guided tours are an awesome way to ensure your first paddleboarding adventure will be a memorable experience.

Photo by Holly Mandarich on Unsplash

Prospect Lake

Located in Memorial Park (1605 E Pikes Peak Ave) in central Colorado Springs, Prospect Lake is a charming spot to spend an afternoon. The hiking trail around the lake is a flat and accessible 1.3-mile loop. The park also has other sports facilities, including tennis courts and a skatepark. 

Prospect Lake has a beach and a designated swimming area. No matter what activity you choose, you’ll have amazing views of Pikes Peak to enjoy. Daily use permits for access to the lake (non-motorized vehicles only) are available for $5. You can also rent a stand up paddleboard on-site if you do not have your own. 

More Prospect Lake Info

Quail Lake

Still within city limits, at 915 Cheyenne Mountain Blvd in Southwest Colorado Springs, Quail Lake Park is a gorgeous city oasis west of the Broadmoor World Arena. The park offers a one-mile hiking trail around the lake, a basketball court, a picnic area, and more. All this is available for just a $5 daily use fee.

Both Quail and Prospect Lake are relatively small bodies of water. This makes them great options for beginner paddleboarders or people who have limited time for their next excursion. If you’re looking for a more advanced paddleboard experience, keep reading. Just a short drive out of town you’ll find yourself at some beautiful larger lakes that are prime spots for seasoned paddleboarders.

More Quail Lake Info

Photo by Marco López on Unsplash

North and South Catamount Reservoirs

Located in the North Slope Recreation Area (on Pikes Peak Toll Road), the North and South Catamount Reservoirs are pristine bodies of water available for a $5 daily use permit. The areas have seasonal usage hours, so check online before heading up the mountain. There is limited parking available, so it’s good to reserve a free one-day parking pass for your visit.

The largest of the three, North Catamount Reservoir has over 210 acres of water for paddleboarders to explore. Positioned on the north side of Pikes Peak, as the name implies, the reservoir has amazing views of the beautiful scenery. With little nooks and crannies everywhere, this spot is a SUP adventurer’s dream. The South Catamount Reservoir is also available. However, the nearby Crystal Reservoir is closed to all aquatic activities for maintenance and repair work.

More Catamount Reservoir Info

Rampart Reservoir

This stunning reservoir is a beautiful place to enjoy aquatic sports like stand up paddleboarding near Colorado Springs. Rampart Reservoir also boasts over 500 surface acres of water. Located about half an hour from downtown Colorado Springs near Woodland Park in Pike National Forest, the Rampart Reservoir Trail is nearly fourteen miles around the lake, taking you up and over the many ridges that form its sides.

The reservoir is open from May to October. But be sure to double-check if it is currently open before you go. Once there, you’ll pay a $7 daily use fee to get into the reservoir. There is a boat launch for fishing, a picnic area, and toilets. The reservoir offers picture-perfect scenery for paddleboarders. You also have plenty of shoreline to enjoy a picnic or take a break from the water. 

More Rampart Reservoir Info

Monument Lake

Only a half-hour drive north of Colorado Springs, Monument Lake is a 30-acre reservoir tucked into the Sangre de Cristo Mountains. This gorgeous spot has clear water, awe-inspiring mountain views, and free access for paddleboarders and other water sport enthusiasts. 

For a longer stay here, the Monument Lake Resort is a beautiful hotel option that offers rentals of paddleboards, kayaks, canoes, fishing pontoons, and more. This is a great family-friendly spot with a small, calm body of water for beginners to safely try paddleboarding near Colorado Springs.

More Monument Lake Info

Palmer Lake

Just past Monument Lake, the Palmer Lake Regional Recreation Area is a 36-acre park nestled between nearby mountains and the town of Palmer Lake. At the parking area (199 County Line Road), you’ll find a playground, a pavilion, restrooms, and the trailhead to the New Santa Fe Regional Trail. 

The park has free entry, and paddleboarding here will give you great views of Ben Lomand Mountain and the surrounding area. Even if you just hang out on the shore, Palmer Lake is a cute community with plenty to see on a local walk. 

More Palmer Lake Info

Photo by Mehdi Benkaci on Unsplash

Lake Pueblo

Lake Pueblo State Park is just under an hour south of Colorado Springs. The park has over 10,000 acres of land, including a sprawling lake with over 4,600 surface acres of water. This lake is a great place for more advanced paddleboarders looking for interesting waterways to navigate. 

The visitors center (640 Pueblo Reservoir Road) offers parking, bathrooms, and a nearby jet ski rental. There are also hiking trailheads and campsites located around the corner, giving outdoor enthusiasts opportunities for a multi-day stay. Access to the park is available via an $8 daily use fee.

More Lake Pueblo Info

Paddleboarding Near Colorado Springs

So if you have been wondering where to paddleboard in Colorado Springs, be sure to check out some of these gorgeous spots. Colorado’s many lakes and mountains offer stunning landscapes to enjoy aquatic adventures, picturesque hikes, and other outdoor activities. If you need to rent gear or take a lesson, be sure to check out a SUP Tour at a local area lake for professional instruction and assistance with your first time. 

How Do Electric Bikes Work?

If you are interested in taking a biking trip but not sure you have the strength or endurance for a longer ride, e-bikes might be for you. In the past few years, electric bikes have become very popular among trail riders and commuters alike, and it is easy to see why. They have the power to assist riders on harder sections of a bike route while still leaving room for riders to get in a quality cardio workout. But how do electric bikes work? Let’s get into it. 

Photo by Himiway Bikes on Unsplash

The Mechanics of an Electric Bike

E-bikes differ from standard bicycles in two important ways: the battery and the motor. Powered by the batteries, electric bike motors provide pedal assistance, meaning that they work with you to deliver increased power and speed with your pedaling. They differ in this way from, say, a motorcycle, which is powered solely by the throttle and does not require an input of physical exertion.

The Battery

Strapped to the down tube of a bicycle’s frame, the battery is the main reason e-bikes are much heavier than traditional bicycles. They are generally easy to tell apart from other bikes because of this battery bank. The battery may also include a power button and an LED screen to show the battery’s charge. The battery is responsible for generating power for the bike, and its capacity will limit how fast you can accelerate and how long you can ride. 

Conveniently, electric bike batteries can be recharged with standard electric outlets, and most e-bike batteries last between thirty and seventy miles on a single charge. Unless you are a marathon cyclist, this will be enough capacity to get you through a day’s ride. Keep in mind that most e-bikes do not recharge the battery as you pedal or coast down a hill.

Photo by KBO Bike on Unsplash

The Motor

The e-bike motor is usually attached either to the back wheel’s cassette, encased in a hub, or to the chain ring where the pedal cranks are attached. The motor converts stored energy from the battery to kinetic energy and helps you turn the pedals via the crank rings. 

With an e-bike’s pedal assistance, you do not exert as much energy per cycle as with a standard bicycle. This difference can be felt most in the initial acceleration and on inclined ascents. Therefore, it makes e-bikes great for people with long commutes or tough trails. Beginners who are training their legs and lungs for harder rides also benefit enormously from e-bikes.

The Speed Sensor

One other important feature of an e-bike that you may not see is the speed sensor. Electric bikes are designed with a maximum speed to protect the user. This means that the motor will kick on, assist up to this speed, and then stop. Once you are there, you can coast at this speed and maintain it with pedal assistance, but you will not be able to achieve a higher speed unless you are going down a hill. The specific speed limit depends on the bike’s manufacturer and your state laws. But most e-bikes are limited to somewhere between twenty and thirty miles per hour.

The Benefits of an Electric Bike

Now that you know how e-bikes work by providing pedal assistance, you can better gauge if an electric bike is a good fit for your cycling interests. Even though it is counterintuitive, e-bikes can actually give you a better workout because you can ride more miles, climb steeper hills, and get over harder obstacles.

However, electric bikes are more expensive and heavier than traditional bikes, but you may find the pros outweigh the cons. There are many more factors to consider, which we already dive into in a different article. Be sure to check it out if you are asking yourself, are e-bikes worth it?

The Best Uses of an Electric Bike

Another essential consideration for cycling with an e-bike is whether you might want to ride without assistance. While it is possible to use an electric bike like a traditional bike (with the motor assistance turned off), it is not the most feasible option. Since e-bikes are bulkier and heavier due to the extra features, your ride will suffer if you try to use an e-bike without the pedal assist.

So when should you use an e-bike? There are tons of great reasons that people are turning to electric bicycles for daily use. One is commuting to work, where e-bikes give riders the opportunity to traverse longer distances in less time. A second is mountain biking. What’s more, biking in Colorado Springs is an especially good cause for trying out an electric bike.

Photo by KBO Bike on Unsplash

Biking in Colorado Springs

There are tons of beautiful and scenic trails in and near Colorado Springs. While many are accessible for hikers, longer trails are also available to cater to Colorado’s active mountain biking community. If you have ever wanted to try mountain biking, an electric bike is a great first step. 

Electric bikes provide pedal assistance so first-timers can enjoy longer trails without running out of energy. They also offer more stability since they are heavier and have a lower center of gravity than standard mountain bikes. This combination makes e-bikes ideal for beginner mountain bikers looking to explore Colorado Springs.

If this sounds like something you want to try, there are two ways you can hit the trails and enjoy a great day trip. First, e-bike rentals give you the space to experience an electric bike for yourself. You can explore nearby trails at your own pace and difficulty. Or you can ride through town and see if commuting with an e-bike is a good fit for you.

The second way to get on an electric bike is with guided e-bike tours. Join a professional guide on a tour around the Garden of the Gods Park, a stunning National Natural Landmark everyone should see. This gorgeous park has views of Pikes Peak, and the five-mile ride is perfectly suited for beginner cyclists. If you are looking to try out an electric bike, these are great opportunities to enjoy the beauty that Colorado Springs offers and better understand how e-bikes work.