What is the Easiest 14er to Hike in Colorado?

Did you know that Colorado has 58 peaks above 14,000’ elevation?

Commonly known as the ‘fourteeners,’ these mountains are popular bucket list items for serious hikers. If you are just getting started on your mountaineering journey, you’ll be glad to know that there are a handful of beginner 14er hikes with lesser mileage and elevation gain.

Best Colorado 14ers for Beginners

Check out this list of routes, and enjoy the beauty of our state’s mountainous terrain!
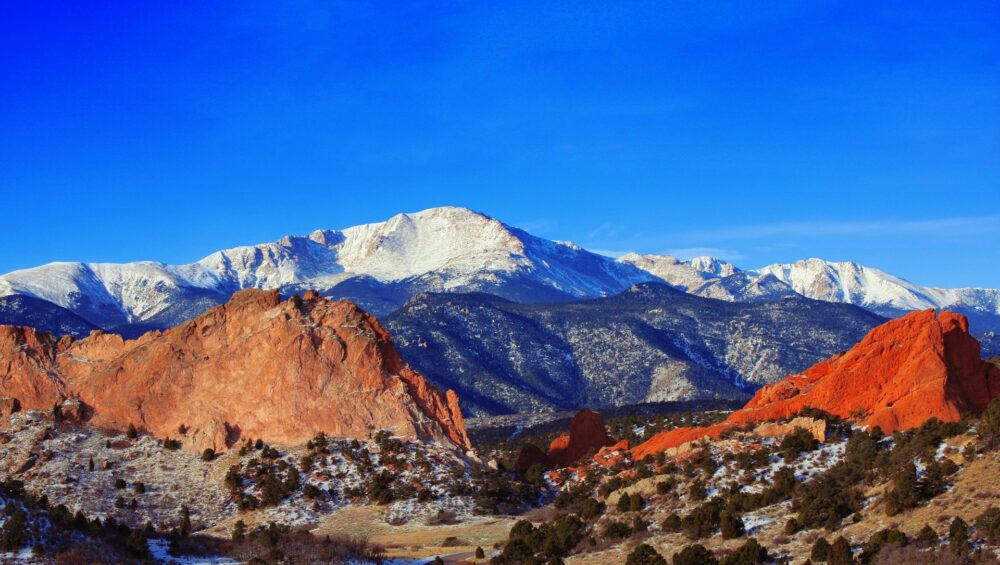
Pikes Peak

  • Location: Parking available at the Devil’s Playground Trailhead
  • Starting Elevation: 12,932’
  • Summit Elevation: 14,115’
  • Elevation Gain: 1,200’
  • Round Trip Mileage: 5.5 miles
  • Class: 1
  • Standard Route: East Slopes route starts at Devil’s Playground

First on this list is the well-trodden Pikes Peak. This popular destination is a super-accessible twelve miles west of Colorado Springs! The wildflower-adorned trail is used for all sorts of activities including mountain biking and horseback riding. Your pup will be glad to know that dogs are allowed on this trail. 


The trail has loads of picnic spots and observation points along the way, so it’s also great for a leisurely hike that’s not focused on summiting. Pikes Peak is arguably the easiest 14er in Colorado, but if you are looking for a little more help on your first mountaineering trip, be sure to check out our Pikes Peak guided hiking tour.
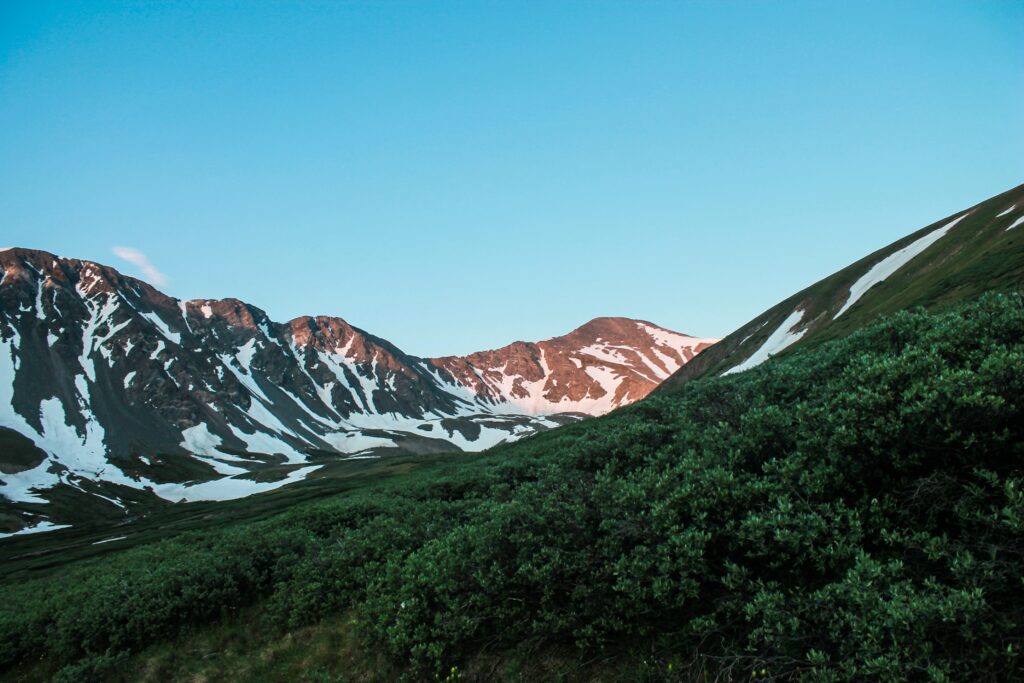
Handies Peak

  • Location: American Basin parking lot
  • Starting Elevation: 11,619’
  • Summit Elevation: 14,058’
  • Elevation Gain: 2,430’
  • Round Trip Mileage: 5.3 miles
  • Class: 1
  • Standard Route: Western route along the American Basin Trail

Located in the San Juan Mountain Range, Handies Peak is one of the easiest 14ers to hike. There aren’t many options with fewer miles or less elevation gain. Handies Peak isn’t just known for its relative ease, though. The San Juan Range is a beautiful place to spend time, and it is more underrated (aka less busy!) than the Colorado 14ers further north and easier for Denverites to visit.

Closest to Silverton, CO, this trail is accessible for vehicles with four-wheel drive and decent clearance. Otherwise, two-wheel drives are advised to park in the first lot and hike the mile to the trailhead. 

Mount Sherman

  • Location: 9700 4 Mile Creek Rd, Fairplay, CO 80440 
  • Starting Elevation: 12,009’
  • Summit Elevation: 14,035’
  • Elevation Gain: 2,020’
  • Round Trip Mileage: 5.2 miles
  • Class: 2
  • Standard Route: Southwest Ridge along Four Mile Creek Road

Part of the Mosquito Range, Mount Sherman is one of the best fourteeners in the Colorado Springs area. The most commonly traveled Southwest Ridge route is a direct ascent, and views from the top are amazing. You’ll have a gorgeous vista of two of Colorado’s highest peaks, Mount Elbert and Mount Massive. 

Other cool sites along the way include mining ruins, mill structures, and prospecting caves. This is an excellent beginner 14er hike for budding mountaineers and amateur geologists alike!
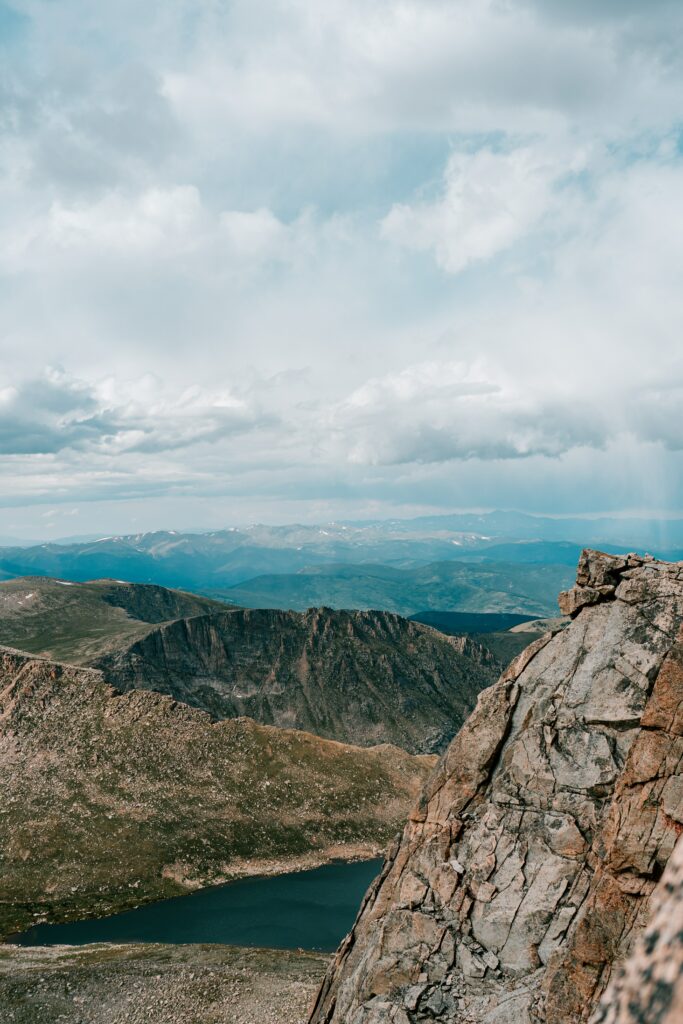
Mount Evans

  • Location: start at Summit Lake Park 
  • Starting Elevation: 12,850’
  • Summit Elevation: 14,265’
  • Elevation Gain: 1,400’
  • Round Trip Mileage: 5.5 miles
  • Class: 2
  • Standard Route: Northwest route, summiting Mount Spalding (13,842’) along the way

The 12th highest summit in the state, Mount Evans is part of the Rockies’ Front Range. Accessible from Idaho Springs, this peak is about a two-hour drive from Colorado Springs. Mount Evans is a very popular destination, in part due to its relatively tame elevation gain. 

This hike has a lot of cool bonuses, namely the beautiful Summit Lake and the population of local mountain goats. There are also a number of other trails you can take to summit Mount Evans, including a short walk from your car because, yes, there is a parking lot at the top.

Mount Bierstadt

  • Location: Parking available at the Bierstadt Trailhead 
  • Starting Elevation: 11,633’ (trail first descends to 11,470’)
  • Summit Elevation: 14,065’
  • Elevation Gain: 2,600’
  • Round Trip Mileage: 7.8 miles
  • Class: 2
  • Standard Route: Western route via the Bierstadt Trail

The western (and slightly smaller) neighbor of Mount Evans, Mount Bierstadt is known as one of the most iconic of the 14ers. Being an hour’s drive from Denver, the hike is quite popular and often crowded. Aim for a visit during the week or off-peak season in order to get a little space to yourself on the trail.

Quandary Peak

  • Location: Quandary Peak Trailhead parking by reservation only 
  • Starting Elevation: 10,930’ 
  • Summit Elevation: 14,265’
  • Elevation Gain: 3,340’
  • Round Trip Mileage: 6.6 miles
  • Class: 1
  • Standard Route: East Ridge route, Quandary Peak Trail

Regarded as the least technical peak, Quandary is one of the most accessible, easiest 14ers in Colorado. The standard East Ridge route is a straight shot to the top where you’ll have outstanding views of Breckenridge and other peaks. 

This peak is part of the Tenmile Range, and one of the more robust elevation gains on this list. Still, it is a Class 1 hike and boasts a short-ish round-trip mileage. That might explain why it is often the most traveled, seeing 50,000 visitors last year! If you’re in the Colorado Springs area, you’ll definitely want to check out Quandary Peak. 

Grays and Torreys Peaks

  • Location: Grays Peak Trail 
  • Starting Elevation: 11,280’
  • Summit Elevation: 14,278’ (Grays) & 14,275’ (Torreys)
  • Elevation Gain: 3,600
  • Round Trip Mileage: 8.6 miles (for both summits)
  • Class: 2
  • Standard Route: Northeast Route forks off to both summits

Grays and Torreys Peaks are decidedly not the easiest on this list. However, they are quite popular and for good reason. First, located in the Front Range, these peaks are just past Mount Evans and around ninety minutes from Denver.

More importantly, the two peaks have a saddle ridge between them, meaning it’s very doable to summit both peaks in one day. It only adds a mile and a half to the hike! If you are new to mountaineering and looking to cross some of Colorado’s 14ers off your list quickly, these make a great two-in-one opportunity.

Other popular beginner 14er hikes in Colorado include Mount Antero (14,275’) in the Sawatch Range and Mount Elbert (14,439’) which is the highest summit in the Rocky Mountains.

With 58 fourteeners in the state, you have a long list to choose from. Be sure to do your research, including double-checking parking reservations, learning the signs of altitude sickness, and planning around weather forecasts. No matter where you choose to hike, these Colorado peaks are sure to provide exciting trails and outstanding views.

How to Pack for a Day Hike in Colorado

The variety of terrain and difficulty found on day hikes requires the skill of adequately packing. 

How to pack for a day hike is a skill that many have been working towards mastering for years and that all hikers need to know the basics of. Before you head out into the backcountry, your pre-trip will always require you to take a look at all of your hiking essentials. 

Day hikes in Colorado Springs can be laid back or some of the more strenuous hikes out there. To take these hikes on safely, you need to pack efficiently and effectively. While optimism and a positive mental attitude should be the first thing you pack, you can’t forget that emergencies do happen. If they happen to you, what’s inside your day pack will often determine how the situation plays out. 

If you’re new to hiking or have never hiked in Colorado before, we recommend booking a hike with a guide. Guided hiking tours will help you feel confident in a new environment and help lower risk while hiking in the mountains.

10 Essentials to pack for a day hike

The Ten Essentials are a great place to start when learning how to pack for a day hike. These were created over 80 years ago and have been modified as our technology and knowledge advance.

To begin, we’ll take a quick look at each of the ten essentials.

1. Navigation

Before you head out, you’ll need to know where you’re going and how to get there.

A map and compass are an excellent pick for navigational aids, but you can up your technology game and bring along any satellite navigation and communication devices. 

2. Sun Protection

The sun will quickly ruin your day hike and potentially lead to more serious problems if you’re unprepared.

If you adequately protect yourself with the proper layers, hats, and sunscreen, you are much less likely to experience heatstroke, dehydration, or any other sun-related illnesses. Even on cloudy days and in the winter, the UV rays can still reach you, so always be prepared!

3. Insulation

If you’re packing for a long day hike or even packing to prepare for potential hazards, extra layers will be key to keeping you safe and comfortable.

The weather flips like a switch in some environments, especially in the mountains. With the proper jackets, hats, and rain shells, you can be ready to take on anything mother nature throws at you. 

4. Illumination

Any day hike can turn into an overnighter if you lose the trail or get turned around unexpectedly (especially if you neglect navigation).

Pack a headlamp or flashlight with spare batteries, so you don’t need to shuffle your way through the dark. 

5. First-Aid

There’s no need for a complicated first aid kid unless you are a professional, but it’s important to have a basic kit ready for any injuries you or other hikers may have.

Remember, not all kits are made for all environments. Buy a basic kit and make changes to it to fit your experience level and the needs of your group. 

6. Fire

Being ready for anything means being prepared to keep yourself warm, cook food, and treat water when in the backcountry.

Fire starting supplies such as waterproof matches, a lighter, or a Ferro rod are great options to help get a fire anywhere. Pick what you are the most comfortable with and pack a spare.

7. Repair kit and tools

Packing a repair kit can seem like overpacking when you’re planning on just going out for the day, but it can be one of the most important things you bring along.

You will find more uses for duct tape and a knife than you ever thought imaginable when you need it out there. 

8. Nutrition

Every day of our lives appears to be driven by, “what meal will we have next?”

When you go out into the backcountry, this question is asked even more frequently as your body works harder than normal to bring you from place to place. Even if you bring out just a few calorie-dense snacks on your day hike, you’ll be grateful. The best practice is to bring at least an extra day’s worth of calories.

9. Hydration

No matter if you’re out in the dead of winter or on one of the guided hiking tours in Colorado Springs during the hottest day of the year, water is always your best friend.

Water keeps you warm in the winter and cools in the summer. Almost every ailment you start experiencing in the backcountry comes with the initial treatment recommendation of “drink some water.” Unsurprisingly, it usually works. 

10. Emergency Shelter

Going out means going out ready for your trip plans to change drastically. In most cases, you’ll never end up spending a night out that was unplanned.

However, if you ever find yourself in that situation, an emergency shelter will be a lifesaver. This can be a small bivy (like a one-person waterproof cocoon) or simply a tarp to protect yourself from the elements. 

More about comfort, less about survival

The Right Pack

The right backpack for day hiking is going to be a complete game-changer when you’re out hiking. A comfortable bag with enough space and support will turn a miserable experience into a walk in the park. For starters, I recommend buying a 30-40 liter pack if you are focused on day hikes.

40-liter packs can be used for short overnight trips but aren’t overkill for just a day. 

Do some research on different packs that give you the back support you need. Certain brands like Osprey will form-fit each pack to your back. This can be helpful, especially if you have a history of back problems. 

Don’t let not having the perfect day hiking pack stop you though! Start with the bag you have and upgrade when you’re ready.

The Right Shoes

Nobody wears flip-flops to the prom, and nobody should wear high heels out on the trail. The right shoes for you will be shoes that are comfortable, sturdy, broken in, and give you good ankle support. After those basics, you can begin looking at the different styles of rubber, traction designs, and waterproof construction.

Wearing the right shoes helps to avoid blisters, which means you won’t need to break into your first aid kit. The more preventative measures you can take to save on supplies will leave you even more prepared for your next day hike. 

How to Pack for a Day Hike

Now that we’ve hit the basics of what you need to pack, it’s important to talk about the process of packing.

The ABCs

The ABCs are a valuable tool for packing a backpack so that it fits comfortably and makes hiking easier. While most people will only use this method with multi-day trips, it’s helpful to consider when you are doing day hikes as well. Like I mentioned earlier, some day hikes in Colorado Springs can push you to your limit. Packing a comfortable bag will take a lot of strain off your back and make these hikes more enjoyable.

Accessibility- When you’re packing, make sure things you’ll need while hiking are packed on top or in an external pocket that you can easily get to. This includes things like rain gear, snacks, and especially a headlamp. Looking for a headlamp without a headlamp can be the most frustrating thing you’ll do all year long. 

Balance- Having a bag that pulls you to one side will end with a cranked back and one leg that takes on a lot more stress throughout the day. The key is to make your pack well-balanced to maximize comfort. The weight should be evenly distributed from side to side, and you want the majority of the weight to be in the bottom third of your bag. 

Compression- Here’s what can save you after packing a long list of essentials to bring on any day hike. Gear that compresses down into a small pouch is the best gear for hiking. After all, you don’t need to buy an 80-liter pack to go out for the day. Invest in a few compression bags to squeeze everything down into a small space. 

Know your Environment

You need to know what kind of a hike you are headed into and what that environment may throw at you. This means looking at the current weather forecast, the weather trends for your location, and reviews of the hike from recent days. 

You can gather information from apps (like AllTrails), with hikers going out onto these trails every day. If one person notices a dried-up river where most hikers rely on water, you wouldn’t know this without their comment. Utilize social platforms to gather as much information as you can before heading out. 

This information will help you greatly when packing your bag. It will tell you if you need extra socks because everything is muddy and wet or if you need to bring a down jacket for when you get up above 11,000 feet of elevation.

If you’re uncertain about reading this information and transferring it into packing, don’t hesitate to reach out for guided trips in Colorado Springs. These are fantastic resources when first learning how to be comfortable in the backcountry. 

Are E-Bikes Worth It?

Electric mountain bikes are taking the trail riding world by storm. These popular bikes provide incredible power and speed and allow longer rides, harder workouts, and greener commutes.

However, the high cost compared to analog bikes has many riders wondering if electric mountain bikes are really worth it.

Here are the pros and cons of electric bikes so you can decide for yourself.

Advantages of e-bikes

For Speed Lovers

The most obvious advantage of an electric mountain bike is the power that doesn’t come from your legs. Unlike analog mountain bikes, e-bikes boost your riding to give you more speed. This can reduce the time it takes to get uphill and increase your speed on the trail. If you are an adrenaline junkie or love trying tricks, this extra speed can be a game-changer. 

Explore New Trails

The other benefit of more speed is that you can go further. With less work for more range, you can enjoy a longer ride to places you couldn’t previously visit. The added power will also help you through tough sections that used to require a dismount. If you want to unlock more trails and explore new territory, an e-bike is a great way to get there.

A Sturdy Ride

The power output of the electric mountain bike is also helpful for stability and capability. With added weight from batteries and more, e-bikes are significantly heavier than standard mountain bikes. This weight is located near the bottom of the bike’s frame, creating a low center of gravity that you’ll love. With added stability, you can enjoy easier and more predictable handling from your bike. This can bring a sense of safety for newer riders, which will give you more confidence to explore and enjoy the ride.

In addition to feeling more comfortable on the bike, you can also expect to be more capable on the trail. There are certain obstacles and maneuvers that not even the best mountain bikers can manage. With an electric mountain bike, though, you can have more power to clear some of those tough technical problems. It still might be hard, but at least an e-bike can keep you on the pedals. On the other hand, the heavier the bike, the tougher sharp turns will be. However, this isn’t necessarily a downside because there are lightweight e-bikes you should check out if you want to stay flexible on the trail.

An Endurance Workout

If you are afraid that you’ll get a worse workout from an electric bike, remember that you’ll go further. Yes, if you were to do the same route and use an e-bike, you would be working out less. But that’s not a fair comparison. With an e-bike, you’ll bike further, climb higher, and go faster. The result is that you will need less strength and more endurance. This provides a different workout, one that you can mix into your current routine. Plus, if you still want that leg burn, you can always minimize the power assist from the e-bike. 

A Better Commute

One of the biggest advantages of e-bikes is how versatile they are. The bike’s assistance can make a ten-mile ride feel like five. This means that the bike commute to work you could never manage is suddenly within reach. If you’ve been looking to ditch your car for errands and local trips, an electric bike is a perfect way to do so.

Not only are they easier to park, but e-bikes take less than a dollar a day to charge. That’s substantially cheaper than gas and better for the planet, too. When you consider the cost of an e-bike, you have to factor in this amazing versatility. It is more expensive than an analog bike but so much cheaper than a car. Using an e-bike for your commute will keep you active and help save the planet.

Potential downsides of e-bikes

You may find that you enjoy the difficulty of mountain biking and the effort required to get uphill. E-bikes are a great way to minimize the uphill effort and get you to the fun parts faster. But if you love that struggle, you may not find electric mountain bikes worth it. 

There is an additional cost to going electric, both because e-bikes are more expensive upfront and because their maintenance is more expensive than analog mountain bikes. More parts mean more opportunity for something to break or get damaged on the trail. You also need to charge the bike, but these costs are very low.

If you think you might use your e-bike for commuting or enjoying longer rides, these costs are definitely worth it. The initial expense will be mitigated by what you will save on gas money, and you will get extra hours of entertainment compared to riding your old mountain bike.

The Best Ways to Test Ride

If you’re not sure if an electric mountain bike is right for you, the best thing to do is try one out in real life. Rentals and tours are great ways to accomplish this. With a day rental, you can explore on your own, visit trails you know and love, and have the opportunity to try an e-bike before you buy one.

For those of you who need a little more guidance, a tour is the perfect way to discover if an electric mountain bike is right for you. An e-bike tour allows you to learn from professionals, get advice on your technique, and build confidence in your riding ability. You’ll understand how e-bikes differ from standard mountain bikes and how to best take advantage of their power. Look no further than Colorado Springs e-bike tours for your chance to check out an e-bike while enjoying the beauty of The Springs!

So, Is It Worth It?

Whether an e-bike is worth the cost depends on your values. If you particularly enjoy the challenge of biking uphill, an e-bike might not appeal to you. For the rest of us, electric mountain bikes are exciting additions to the world of trail riding. E-bikes offer riders more speed, more power, and more adventure. Plus, people looking for an eco-friendly daily commute can certainly enjoy the investment of an e-bike. Check one out for yourself on a tour and experience the thrill of electric mountain biking!

Rock Climbing Safety for Outdoor Climbing

No matter your skill level or knowledge base, rock climbing is an inherently dangerous sport. Yes, risk can be minimized but never eliminated. 

That’s why establishing a base of knowledge and know-how when it comes to outdoor climbing is imperative to help you have the safest outdoor climbing experience possible. 

It is better to be more prepared and well equipped to handle any situation when it comes to outdoor climbing. If you’re new to climbing, the safest way to get outside is to hire a guide or take an instructional course to teach you the ropes.

Photo by Jon Hieb on Unsplash

Dangers of outdoor rock climbing 

What’s more is that most rock climbing accidents and deaths are due to human error of some kind, not a gear failure. That means that most of the dangers involved in outdoor climbing are under our control, and we can do our due diligence to prevent them. 

Things like 

  • knowing how to use your safety gear properly, 
  • learning how to land safely when bouldering,
  • doing your safety checks,
  • being aware of climbing and weather conditions, and
  • climbing within your skill level is somewhat within your control as a climber. 

There are always natural risks, such as falling rocks, sudden weather changes (common in the mountains), or gear failure that can cause severe injury or even death. 

But rock climbers are far more likely to experience a minor injury versus a serious injury in their climbing career. These will be things like scraped knees or elbows from the rock wall or maybe a sprained ankle from landing on the edge of a crash pad. 

Most of these minor injuries tend to be reported by sport climbers, trad climbers, or boulderers. So, if you are venturing into outdoor climbing in pursuit of top-roping, your risk has already decreased because you won’t be lead climbing or bouldering.

Minimize risk when climbing outdoors with these safety tips

Severe injuries and minor injuries can be minimized with the proper knowledge and attention. Here are our top tips to improve your level of outdoor climbing safety. 

1. Climb within your ability level

It is great to get outside and push grades, but this should be done in a controlled manner. It is one thing to go out to the crag and push grades with a group of experienced climbers, and it is something else to jump from lead climbing in a gym to trad climbing a multi-pitch. 

We aren’t saying that you should never challenge yourself when climbing outdoors, but be aware of your physical boundaries and technical knowledge. 

In some cases, you may be strong enough to climb something, but you may lack the technical knowledge (i.e., how to build a trad anchor or clean a sport anchor) to do it safely. To overcome these barriers, enroll in an instructional class on anchor building, climbing technique, or climb with more experienced people. 

You can also hire a personal trainer to help you build up your climbing endurance if you’re preparing for a big climb and want to be physically prepared. 

2. Have the proper safety equipment (and know how to use it!)

You need to know the gear necessary to complete a climb safely when you head outside. This knowledge can be found on online resources like Mountain Project or guidebooks for the area you plan to climb. These resources also provide you with approach information, and if you use online platforms, they may also provide weather updates.

Knowing what you need before you go can save you a lot of time, trouble, and potentially an accident. Just having the safety gear will only get you so far, though. You need to know how to use it too!

If you’ve climbed in a gym before, you likely already know how to wear your harness and tie a few knots. But do you know how to clip draws when sport climbing to avoid back clipping or z-clipping?

Can you build a toprope anchor using your own gear?

Do you know how to place solid gear?

You need to ask yourself these types of questions when you are investing in gear and when you are heading outside to climb. There are several resources to learn how to do these things, such as articles online, videos, books, courses, and friends. 

Simply taking the time to practice these skills under the supervision of someone who already knows the ins and outs of climbing safety will help you feel more confident when climbing outdoors, and it will be much safer when you go on your own. 

Other safety gear to always use outdoors: helmets.

Helmets should ALWAYS be worn by both the climber and belayer.

3. Understand belay systems and knots

A big part of knowing how to use your safety gear is knowing how to belay correctly and tie your knots. On top of that, always do safety checks for your climber and belayer. Even if you are experienced as a climber, a safety check can save your life. We are all human, and humans make mistakes. Double-checking helps us catch those mistakes before it is too late.

Lead belaying and toprope belaying differ, so know how to do both if you plan to climb in both styles. 

There are a few ways to tie into your harness as the climber. The most common way is to use the figure-eight follow-through knot. Know how to tie this knot with proficiency and perform checks on your partner. 

Other knots should be learned and practiced for anchor building, self-rescue, and other climbing skills. 

Knowing how to tie knots is essential. Take the time to learn about anchor systems and how to clean anchors. While sport climbing tends to be less technical than trad climbing, plenty of accidents occur when cleaning anchors due to a lack of knowledge and know-how. 

4. Have experience or climb with someone who does 

If you read the above tips and were thoroughly confused, then the best tip to apply is this one: climb with someone more experienced so they can teach you best practices for outdoor climbing safety. 

You don’t necessarily need to book a guided trip with a professional or enroll in an instructional course if you have a knowledgeable friend. Still, the benefit of booking with a certified climbing guide is that they’re professionally trained. 

They’ve not only done these things themselves, but they’ve gone through classes to learn best practices and how to teach rock climbing safety to people of all skill levels.

In the end, while some risk in rock climbing is left up to nature, a lot of it is up to you. With the proper education, practice, and safety equipment, you can minimize some risks.

Not sure if you’re ready to climb outside on your own yet? Hire a guide!