Best Beginners Rock Climbing in Colorado Springs, CO

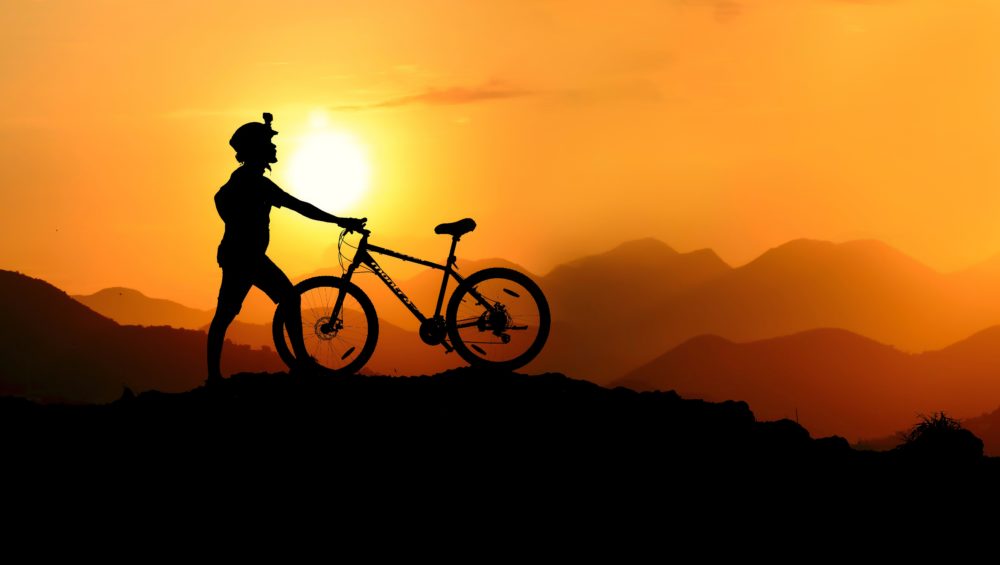
The Centennial State is a paradise for any outdoor enthusiast, with seemingly endless options for recreational activities for residents and visitors alike. While each corner of the state has its own brand of exciting outdoor opportunities, Colorado Springs is conveniently located to offer access to just about any activity you could want to pursue in the Rocky Mountains.

From world-class hiking and fishing to mountain biking, skiing, and rock climbing for those more fueled by adrenaline, The Springs boasts unrivaled access to it all. If you have always wanted to try rock climbing but were unsure where to go, some of the best beginner climbing in Colorado is right here in our backyard.

Many of the best places to climb near Colorado Springs are very beginner-friendly while simultaneously offering terrain to excite even the most experienced climbers in your party.  

Photo by Intricate Explorer on Unsplash

What to Look for in a Beginner’s Climbing Area

If you are new to the sport, seek out guided rock climbing in Colorado Springs to safely learn about rock climbing. If you want to give it a shot on your own – or perhaps are taking out a friend for their first time – here are a few things to consider when identifying beginner climbing in Colorado Springs:

The Approach

Avid rock climbers know that some of the most rewarding climbs may require many hours – or perhaps even an overnight – on a trail to access the routes they seek to climb. When looking where to climb near Colorado Springs for beginners, consider crags that require a minimal approach to access.  

Type of Climbing

There are a variety of types of rock climbing ranging from beginner-friendly to expert.  

Bouldering is performed on small rock formations – often boulders – without the use of ropes or harnesses. Routes generally do not get too high off the ground, and crash pads help protect from a fall. Bouldering is a beginner-friendly style of climbing but often requires considerable strength to navigate the more dynamic moves.  

If you are hoping to use ropes and harnesses, top rope accessible routes are the most beginner-friendly options available. When top roping, the rope runs from the climber through anchors at the top of the route and back down to a belayer at the bottom. This offers the most protection should the climber fall or need a break during the climb. 

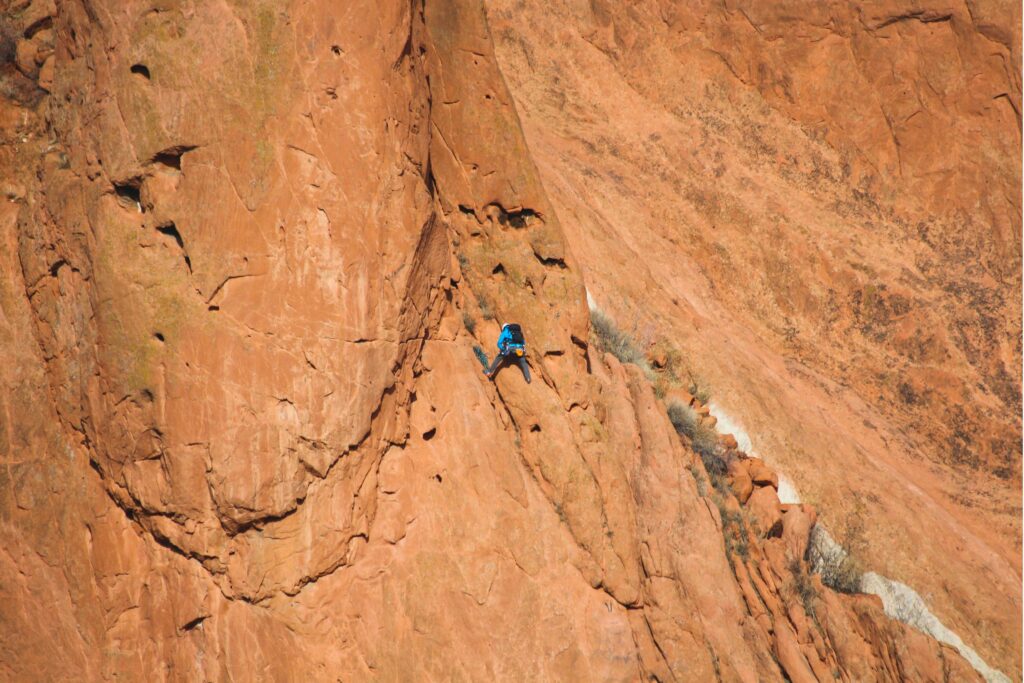
Sport climbing utilizes preplaced bolts in the rock, which a climber clips with a quickdraw on their way up the wall for periodic protection. This type of climbing is more consequential, as coming off the wall will usually result in a larger fall. 

Traditional climbing, or trad climbing, requires climbers to place gear and protection as they navigate a route and remove all gear upon completion. Leading a trad climb is not recommended for beginners.  

Ratings

When seeking beginner climbing in Colorado, checking route ratings is imperative. Using the Yosemite Decimal System, ropes are recommended for all 5th class climbing. Beginner rock climbs then fall between 5.0 – 5.8 in rating, and climbing areas with many routes in that range are great for novice rock climbers. Bouldering uses the V Scale, with beginner routes ranging from V0 – V3.

Photo by Alexis Gethin on Unsplash

Best Beginner Climbing Areas in Colorado Springs

Red Rock Canyon Open Space

Location: 10 Minutes from Downtown

Type of Climbing: Mostly sport climbing with some top rope options available 

Recommended Routes: Head to The Whale for the biggest selection of beginner sport routes

This young park located just outside of downtown Colorado Springs is owned by the city and managed by a dedicated team that aims to protect and preserve this natural and recreational asset for many generations. With nearly 100 unique routes between the east and west canyon walls, Red Rock has one of the best selections of beginner and moderate routes in the region. 

Given its proximity to Colorado Springs, Red Rock Canyon Open Space is a favorite among locals and visitors alike. Not only is the park virtually located in town, but most of its climbing areas boast incredibly easy access as well. Whether you have a full day to explore or just a morning or afternoon, Red Rock Canyon Open Space is undeniably one of the best places to climb near Colorado Springs. 
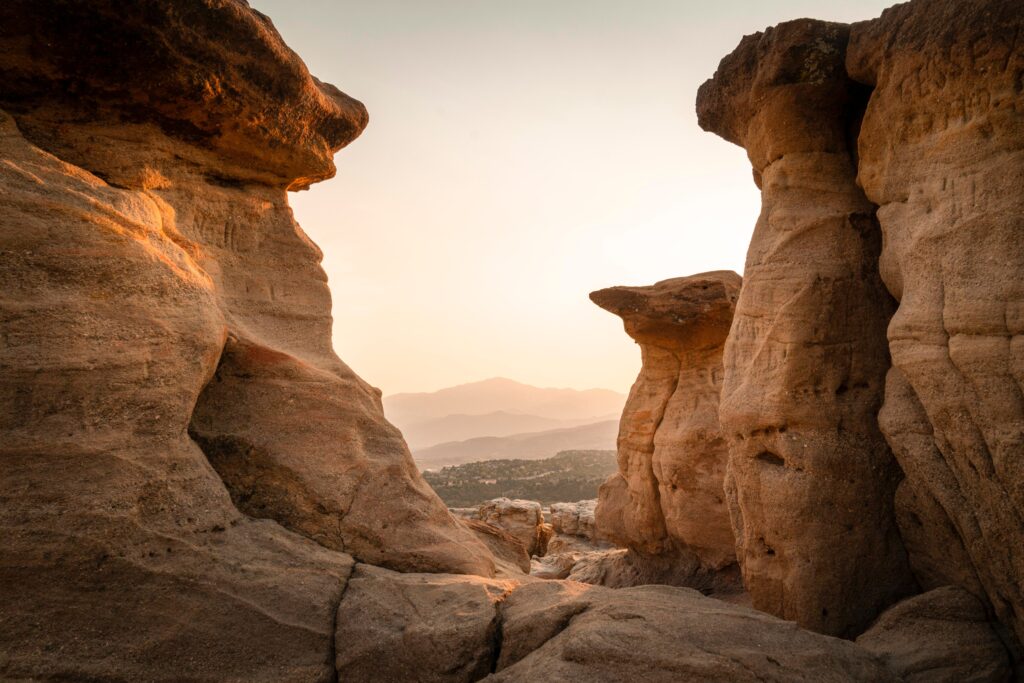
Shelf Road

Location: North of Canon City

Type of Climbing: Mostly sport climbing with accessible anchors to set up top rope routes

Recommended Routes: The best beginner routes can be found at  The Bank and Cactus Cliff 

If you were to ask a local where to climb near Colorado Springs, they would likely point you to Shelf Road. Located just a little over an hour southwest of Colorado Springs, this climbing hotspot has well over 1,000 unique routes to explore. Climbers from around the world come here to test their mettle, but there are many beginner-friendly routes at Shelf Road as well. While sport climbing is the modus operandi, many of the bolted anchors can be used to set up a top rope with relative ease. 

As a bonus, many of the walls on Shelf Road boast very friendly approaches, and the quiet and beautiful backdrop is worth a visit alone. Coupled with excellent camping options nearby, Shelf Road has quickly become one of Colorado’s premier climbing destinations. 
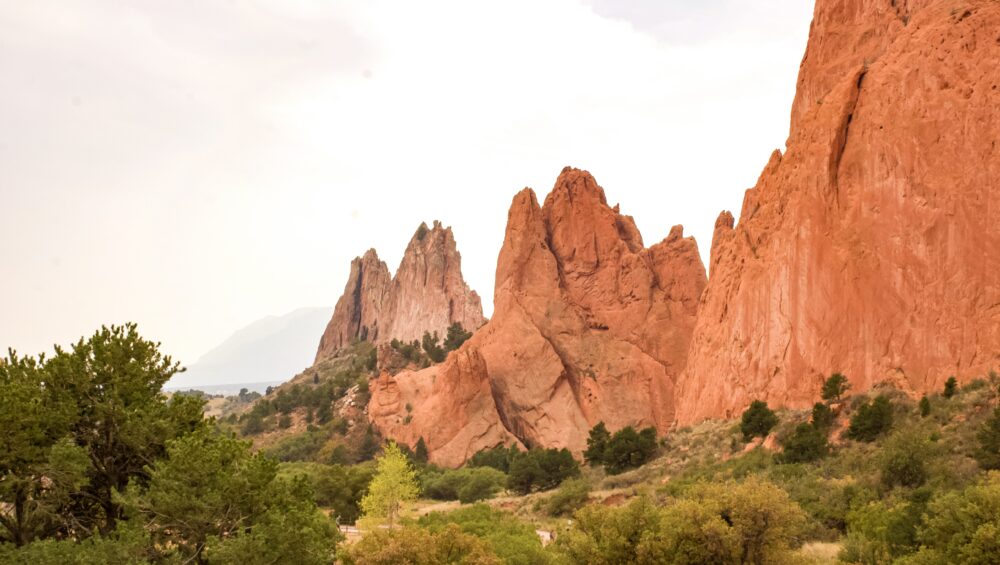
Garden of the Gods

Location: Off of US Highway 24

Type of Climbing: Mostly traditional and sport with some quality bouldering and a few top rope options

Recommended Routes: 

Big Sky (5.7 Sport) and New Era (5.7 Trad, 2 pitches) at Kindergarten Rock

The Prow (V0+) and West Face Left (V2) at The Snake Pit Area

We would be remiss to discuss rock climbing in Colorado Springs and not mention Garden of the Gods. This is the area’s most famous destination. In addition to over two miles of hiking trails, ample road and mountain biking options, and easy access right out of town, this National Natural Landmark is also a great place to go rock climbing.

While not as beginner-friendly as the other places on our list, the conglomerate sandstone, and limestone formations beckon to be climbed. Routes range from easy bouldering problems to complex traditional climbing routes. With just a little sleuthing, you can find something for everyone.  

No matter your outdoor interests, The Centennial State has you covered. If this is the year you decide to give rock climbing a try, some of the best beginner climbing in Colorado is located right here in Colorado Springs. Explore the area on your own or with the best guided rock climbing in Colorado Springs, and prepare to rope up and have the time of your life. 

What is Falconry?

Witnessing the beauty of large birds of prey up close is an unforgettable experience. Falconry (hunting with a bird of prey) is a thrilling sport with a rich history and culture that offers a unique connection with nature and provides a different view of the world around you. You quite literally get a bird’s eye view!

Head falconer at Broadmoor Outfitters, Deanna Curtis, has been enamored with raptors ever since she first saw a live presentation with them in 1999. Curtis now has over 16 years of experience as a licensed falconer. Here, she’ll answer the question “what is falconry?” and share a little of her falconry expertise along with what you can expect from a Broadmoor Outfitters falconry experience in Colorado Springs, CO.

Image by holzijue from Pixabay

What Is Falconry?

“Falconry is to hunt wild quarry with a trained raptor in its natural state,” says Curtis. “So the birds are out there hunting, and when they catch something, we convince them to give it up for us to eat.”

The type of wild game you hunt with your raptor depends on the type of bird you’re working with. 


“For instance, a red-tailed hawk is generally going to be hunting rabbits – so cottontails, jackrabbits, squirrels,” says Curtis. “If you’re hunting with a peregrine falcon, you’d be hunting pheasants, grouse, quail, ducks.”

While falconry does mean working with a trained bird, they are also still wild animals with free will, and the sport requires a tremendous amount of work and dedication.

A Brief History of Falconry

Falconry is an ancient sport people have practiced for thousands of years both as a form of hunting for food in nomadic societies and as a sport for nobles in Medieval Europe, Middle East, and the Mongolian Empire. In empires, the nobility would hire master falconers to trap, train, and care for the hawks and other birds of prey so they would be available for hunting with kings and other high nobles.

Falconry has a history worldwide, though the exact origin of falconry is unknown and could date back as far as 8,000 to 10,000 years.

Nowadays, there are strict laws around falconry to ensure the raptors are properly cared for and trained because of the potential impact improper care could have on wild raptor populations.  

What Does a Falconer Do?

For Curtis, being a falconer doesn’t just mean training and hunting, but also educating people about falconry and raptor conservation. Curtis has trained and worked with 22 different species of raptors and has spent much of her career working with non-releasable raptors for educational purposes.

When Curtis takes any of her birds hunting, she goes with her hunting dog, who “flushes” the game out of bushes or tall grass for the raptor to chase.

“And hopefully [my hawk] ends up catching one, and then I give her a large reward, and I take the rabbit and cook it up the next day,” says Curtis.

How Are Raptors Trained?

“People are [often] amazed by how fast one can train a bird to hunt with humans,” says Curtis. “Usually, it’s about 2 to 6 weeks.”

The actual training process is all through food. The falconer limits the bird’s food intake to keep the bird both motivated to follow commands and light enough to fly with the speed it needs to catch prey. 


Curtis says, “If your bird is fed up, then I hold no value, and there’s no reason for it to come back to me.”

In fact, that’s where the term “fed up” comes from!

Like working with any animal, the training happens incrementally with getting the bird to fly to a post or the falconer’s hand from longer and longer distances. Eventually, the bird can fly free and will still fly back when the falconer calls (most of the time), knowing they’ll get food.

Image by Kevinsphotos from Pixabay

How Can I Learn Falconry?

Learning falconry and becoming a falconer requires a significant time and monetary commitment. It requires money for all the bird equipment, shelter, food, veterinary costs, permits, and other fees. With time commitment, it requires the time to go through at least a two-year apprenticeship and then take at least another five years to become a master falconer. 

Throughout this time, your bird needs daily care and training. Being a falconer becomes a lifestyle rather than just a hobby. 

Experience Falconry at Broadmoor Outfitters

Now let’s move on from “what is falconry” to how you can experience it! If you’d like to get a taste of what falconry is like and spend time with these magnificent birds, you can also take one of Broadmoor’s falconry experience lessons. During these sessions, you’ll meet Curtis – or Broadmoor Outfitters’ other falconer, Roger Tucker – and the birds they work with while experiencing Colorado falconry firsthand.

Beginner Falconry Lesson

During the beginner falconry lesson, your falconer will go over the natural history of the birds they have, discuss the history of falconry, and how they train and hunt with the birds. The group then goes to Broadmoor’s outdoor space in beautiful Colorado Springs, where your falconer will have a Harris hawk fly over and in between the guests. Finally, guests get the opportunity to hold the raptor using specialized leather gloves – making this lesson the perfect opportunity to explore falconry for beginners.

“I think the flying portion honestly is where people light up the most,” says Curtis. “They get excited about the birds flying so close to them and over the top of their heads.”

Broadmoor Outfitters currently has 3 Harris hawks, 3 falcons (a Saker falcon, a Lanner falcon, and a Peregrine falcon), a barn owl, a Eurasian eagle owl, and an Ornate Hawk-eagle.

Intermediate Falconry Lesson

The intermediate falconry experience is even more hands-on, where you’ll go out on one of Broadmoor’s outdoor trails with an expert guide and a trained Harris hawk. On the trail, you’ll have an opportunity to work with the hawk. Either Curtis or Tucker will guide you through using the falconry glove, holding the hawk, and casting the hawk out to one of the nearby pine trees. You’ll then be able to watch it fly from tree to tree and eventually return to your glove.

This experience is only available to folks who have taken the beginner’s falconry experience within the past year. However, if you fall in love with the raptors that first round, this is the next step!

Should I Book a Mountain Bike Tour or Rent a Mountain Bike?

Headed out to Colorado Springs for a family vacation? Or are you traveling solo and looking to pack as much outdoor activity into your trip as possible? Perhaps you’re a nature lover and want to spend some time leisurely exploring the Garden of the Gods, Red Rock Canyon, or Ute Valley Springs. No matter where you fall in these categories, mountain biking is a fantastic way to make the most of your time in world-renowned Colorado Springs! 

Now, your adventure boils down to two options:

A mountain biking tour in Colorado Springs

Or, 

A mountain bike rental in Colorado Springs 

On a bike tour, you’ll have various trails to choose from and get to do your exploring with a knowledgeable guide. On the other hand, if you rent a bike, you’ll have free reign over your trip length and can hit the trail without a guide. 

At Broadmoor Outfitters, you’ve got both options! The main points to consider when deciding are skill level, budget, and interests. This article will help you decide which route to choose so your mountain biking in adventure in Colorado Springs is a wonderful experience.

So, let’s dive into what to consider when deciding on a mountain bike tour vs. mountain bike rental.

Skill Level

For people who can ride a bike but aren’t super skilled at navigating curves and rocks, a mountain bike tour in Colorado Springs, CO is definitely the way to go. 

Did a young family member recently ditch their training wheels? Our bike tour is perfect for families with children. Our tour guides are happy to speak with you about your comfort on a bicycle in order to fine-tune the tour to suit everyone’s unique needs. Your guide will also factor in how long you want to ride, and they’ll be able to navigate you back to “base” easily if anyone decides they’re done with the ride early.

Photo by Darcy Lawrey from Pexels

For athletic or even semi-athletic folks who are looking to pack in as much scenery as possible or can comfortably work up a sweat, a mountain bike rental might be the way to go. 

The rental option can also be ideal for families who have children that are close in age and riding level. It can be a fun and unique bonding experience for families to decide which trails to explore, navigate the trails together, and even choose when to take breaks for water and snacks.

Cost

Mountain biking in Colorado Springs is something anyone can enjoy on any budget. No matter how much you’re able to spend, there’s an experience for you. Here are some items to keep in mind as you consider your budget.

 How much time do you want to spend mountain biking? If it’s just one item on a long list of adventures you’re preparing to go on at Broadmoor Outfitters, you should go with a mountain bike tour.

Image by Fabricio Macedo FGMsp from Pixabay

Seeing as you’ll have lots to do and only want to spend a few hours on a bike, a guided tour is a cost-effective way to optimize your time. You pay for a few hours of riding versus renting a bike for an entire day when you plan to use it only for a short time. Your guide will help you make the most out of your trip. Then, you’ll have plenty of time left in the day for other activities. 

If mountain biking is your thing and you want to dedicate a day – or even more – to biking, then consider mountain bike rentals in Colorado Springs, CO. When renting, you’ll have a whole day or more to ride your bike to multiple areas of your choosing. You won’t pay for a guide, and you’ll have total freedom to make it an epic and unforgettable ride.

Interests

What do you want out of your trip and, specifically, this mountain bike ride?

If the purpose of your trip is to spend some solo time in nature, and you enjoy looking at trail maps and selecting your route, you’ll enjoy mountain bike rentals in Colorado Springs, CO. Just make sure you’re comfortable with navigating the area and, of course, follow all safety protocols. 


If your goal is to relax and let someone else do the planning, consider mountain bike tours in Colorado Springs, CO. We’ll take all the fuss out of figuring out which trail is perfect for you and your family. That way, all you’ll have to do is show up and enjoy the ride!

Image by Fabricio Macedo FGMsp from Pixabay

Bringing it Together 

Mountain Bike Tour in Colorado Springs

Pros

  • Efficient method to see the beautiful sights.
  • Stress-free! It’s already planned out.
  • There’s a guide with you – you won’t get lost, and you’ll have someone who knows the area in case of an emergency.
  • The trail is well-maintained. 

Cons:

  • The tour may not cover the area you want to see. 
  • Can only ride for a few hours or the duration of the tour

Mountain Bike Rental in Colorado Springs

Pros: 

  • Total control over where to ride. 
  • You can rent the bike for a whole day or more. 
  • Great for people looking to ride for exercise. 

Cons: 

  • It may be difficult to transport bike(s) depending on where you plan to ride. 
  • The trail may not be maintained/easily navigable. 

Still not sure? Don’t worry; you can’t choose wrong! The main characteristic that both mountain bike tours and mountain bike rentals have in common is that they’re a great way to experience nature and make memories that’ll last a lifetime. Have any questions before making your decision? Feel free to contact us and we’ll help you pick the perfect activity for your trip.

Beginners Guide to Stand Up Paddleboarding

Beginners Guide to Stand Up Paddleboarding

If you’ve ever watched people gracefully paddling on water and wondered how to stand up paddleboard, you’ve come to the right place. Stand up paddleboarding is a fun way to enjoy the outdoors, and it’s easy for beginners to learn. Check out our stand up paddleboarding tips below, and when you’re ready to join us, book your spot in our Stand Up Paddleboard Tour in Colorado Springs.

What Is Stand Up Paddleboarding

Stand up paddleboarding involves standing on a paddleboard, which is not unlike a surfboard, and using a paddle to propel yourself across the water. Unlike surfing, however, these boards are wide and stable, so it’s easier to stay upright. Beginner paddleboards are usually 10’6” long and 31” wide. They are easy to maneuver and don’t require as much balance as you might think. Plus, the benefits of learning how to stand up paddleboard are totally worth the potential of falling off in front of your kids.

Image by ivabalk from Pixabay

There are plenty of benefits to this fun watersport. First, stand up paddleboarding is an excellent full-body workout, using core muscles for balance and paddling. Second, it’s a great way to enjoy the beauty that Colorado Springs has to offer. You can paddleboard on a river, ocean, or – as we do here – a lake. Since you are standing, you can easily take in the sights while relaxing on the water. Finally, it’s a fun social activity for friends and families. This is an excellent adventure for older kids to tackle alone, and little ones can stand on a board with a parent.

Gear Needed for Stand Up Paddleboarding

Your Paddleboard 

There are three required pieces of equipment for learning how to stand up paddleboard, and we provide them all on our tours. The first is a paddleboard, and we use only high-quality and reliable boards. These solid boards with slip-proof coating are ideal stand up paddleboards for beginners to learn on. All boards come with a velcro leash to secure around your ankle. This prevents the board from drifting away if (and when) you tackle a tumble into the water. 

The Paddle 

The second is a paddle, and our lightweight paddles are comfortable to use. The paddles are adjustable and should be nine or ten inches taller than you. One simple trick for sizing your paddle is to raise your hand straight up above your head and put the paddle handle in your palm. When you can comfortably grip the paddle from this position, that’s the perfect height for you. It’s easy to learn how to use the paddle to navigate through the water, and our Stand Up Paddleboarding Tour in Colorado Springs covers this and other techniques. 

Personal Flotation Device (PFD)

The third piece of gear is a personal flotation device (PFD), which is essential while paddleboarding. A PFD allows you to stay safe while paddleboarding over deeper waters, and it also makes it easier to remount the paddleboard from the water. PFDs come in multiple sizes for adults and children, so be sure to get one that fits snugly without being restrictive. 

Finally, let’s talk about clothing. If it’s cold, you may want a wet suit or rash guard. You can also wear water shoes to keep your feet warm while paddleboarding. Make sure to pick shoes that will stay on (flip flops are sure to get lost) and won’t slip on wet surfaces. In warmer weather, don’t forget to lather up with sunscreen before hitting the water.

Image by Dimitris Vetsikas from Pixabay

Stand Up Paddleboarding Tips and Techniques 

When you first get on the water, you’ll do so from a kneeling position. Having your center of gravity a little lower keeps you more balanced and prevents falling in shallow waters. You can stay kneeling or sitting the whole time, but then you wouldn’t be stand up paddleboarding. What’s the fun in that? So the first thing you need to learn about how to stand up paddleboard is, well, standing up!

Standing Up on Your Paddleboard

The key to standing up on a paddleboard is to go slowly from kneeling, to squatting, to standing. When you stand from a kneeling position on solid ground, you move all your body weight to one foot and then the other. If you tried this on a paddleboard, you would tip over and end up in the water. This is an easy enough mistake to make, but it’s also avoidable if you know the proper technique!

Photo by Elise Bunting from Pexels

To maintain your balance, first move into a low squat to keep your center of gravity closer to the paddleboard. It’s easiest to put down your paddle first – across the paddleboard in front of you. Then, place a hand (or both) on the board while you move into a squat. Place your foot in the same place your knee just left to ensure balance and stability in your stance. 

Once you’ve made it to a low squat, you can stand straight up. Don’t forget to bring the paddle with you! Now standing, make sure your feet are hip-width apart with your toes facing forward. Keep your knees bent and engage your core for balance. This is especially important while paddling, which is next on the list.

How to Paddle a Stand Up Paddleboard

First, let’s go over the proper technique for holding a paddle. If the paddle is to the right of your board, your left hand should be on top, holding the T-grip in your fist. Place your right hand a few feet down the shaft. To keep the paddleboard moving straight, switch sides every few strokes. When you do this, also change your hand positions so the opposite hand is always on top. 

The Forward Stroke 

Let’s start moving with a forward stroke. Both of your arms should be fully extended, with your top arm parallel to the board and your bottom arm at a forty-five-degree angle. The angle of the paddle blade should point away from you. Bury the whole blade in the water to get maximum power with each stroke. Be sure to pull your paddle back as far as you can; try to get your body past the paddle before you take it out of the water for the next stroke.

Image by thelester from Pixabay

Reverse Stroke 

Once you’ve got the forward stroke down, you can also do a reverse stroke. As the name implies, it’s just the forward stroke backward with the paddle starting next to or slightly behind you. Make sure to bend your knees and engage your core! Doing so provides stability and power as well as protecting your back from injury in this twisted position. You’ll most often use the reverse stroke for stopping or slowing down.

The Sweep Stroke – For Turning 

The last aspect to paddling a stand up paddleboard for beginners is the sweep stroke. This stroke allows you to turn quickly, even when your board is standing still. Start by placing the paddle near the nose of your board with the blade perpendicular to the paddleboard. Then, using your legs and hips for power, sweep the paddle in a semicircle backward towards the tail of your board. This motion will cause you to turn away from the paddle. If you do a reverse stroke, starting at the tail and sweeping toward the nose, you will turn toward the paddle. 

This technique gives you a couple of options for turning in the water. If you want to turn to the right, for example, you can do a sweep stroke on the left side of the board or a reverse sweep on the right.

How to Get Back on a Stand Up Paddleboard from the Water

The last of our stand up paddleboard tips, especially important for beginners, is how to get back onto a board after you’ve fallen in the water. The first step is to locate your paddle and place it across the nose of your paddleboard. If it has drifted too far away, you’ll need to get back on your stand up paddleboard first (since you’re connected via leash) and paddle with your hands to retrieve it.

Join an intro to paddleboarding class today!