Hybrid vs Road Bikes: Which to Choose

Are you looking to get into biking in Colorado and not sure where to start? There are a lot of options to consider when you are in the market to buy your first bike. It can be hard to choose whether you want a hybrid or road bike, especially if you are not sure about the differences between them. In this article, we will break down all the important distinctions and features of both so you can make an informed decision about which is right for you.

What are Road and Hybrid Bikes for?

Before we get into the differences between road vs hybrid bikes, it is helpful to remember the goals of each. As the name implies, a road bike is used for cycling on paved roads. They tend to be sleek and lightweight, great for professional cyclists, commuters, and cycling hobbyists. If you are getting a bike for your daily commute to work or weekend rides down paved bike trails, a road bike might be right for you. 

When you hear the name hybrid bike, you are probably wondering, a hybrid of what? It is a hybrid between a road and a mountain bike, giving you some of the capabilities of a mountain bike without quite so much extra weight. Biking in Colorado offers so many opportunities to off-road, from bike paths to mountain bike courses. If you have any interest in checking out the sport of mountain biking, a hybrid bike might be your best bet. While you can certainly ride a hybrid bike around the city, you will just find that your commute takes a bit more effort than it would with a road bike. The fourth type of bike to consider is electric bikes or e-bikes, which give you extra power and can help with long commutes or tough ascents.

Photo by Alex Diffor on Unsplash

The Main Differences between Road and Hybrid Bikes

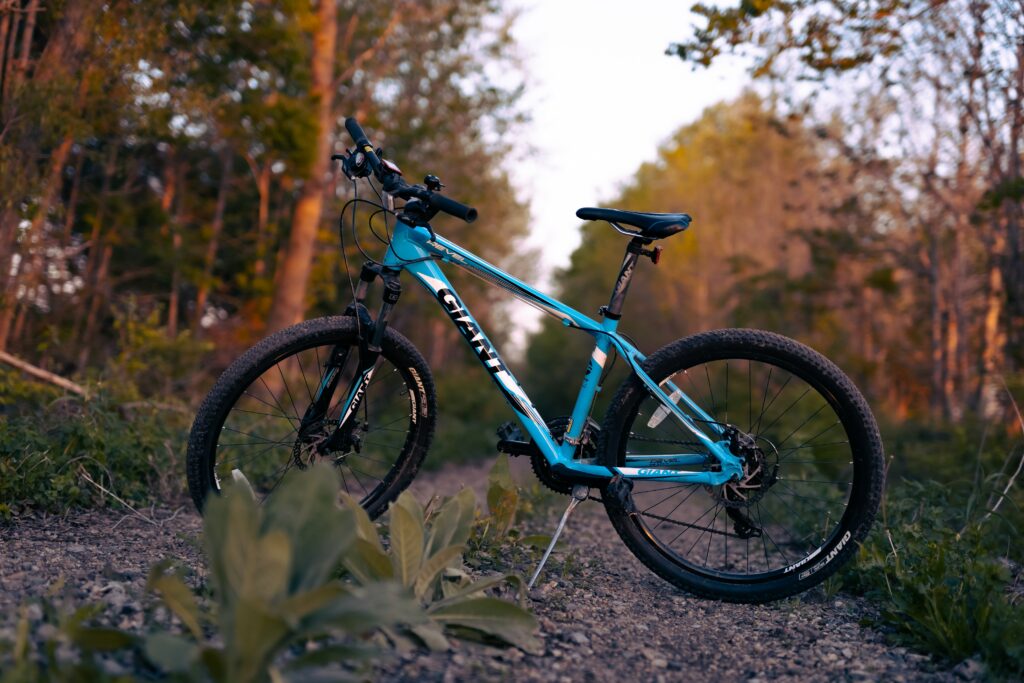
Unless you know what to look for, it is easy to confuse road and hybrid bikes. Both have similar shapes and roughly the same features. One of the most obvious differences is the tires. Where road bikes have tires that are narrow and slim, hybrid bikes have wider tires. In order to allow for off-roading, hybrid bikes have bigger tires that are puncture resistant and more durable against biking over gravel and dirt. The extra width also provides added stability and grip on potentially slippery conditions.

The other main difference you can spot between road vs. hybrid bikes is the position and shape of the handlebars. Road bikes have drop handlebars that curve down and allow the rider to adopt a more aerodynamic riding position. This more crouched body position can be harder to get used to as a beginner cyclist, but drop handlebars have some other benefits, too. They tend to be more narrow, thus fitting into smaller gaps in traffic. They also allow for three distinct hand positions, which help long-distance cyclists stay comfortable and adapt to the cycling conditions. 

Hybrid bikes, on the other hand, have the same flat handlebars as mountain bikes. These flat handlebars keep the rider upright for better stability and visibility on the rough terrain of mountain biking trails in Colorado. While this style is easier for beginners, it lacks versatility and proper positioning for faster rides.

Factors to Consider with Hybrid vs. Road Bikes

Comfort of Road vs. Hybrid Bikes

Road bikes have a lot of perks, but they can also take a bit of getting used to. Because of the more crouched posture, road bikes are initially tough on the rider’s back and arms. The most comfortable and unstressed riding opportunity definitely comes from a hybrid bike. The trade-off to this is that road bikes have multiple positions, which you can switch between on a longer ride. This helps prevent stiffness and makes it easier for long-distance cyclists to adapt to a steep uphill slope or be aerodynamic to preserve speed.

Weight Differences between Hybrid and Road Bikes

Hybrid bikes are always heavier than road bikes, and this can be an important factor to you. Because of the bigger tires and a few more gear options, hybrid bikes tend to weigh around five to ten pounds more than road bikes. Road bikes are also usually carbon fiber, which is lighter but more expensive, while hybrid bikes opt for durability and the stability of added weight. If you have to haul your bike up a flight of stairs or are looking for the easiest commute to work, this difference might be a key point in favor of road bikes. Bike weights can also vary by brand and model. If your bike has added features, for example, that will mean added weight. If you are really concerned about minimizing weight, a road bike should be under twenty pounds.

Speed Potential of Road Bikes vs. Hybrid Bikes

The difference in speed possible between hybrid and road bikes is significant. This is from a lot of factors, including weight and riding position. If you are hoping to get involved in some  Colorado Springs cycling events or just want to shave a few minutes off your commute, a road bike is the way to go. You will find that a road bike is much more efficient in terms of converting your work into speed. With less weight and a more aerodynamic posture, you can make every rotation of the pedal worth your effort.

Road v.s Hybrid Bikes and Riding Terrain

If you have any interest in off-roading, you will need to opt for a hybrid bike. This would make your decision very easy, as it is not possible to go off-road with a road bike. It is, in fact, dangerous. Not only will you likely pop a tire, but road bikes are not heavy or stable enough to manage uneven terrain. If you have ever accidentally gone off-road on a road bike, you know it is not safe or comfortable. You need the wider tires, sturdier frame, and more upright posture of a hybrid or mountain bike to safely enjoy unpaved bike trails. If you are not sure if you would enjoy mountain biking or trail biking, consider trying a guided bike tour where you can hop on a mountain bike and see if cycling through nature appeals to you.

Price Difference of Road vs. Hybrid Bikes

You may be surprised to find that road bikes can be more expensive than hybrid bikes. You can certainly find either at any price point, from a few hundred to a few thousand dollars. Because road bikes prioritize being lightweight, they are often made of carbon fiber which is lighter and more expensive than aluminum or steel frames often found on hybrid and mountain bikes. It would be best to avoid spending too much if this is your first foray into cycling in Colorado. That way, you can ride for a year, better understand what you personally need from your bike, and upgrade to a more long-term investment bike. 

Maintenance Needs of Road vs. Hybrid Bikes

As noted above, road bikes are often made with a carbon fiber body. This extra expense should be considered as a potential recurring expense, as replacement parts and maintenance can be more. On the other hand, road bikes tend to have a slightly more simple construction, offering fewer gear shifts, for example, than hybrid bikes. These extra mechanics on hybrid and mountain bikes translate to more care in terms of bike maintenance and potential added expenses. In this consideration, the specific brand and model of bike will need to be evaluated.

Final Thoughts

If this is your first bike since you were a kid, you may want to start with something less expensive to get a feel for it. While the riding is, well, just like riding a bike, you may find that you don’t like the handlebars of a road bike or the weight of a hybrid bike. You can rent a hybrid bike for the day or borrow a friend’s bike to help you make your decision. Once you know better what you are looking for, you can invest in a quality bike that will serve your needs. Please make sure to always wear a helmet and obey traffic laws. Happy riding!

How to Train for Hiking and Backpacking

Many beginner hikers make the easy mistake of under-preparing for their journey. I have certainly heard, “If I can walk, I can hike.” But just going for walks around the neighborhood is not the best way to train for hiking. Long-distance hikes, multi-day hikes, and elevation hikes require a more focused training schedule.

If you are coming to Colorado Springs for a hiking vacation and wondering what you need to do to get ready, we’ve got you covered. We will go over all the essentials of how to train for backpacking – including cardio, strength, and flexibility training – so you can get the most out of your trip. Whether you are planning a solo adventure or scheduling a guided hike, this workout regimen will have you in tip-top shape for whatever part of the great outdoors you will conquer. 

Endurance-Focused Cardio Training for Backpacking

At nearly 6,000 feet above sea level, Colorado Springs is even higher than Denver, which is commonly called the Mile High City for its 5,280-foot elevation. What this means for visiting backpackers is that you need to train for cardio even more. Depending on where you are coming from, your body will not be used to the lessened amount of oxygen in the air at this elevation.

Cardio exercises train your body to use oxygen more efficiently, which is key for hiking at elevation. This can help you prevent muscle cramps, keep you from fatiguing early, and even combat the symptoms of altitude sickness. The best way to train for this is by going on some day hikes near you and working up to higher elevations and longer mileage.

Endurance training for multi-day backpacking in Colorado Springs requires at least an hour of steady-state cardio every other day. Steady-state cardio involves breaking a sweat and maintaining the exercise with minimal rest. You can choose activities that suit you best while prioritizing low-impact exercise. Endurance training in the form of rowing, swimming, or biking will help protect your joints from overuse while giving your lungs the workout they need.

Strength Training for Multi-Day Hikes

Many people do not consider strength training a key part of preparing for backpacking, but it is. If your muscles are not strong enough for the pack you are carrying or the steep incline you are ascending, you will surely get burnt out more quickly. Weight training is a great way to build muscle endurance for multi-day backpacking trips. 

There are two main groups to consider for strength training. The first is your legs for hiking, and the second is your core and upper body for carrying your backpack. Great lower body exercises will focus on stability for your ankles, knees, and hips. You can strengthen your feet with arch workouts like towel scrunches, your lower legs with heel raises, and your upper legs with squats and lunges. Don’t forget to include hip exercises like hip thrusts and deadlifts to build stability in your lower core. You can find more exercises in our guide on how to train to hike a Colorado Fourteener.

Core Exercises for Pack Training

The second area to focus on for strength training is the upper body. When you go on your first multi-day backpacking trip, you will be surprised at the heft of your pack. Backpackers have to carry a lot of weight, including shelter, food, supplies, and more. Luckily, the pack will get lighter as you eat through your supplies. 

To properly prepare for a backpacking journey, you should strengthen your core, shoulders, neck, and back muscles. Lower back exercises are important for preventing injury when carrying heavy loads. You can lie flat on your stomach and raise one arm and the opposite leg. Repeat this exercise from a tabletop position, resting on your hands and knees. Core strengthening like ab workouts and planks are also essential for building upper body stability.

The best way to prepare to carry a pack is, simply, to carry one. Pack training involves venturing out on your training hikes with a pack stuffed full of weight. Depending on the length of your multi-day backpacking trip, your pack could be twenty to forty pounds. Keep in mind that it is not recommended to carry a pack of more than twenty percent of your body weight. With this in mind, you can load your backpack with some heavy household items and practice hiking with it. If you are training by yourself, be sure to follow the best practices for staying safe when hiking alone.

Flexibility Training for Hiking

The final, and arguably most important, part of backpacking training is stretching. While you should alternate cardio and strength training days, you should stretch daily after all of your workouts. You should also begin your workouts with some dynamic stretches but only after you have warmed up for five to ten minutes.

When working on flexibility for backpacking, it is important to focus on the legs and back. You will want to ensure that your legs stay as flexible as possible through miles and miles of hiking. Flexibility training is important for preventing joint injury. This is because when your muscles are overly tight, they pull on your joints and cause stress. Keeping your legs loose will protect your knees and ankles from feeling worn out on your hike.

In addition to the basic toe touches, you will want to stretch your calves, hamstrings, quads, IT bands, and hip flexors. Each stretch should last twenty seconds with a continual effort to reach your limit (without injuring yourself). If you have any previous injuries, be sure to give those areas some extra attention. Any foot pain or arch tightness will require you to stretch and strengthen in order to prepare for the innumerable steps you will take on your backpacking trip.

Final Thoughts

Our beautiful state of Colorful Colorado is one of the most scenic places to take a multi-day backpacking trip. Every beginner can learn how to train for hiking and prepare themselves for this adventure of a lifetime. With a couple of months of dedicated training, you will be ready to take on the elevation and mileage of a multi-day hike in Colorado. Happy hiking!

Stretches for Rock Climbing

Are you getting into rock climbing and want to make sure your body is ready? Maybe you are realizing that a lack of flexibility can impact you on the wall. You may not expect it, but there are specific stretches for climbing, and we’ll go over them here. Rock climbing uses a lot of muscles you may not use regularly, especially in the forearms, wrists, hands, and fingers. 

It is normal for beginner rock climbers to get burned out early, or as we say “pumped.” Just like any physical activity, it is important to stretch beforehand to prevent injury. Flexibility training is also a great way to improve performance in exercise, build endurance, and expand your abilities. So without further ado, let’s get into the essential rock climbing stretches you should be doing before and after your workouts.

Before You Stretch

Before we get started, it is important you know not to stretch cold. Stretching is meant to length your muscles by comfortably finding and challenging your limits. If your muscles are cold from sitting around, stretching can actually cause damage like microtears. For this reason, you should always warm up for at least five minutes before stretching. 

Good warm ups include a light jog, jumping jacks, or an easy climbing route that is well below your grade level. Once you are feeling warmed up, the best pre-workout stretches are dynamic ones. As opposed to stationary, static stretches, you can move through positions when doing dynamic stretches. These will ensure your muscles are loose and amenable to odd positions and movements. 

Pre-workout Dynamic Stretches 

Dynamic climbing stretches are a good way to loosen the joints and lengthen your muscles through their comfortable range. It is most important to work on the shoulders and arms, spine, and hips. You can start with knee pull ups, touching your toes, torso rotation, side stretches, and neck stretches. Once your back is open, focus on stretching the joints to prepare for your climbing workout.

One of my favorite stretches is joint circles. I say “joint” because you can and should do this with your shoulders, wrists, hips, and ankles. Shoulder circles, both backward and forward, are key for warming up the shoulder muscles and rotator cuffs. These are common injuries among rock climbers, so make sure to give your shoulders the attention they need. 

Opening and closing your hips is another exercise key for rock climbing flexibility. Make big circles with your knees going ten times in each direction. Taking little steps between circles is a good way to reset your hips and make the stretch the most effective. This will ensure you can maneuver on the wall into whatever position is needed to reach the holds. A key beginner rock climbing technique is about hip rotation, so make sure your body is prepared for the movements.

Finally, give some extra focus to your forearms, wrists, hands, and fingers. You will find these muscles easily exhausted when you first start climbing. Begin by shaking everything out, reaching for the ceiling, and wiggling your fingers. You can stretch by gently pulling your fingers back, bending your wrists forward, and pushing your hands together with raised elbows.

Post-workout Static Recovery Stretches

If you feel any tightness or pain, post-workout climbing stretches are absolutely essential. Static stretches focus on holding an elongated position for 20-30 seconds. As your muscles cool off and switch into recovery mode, it is important they do not tighten up. These static stretches for climbing will help repair muscles, improve flexibility, and prevent injury.

Many of these static stretches will be done on the ground, so it is best to grab a yoga mat for your post-workout cool down. I like to incorporate hatha yoga in my recovery stretching, as many of the positions are restful and provide the needed muscle elongation. I also tend to work in reverse from my pre-workout stretch, starting with the arms, then the joints, then the spine.

Start in a tabletop position, and gently move your weight over your hands to get a nice forearm stretch. You can then switch this by resting on your knuckles and stretching the backs of your wrists. Certain rock climbing holds, like pinches, really burn out the forearms so make sure to stretch well during and after these climbs. Next, feed an arm under the other and rest on your shoulder for a great back and shoulder stretch. 

Rocking backwards to sit on your heels, you can lengthen the spine to get a deep stretch and walk your fingers to the right and left to stretch your sides. Moving up into downward dog, take time to stretch your hamstrings, calves, and feet. Many people overlook stretching the arches of the feet, but you should do these if they are sore after wearing climbing shoes. Finally, transition into a cobra pose to stretch your chest and abs. The most important element of a post-workout stretch is a minute of rest to sit and listen to your body. If you have any other areas of tension, you should stretch both that area directly and the surrounding muscles and joints. 

Other Tips for Climbing Recovery

You will find that stretching once after a climb is not enough. If you are new to climbing, or go out on a full day climbing tour, you will likely be tight the next day or two. You will need to continue doing these climbing stretches, especially forearm ones, for a couple days as you recover. Keep shaking out the arms and flicking your fingers to release the tightness in your joints. 

Aside from stretches for rock climbing, the best thing you can do for your post-workout recovery is drink plenty of water. This is true for any physical activity, but especially climbing. Being well hydrated helps with injury recovery and muscle healing. On top of this, the tendons in your arms (and whole body) are very sensitive to changes in water and tighten up when dehydrated. If you are feeling tendonitis in your elbows, shoulders, or wrists after climbing, staying well hydrated will help.

With ten minutes of thoughtful stretching before and after climbing, you can set yourself up for a better workout and a safer recovery. Over time, you will find these stretches for climbing help you both on and off the wall. 

How To Snowshoe

Snowshoeing is a fun winter sport with a long history, invented thousands of years ago and used by the humans that migrated across the Bering Land Bridge to North America. It is an excellent way to exercise and enjoy the great outdoors during the winter when snow is on the ground. If you are looking to try winter hiking, you are in the right place. We will go over how to snowshoe, what gear is needed, and where to snowshoe near Colorado Springs.

What Is Snowshoeing?

Snowshoes are specialized gear with oversized footprints to allow users to walk over snow rather than through it. By increasing the surface area and distributing weight, snowshoes make it possible to enjoy hiking year-round, even when your favorite trail is buried beneath a foot of fresh powder.

There are different types of snowshoes depending on the terrain you plan to hike. In some styles, the heel lifts in order to allow you to walk up steep slopes comfortably. Another key feature is crampons, which provide more traction for steep and icy areas. Depending on your weight, you may need larger snowshoes to get the necessary floatation (to keep you on the snow’s surface). This is why snowshoes are a personalized, specialized piece of gear.

Photo by Taylor Brandon on Unsplash

What Gear Do You Need to Snowshoe?

In addition to the proper snowshoes, there are a few other pieces of gear you will need for your first snowshoeing adventure. As with all winter hiking, you will need solid hiking boots. They should be warm and waterproof. Insulated boots are a great way to stay warm, but having them requires the right socks, too. Because insulated and waterproof boots are not breathable, you will need moisture-wicking wool socks to avoid cold, sweaty feet. 

The rest of your winter clothing should be similarly moisture-wicking in the base layers and insulating in mid-layers. Depending on the conditions, you may need an outer shell that is wind and waterproof to stand up to the elements. These are the essentials of what to wear when hiking in Colorado, and these proper layers will keep you warm and safe on your snowshoeing trip. 

When you go to buy or rent snowshoes, you should also get snowshoeing poles. If you already have trekking poles, you just need to add baskets. Baskets are the little plastic circles at the bottom of the poles to keep them from sinking too far down into the snow. Snowshoeing poles are extremely helpful for providing stability on the trail. Especially when traversing slippery conditions or going up or down a slope, poles will keep you balanced and upright and help distribute weight off your knees.

Regarding the gear you will need to pack, you should always bring the Ten Essentials on any trip into the wilderness, especially water, snacks, a first aid kit, and an emergency shelter. When hiking in the winter, there is one more thing: Avalanche safety gear, like a probe, beacon, or airbag, is the final addition to your pack for winter hiking safety.

Basic Snowshoeing Techniques

Let’s go over the basics of how to snowshoe on any given terrain. To avoid stepping on the frames of your snowshoes, you need to adopt a wider walking stance. This will surely cause initial discomfort initially, and you will feel your hips on your first winter hike, but it will improve. 

When snowshoeing uphill in powder, you want to kick your foot into the snow in order to create a level surface to stand on. If the snow is harder, you will skip this step and rely solely on the friction from your crampons. The second part of any step, bringing your foot down, is important either way. When you step down, you need to plant your foot hard to make sure the crampons grip instead of slip. 

When snowshoeing downhill, you should start by elongating your poles if they are adjustable. You will want them out in front of you so you can balance and avoid slipping. You will need to tilt your weight back slightly. If you feel yourself start to slip, you can simply sit down and reset.

Lastly, you will likely find yourself at some point walking sideways across a slope. “Side-hilling” requires a specific technique similar to snowshoeing uphill. You need to push your snowshoe into the side of the mountain in order to create a level step for yourself. In order to keep your balance, be sure to keep your weight on the uphill side of your snowshoe.

Where to Get Started Snowshoeing near Colorado Springs

There are tons of options for snowshoers looking to hit up a trail in Colorado. An easy rule of thumb is that you generally can snowshoe anywhere you can hike. Popular hiking trails near Colorado Springs stay open year-round to accommodate winter enthusiasts like snowshoers. 

State and national parks and forests are a great choice as their well-manicured trails will be easy to follow even when hidden under snow. The beautiful and extensive Rocky Mountain National Park has ranger-led snowshoe walks throughout the winter to get you started on how to snowshoe, including basic technique and safety.

Proper Snowshoeing Etiquette

Wherever you end up, it is important to keep in mind that you will not be alone on the trail. Many trails might be open to cross-country skiers or even snowmobilers. If you do find yourself on a mixed-use trail, here are a few etiquette tips.

When snowshoeing or winter hiking generally, it is nice to stay in a single file line on the outskirts of the trail or path. This is helpful for cross-country skiers who prefer a smooth surface and likely pay a higher usage fee to have the trails groomed. You should also give right of way to cross-country skiers as it is harder for them to navigate around you than for you to simply step to the side. 

It is best to avoid snowshoeing on routes with snowmobiles. If you find yourself on one by accident, make sure to give them the right of way. You should keep your eyes and ears open and your head up. Listen for the sounds of approaching vehicles and be aware of your surroundings. You should step out of the way, but try to remain visible. This way, both you and the driver can see each other and cross paths safely.

Final Thoughts

Snowshoeing is a rewarding winter activity that not enough people try. It is a great workout, a fun way to get into nature in the snowy months, and it provides beautiful sights of unspoiled winter wonderlands. With the right gear and a little lesson on how to snowshoe, you can enjoy a safe and fun adventure outdoors.