How To Get In To Rock Climbing

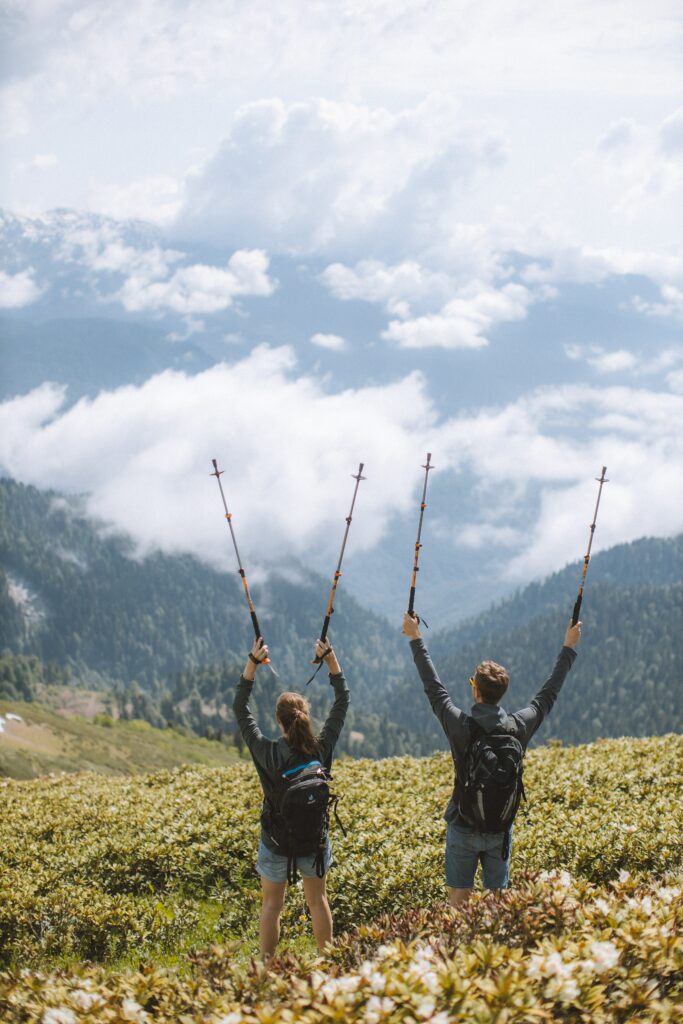
As a fun and challenging all-body workout, it is no surprise that rock climbing is such a popular sport. With indoor gyms popping up in cities all over the country, you might be wondering how to get into rock climbing.

We will explore the different types of rock climbing that you can try as a beginner, whether you plan to climb indoors or outdoors, as well as the gear you will need to get started. With some of the best beginner rock climbing routes right here in Colorado Springs, outdoor climbing is a fun way to explore nature, get access to some beautiful views, and learn a new athletic skill.

Also, don’t forget that a Guided Rock Climbing Trip with Broadmoor can also be an excellent introduction to this exciting sport.

Photo by Patrick Hendry on Unsplash

Types of Rock Climbing

Top-Rope Climbing

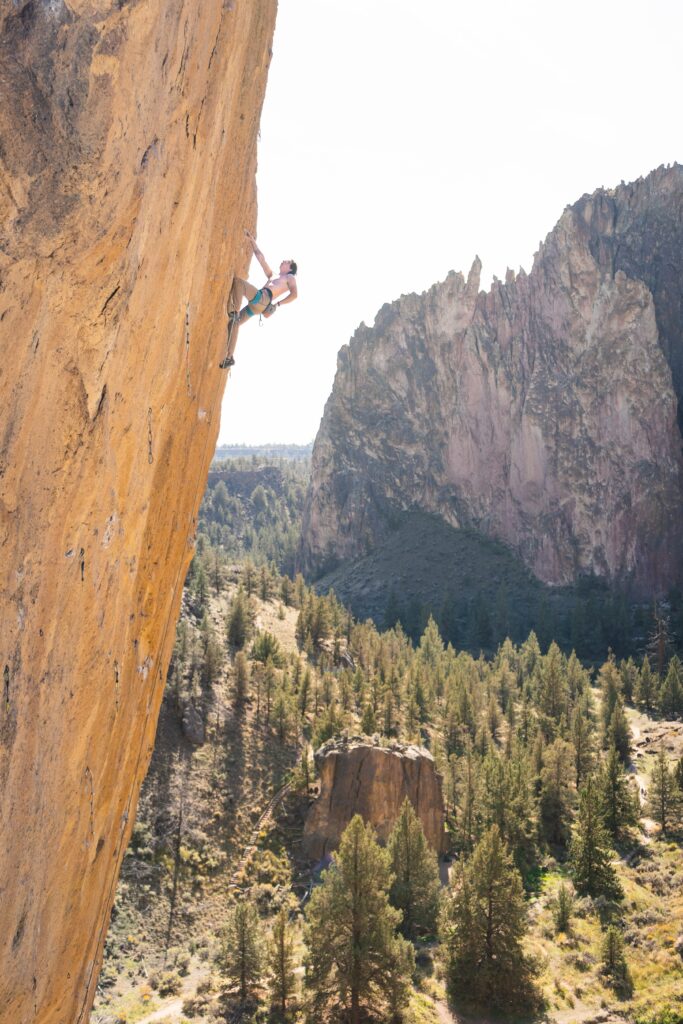
There are two types of climbing that are suitable for beginners, top-rope climbing and bouldering. In top-rope, as the name suggests, a rope hangs down from above, and as you climb, a belayer takes in the excess slack to keep the rope taut in case you fall. In an indoor gym, ropes hang from anchors like large pulleys. If you climb outdoors, a guide or qualified friend will create an anchor system using ropes and trees or rocks. 

Top-rope climbing routes range in difficulty from 5.0 to 5.15d, with 5.10s and above using a, b, c, and d to further distinguish difficulty. Where a 5.10a is easier than a 5.10d. Based on strength and athleticism, beginner climbers can generally climb up to a 5.4 or 5.6 on their first go. Climbers who are tall or strong might get away with these higher routes upfront, but as you move into intermediate climbs, technique and precision become more important than brute force.
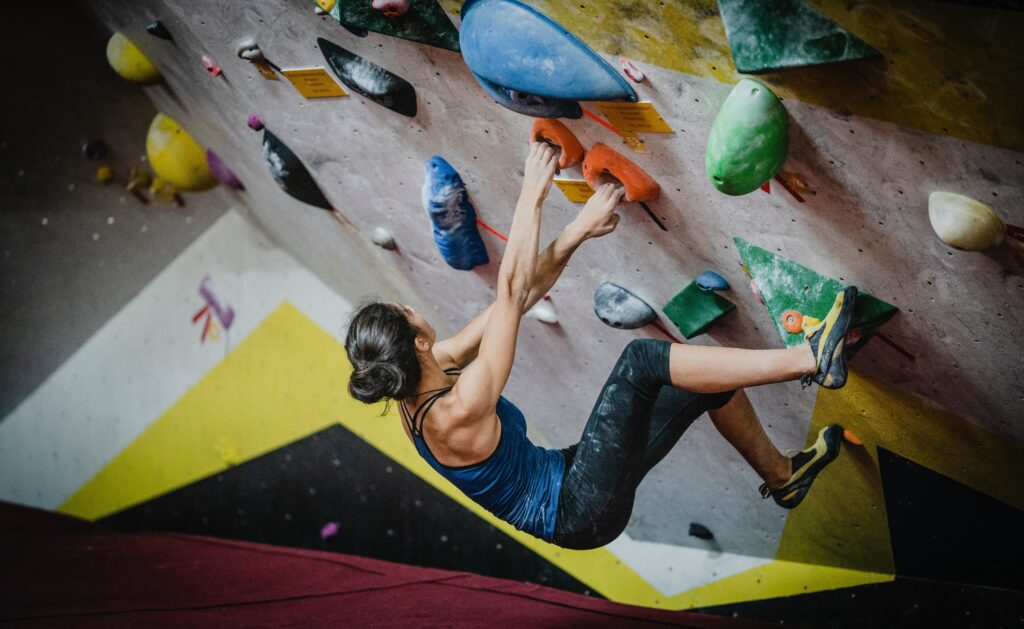
Bouldering

Bouldering is a rope-free experience, with climbs typically up to fifteen feet maximum. If you are at a gym, the bouldering area will be padded to keep you safe when you jump down or fall. Learning how to fall correctly (stay loose and bend your knees!) will keep you safe from injuries. I generally downclimb to protect my knees, but it’s still important to know how to fall safely. If you are climbing outdoors, crash pads are essential for rock climbing safety.

The bouldering rating system is different from top-rope. Bouldering routes go from V0 to V17, with V2 being the hardest I’ve seen first-timers accomplish. Not only are these ratings different from top-rope, but they also don’t translate easily. Some people are much better at the big, power moves that many bouldering problems have. Others are more skilled with finesse and balance – challenges that are also more common to top-rope. Top-rope climbs at indoor gyms also range from 30 to 60 feet, making them a lot more of a cardio workout than bouldering climbs.

Photo by yns plt on Unsplash

Advanced Climbing Options

For more advanced climbers, lead climbing, sport climbing, and trad climbing are fun options that you can look forward to after learning to climb. Once you know what type of climbing you are looking to start with, you can get out there and take the first step.

Getting Started with Rock Climbing

The Gear

Whether you decide to top-rope or boulder, you’ll need rock climbing shoes and a chalk bag. The shoes are crucial for proper technique and movement while the chalk keeps your hands dry and grip secure. Rock climbing shoes are meant to be snug; generally one size below the sneakers you wear. Keep in mind that climbing shoes should not be worn anywhere but for climbing. Their extra snug fit emphasizes this point and generally makes them uncomfortable to walk around in. Also, you will stretch out the shoes and ruin the grippy soles if you wear them for non-climbing activities. 

If you are top-rope climbing, you will also need a belaying harness to be properly tied in and secured to the rope. You can take a belay class to learn how to belay a partner, and then you can switch climbs with a friend. To belay, you’ll need a carabiner and a belay device. Many climbing companies sell beginner-friendly packages with harnesses and belay equipment together.

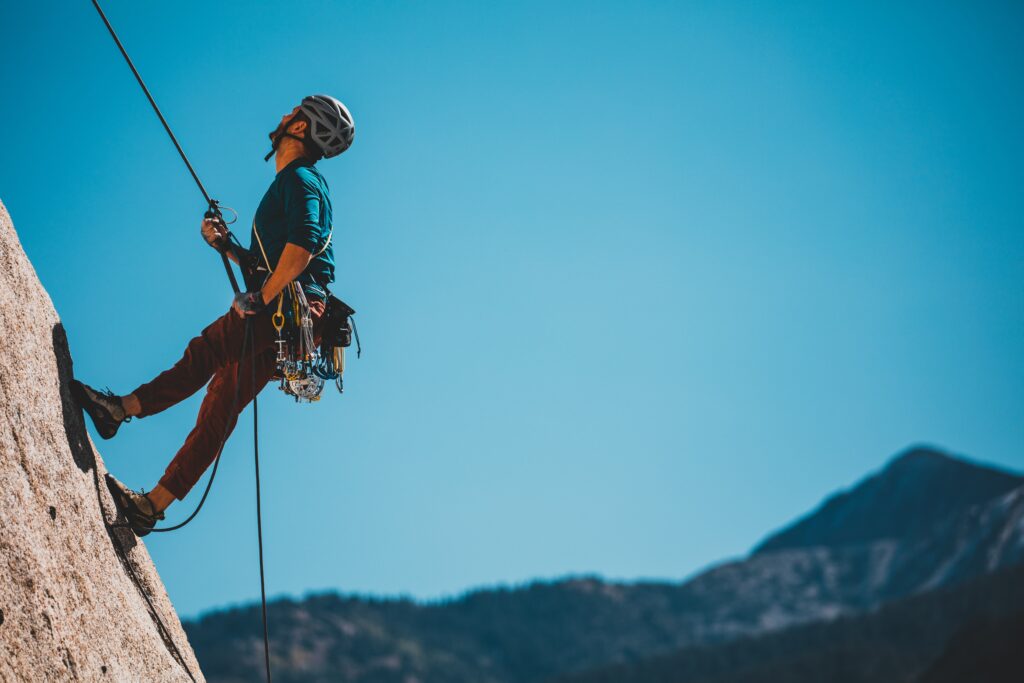
If you are climbing outdoors, you should always wear a helmet to protect your head in the event of a fall or a rock tumbling down from above you. It’s also common to be so focused on your climbing that you forget to look up and climb right into a rock sticking out of the wall. It has certainly happened to me! Other outdoor equipment involves crash pads for bouldering, as mentioned above, a first aid kit, sunscreen, and maybe fingerless gloves if it’s a cold day.

Indoor Rock Climbing

If you want to get started at a gym, most have classes on rock climbing basics. Most also have rental gear available, so you don’t need to buy everything up front before trying rock climbing. You can also head to the gym and start bouldering right away; no help needed. Watch other people do the routes and even ask for “beta” if you need advice on how to get up.

If you’re interested in trying top rope climbing but don’t yet have a belay partner – no need to worry! Many gyms have several auto-belays. These devices clip into your harness and function just like a human belayer, allowing you to test out top-rope climbing as a beginner.

You can easily search for local climbing gyms in your area online, or take a look at this gym directory on Mountain Project to find a place to visit.

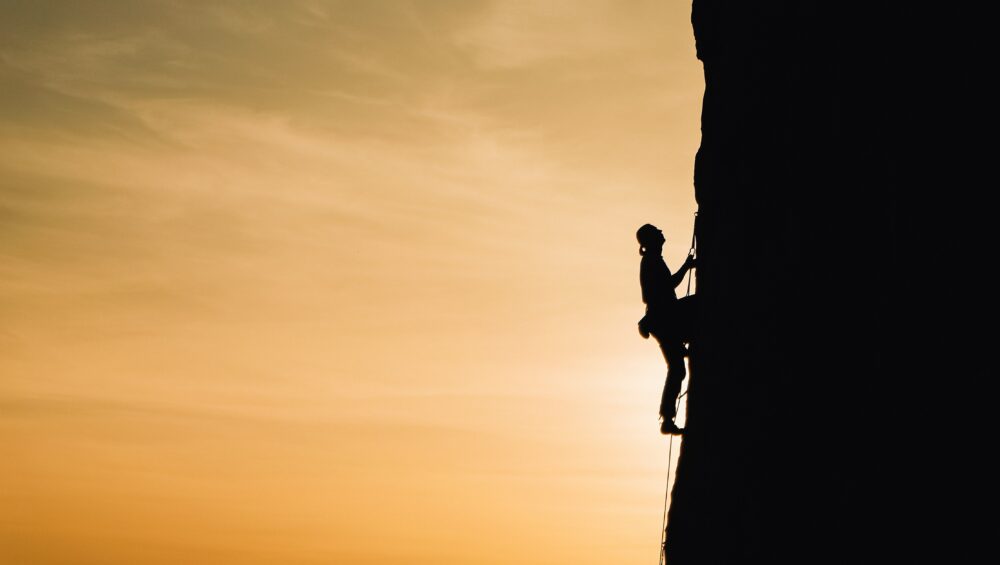
Outdoor Rock Climbing

In order to get started with climbing outdoors, you need a guide or, as mentioned above, a qualified friend. The most surefire way to have a fun and safe adventure is with a guided rock climbing tour, which will take you rock climbing in Colorado Springs at a popular local spot. On a guided trip, you’ll learn climbing techniques and safety and have a chance to try different climbs. 

If you want to get into rock climbing via a more DIY style, you’ll need to find a friend who has the necessary gear and know-how to set up climbs. You’ll also want to research the different climbs available in your area to find the best sites for outdoor bouldering or top rope spots with anchor points.

Photo by Ben Kitching on Unsplash

Rock Climbing Basics

The best way to learn how to rock climb is to get on a route and give it a try. It’s easier to learn rock climbing techniques once you experience the grips and movements. Rock climbing also involves using your forearms, wrists, and hands in ways that most people haven’t developed through other athletics, so it takes time to build these muscles.

My favorite advice for beginner rock climbers is to remember to use their legs and hips. Beginners often overuse their arms and tire quickly. Using all limbs available will help your endurance and give you a good leg workout. My general rule is to make sure I move my legs just as much as I move my arms. There are enough holds on a beginner indoor climbing route to climb a route almost like a ladder.

Similarly, if you find yourself in a tough spot, pivot your feet and move your hips. These small adjustments can get you more reach and flexibility to find that next hold. Keeping your hips closer to the wall also brings your center of gravity closer to minimize the strain on your arms.

Now that you know how to get into rock climbing, I hope you’ll give it a try! Even people who are nervous of heights can overcome this fear by learning belay safety or bouldering. Outdoor rock climbing is a truly unique way to experience nature, and the views from the top of a climb are like nothing else. Enjoy!

Paddleboarding Near Colorado Springs

There are so many bodies of water in Colorful Colorado. If you’re willing to make just a short drive, you can find many places to enjoy aquatic activities like stand up paddleboarding near Colorado Springs. Whether you’re renting a stand up paddleboard (SUP) or have your own, we’ve got some great places to explore – all within an hour’s drive of Colorado Springs.

This list has all the best reservoirs and lakes for paddleboarding in the heart of Colorado. It includes prices, availability, and what is best for beginners. We’ve also organized these spots by distance from Colorado Springs, and you’ll note that options for larger lakes tend to be outside of the city proper. 

But before we get into the top spots for paddleboarding in Colorado Springs, let’s make sure you know what you are doing! First, you can check out the comprehensive Beginner’s Guide to Stand Up Paddleboarding. This guide covers all the gear you need and some basic techniques for staying on the board. If you think you might need more help, consider a SUP Tour at a Colorado Springs lake for in-person instruction. These guided tours are an awesome way to ensure your first paddleboarding adventure will be a memorable experience.

Photo by Holly Mandarich on Unsplash

Prospect Lake

Located in Memorial Park (1605 E Pikes Peak Ave) in central Colorado Springs, Prospect Lake is a charming spot to spend an afternoon. The hiking trail around the lake is a flat and accessible 1.3-mile loop. The park also has other sports facilities, including tennis courts and a skatepark. 

Prospect Lake has a beach and a designated swimming area. No matter what activity you choose, you’ll have amazing views of Pikes Peak to enjoy. Daily use permits for access to the lake (non-motorized vehicles only) are available for $5. You can also rent a stand up paddleboard on-site if you do not have your own. 

More Prospect Lake Info

Quail Lake

Still within city limits, at 915 Cheyenne Mountain Blvd in Southwest Colorado Springs, Quail Lake Park is a gorgeous city oasis west of the Broadmoor World Arena. The park offers a one-mile hiking trail around the lake, a basketball court, a picnic area, and more. All this is available for just a $5 daily use fee.

Both Quail and Prospect Lake are relatively small bodies of water. This makes them great options for beginner paddleboarders or people who have limited time for their next excursion. If you’re looking for a more advanced paddleboard experience, keep reading. Just a short drive out of town you’ll find yourself at some beautiful larger lakes that are prime spots for seasoned paddleboarders.

More Quail Lake Info

Photo by Marco López on Unsplash

North and South Catamount Reservoirs

Located in the North Slope Recreation Area (on Pikes Peak Toll Road), the North and South Catamount Reservoirs are pristine bodies of water available for a $5 daily use permit. The areas have seasonal usage hours, so check online before heading up the mountain. There is limited parking available, so it’s good to reserve a free one-day parking pass for your visit.

The largest of the three, North Catamount Reservoir has over 210 acres of water for paddleboarders to explore. Positioned on the north side of Pikes Peak, as the name implies, the reservoir has amazing views of the beautiful scenery. With little nooks and crannies everywhere, this spot is a SUP adventurer’s dream. The South Catamount Reservoir is also available. However, the nearby Crystal Reservoir is closed to all aquatic activities for maintenance and repair work.

More Catamount Reservoir Info

Rampart Reservoir

This stunning reservoir is a beautiful place to enjoy aquatic sports like stand up paddleboarding near Colorado Springs. Rampart Reservoir also boasts over 500 surface acres of water. Located about half an hour from downtown Colorado Springs near Woodland Park in Pike National Forest, the Rampart Reservoir Trail is nearly fourteen miles around the lake, taking you up and over the many ridges that form its sides.

The reservoir is open from May to October. But be sure to double-check if it is currently open before you go. Once there, you’ll pay a $7 daily use fee to get into the reservoir. There is a boat launch for fishing, a picnic area, and toilets. The reservoir offers picture-perfect scenery for paddleboarders. You also have plenty of shoreline to enjoy a picnic or take a break from the water. 

More Rampart Reservoir Info

Monument Lake

Only a half-hour drive north of Colorado Springs, Monument Lake is a 30-acre reservoir tucked into the Sangre de Cristo Mountains. This gorgeous spot has clear water, awe-inspiring mountain views, and free access for paddleboarders and other water sport enthusiasts. 

For a longer stay here, the Monument Lake Resort is a beautiful hotel option that offers rentals of paddleboards, kayaks, canoes, fishing pontoons, and more. This is a great family-friendly spot with a small, calm body of water for beginners to safely try paddleboarding near Colorado Springs.

More Monument Lake Info

Palmer Lake

Just past Monument Lake, the Palmer Lake Regional Recreation Area is a 36-acre park nestled between nearby mountains and the town of Palmer Lake. At the parking area (199 County Line Road), you’ll find a playground, a pavilion, restrooms, and the trailhead to the New Santa Fe Regional Trail. 

The park has free entry, and paddleboarding here will give you great views of Ben Lomand Mountain and the surrounding area. Even if you just hang out on the shore, Palmer Lake is a cute community with plenty to see on a local walk. 

More Palmer Lake Info

Photo by Mehdi Benkaci on Unsplash

Lake Pueblo

Lake Pueblo State Park is just under an hour south of Colorado Springs. The park has over 10,000 acres of land, including a sprawling lake with over 4,600 surface acres of water. This lake is a great place for more advanced paddleboarders looking for interesting waterways to navigate. 

The visitors center (640 Pueblo Reservoir Road) offers parking, bathrooms, and a nearby jet ski rental. There are also hiking trailheads and campsites located around the corner, giving outdoor enthusiasts opportunities for a multi-day stay. Access to the park is available via an $8 daily use fee.

More Lake Pueblo Info

Paddleboarding Near Colorado Springs

So if you have been wondering where to paddleboard in Colorado Springs, be sure to check out some of these gorgeous spots. Colorado’s many lakes and mountains offer stunning landscapes to enjoy aquatic adventures, picturesque hikes, and other outdoor activities. If you need to rent gear or take a lesson, be sure to check out a SUP Tour at a local area lake for professional instruction and assistance with your first time. 

How Do Electric Bikes Work?

If you are interested in taking a biking trip but not sure you have the strength or endurance for a longer ride, e-bikes might be for you. In the past few years, electric bikes have become very popular among trail riders and commuters alike, and it is easy to see why. They have the power to assist riders on harder sections of a bike route while still leaving room for riders to get in a quality cardio workout. But how do electric bikes work? Let’s get into it. 

Photo by Himiway Bikes on Unsplash

The Mechanics of an Electric Bike

E-bikes differ from standard bicycles in two important ways: the battery and the motor. Powered by the batteries, electric bike motors provide pedal assistance, meaning that they work with you to deliver increased power and speed with your pedaling. They differ in this way from, say, a motorcycle, which is powered solely by the throttle and does not require an input of physical exertion.

The Battery

Strapped to the down tube of a bicycle’s frame, the battery is the main reason e-bikes are much heavier than traditional bicycles. They are generally easy to tell apart from other bikes because of this battery bank. The battery may also include a power button and an LED screen to show the battery’s charge. The battery is responsible for generating power for the bike, and its capacity will limit how fast you can accelerate and how long you can ride. 

Conveniently, electric bike batteries can be recharged with standard electric outlets, and most e-bike batteries last between thirty and seventy miles on a single charge. Unless you are a marathon cyclist, this will be enough capacity to get you through a day’s ride. Keep in mind that most e-bikes do not recharge the battery as you pedal or coast down a hill.

Photo by KBO Bike on Unsplash

The Motor

The e-bike motor is usually attached either to the back wheel’s cassette, encased in a hub, or to the chain ring where the pedal cranks are attached. The motor converts stored energy from the battery to kinetic energy and helps you turn the pedals via the crank rings. 

With an e-bike’s pedal assistance, you do not exert as much energy per cycle as with a standard bicycle. This difference can be felt most in the initial acceleration and on inclined ascents. Therefore, it makes e-bikes great for people with long commutes or tough trails. Beginners who are training their legs and lungs for harder rides also benefit enormously from e-bikes.

The Speed Sensor

One other important feature of an e-bike that you may not see is the speed sensor. Electric bikes are designed with a maximum speed to protect the user. This means that the motor will kick on, assist up to this speed, and then stop. Once you are there, you can coast at this speed and maintain it with pedal assistance, but you will not be able to achieve a higher speed unless you are going down a hill. The specific speed limit depends on the bike’s manufacturer and your state laws. But most e-bikes are limited to somewhere between twenty and thirty miles per hour.

The Benefits of an Electric Bike

Now that you know how e-bikes work by providing pedal assistance, you can better gauge if an electric bike is a good fit for your cycling interests. Even though it is counterintuitive, e-bikes can actually give you a better workout because you can ride more miles, climb steeper hills, and get over harder obstacles.

However, electric bikes are more expensive and heavier than traditional bikes, but you may find the pros outweigh the cons. There are many more factors to consider, which we already dive into in a different article. Be sure to check it out if you are asking yourself, are e-bikes worth it?

The Best Uses of an Electric Bike

Another essential consideration for cycling with an e-bike is whether you might want to ride without assistance. While it is possible to use an electric bike like a traditional bike (with the motor assistance turned off), it is not the most feasible option. Since e-bikes are bulkier and heavier due to the extra features, your ride will suffer if you try to use an e-bike without the pedal assist.

So when should you use an e-bike? There are tons of great reasons that people are turning to electric bicycles for daily use. One is commuting to work, where e-bikes give riders the opportunity to traverse longer distances in less time. A second is mountain biking. What’s more, biking in Colorado Springs is an especially good cause for trying out an electric bike.

Photo by KBO Bike on Unsplash

Biking in Colorado Springs

There are tons of beautiful and scenic trails in and near Colorado Springs. While many are accessible for hikers, longer trails are also available to cater to Colorado’s active mountain biking community. If you have ever wanted to try mountain biking, an electric bike is a great first step. 

Electric bikes provide pedal assistance so first-timers can enjoy longer trails without running out of energy. They also offer more stability since they are heavier and have a lower center of gravity than standard mountain bikes. This combination makes e-bikes ideal for beginner mountain bikers looking to explore Colorado Springs.

If this sounds like something you want to try, there are two ways you can hit the trails and enjoy a great day trip. First, e-bike rentals give you the space to experience an electric bike for yourself. You can explore nearby trails at your own pace and difficulty. Or you can ride through town and see if commuting with an e-bike is a good fit for you.

The second way to get on an electric bike is with guided e-bike tours. Join a professional guide on a tour around the Garden of the Gods Park, a stunning National Natural Landmark everyone should see. This gorgeous park has views of Pikes Peak, and the five-mile ride is perfectly suited for beginner cyclists. If you are looking to try out an electric bike, these are great opportunities to enjoy the beauty that Colorado Springs offers and better understand how e-bikes work.

Are Trekking Poles Worth It?

Are trekking poles worth it? As a hiking guide, I’m asked this question hundreds of times every single season I’m in the backcountry. It could be guests asking me before a trip if they should have hiking poles or strangers I meet on the trail who see that I’m a guide and want my opinion on the matter. But no matter the circumstances of the question or who is asking it, there is rarely a straightforward yes or no answer. There are several distinct pros and cons worth discussing to help you decide if trekking poles are worth it.

Therefore, let’s take a moment to go over these pros and cons to see where hiking poles shine on the trail and where they might be a hindrance, and I’ll finish with my own recommendation on the issue. Then, you should have all the information you need to decide if a new pair of hiking poles will make an appearance on your next hike, be it a guided hike in Colorado Springs or on your own.

Trekking Pole Benefits

Increased Stability

Trekking poles dramatically increase your overall stability on the trail. Uneven terrain, fatigue, and sneaky tree roots can all play a role in compromising your stability and cause you to lose your balance or even take a tumble while hiking. Trekking poles, however, can dramatically improve your overall stability by increasing the number of contact points you have on the ground from two – just your feet – to four. You can also use those two additional contact points to test water/snow depth, untrustworthy-looking rocks, or mud you might encounter on the trail. In fact, trekking poles are one of our “must-have” recommendations on our list of tips for hiking in muddy terrain.

By doubling your contact with the ground, hiking poles make it much easier to avoid losing your balance, and to recover more quickly if you do.

Support

In addition to upping your stability on the trail, trekking poles also offer the crucial benefit of providing support for your knees and hips. When used properly, they can transfer some of the burden of hiking to your arms and shoulders – allowing you to hike harder and farther without letting achy knees hold you back.

The benefit is especially pronounced when going downhill. The jarring impact of hiking down a steep trail – especially with a fully loaded backpack – can trash your knees in no time. But distributing part of that load to your arms can make a world of difference in your hiking experience. Let’s take a closer look at how your arms can suddenly play a larger role in your hiking.

Photo by Nilotpal Kalita on Unsplash

Let Your Arms Do Some Work

Your legs are working endlessly as you hike, but having your trekking polls in hand allows you to push down on the ground with your arms to propel yourself forward or upward (or lessen the impact of going downward). Therefore, you’re suddenly able to use your arm muscles to improve your forward movement and shepherd in the support we discussed earlier by taking some pressure off your knees and hips.

While your arms can absorb and mitigate that shock of going downhill – thus saving your knees – they can also fully join the hiking effort when going uphill. In this case, using trekking poles and your arms to push down on the ground will help you get a small but noticeable amount of power pushing you upward. Over the long run, during a strenuous or prolonged climb, this assistance can play a prominent role in your hiking endurance. You’ll also get an arm workout during what is predominantly a leg-only activity.

Trekking Pole Downsides

Now that we’ve covered the benefits, we must balance that information by including a few drawbacks that influence the question: are trekking poles worth it?

Additional Weight and Bulk

A common downside to trekking poles is that they add more bulk and yet another piece of gear to your hiking equipment. Hiking is already a gear-heavy enterprise, and adding even more to the mix can be hard to justify. Specifically, trekking poles need to be stashed in or on your pack when you’re not using them. In this scenario, they’re simply more weight you’re toting around and taking up valuable space in your pack.

Next, wielding trekking poles effectively has a learning curve, and they may feel like a handful when you first start using them. Let’s take a look at this drawback next.

They Can Be a Handful

For many hikers, the thought of no longer having your hands free and available for drinking, bracing on rocks, or adjusting your pack is borderline repulsive. Suddenly acclimating to having your hands engaged during your entire activity can feel strange and alien – and many people avoid using trekking poles for this reason.

This downside becomes especially pronounced on narrow or overgrown trails.

Increased Snag Risk

Using poles for balance and support on the trail may work like a charm on open terrain, but it can become a different story in overgrown areas. Thick shrubbery, bushes, and narrow trails are all a recipe for snagged trekking poles, which can quickly turn them into a hindrance. Very rocky terrain also holds the same dangers. Here, gaps between boulders or smaller rocks are the perfect trekking pole traps.

In all these cases, a snagged trekking pole can be anything from a minor annoyance to a more severe obstacle that upsets your balance.

As with many of our trekking pole downsides, this issue can be mitigated with experience and practice. But once again, that learning curve comes into play, and many hikers decide that trekking poles are not worth this effort.

My Recommendation

After years of working as a hiking and backpacking guide and seeing the full range of hikers, from trekking pole lovers to ardent refusers, I’ve developed the opinion that just about everyone can benefit from a hiking pole or two in most situations.

For the longest time, I was also highly skeptical of trekking poles even when I was carrying ridiculous pack loads as a guide. But a season in the famously rugged White Mountains of New Hampshire shattered that prejudice, and I now fully appreciate that the benefits of trekking poles far outweigh the downsides for the vast majority of circumstances. I now tell my guests, and about everyone who asks, that you can’t go wrong with at least one trekking pole.

A single pole bridges the divide between pros and cons where you still benefit from increased stability and support while mitigating the downsides by still having one hand free and not trying to learn how to wield two new hiking instruments at the same time. Once you’re comfortable with just one trekking pole, perhaps that’s the perfect balance for you or perhaps you’ll take the next step and use a pair. My recommendation here grows dramatically if you tend to suffer from sore knees or poor balance with hiking – you’ll be amazed by the added support! So, for many folks on the fence about trekking poles – just try one.

That said, there are certain situations where trekking poles may not be worth it. Bushwacking – hiking in dense vegetation off-trail – is a perfect example where hiking poles have the potential the get snagged and become a hindrance. Or if you’re a super lightweight hiker and can’t justify adding additional weight to your gear list.

Final Thoughts

So in the end, think about where you’re hiking and if trekking poles have a chance of making that hike easier. If the answer is yes, then I wholeheartedly recommend that you take the plunge and give them a try. If you’re hesitant, then just try a single pole to test the waters and find out if trekking poles are worth it to you. All you need to do now is find a trail, and our favorite hikes near Colorado Springs are a great place to start.

Happy hiking!