Best Colorado Springs Activities for Families

Not many states call-in visitors from all over the world quite like Colorado does, and for good reason. Sitting at the Eastern foot of the Rocky Mountains, Colorado Springs is often ranked one of the best places to live and retire. Its residents are also known to be some of the happiest people in America. Maybe it’s the picturesque mountain views that are always accessible, or the neverending list of things to do outside that makes Colorado Springs one of the best destinations for families. 

Either way, whether you’re considering moving your family to the area, already live nearby, or just want to have an unforgettable summer vacation with your kids, we’ll help inspire your list of things to do in Colorado Springs.

Photo by Pragyan Goswami on Unsplash

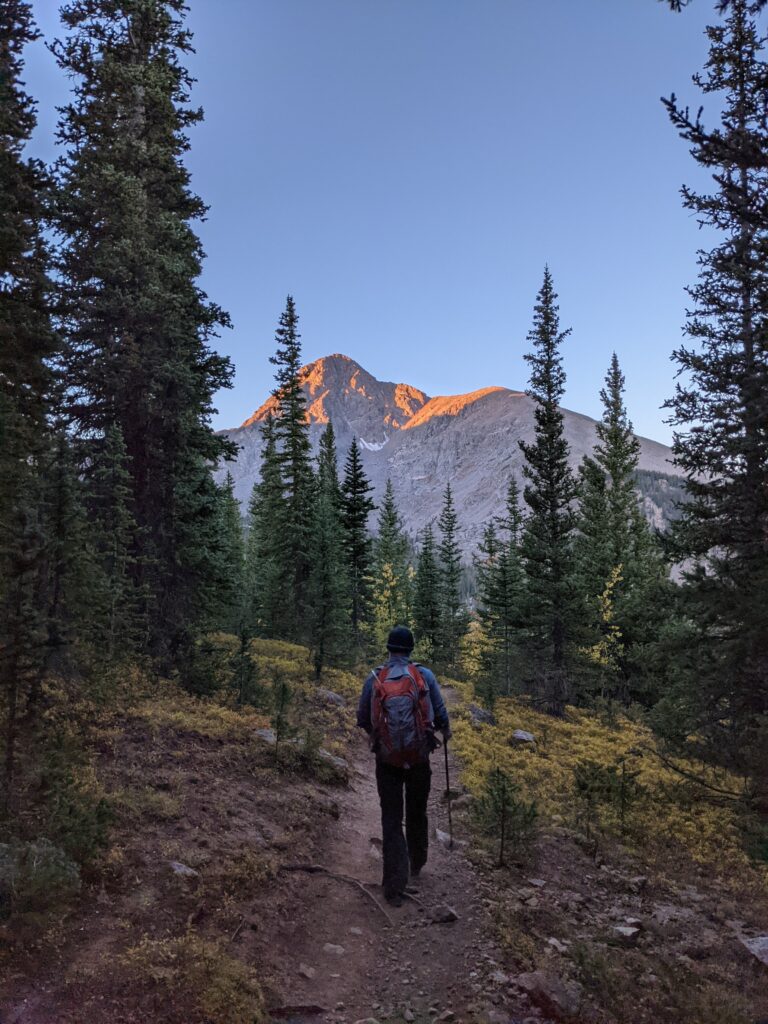
1: Explore Pike’s Peak

Pike’s Peak, dubbed “America’s Mountain,” is a National Historic Landmark and even claims to be the most visited mountain on the continent. We added this to our list of Colorado Springs activities for families not only for its fame but also for its easy access. Pike’s Peak is one of the only Fourteeners (mountains above 14,000 feet elevation) accessible by more than just foot. You can summit Pike’s Peak by hiking, biking, driving, or train. Additionally, Broadmoor Outfitters offers an exciting combination of two modes of transportation: ride up and bike down!

2: Cave of the Winds Mountain Park

Believed by the Apache to be home to the Great Spirit of the Wind, the Cave of the Winds cavern is a geological time capsule. The main cavern is around 4 to 7 million years old. However, there are no written records of the cave until two school-aged boys discovered it in the 1800s. This is one of the best Colorado Springs activities for families because the Cave of the Winds Mountain Park offers customized plans for your family’s day based on your group’s adventure level and how much time you have to explore.

While there are dozens of things to do at the Park, two main (and exhilarating!) tours explore the entire cave system. The Discovery Tour is 45 minutes and perfect for everyone in the family! The Haunted Lantern Tour is a little longer, 90 minutes, and is a thrilling, deep exploration into the mountain with only candles lighting the way. The Haunted Lantern tour is only suitable for children 8 years old and up. All tours fill up quickly, so be sure to reserve yours as soon as possible. 

Photo by Colin Lloyd on Unsplash

3: Broadmoor Hunt

This scavenger hunt activity is probably one of the most unique experiences on our list of things to do in Colorado Springs. It also happens to be located on the same property as some of the best lodging in Colorado Springs! The Broadmoor Hunt is perfect for families and large groups of up to 100 people. You’ll download the app on your phone to access the scavenger hunt’s challenges and explore every bit of the historical property around The Broadmoor. All the while taking photos, solving riddles, and even asking Broadmoor staff for tips! This is a highly interactive game-like activity that lasts about two hours.

4: Royal Gorge Suspension Bridge and Park

The Royal Gorge Bridge and Park is home to the tallest suspension bridge in the United States. What’s more, it also has Colorado’s #1 Bucket List Zipline, and the World’s Scariest Skycoaster. Visiting the park and walking across the tallest bridge in America is a must-do for adventurous families. This attraction is so thrilling. It also made it onto our list of Best winter activities for families in Colorado Springs. Assuming everyone in your family is ok with heights, this park has tons to offer the thrill-seeking family, from walking the bridge that hangs 1000 feet over the river to riding in aerial gondolas.

Photo by Jonathan Chaves on Unsplash

5: U.S. Olympic and Paralympic Training Center

If you’re a family who likes to gather around the television to cheer on your favorite nations and athletes during the Olympic Games, you’ll not want to miss out on the opportunity to visit the Olympic Training Center. This is America’s hub for the country’s top-performing athletes and their coaches. This facility in Colorado Springs offers lodging, dining, training, and recreational facilities. It can accommodate 500 athletes and coaches. You’ll need a reservation to embark on one of the three tours offered at Bronze, Silver, and Gold tiers. Each tour offers varying levels of access to the facilities. For example, Bronze tours will show you around some major areas of interest, whereas the more expensive Gold tour will get you inside access to pools, basketball courts, and even the dining hall. On occasion, when their schedules allow, Olympic athletes offer exclusive tours.

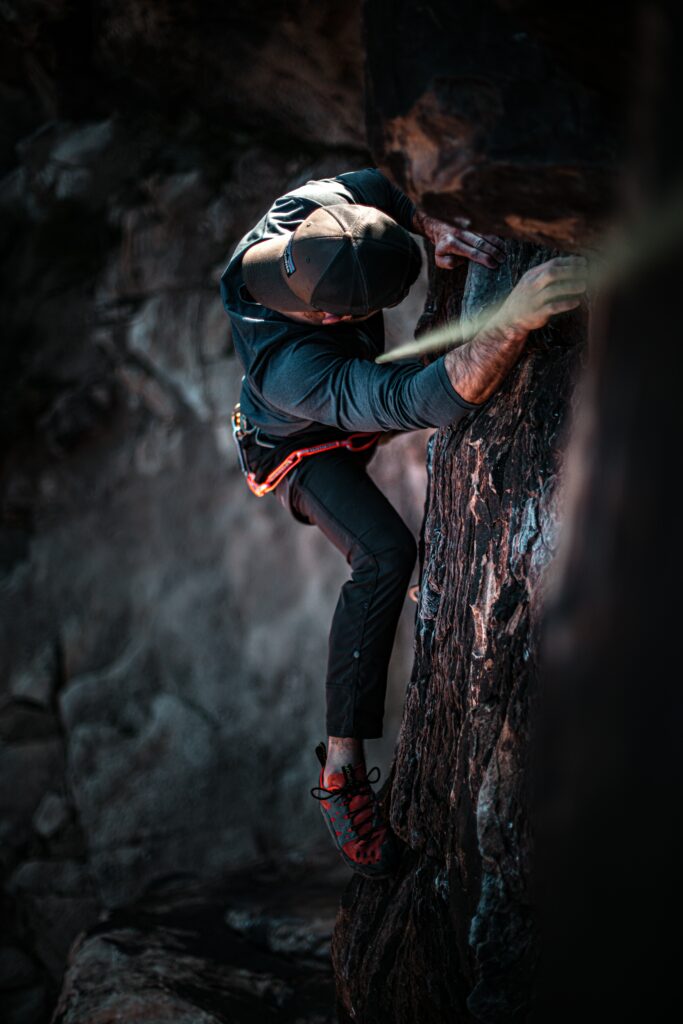
6: Garden of the Gods Visitor and Nature Center

This is one of the top destinations and things to do in Colorado Springs. Picturesque views of sandstone rock formations and mountain passes make this Nature Center a must for your family-friendly activities! Among the activities offered with breathtaking views as the backdrop are hiking, canoeing, ziplining, and open-air Jeep rides. Additionally, there are indoor activities like museums and informational videos covering the stunning rock formations and towers. There’s something for everyone at Garden of the Gods. 

Conclusion: 

We’re hopeful this list offers you a starting point and inspiration for things for families to do in Colorado Springs. This is by no means an exhaustive list, as Colorado Springs has thousands of attractions, trails, and activities to explore. “Fun” could be a full-time job in this city, and we hope to be part of yours! 

Rock Climbing in Colorado Springs – Where to Go

Situated against the foothills of the Rocky Mountains lies the City of Colorado Springs. Just south of Denver, this city is a premier gateway to adventure, offering access to various activities and awe-inspiring landscapes. Of these activities, rock climbing in Colorado Springs is one of our favorites.

Colorado Springs has it all, from unique sandstone rock formations to glistening glaciated peaks. Rock climbing in Colorado Springs is an activity you do not want to miss! But with so many options, it can be hard to know where to go. To save you time, we have laid out a quick guide to Colorado Springs rock climbing locations to suit climbers of all skill levels.

Before heading to the crag, remember to review the rules and regulations for rock climbing in Colorado Springs. These include very important safety information and general rules for each park to make sure all climbers have a fun and safe adventure.

Photo by Patrick Hendry on Unsplash

A Quick Note

Climbing is inherently dangerous. However, it can be a safe, enjoyable, and memorable activity with the proper equipment and skills. If you have never climbed before, first try climbing in an indoor space or seek a guided tour. To learn more about rock climbing safety for outdoor climbing, check our rock climbing safety guide.

If you’re ready to try climbing outdoors and don’t have the necessary skill and equipment, try going with a guide! Broadmoor Outfitters offers several guided rock climbing tours in Colorado Springs to phenomenal climbing locations in the area. This is also an excellent option for those looking to transition from indoor climbing to outdoor climbing. Or for those who have never climbed before but would like to immerse themselves into new landscapes and exciting rock climbing experiences in Colorado Springs.

Beginner Rock Climbing in Colorado Springs

City Rock (Indoor Climbing Gym)

Location: 21 N Nevada Ave., Colorado Springs

Parking: There is metered parking on downtown streets and many parking garages nearby. See parking information here. 

Approach: Easy walk in town from street or garage parking.

City Rock offers fantastic indoor rock climbing in Colorado Springs. This gym includes bouldering, auto-belays, sport climbing, and top-roping for all ages and ability levels. In addition to the climbing, City Rock also features a yoga studio, fitness training, a kids’ area, and more. This is a great option for first-time climbers or those seeking an alternative activity due to inclement outdoor weather.

Intermediate Rock Climbing in Colorado Springs

Ute Valley Park – Excellent Bouldering Opportunity

Location: 1705 Vindicator Dr, Colorado Springs

Parking: A parking lot is available at the Ute Valley Park Entrance at the address listed above.

Approach: Per Mountain Project, it is best to access the boulders by following Mule Deer Drive past Pinon Valley Park and turning left onto Pinon Park Drive. Pinon Park deadends at a gate; park along the street and walk up the dirt road. After about 100m, you will be at the boulders.

Ute Valley Park is primarily comprised of bouldering – short climbs with hard movements. No ropes or belays for this style of climbing. However, having enough crash pads, a confident partner to spot you, and some practice falling will make this more enjoyable.

While this climbing style is safe and accessible to most, we rank this location as intermediate due to the difficulty of the “problems” (routes). These problems typically range from V1-V12, which can be challenging for beginners. In this scale, V0 is the easiest (or VB for ‘beginner’), and the routes get harder as the number increases towards V12. Therefore, this is an excellent place to improve your climbing strength or challenge yourself on a tricky problem.

Red Rock Canyon Open Space – Sport Climbing

Location: 3550 W High St., Colorado Springs

Parking: Designated parking areas on the right side of W. High St. – Exact directions on Mountain Project

Approach: Find the trailhead by turning south from US 24 at the only turnoff between 30th Street and the first Manitou Springs exit.

Red Rock Canyon Open Space offers accessible and friendly climbing to novice and expert alike. With 80+ routes from 4th class to 5.13, there is a route for everyone. This area is primarily sandstone climbing with face holds, offering holds and movement very similar to gym climbing. Most climbs are bolted sport routes with lowering and rappelling anchors. 

NOTE: A free permit is required before climbing and is obtainable online. Be sure to watch the video on the climbing permit page, as this includes very important rules and regulations for the area.

Photo by Mark McGregor on Unsplash

Advanced Colorado Springs Rock Climbing

Cheyenne Cañon Park – Primarily Sport with Crack and Trad Options

Location: 4682 Gold Camp Rd, Colorado Springs

Parking: Enter near the Starmore Discovery Center, drive along the road, and park at various pullouts. There is also parking at the Powell parking lot on Gold Camp Road – See Mountain Project for more directions.

Approach: Most approaches are short and accessible from the parking lot or pullouts.

Situated in a narrow canyon with beautiful views, this fantastic granite crag contains a mixture of climbing styles. The options include bouldering, trad, and sport routes of varying difficulties. Although primarily a sport climbing location, there are a handful of crack climbs and trad routes offering a place to learn crack climbing techniques and trad climbing skills. 

This rock is also known to be of varying quality, so be sure to assess your routes. Cheyenne Cañon is an excellent option for hot days as it tends to stay cooler in the canyon shade. If you happen to be around in the winter months, this area is also known for its Ice Climbing.

NOTE: A free permit is required before climbing and is obtainable online. Be sure to watch the video on the climbing permit page, as this includes very important rules and regulations for the area.

Garden of the Gods – Great Trad Climbing

Location:  180 N. 30th St., Colorado Springs

Parking: Parking is available in the Visitor Center lots

Approach: From the parking lot along well-marked and traveled paths. See Mountain Project for specific route information.

Garden of the Gods is the most well-known rock climbing area in Colorado Springs. This area comprises beautiful towering sandstone formations with picturesque snowy peaks in the background. This area is well protected, so obtaining a park permit and learning about rules and regulations is mandatory before entering. 

While there are some beginner routes, this area is best known for traditional “trad” climbing – often reserved for advanced climbers only. Trad climbing grades range from 5.3 to 5.12. Climbing in this area requires advanced rope system knowledge, gear placement techniques, crack climbing skills, and more. Many famous and historical “test pieces” are available to measure your skill. While mostly known for traditional climbing, this area also offers bouldering up to V8 and sport climbing up to 5.13.

Photo by Sean Benesh on Unsplash

Final Thoughts

No matter where you go or what style you choose, rock climbing in Colorado Springs will be an unforgettable experience. Whether you are testing your abilities, trying out a new sport, going on a guided climbing tour, or searching for the perfect view, Colorado Springs will meet your needs. Grab a friend or guide, be safe, and climb on!

Colorado Springs Trail Guide – Best Hiking Trails in Colorado Springs

The city and area surrounding Colorado Springs have gorgeous scenery and ample ways to enjoy the great outdoors, perhaps one of the best parts of Colorful Colorado. Whether you are looking for a quick walk or a long, tiring trek, there are plenty of hiking trails in Colorado Springs at every difficulty level. And for those just getting started, be sure to check out our guided hiking tours.

If you are looking for the absolute best trails in Colorado Springs, we have an in-depth review of our top 5 favorite hikes near Colorado Springs. You’ll also see them on this list along with many other excellent options for hikers of all abilities. This list is organized roughly by difficulty level, as determined based on reviews from fellow hikers, length, and elevation gain. So if you are wondering where to hike in Colorado Springs, look no further. 

Easy Hikes

Memorial Park Prospect Lake Loop Trail

Parking: 280 S Union Blvd, Colorado Springs, CO 80910 (Tons of parking available in the park along Memorial Dr)

Elevation Gain: 26 feet

Round Trip Mileage: 1.3 miles

Highlights:

  • Paved loop, very accessible for wheelchairs, strollers, etc.
  • Great views of mountains and scenic lake
  • Beach area and playground

Palmer Park Cheyenne and Grandview Trail Loop

Parking: Palmer Park Trail Cave Outlook, 3120 N Chelton Rd, Colorado Springs, CO 80909

Elevation Gain: 183 feet

Round Trip Mileage: 1.8 miles

Highlights:

  • So much to see here including a botanical reserve, horse stables, canyons, ravines, bluffs, and more
  • Tons of wildlife: Palmer Park is popular among birdwatchers

Stratton Open Space The Chutes, Laveta, and Chamberlain Trail Loop

Parking: North Cheyenne Cañon Park & Stratton Open Space Trailhead, N Cheyenne Canyon Rd, Colorado Springs, CO 80906 (on the right, just past the Starsmore Visitors Center)

Elevation Gain: 705 feet

Round Trip Mileage: 3.8 miles miles

Highlights:

  • Most popular hiking trail in Stratton Open Space
  • Excellent wildflowers and wildlife
  • Beautiful views of the Gold Camp Reservoirs

Garden of the Gods The Palmer, Buckskin-Charley, Niobrara, and Bretag Trail Loop

Parking: 3105 Gateway Rd, Colorado Springs, CO 80904

Elevation Gain: 449 feet

Round Trip Mileage: 4.0 miles

Highlights:

  • Gorgeous views of the National Natural Landmark that is Garden of the Gods
  • Combines four popular trails around the park
  • Access to horseback riding, rock climbing, and biking trails
  • A Top 5 Pick! Learn More.

Ute Valley Park Ute Valley Park Trail

Parking: Ute Valley Trail Head, Ute Vly Trl, Colorado Springs, CO 80919

Elevation Gain: 488 feet

Round Trip Mileage: 4.3 miles

Highlights: 

  • Excellent views of Pikes Peak
  • Plenty of side trails to explore
Photo by Bailey Galindo on Unsplash

Moderate Hikes

North Cheyenne Cañon Park Mount Buckhorn Peak

Parking: Upper Gold Camp parking lot, 4415 Gold Camp Rd, Colorado Springs, CO 80906

Elevation Gain: 859 feet

Round Trip Mileage: 3.9 miles

Highlights:

  • Beautiful views along the way 
  • Boulders to climb at the summit (the tallest offers panoramic views)
  • A Top 5 Pick! Learn More.

North Cheyenne Cañon Park Seven Bridges Trail

Parking: Seven Bridges Trailhead, N Cheyenne Canyon Rd, Colorado Springs, CO 80906 (right before Helen Hunt Falls)

Elevation Gain: 912 feet

Round Trip Mileage: 3.5 miles

Highlights:

  • Very popular trail due to its history and uniqueness
  • Meanders alongside a creek and crosses over via seven charming bridges
  • Close to Helen Hunt Falls and Silver Cascade Falls

Pike National Forest The Crags Trail

Parking: Crags/Devil’s Playground Trailhead, 615 Teller Co Rd 62, Divide, CO 80814

Elevation Gain: 820 feet

Round Trip Mileage: 4.8 miles

Highlights:

  • Awesome views of unique geological features
  • Well marked trail
  • Challenging, but a good introduction for beginner hikers
  • A Top 5 Pick! Learn More.

North Cheyenne Cañon Park Mount Muscoco Trail

Parking: Mount Cutler and Muscoco Trailhead, N Cheyenne Canyon Rd, Colorado Springs, CO 80906 (on the left, 1.5 miles past Starsmore Visitors Center)

Elevation Gain: 1,292 feet

Round Trip Mileage: 4.0 miles

Highlights:

  • Includes a fun scramble at the summit
  • Outstanding views of the surrounding mountains
  • Well marked and well maintained
  • A Top 5 Pick! Learn More.

North Slope Recreation Area North Catamount Reservoir Trail

Parking: Pikes Peak Toll Rd, Woodland Park, CO 80863 (just past the Crystal Reservoir Visitors Center)

Elevation Gain: 262 feet 

Round Trip Mileage: 2.7 miles

Highlights:

  • Short but steep (15% grade around the 1.5-mile marker), so you’ll get a good workout
  • Beautiful views of meadows and wildflowers along the way
Photo by Jonathan Chaves on Unsplash

Hard Hikes

Red Rock Canyon Open Space Sand Canyon, Mesa, Greenlee, Red Rock Canyon Loop

Parking: 3550 W High St, Colorado Springs, CO 80904

Elevation Gain: 882 feet

Round Trip Mileage: 5.4 miles

Highlights:

  • Varied terrain and interesting geology
  • Lots of sun as shade is limited
  • Good views without too difficult an elevation gain

Pike National Forest The Incline Trail

Parking: Barr Trailhead, 98 Hydro St, Manitou Springs, CO 80829

Elevation Gain: 1,978 feet

Round Trip Mileage: 4.0 miles

Highlights:

  • The most popular trail in the Pike National Forest
  • All the elevation is in the first mile – at the hardest point, it’s an extremely challenging 61% grade!

North Slope Recreation Area Limber Pine, Mule Deer, Mackinaw, and Ridge Trails Loop

Parking: Catamount Recreation Area, 3168 Co Rd 28, Woodland Park, CO 80863

Elevation Gain: 1,036 feet

Round Trip Mileage: 8.4 miles

Highlights:

  • Challenging trek around the North Catamount Reservoir with a bunch of elevation changes
  • At times follows the water, and at other times, you’ll be in the forest

North Cheyenne Cañon Park Columbine Trail

Parking: Starsmore Discovery Center, 2120 S Cheyenne Canyon Rd, Colorado Springs, CO 80906

Elevation Gain: 1,607 feet

Round Trip Mileage: 7.6 miles

Highlights:

  • Great views of the surrounding mountains
  • Plenty of wildlife (don’t forget to check out the Starsmore Discovery Center at the trailhead
  • Gradually inclining slope, no huge scrambles
  • A Top 5 Pick! Learn More.

Pike National Forest The DeCaLiBron: Mounts Democrat, Cameron, Lincoln and Bross Trail

Parking: Kite Lake Trailhead, Co Rd 8, Alma, CO 80420

Elevation Gain: 3,136 feet

Round Trip Mileage: 7.0 miles

Highlights:

  • Ability to summit three 14-ers, the highest being Mount Lincoln at 14,295’ (Note that Mount Bross is private property and illegal to summit)
  • Real right of passage for serious Colorado hikers

Final Thoughts

Before you hit one of these awesome hiking trails in Colorado Springs, be sure that you are well prepared for your trip. Bring plenty of water, sunscreen, and other essentials that we cover in how to pack for a day hike. Happy trails!

Bike Maintenance Basics – How to Clean Your Bike

When you think about hitting the trails with a mountain bike or e-bike, maintenance is never top of mind. However, bike maintenance is a very important part of any ride, and in fact, every ride. Skipping the bike maintenance basics not only leads to more wear and tear, but it can even be dangerous to you as the rider. 

That’s why we’re here to discuss bike maintenance basics to make sure you keep your gear in peak condition. It might seem hard, but taking a little time to learn how to clean your bike and how to complete a pre-ride inspection will save you a lot of hassle down the line. So let’s get to it.

Don’t want to worry about bike maintenance? Join our Cog Up/Bike Down Pikes Peak experience or a guided mountain bike tour in Colorado Springs to reap the benefits of our perfectly maintained bikes and expert guides. Or alternatively, utilize our bike rentals in Colorado Springs to use for your own adventure.

Photo by Tim Foster on Unsplash

How to Do a Pre-Ride Bike Inspection 

A quick check before each ride is essential bike maintenance to keep you safe and keep your bike functioning optimally. Many people call this the ABCs of bike maintenance. If you remember that, you’ll be able to keep track of these critical steps of the pre-ride inspection.

Air in the Tires 

Look closely at the sidewall of your bike tires, and you will find a range of recommended tire pressures (PSI). There are a lot of factors that go into deciding what pressure within this range you want. You can begin at a pressure in the middle of the specified range to start, and learn your preferred tire pressure by feel as you get more experience. But in short, a more inflated tire will have less resistance and allow you to go faster (best for road cyclists), while a less inflated tire will absorb more shock (best for trail riders) and achieve better grip (safest for riding in wet conditions).

While you are inflating your bike tires to the desired pressure, be sure to inspect the tires for damage or deformities, and make sure the quick release lever or thru-axle (depending on your bike) are securely tightened. Finally, don’t forget to bring your pump and tire repair kit or patch kit on the ride with you in case of emergencies.

Brake Check

Your bike’s manufacturer can tell you how often you need to replace your brake pads and rotors, but it is also important to use your own judgment and look for excessive wear. In addition to a visual check, be sure to spin the tires and apply the brake mechanisms. 

Here, you want to make sure they move smoothly, don’t get stuck anywhere, and clamp down strong on the tires. If you feel a hitch or resistance, you may need to lubricate the parts. These cables and assemblies need lubrication to function correctly, and that’s ongoing maintenance we’ll discuss in the post-ride section covering how to clean your bike.

Chain Inspection

Bike chains are one of the most important pieces on the entire bike, and unfortunately, they’re also one of the most fragile. Before every ride, you should turn the pedals slowly and examine every chain link. 

Check to make sure the bike chain is not dirty or rusted, that there is no gunk or other impediment, and that the chain moves smoothly. Also, check the gears and the drivetrain, making sure the bike shifts without a hitch. 

The Nuts and Bolts of Bike Maintenance Basics

The last thing to do pre-ride is to ensure that the bike’s many nuts and bolts are tight and secure. Especially with mountain biking, it is normal for these to loosen over time as you maneuver the bike over obstacles and force different stressors on it. 

With hex keys and a Torx wrench, a decent bike tool will allow you to tighten all these pieces and make sure your bike is ready for the next adventure. This multi-tool is a great piece to bring with you on the ride, too, in case something loosens mid-ride. Loosening parts are all potential sources of problems that you do not want to learn about while on the trail, so invest a few minutes pre-ride in this important bike inspection.

Photo by Anastasia Shuraeva from Pexels

How to Clean Your Bike Post-Ride

After every ride, it pays to give your bike a quick wash. Especially if you have been hitting trails on a mountain biking tour, you don’t want to leave your bike dirty. Over time, dirt and grime accumulate and impact the smooth functioning of the bike’s fragile mechanisms. It causes rust and leads pieces to break earlier than they would otherwise.

Rinse and Dry

So, one of the most critical bike maintenance basics is also the easiest. Using good old soap and water (or bike wash cleaner), carefully wipe down the bike frame, handlebars, seat post, and brake mechanisms. You want to be gentle with these sensitive pieces, so don’t use a pressure washer. 

It’s also harmful to get soap on the brake pads themselves. Instead, use rubbing alcohol or rotor cleaner to degrease the rotors and brake pads. As noted above, you do not want to leave the bike to air dry as that can cause rusting, so use clean rags to get the bike nice and dry. 

Degreasing

For the chain and drivetrain, you want to really get in there and clean out any debris and grease. Especially for mountain bikes, these parts can get very dirty quickly, and you will find debris stuck in hard-to-reach areas. Cleaning out these parts is essential bike maintenance for preventing your bike from wearing out too rapidly and also ensuring future rides will be smooth and safe. 

You can clean the drivetrain with a rag and degreaser if it is not too dirty, or use a toothbrush to scrub off built-up grime. A bike chain cleaner is a good investment for thoroughly cleaning your chain without making a mess. Be sure to go through a couple of full rotations of the chain and shift gears a couple of times to make sure no dirt or grease remains. You can then use a clean rag to wipe away any leftover muck and clean the degreaser from the bike.

Lubrication

Once your bike is clean and dry, it is time to apply lubrication. You should lubricate your bike after cleanings, anytime it starts to squeak, and after wet rides to prevent rust. Keeping all these parts well lubricated will ensure a smooth and safe ride and keep the bike from unnecessary wear and tear. Depending on how frequently you ride, you might end up doing this weekly or more, but it is an essential step of bike maintenance and well worth the effort. 

Lubricate the drivetrain, chain, brake cables, and assemblies. When you lubricate your bike, you really only need a few drops for each component. Give the lubrication a few minutes to soak in and work it around by turning the pedals and moving the mechanisms. Then, be sure to use a clean rag to wipe away the excess. After it has soaked in, wipe down the parts gently, so it is not dripping with lubricant. Overlubricating your bike can actually hurt it, as dirt and debris are attracted to and accumulate in the excess lubrication.

Storage

Now that we’ve covered how to clean your bike, you’re ready to store your bike until the next ride. You might not have considered it, but there are actually better and worse ways to store a bike. First, don’t store a bike outdoors where it will be exposed to the elements. This will increase rust and corrosion, not to mention the fading of the paint job and increased risk of theft! 

Regarding positioning, storing a bike by hanging it with hooks or a wall mount is the best way to keep your bike in peak condition. If you are storing your bike upright, be sure to put rugs under the wheels and make sure to keep the tires inflated. Otherwise, you could find the tires have bulged or cracked over long periods of disuse.

Photo by Jan Kopřiva on Unsplash

Extra Notes for Electric Bike Maintenance Basics

On top of everything we’ve covered, e-bikes have some extra maintenance steps. Once you understand how electric bikes work, these extra maintenance requirements make sense since there are additional parts to consider. Specifically, we’re concerned about the e-bike’s battery and motor. 

E-Bike Battery Maintenance

Just like any battery, good maintenance procedures help extend the battery’s lifespan and optimize its capacity. First, top off your electric bike’s battery after every ride. It’s not good for batteries to sit empty for extended periods. However, it is equally bad for a battery to sit fully charged for too long as it puts excessive stress on the battery’s components. 

Therefore, if you don’t plan to ride for a while, put your electric bike’s battery in storage, so to speak, by unplugging the battery and hooking it up to a charge tender. Battery tenders allow batteries to naturally discharge and then recharge in a cycle. This keeps the battery in optimal condition no matter how long you leave it. 

E-Bike Component Maintenance

The other main consideration with e-bikes is the extra wear and tear on the drivetrains and chains. Because of this, it is important to clean, dry, and relubricate your electric bike more frequently than you would a non-electric model. 

When cleaning, be sure to avoid using high-pressure water to rinse off your e-bike. While the batteries and electrical components are sealed and waterproofed against rain, pressurized water can prove too much and cause damage. 

Final Thoughts

With a little investment in time spent cleaning and lubricating your bike, you can rest assured that it will last longer and give you a smooth, safe ride. If you struggle with any of these bike maintenance basics or feel like your bike is still not riding right, be sure to bring it to a bike repair shop for more expert repair. Also, if you are thinking about switching to an e-bike, check out e-bike guided tours in the Colorado Springs area. Finally, don’t forget that our bike rentals in Colorado Springs and mountain bike tours in CO Springs are both fantastic avenues to ride a clean and perfectly maintained bike. Happy riding!