How to Clean Your Sleeping Bag

A sleeping bag is a vital piece of equipment for anyone who ventures into the outdoors, especially since it’s part of the essential gear you need for camping. But it can also be a spendy investment. Maintaining, storing, and washing your sleeping bag is essential to get the most use out of it. We’ve compiled all the information you need below to help you clean your sleeping bag. 

Photo by Felix M. Dorn on Unsplash

General Care

Sleeping bags should not need washing for many years when properly tended to. The best way to prolong the time between washes is to take good care of your sleeping bag in the first place. Some tips to help maintain cleanliness include:

  • You get what you put in: Keep a clean pair of clothes to sleep in. Try to keep yourself clean as well. That means removing oil, dirt, sunscreen, and bug spray that can permeate into the bag. The cleaner the items are in the bag (you), the greater likelihood your sleeping bag will stay clean too.
  • Liner: A sleeping bag liner is a single-layer enclosed sheet you sleep in inside your bag. The liner serves as a barrier between your body and the bag. It should be easy to remove and should be washed regularly. Liners are slipped inside a bag, not attached.
  • Off the floor: Keeping your bag off of the ground will help keep dirt, pine needles, and other debris out and off of your bag. This does not include your sleeping pad which serves as a barrier between your bag and the ground.
  • Dry it out: Lay your sleeping bag to dry the day after every use. Our bodies produce moisture that gets trapped in our bags from our breathing, sweat, or the environment’s humidity. When camping, try to find a dry spot on a tarp or maybe over a clean log and give the material a chance to dry and breathe. Laying out your sleeping bag prevents mold from forming in your bag.

Be Gentle

Treat your bag with care. Take your time with zippers, gently put the sleeping bag away, and mind where you place them. Most bags are best stored loosely in a well-vented bag or hanging environment. Compression stuff sacs are helpful for compact travel but are not recommended for long-term storage as they compress the material and wear down the fill. Over time, this compression ultimately impacts your bag’s warmth and comfort. Additionally, tight storage can trap smells and moisture, leaving you with a pleasant experience the next time you use it!

Washing

The first factor to consider when cleaning your sleeping bag is how much of your sleeping bag needs cleaning. The second factor to consider is whether you have a down or synthetic bag. The third is whether you have access to a machine wash or if you will need to hand wash. Consider a total wash if you notice a general browning color, overall grime, or an overall smell. For smaller messes or stains, simple spot treatment of the impacted area is fast and effective. 

Spot Cleaning

Often, only a few areas of a sleeping bag need cleaning. To spot clean, use a gentle soap mixed with water and lightly brush or rub the dirty area with the cleaning solution. Do your best to keep the cleaning solution on the exterior material only and not saturate the bag’s fill. Once you have spent some time cleaning, wipe the spot with a wet cloth and leave it to dry.

Photo by Ivana Cajina on Unsplash

Full Wash

Most new sleeping bags come with wash instructions which you can find on the tag. This is the best method to follow when cleaning your bag. If there are no instructions, consider the following techniques and remember that no matter the form, cleaning your sleeping bag takes time and patience:

Machine Wash

  • Device: The best way to machine wash a sleeping bag is to use a front-loading washing machine. Do not use a top loader, as the bag may become damaged and tangled around the center bar. If you do not have access to such as machine, consider going to a laundromat.
  • Soap: If you are machine washing a down sleeping bag, use special soap that is friendly on down material. If your fill is synthetic, you can use a regular detergent, but a technical gear-specific detergent will be best. Nikwax makes different detergents for both down and synthetic fill.
  • Means: Some suggest fully unzipping your bag before loading it into the washing machine, so the upper doesn’t pull apart or catch in the wash. Another option is to turn your bag inside out with the zipper fully closed. Wash your sleeping bag in warm water on a gentle cycle. The sleeping bag may need two or more rinse cycles. It is ready to dry if the bag is wet but not holding large amounts of water. Then be sure to gently squeeze any excess moisture out of the bag as you remove it from the wash.
  • Drying: Use a large dryer if possible; the more room in the dryer, the better the fill can expand when drying. Synthetics will often dry faster. Bags with down fill may take several drying cycles. Set the dryer to tumble on a low heat setting. Consider using tennis balls or other dryer aids to break up condensed pockets of fill towards the end of the cycle or when it is mostly dry.

Hand Wash

  • Device: Fill your bathtub or a similarly large tub with warm or cool water.
  • Soap: Use the same material-specific soap listed above and read the instructions for the recommended amount. When hand washing, it can be more difficult to rinse the soap out, so starting with a smaller amount than recommended may be beneficial, and slowly adding more as you go.
  • Means: Lay the bag in the water and gently rub and massage the bag. Next, soak the bag for around thirty minutes or until it is fully saturated. Rinse your bag with clean water (you may do this multiple times) until the soap is out. Before hanging to dry, gently squeeze excess water out of the bag. It can be helpful to work from one end to the other squeezing section by section.
  • Drying: Follow the directions above. If a dryer is unavailable, lay the sleeping bag on a clean surface or hang it up to dry. Use a location out of direct sunlight and with low humidity. Once it has started to dry, you may need to manually unclump or fluff the fill in your bag to ensure it dries thoroughly.

Final Thoughts

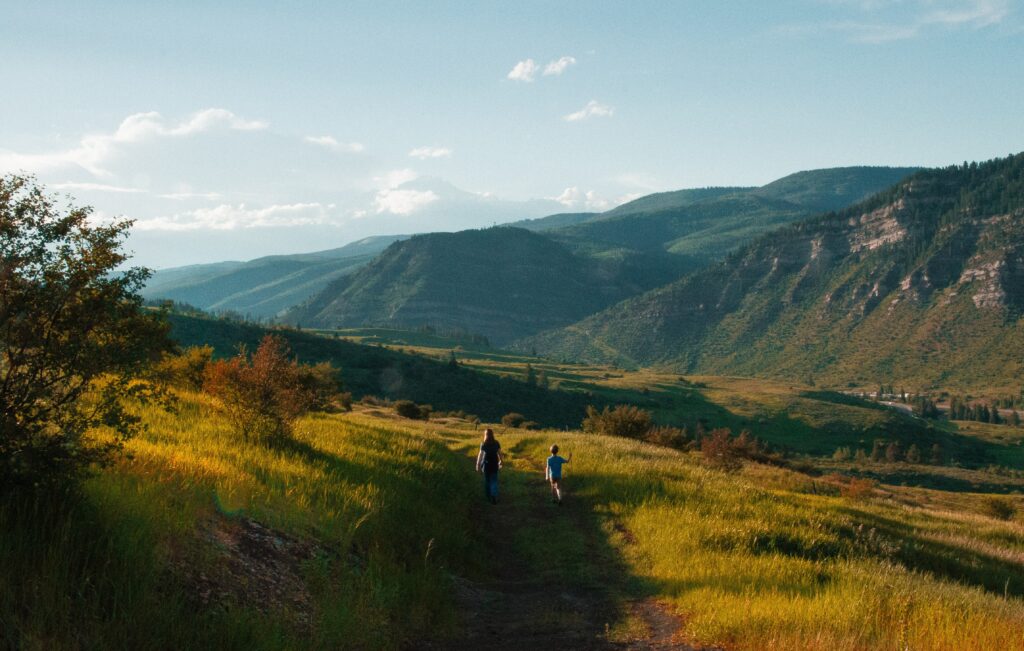
Have a new sleeping bag that you are excited to test out? Autumn is the ideal time to hike and then cozy up in your sleeping bag under the stars! For some spectacular colors and views, check out the best fall hikes near Colorado Springs. While it is safe to hike alone, if you are looking for some expertise, guided hikes through Broadmoor Outfitters are a perfect way to learn about and get familiar with a new area or trail.

Best Fall Hikes Near Colorado Springs

Crisp air, cozy fleeces, and stunning aspen colors make for some of the best hiking conditions. Autumn in Colorado is stunning, and fall hiking near Colorado Springs is not something you want to miss! Oh, and did we mention the jaw-dropping mountain views?

The landscapes near Colorado Springs offer something for everyone. Between the aspen and pine forests, soothing creeks, and glistening mountain tops, it is hard to know where to start. Below you will find all the information you need on some of the best fall hikes near Colorado Springs.

A Quick Note

While generally safe, hiking does have potential risks: animal encounters, weather, and terrain. To set yourself up for success, always bring a pack and be prepared with food, water, layers, and other essentials. For more tips on getting prepared, check out how to pack for a day hike in Colorado.

Because bears are native to our beautiful state, bear safety is a factor to consider while preparing for and enjoying a hike here near Colorado Springs. Be sure to learn and follow NPS Animal Viewing guidelines and suggestions in order to enjoy wildlife sightings safely. When done safely, wildlife encounters can be a true highlight of the Colorado hiking experience!

expansive field with mountains and family walking on trail
Photo by Holly Mandarich on Unsplash

Preachers Hollow

Location: Mueller State Park
Distance: 20-25 minute drive, 15 miles from downtown Colorado Springs
Parking: Mueller State Park Visitors Center, 21045 Hwy S. Divide, CO
Permits: Colorado State Park Pass required per vehicle or you can purchase a day pass
Stats: 2.1-mile loop, 462 ft of elevation gain, easy
Note: Dogs are not allowed in the park

If you are looking for a fun beginner hike, look no further than Preachers Hollow. This loop offers a friendly multi-use trail with minimal elevation gain. Additionally, the loop style ensures that you will be exploring new terrain the whole route! You’ll find yourself wandering through canopies of aspens that open up to meadows with gorgeous views of the mountains in the distance. If you find yourself looking for a longer day, there are many other worthy trails in this park to explore.

The Palmer, Buckskin-Charley, Niobrara, and Bretag Trail Loop

Location: Garden of the Gods
Distance: 15-20 minute drive, 7 miles from downtown Colorado Springs
Parking: 1805 N. 30th St, Colorado Springs, CO; Park in the North Lot
Permits: Open to all hikers, no permit required
Stats: 4 miles round trip, 449 ft of elevation gain, easy

Hiking in the Garden of the Gods is a must-do when visiting Colorado Springs. The terrain in Garden of the Gods is open with little shade, so in the cooler temperatures, fall is the perfect time to hike this popular park. On this loop, hikers pass all of the unique rock formations in the park. There may also be opportunities to spot local wildlife or rock climbers scaling the rock. This park has tons of fun activities for people of all ages, and this trail is an accessible way to explore all the park’s best features.

Photo by Justin Hu on Unsplash

The Crags Trail

Location: 615 Teller Co Rd 62, Divide, CO
Distance: 50-60 minute drive, 34 miles from downtown
Parking: The Crags Trailhead, 615 Teller Co Rd 62, Divide, CO
Permits: Open to all hikers, no permit required
Stats: 4.8 miles round trip, 820 ft of gain, easy/moderate difficulty

Glistening granite features are a highlight of this trail. Before you get there, you will meander through aspens on a well-maintained trail. The trail then opens up to meadows and eventually, you will reach the top of the Crags Trails and enjoy stunning views of Pikes Peak. This hike also offers the opportunity to see the unique and twisted Bristlecone Pines native to the area.

Seven Bridges Trail

Location: North Cheyenne Cañon Park
Distance: 20-25 minute drive, 7.6 miles from downtown
Parking: Seven Bridges Trailhead, N Cheyenne Cañon Rd, Colorado Springs, CO
Permits: Open to all hikers, no permit required
Stats: 3.7 miles round-trip, 912 ft of gain, moderate difficulty

Aptly named for its defining features, Seven Bridges Trail swerves its way across North Cheyenne Creek via seven bridges. Not only do hikers enjoy the babbling of the creek underfoot, but this trail also offers fall hikers a golden aspen grove near the seventh bridge.  The end of the trail has beautiful views of the creek, valley, and Colorado Springs below. This is a moderate hike with good protection from the elements, making it a good choice in breezy weather.

Mount Buckhorn Peak

Location: North Cheyenne Cañon Park
Distance: 25-30 minute drive, 8.2 miles from downtown
Parking: Starsmore Discovery Center, 2120 S Cheyenne Cañon Rd, Colorado Springs, CO
Permits: Open to all hikers, no permit required
Stats: 3.9 miles round trip, 859 ft of gain, moderate difficulty

While views from any mountain peak are magical and inspiring, nothing compares to the 360-degree views from atop this one. At an elevation of 8,380 ft, Mount Buckhorn will satisfy every mountain lover’s dreams. It is a little harder to get to, but definitely worth it. This is an out-and-back trail through thick forests ending atop a peak filled with budging boulders. The views from the top are spectacular year-round, but especially with the fall foliage, making this one of the best fall hikes near Colorado Springs.

rocky steps through forest hiking trail
Photo by Isaac Smith on Unsplash

Columbine Trail

Location: North Cheyenne Cañon Park
Distance: 15-20 minute drive, 6 miles from downtown
Parking: Starsmore Discovery Center, 2120 S Cheyenne Cañon Rd, Colorado Springs CO
Permits: Open to all hikers, no permit required
Stats: 7.6 miles round trip, 1,607 ft of gain, moderate/hard difficulty

The Columbine Trial is a great hike close to town that offers stunning views, opportunities to see tons of flora and fauna, and flexibility for different hiking abilities. This trail has three different starting points, lower, middle, and upper trailheads, which allow you to customize the hike length depending on how much time you have. No matter where you start, you will follow the creek up the canyon and be treated to the sounds of birds and views of the surrounding mountains. 

Colorado Springs is a perfect destination for fall hikers. With easy access to a multitude of trails and nature areas, adventure awaits hikers of all skill levels. If you are new to hiking, Broadmoor Outfitters offers Guided Hikes so you can be sure you will see some of the best hiking trails in Colorado Springs. There’s no better time than autumn in Colorado, so lace up your boots and get out there!

image of rock climbing gear

Rock Climbing Gear – A Beginner’s Guide

Rock climbing has had an explosion of growth over the last couple of decades. The unique sport offers excitement, a challenge for all abilities, and different ways to explore and play in both indoor and outdoor spaces. Sometimes a new sport can be intimidating: the gear, systems, and language can be a lot to learn. If you are uncertain about what comes first, it can be helpful to research and learn more about how to get into rock climbing

As a beginner rock climber, consider familiarizing yourself with the sport through a guided rock climbing tour. Guided excursions come with all the gear you will need and allow you to get comfortable with proper climbing gear use. If you have never climbed before or want to upgrade from rental gear, this rock climbing gear list has all the beginner climbing essentials you need to start your journey into the vertical world.

Rock Climbing Shoes

Rock climbing shoes are an important part of climbing. The special rubber sole and snug shape allow you to grip the rock, offer protection for your feet, and give you the ability to place your feet on small holds. There are various shoes for all styles of climbing, and climbing shoes can be organized into the following categories: neutral “flat” sole, moderate “slightly downturned” sole, aggressive “very downturned” sole. Many shoes also offer options of “slip-on,” laced, or velcro closures.

As a beginner, you should go with more neutral shoes as they tend to be the most comfortable and least expensive. Downturned, aggressive shoes are tight, uncomfortable, and typically reserved for more technical terrain. When you are just getting started, comfort is key as you get used to wearing these new shoes. Climbing shoes should be snug, but not so tight that they cause pain. Due to the fit, you should not walk in the shoes or wear them if you are not climbing.

Some examples of beginner rock climbing shoes include:

Black Diamond Momentum, La Sportiva Tarantulace, Mad Rock Drifter

Rock Climbing Harness

Just like climbing shoes, a harness is an essential piece of protective rock climbing gear for any rock climbing with ropes. All harnesses come with basic features of holes for your waist and legs, gear loops, and a belay loop. There are many differences between harnesses such as adjustable leg loops, weight, material, and fit. These features become more important if you choose to specialize in a style of climbing down the road.

For a beginner rock climbing harness, look for an “all-around” harness that is comfortable and affordable. Fit will be one of the most important factors when buying your first harness. Make sure it has a snug fit around your upper legs and waist. Some people prefer the ease of non-adjustable leg loops but if you are looking to get used to the fit and feel of a harness, the ability to adjust your leg loops can be helpful.

Some examples of all-around rock climbing harnesses include:

Black Diamond Momentum, CAMP Energy, Petzl LUNA 

Chalk & Chalk Bag

Whether bouldering or top-rope climbing, chalk can be a game changer while climbing, especially if it is hot or humid. Chalk comes in a variety of forms: block, loose, and liquid. An easy way to start is by purchasing a “chalk ball,” which is a small cloth pouch filled with loose chalk. You chalk up simply by grabbing the chalk ball and easily refill the ball when it gets low with separately purchased loose chalk. 

It’s not a great idea to just dump loose chalk into your bag without a ball, and in fact prohibited at some gyms, as it is messy, wasteful, and annoying for your belayer to have chalk dropped on them when you use it mid-climb. Liquid chalk is preferred by some but not as common for top-rope climbing. Also, “eco” chalks, most often reserved for outdoor climbing, vary in color to match the rock.

Most chalk bags are pretty small with a closure mechanism and a waist loop. A bouldering-specific chalk bag or “buckets” will be larger, without a waist strap, and often come with a brush. If you are new to climbing, an affordable waist belt chalk bag with a chalk ball inside should be all you need. Chalk bags come in all sorts of colors, designs, patterns, and shapes so have fun. You can’t go wrong with this piece of rock climbing gear!

Belay Device

If you want to rope climb, belaying will be necessary. You will need a locking carabiner and a belay device. Again, there is a multitude of devices to choose from. Belay devices often come in the following broad categories: tube style, semi-assisted braking, auto-locking, and figure 8 (not commonly used). The most traditional and entry-level option is a “tube style” device such as an ATC. Most climbers learn to belay with an ATC and then switch to an assisted or auto-braking device. No matter which device you choose, be sure to seek instruction on how to use the device safely and appropriately.

Some examples of common belay devices:

Black Diamond ATC- XP, Edelrid Mega Jul, Petzl GRIGRI

Helmets for Outdoor Rock Climbing

While helmets are not commonly used inside, they are a must-have piece of rock climbing gear for any outdoor climbing. This important piece of gear protects you from anything that may fall from above – or protect you from the ground in the event that you fall. You will want to look for a designated rock climbing helmet as they are designed to protect your head from specific injuries that could be encountered in the sport.

There are generally two types: hard shell and shell-foamed helmets. Hardshell helmets are generally more affordable and more durable, making them great for beginners. Shelled foam helmets tend to be more expensive and have less longevity but are more breathable and lightweight. As with most types of gear, fit and comfort are top priorities when selecting your gear. 

Some examples of rock climbing helmets include:

Black Diamond Half Dome, CAMP Armor, Petzel BOREO

Final Thoughts

There is so much more to know about the sport of climbing aside from the rock climbing gear, but it is all worth it to take the time and learn. Rock climbing is one of the most invigorating and satisfying challenges. For an introductory experience, try a guided rock climbing tour. Once you have your own rock climbing gear, the technique and knowledge, and some confidence, be sure to check out the best beginner rock climbing in Colorado Springs and enjoy the views from new heights!

Is It Safe to Hike Alone?

We’ve all been there – maybe you’re new in town or have found yourself with an empty weekend and have no one to explore with, or perhaps your schedule just can’t line up with your friends’. But regardless of the reason, this may beg the question, is it safe to hike alone? The answer is yes! Being solo certainly does not need to end your adventure before it begins.

If you are someone with an unusual work schedule, who travels often, or are looking to get outside on your own schedule, hiking alone can be a freeing experience if you do it safely.

Like most new endeavors, hiking alone can seem intimidating; however, with the proper preparation and knowledge, hiking solo is safe and empowering. To help you mitigate and control the potential safety risks, see the below tips to keep you safe while getting started on your solo journey!

Photo by Julien Flutto on Unsplash

1: Start Small

While hiking alone is often depicted through the stories of lengthy endeavors or epic circumstances, hiking alone can be what you make it! Your first hike (and any hikes after that) does not have to be far, extreme, or to unknown places. 

To get used to hiking alone, picking a trail close to home, one you’ve been on before, or one you have walked with a friend first can be helpful. You may also want to consider going on a guided hike in a new area to get a feel for the terrain and to learn a few things from your experienced guide.

Once you’re comfortable, consider hiking on a new to you, well-established,  and populated trail. Some popular trails have maps at intersections (but always bring your own!), and there is often comfort in seeing others around. From here, the possibilities to increase your adventure and push your comfort zone are endless.

2: Know Your Trail

One of the most important aspects of hiking alone is researching your route. The depth of this research may vary depending on the types and lengths of trails you choose. No matter the trail, be sure to note the general direction you will be traveling, the length of the route, possible exits, turnaround options, the type of terrain you’ll encounter, and important features or landmarks such as rivers, intersecting trails, and more. 

Part of knowing your trail is also knowing what you may encounter. This may include wildlife, flora and fauna, exposure, closures, and more. When it comes to wildlife, be sure to inform yourself about the various animals and how to respond if you encounter them. For example, hiking in areas with Grizzy Bears usually means you will need to carry bear spray and know how to use it. Some areas may also have seasonal closures due to conditions, wildlife breeding/nesting patterns, or areas to avoid to due to damage or erosion. No matter the reason, check online, at state park offices, or wherever is needed to get the information you need to prepare for what’s ahead.

3: Carry a Navigation Tool

Some trails have maps for users at the trailhead entrance; some have occasional maps throughout the trail system. However, many trails have no markers or directions for where you are or where the trail goes. Consider using a paper map with a compass, a GPS device, or other technology to navigate as needed. 


There are many tools available online and via phone applications to help with navigation. Some common resources include Gaia GPS, All Trails, or Hiking Project. If you like gadgets, many smartwatches now offer GPS maps and safety features that allow you to retrace your steps to your starting location. Other options (especially for hikers who venture into more remote territory) worth exploring are handheld GPS devices, satellite phones, and other safety gadgets such as the ones offered by Garmin.

Photo by Annie Spratt on Unsplash

4: Tell Someone Where You’re Going

Sometimes in life, things don’t go as planned, no matter how much you prepare. Therefore, it is imperative that you tell a close, trusted, and available friend or family member about your plan. Be sure to tell them which trail you will be on, the intended direction and length of travel, as well as the approximate time you should return home and contact them. 

The goal, of course, is that this is a backup and never needed. It may seem simple; however, this easy step in planning may just be the one thing that saves your life or gets you the help you need if the unexpected happens.

5: Carry The 10 Essentials

The 10 essentials are made up of various emergency and first aid items. They include navigation items (discussed above), sun protection, insulation and clothing layers, illumination, first aid supplies, fire-starting equipment, repair kit and tools, food/nutrition, hydration, and emergency shelter. 

These are items that, if you need them, you do not want to be caught without them! These items make all the difference when it comes to the safety of hiking alone. Hiking has potential risks, but many of these risks can be mitigated and prepared for with the above items. The degree to which you carry some of these items may vary based on a number of factors specific to your hike, so again, do your research.

6: Know The Weather 

When you are outside, mother nature is in control. Be sure to look up the weather patterns for the area you are hiking. Of course, be sure to look at the weather forecast for the day you plan to hike, but also consider the weather patterns of the previous days to get a better picture of the trail conditions. For example, a week’s worth of rain before your trip may mean muddy conditions and partially flooded trails.

Additionally, mountains can have unique weather patterns such as afternoon storms in the summer, snow, changes in cloud cover, or wind. Therefore, the weather can vary dramatically at different elevations, and it may be challenging to get an accurate forecast. For example, if you are going up to hike at elevation, the forecast and weather patterns may be different up high than from a town or city below. If you plan to hike in the winter or at elevation where there can be winter conditions, be sure to check out Broadmoor’s tips for safely hiking in the winter

Photo by Davide Sacchet on Unsplash

7: Know Your Limits 

 Everyone has different abilities. This spectrum of capabilities can vary from outdoor knowledge, fitness, weather, or time limits. You may want to ask yourself: what am I hoping to get out of this hike? Have I done a comparable hike before? Is this within my knowledge or fitness abilities? Is this within my risk tolerance (distance, technical difficulty, conditions, exposure/ hights)?

A fun aspect of hiking for many people is pushing your own limits. But remember, doing this a little bit at a time is okay. Don’t overwhelm yourself or put yourself at risk by getting too far out of your limits. Trust what feels right to you both before and during your hike, and make sure to listen to your body. Make hiking alone an activity you can return to, love, and enjoy. 

So, is it safe to hike alone? Yes. And by keeping the tips above in mind, hiking alone can be a safe activity and may just open up a whole new world of possibilities.

Rock Climbing in Colorado Springs – Where to Go

Situated against the foothills of the Rocky Mountains lies the City of Colorado Springs. Just south of Denver, this city is a premier gateway to adventure, offering access to various activities and awe-inspiring landscapes. Of these activities, rock climbing in Colorado Springs is one of our favorites.

Colorado Springs has it all, from unique sandstone rock formations to glistening glaciated peaks. Rock climbing in Colorado Springs is an activity you do not want to miss! But with so many options, it can be hard to know where to go. To save you time, we have laid out a quick guide to Colorado Springs rock climbing locations to suit climbers of all skill levels.

Before heading to the crag, remember to review the rules and regulations for rock climbing in Colorado Springs. These include very important safety information and general rules for each park to make sure all climbers have a fun and safe adventure.

Photo by Patrick Hendry on Unsplash

A Quick Note

Climbing is inherently dangerous. However, it can be a safe, enjoyable, and memorable activity with the proper equipment and skills. If you have never climbed before, first try climbing in an indoor space or seek a guided tour. To learn more about rock climbing safety for outdoor climbing, check our rock climbing safety guide.

If you’re ready to try climbing outdoors and don’t have the necessary skill and equipment, try going with a guide! Broadmoor Outfitters offers several guided rock climbing tours in Colorado Springs to phenomenal climbing locations in the area. This is also an excellent option for those looking to transition from indoor climbing to outdoor climbing. Or for those who have never climbed before but would like to immerse themselves into new landscapes and exciting rock climbing experiences in Colorado Springs.

Beginner Rock Climbing in Colorado Springs

City Rock (Indoor Climbing Gym)

Location: 21 N Nevada Ave., Colorado Springs

Parking: There is metered parking on downtown streets and many parking garages nearby. See parking information here. 

Approach: Easy walk in town from street or garage parking.

City Rock offers fantastic indoor rock climbing in Colorado Springs. This gym includes bouldering, auto-belays, sport climbing, and top-roping for all ages and ability levels. In addition to the climbing, City Rock also features a yoga studio, fitness training, a kids’ area, and more. This is a great option for first-time climbers or those seeking an alternative activity due to inclement outdoor weather.

Intermediate Rock Climbing in Colorado Springs

Ute Valley Park – Excellent Bouldering Opportunity

Location: 1705 Vindicator Dr, Colorado Springs

Parking: A parking lot is available at the Ute Valley Park Entrance at the address listed above.

Approach: Per Mountain Project, it is best to access the boulders by following Mule Deer Drive past Pinon Valley Park and turning left onto Pinon Park Drive. Pinon Park deadends at a gate; park along the street and walk up the dirt road. After about 100m, you will be at the boulders.

Ute Valley Park is primarily comprised of bouldering – short climbs with hard movements. No ropes or belays for this style of climbing. However, having enough crash pads, a confident partner to spot you, and some practice falling will make this more enjoyable.

While this climbing style is safe and accessible to most, we rank this location as intermediate due to the difficulty of the “problems” (routes). These problems typically range from V1-V12, which can be challenging for beginners. In this scale, V0 is the easiest (or VB for ‘beginner’), and the routes get harder as the number increases towards V12. Therefore, this is an excellent place to improve your climbing strength or challenge yourself on a tricky problem.

Red Rock Canyon Open Space – Sport Climbing

Location: 3550 W High St., Colorado Springs

Parking: Designated parking areas on the right side of W. High St. – Exact directions on Mountain Project

Approach: Find the trailhead by turning south from US 24 at the only turnoff between 30th Street and the first Manitou Springs exit.

Red Rock Canyon Open Space offers accessible and friendly climbing to novice and expert alike. With 80+ routes from 4th class to 5.13, there is a route for everyone. This area is primarily sandstone climbing with face holds, offering holds and movement very similar to gym climbing. Most climbs are bolted sport routes with lowering and rappelling anchors. 

NOTE: A free permit is required before climbing and is obtainable online. Be sure to watch the video on the climbing permit page, as this includes very important rules and regulations for the area.

Photo by Mark McGregor on Unsplash

Advanced Colorado Springs Rock Climbing

Cheyenne Cañon Park – Primarily Sport with Crack and Trad Options

Location: 4682 Gold Camp Rd, Colorado Springs

Parking: Enter near the Starmore Discovery Center, drive along the road, and park at various pullouts. There is also parking at the Powell parking lot on Gold Camp Road – See Mountain Project for more directions.

Approach: Most approaches are short and accessible from the parking lot or pullouts.

Situated in a narrow canyon with beautiful views, this fantastic granite crag contains a mixture of climbing styles. The options include bouldering, trad, and sport routes of varying difficulties. Although primarily a sport climbing location, there are a handful of crack climbs and trad routes offering a place to learn crack climbing techniques and trad climbing skills. 

This rock is also known to be of varying quality, so be sure to assess your routes. Cheyenne Cañon is an excellent option for hot days as it tends to stay cooler in the canyon shade. If you happen to be around in the winter months, this area is also known for its Ice Climbing.

NOTE: A free permit is required before climbing and is obtainable online. Be sure to watch the video on the climbing permit page, as this includes very important rules and regulations for the area.

Garden of the Gods – Great Trad Climbing

Location:  180 N. 30th St., Colorado Springs

Parking: Parking is available in the Visitor Center lots

Approach: From the parking lot along well-marked and traveled paths. See Mountain Project for specific route information.

Garden of the Gods is the most well-known rock climbing area in Colorado Springs. This area comprises beautiful towering sandstone formations with picturesque snowy peaks in the background. This area is well protected, so obtaining a park permit and learning about rules and regulations is mandatory before entering. 

While there are some beginner routes, this area is best known for traditional “trad” climbing – often reserved for advanced climbers only. Trad climbing grades range from 5.3 to 5.12. Climbing in this area requires advanced rope system knowledge, gear placement techniques, crack climbing skills, and more. Many famous and historical “test pieces” are available to measure your skill. While mostly known for traditional climbing, this area also offers bouldering up to V8 and sport climbing up to 5.13.

Photo by Sean Benesh on Unsplash

Final Thoughts

No matter where you go or what style you choose, rock climbing in Colorado Springs will be an unforgettable experience. Whether you are testing your abilities, trying out a new sport, going on a guided climbing tour, or searching for the perfect view, Colorado Springs will meet your needs. Grab a friend or guide, be safe, and climb on!