Winter Sports to Try in the New Year

With a brand new year and a ground blanketed with snow, there’s no better time to get outside and try out some new winter sports. Staying inside and making your way through the Netflix queue is an easy way to try and make the dark winter days pass, but you quickly feel the physical and mental effects. 

Getting outside in the winter is one of the best ways to stay in shape, and more importantly, stay mentally healthy. Downhill skiing and extreme winter sports can seem intimidating for anyone who isn’t accustomed to playing around in the snow.

The good news is that there are plenty of other great winter sports for beginners and experts alike to try for the first time this year. 

Start Slow

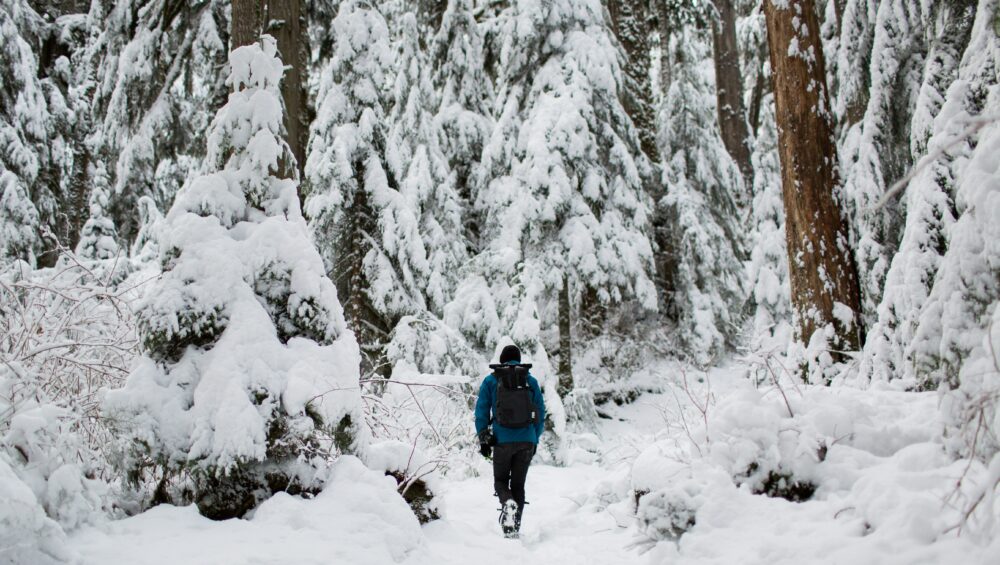
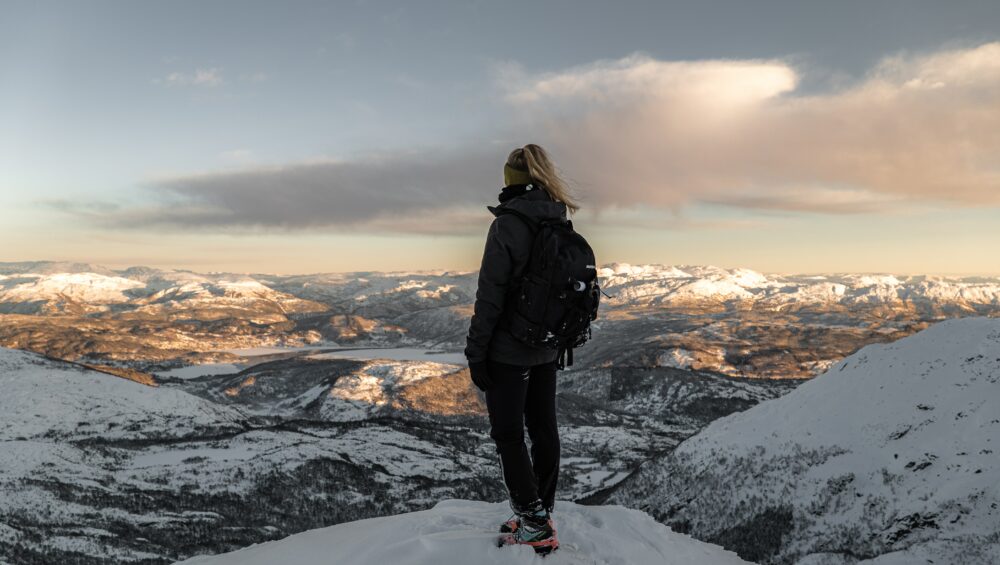
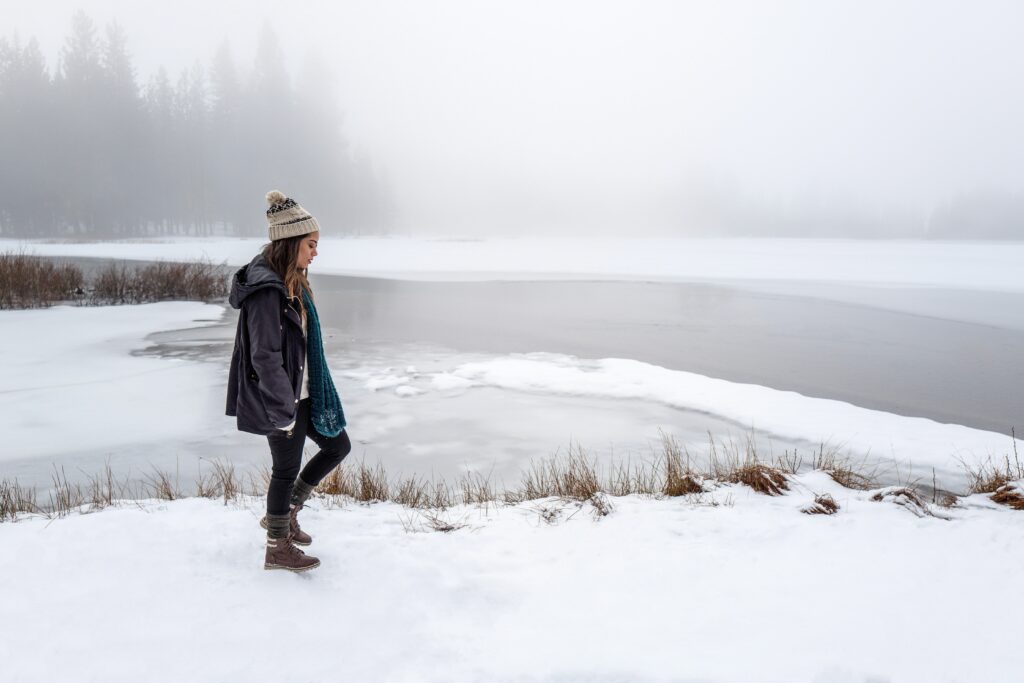
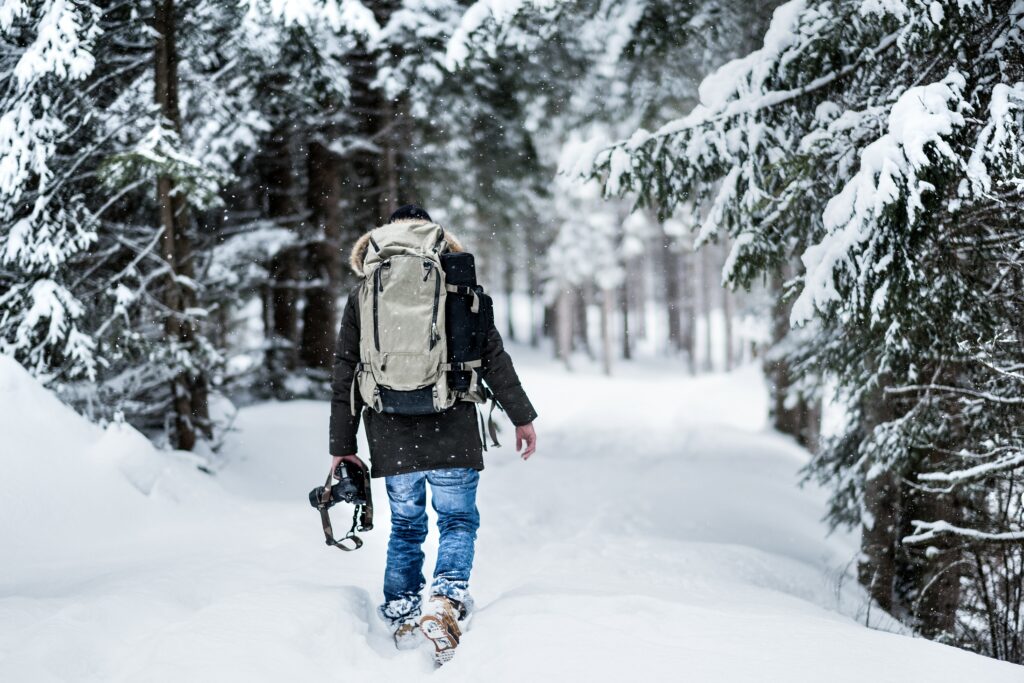
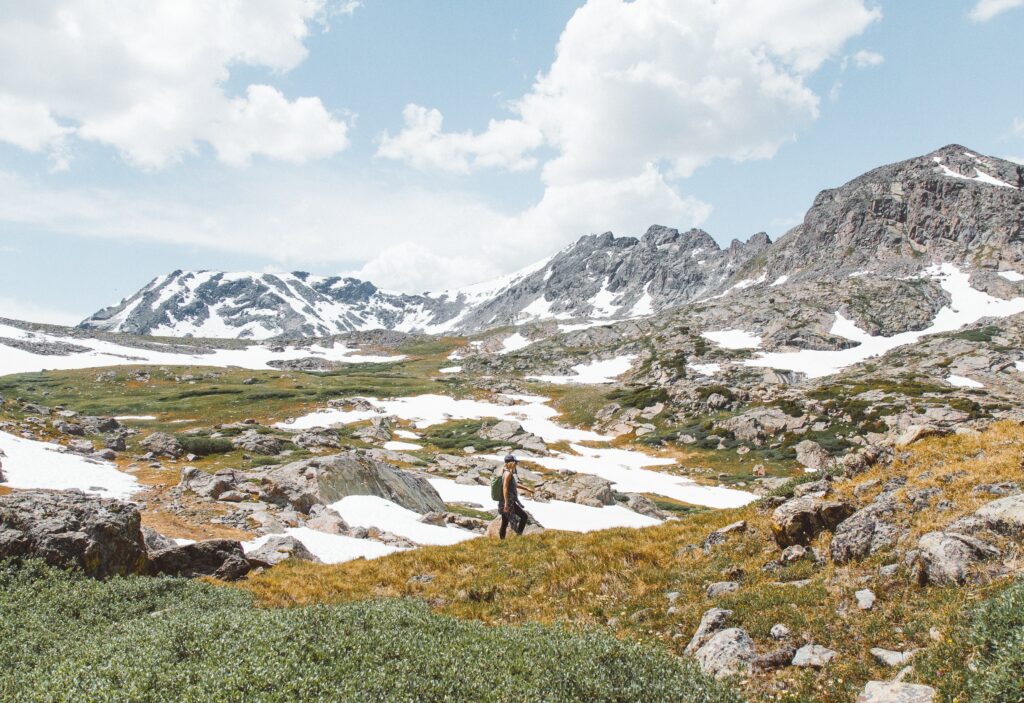
Winter Hiking and Walking

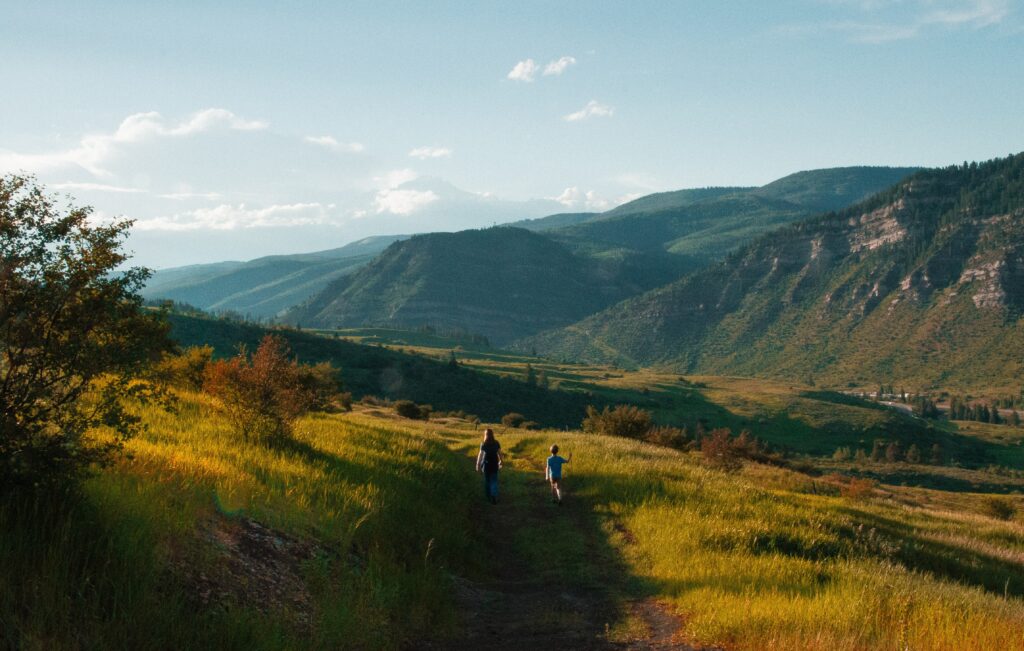
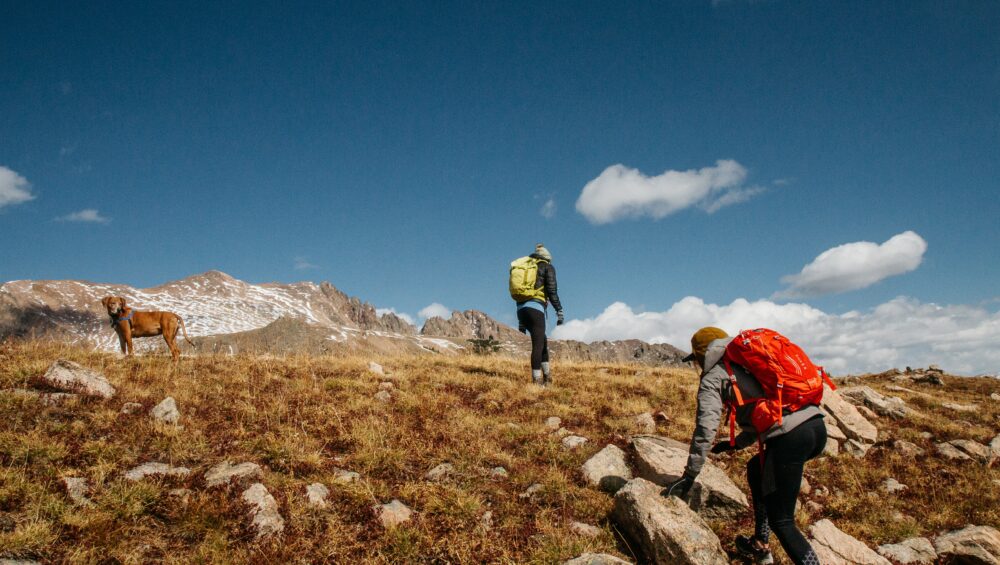
There’s no need to jump straight into bombing down the mountainside on a pair of skis or a snowboard. Simply getting outside to find a winter hike to try out is a great way to introduce yourself to a new winter snowscape. Get out on winter hikes with your friends and family, or even go solo in a well-maintained area to start. It’s great for all skill levels. 

A big part of starting new winter sports in the new year is learning to love the cold. You’ll often find yourself heating up as you start moving. Still, it’s an immense help if you can appreciate the ice-covered trees, frozen streams, and fluffy powder covering the ground—hiking and walking help get you in the right mindset for other winter sports. 

This is a great starter activity because all you need to do is learn how to dress for winter hiking, head to your closet, and straight out the door. There’s no complicated gear system or any technical skills you’ll need. Just stay in safe terrain on well-traveled trails, and you can start to challenge yourself from there. 

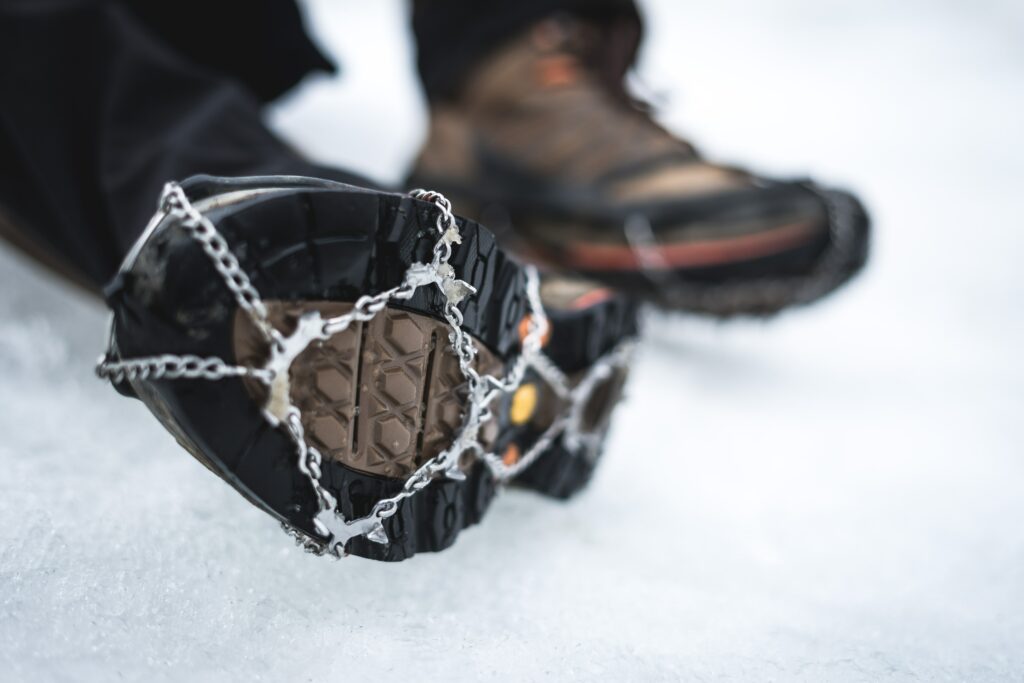
If you need a little extra traction as you hike, invest in traction aids like micro-spikes or yak tracks to give you more confidence on snow and ice-covered trails.
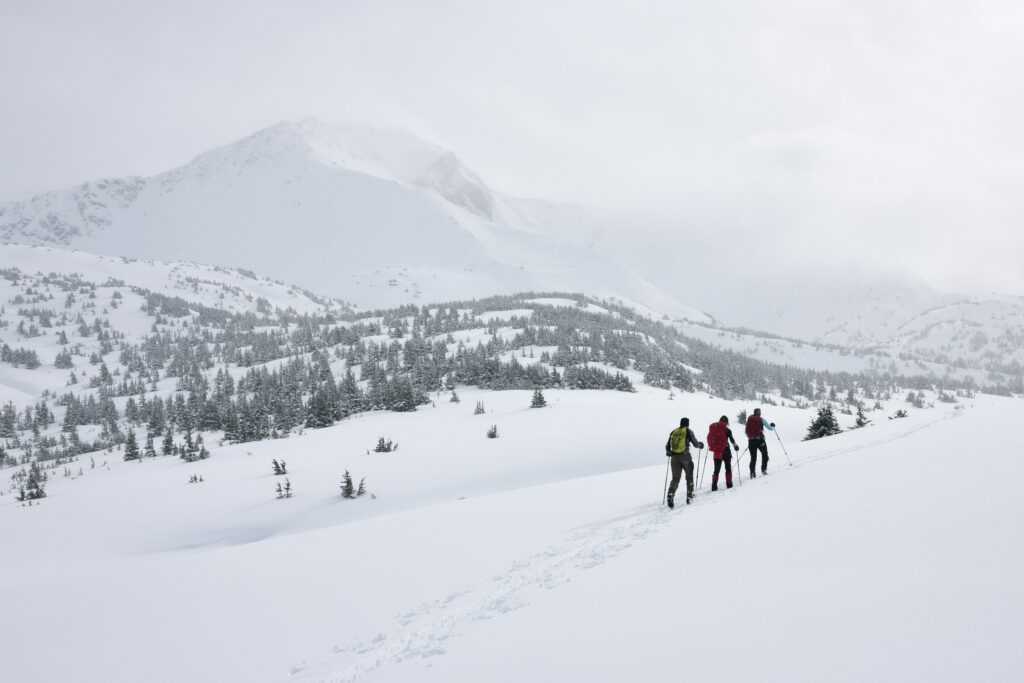
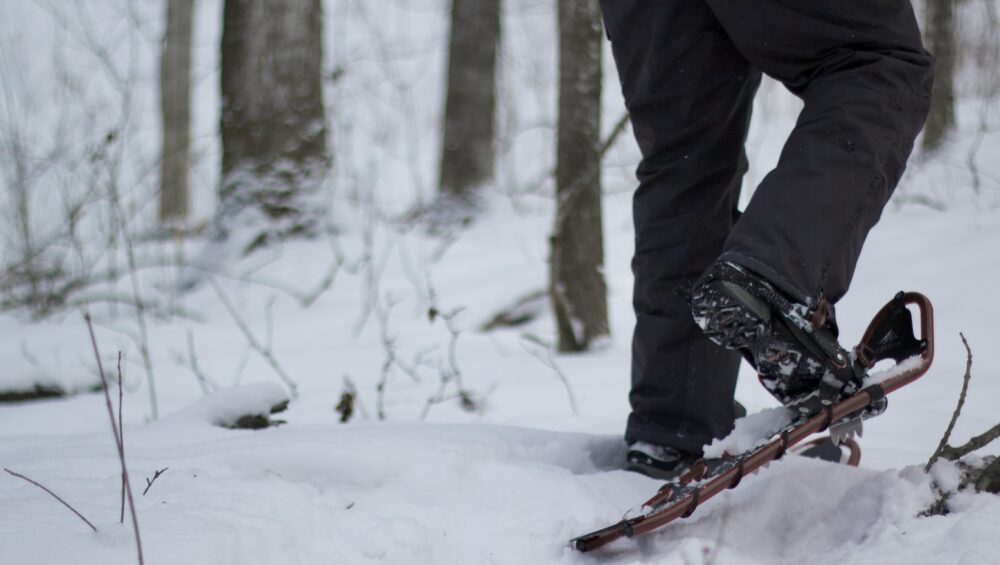
Snowshoeing

If you want to get deeper into the mountains, you may find that you start sinking in the snow. Flotation devices are common in the winter, and one of the most popular ways of staying above the snow is on a set of snowshoes.

Snowshoeing is an enjoyable choice with plenty of options of places to go. There are many winter activities in Colorado Springs, but with snowshoeing, you can explore the same trails you would in the summer but see them in a completely different light. 

Cross Country Skiing

Even if you have never been on skis before, you may find that you would love trying out cross country skiing. It can be a slow-paced sport, but it doesn’t have to be. This is one of the best winter sports for beginners because it keeps you warm and can be learned quickly. 

Once you start to feel more comfortable on classic skis, you can try out skate skiing. This is a much more active style of cross country skiing that will get you moving quickly and get a better aerobic workout than running in the summer. 

Photo by Tim Foster on Unsplash

Picking up the pace

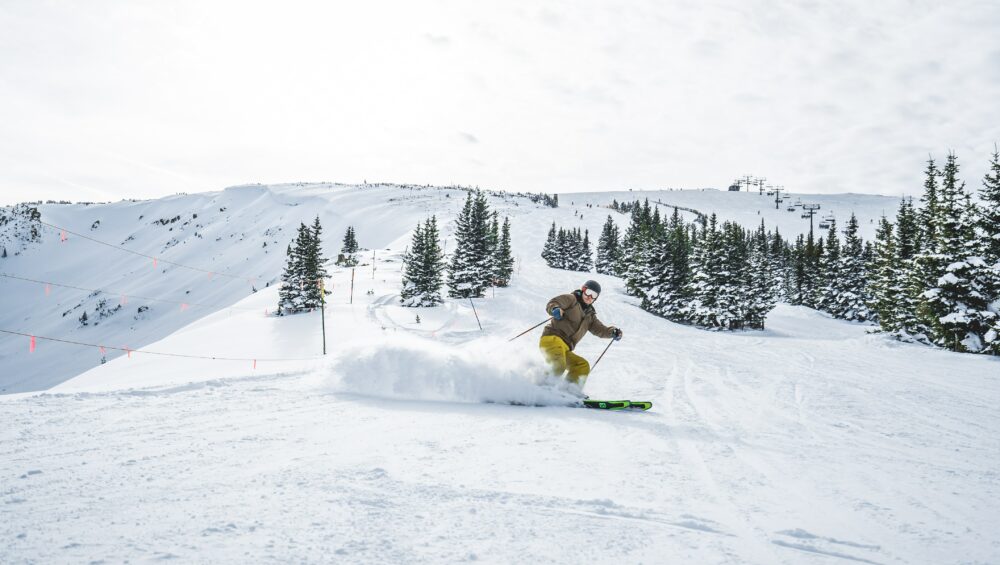
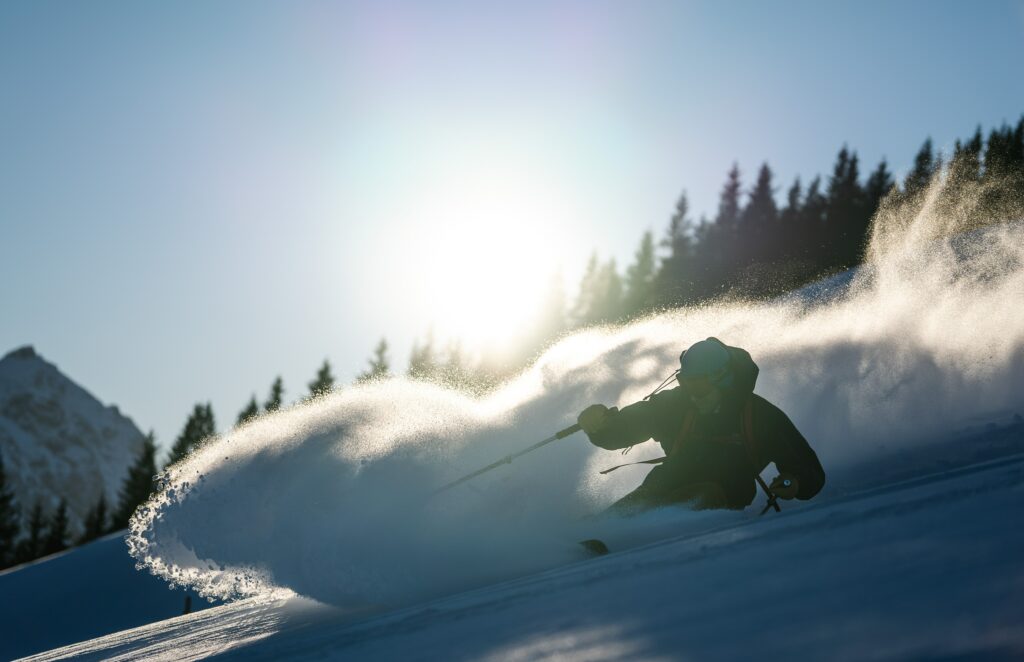
Downhill Skiing and Snowboarding

Downhill skiing, or snowboarding, is a great winter activity that doesn’t need to be incredibly fast-paced. You can start slow, and Colorado Springs is a great place to start from. There are plenty of local areas where you can find lessons with affordable rentals. 
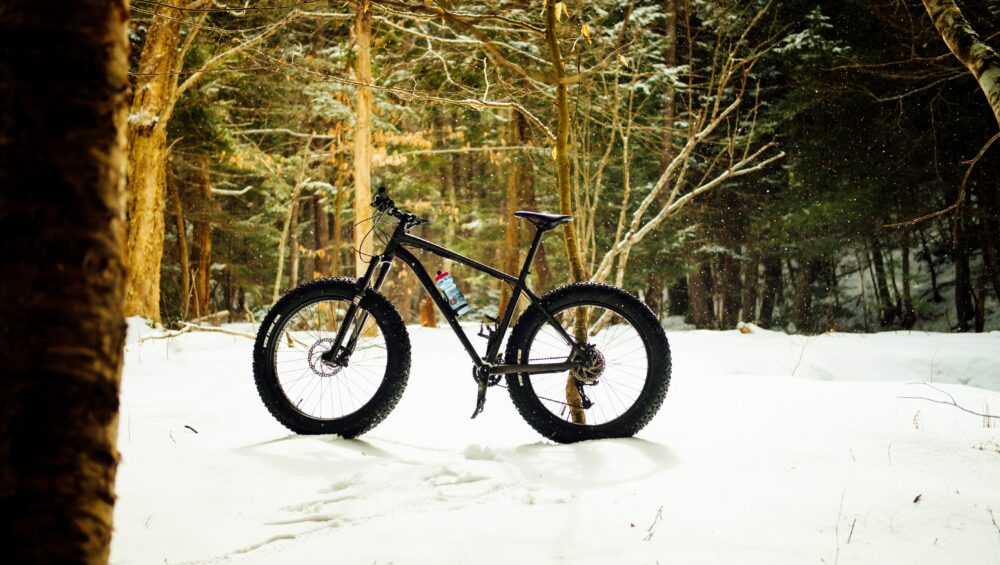
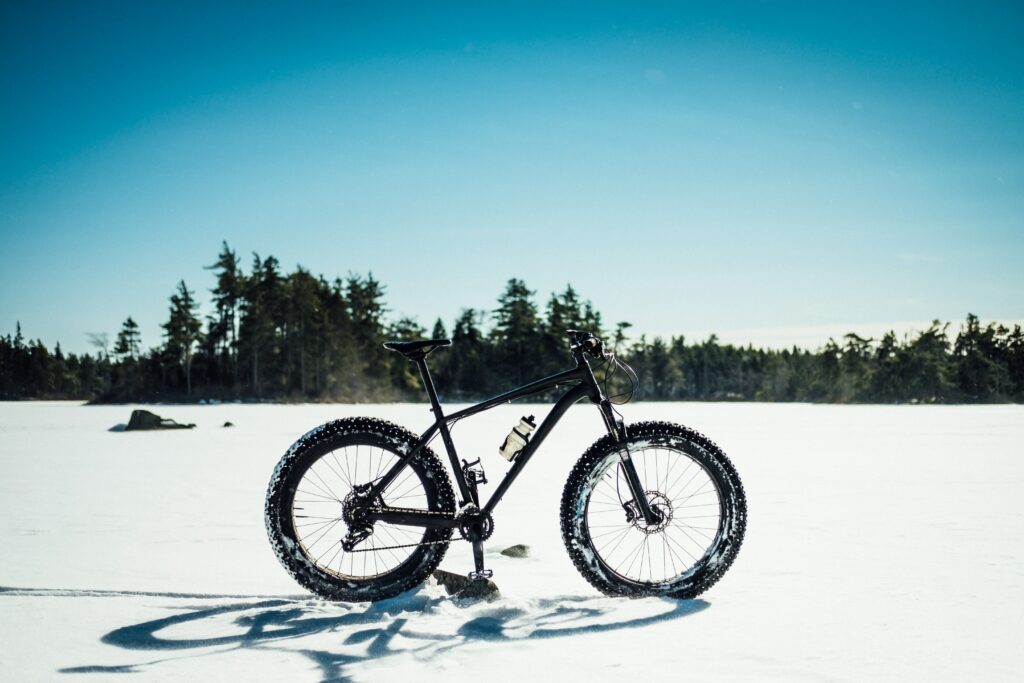
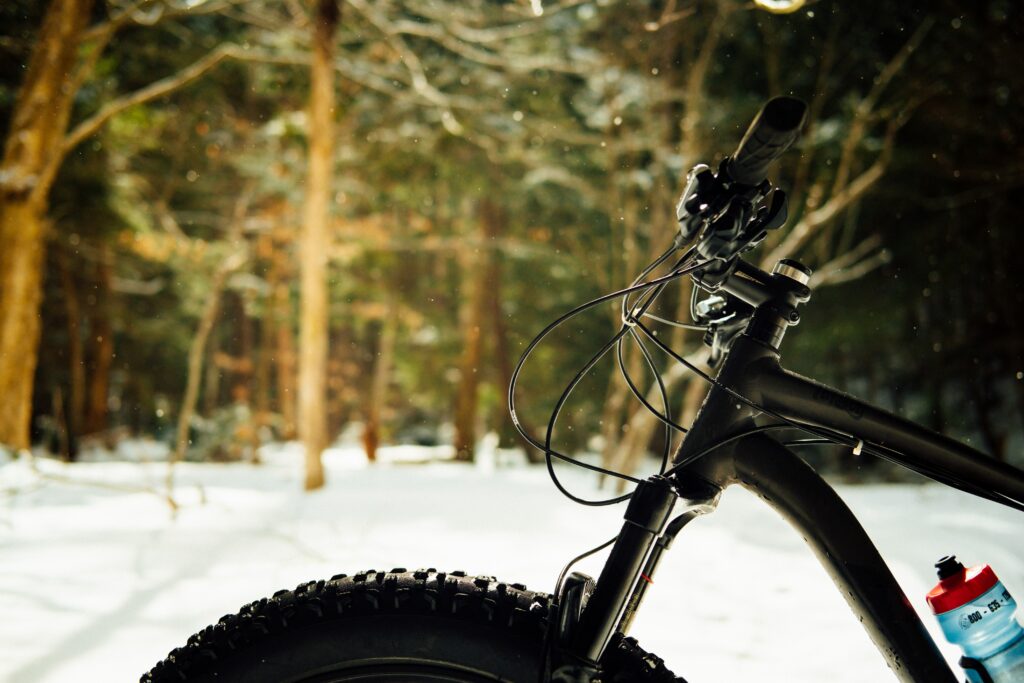
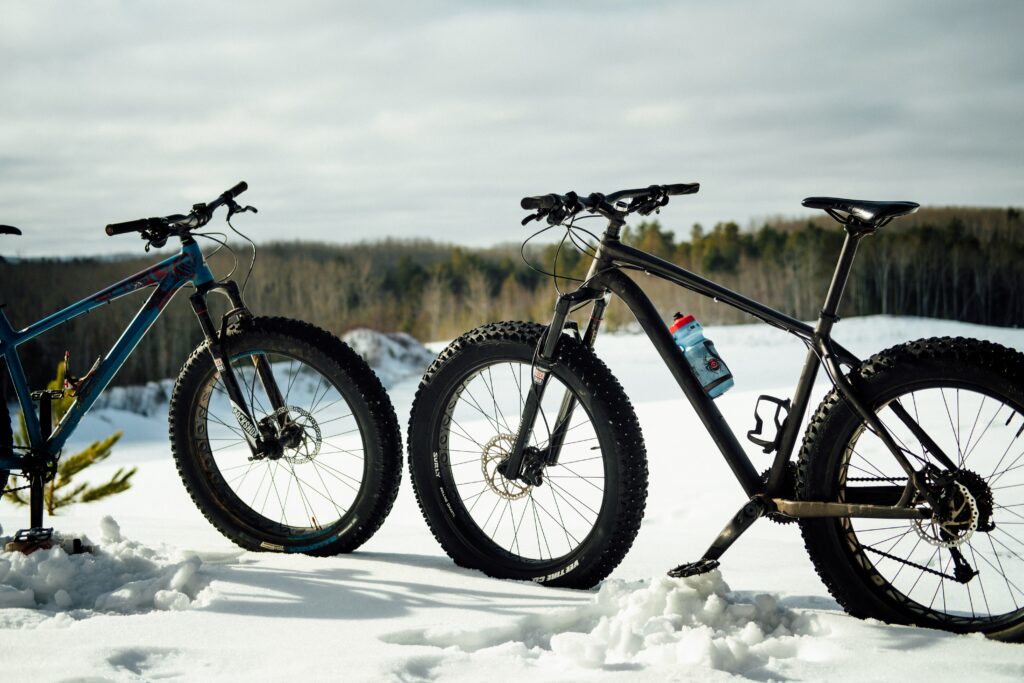
Fat Biking

Fat biking has become widely popular as biking technology has moved forward over the last few years. These bikes are designed with huge, fat tires that help to keep you afloat on top of deeper powder. 

You can travel on typical mountain bike trails in the winter with a fat bike, but you can also set out and explore other areas that you may not be able to access on a mountain bike in the summer. Fat bikes are also available to rent out from several different gear shops, so you don’t even have to invest in buying one. 
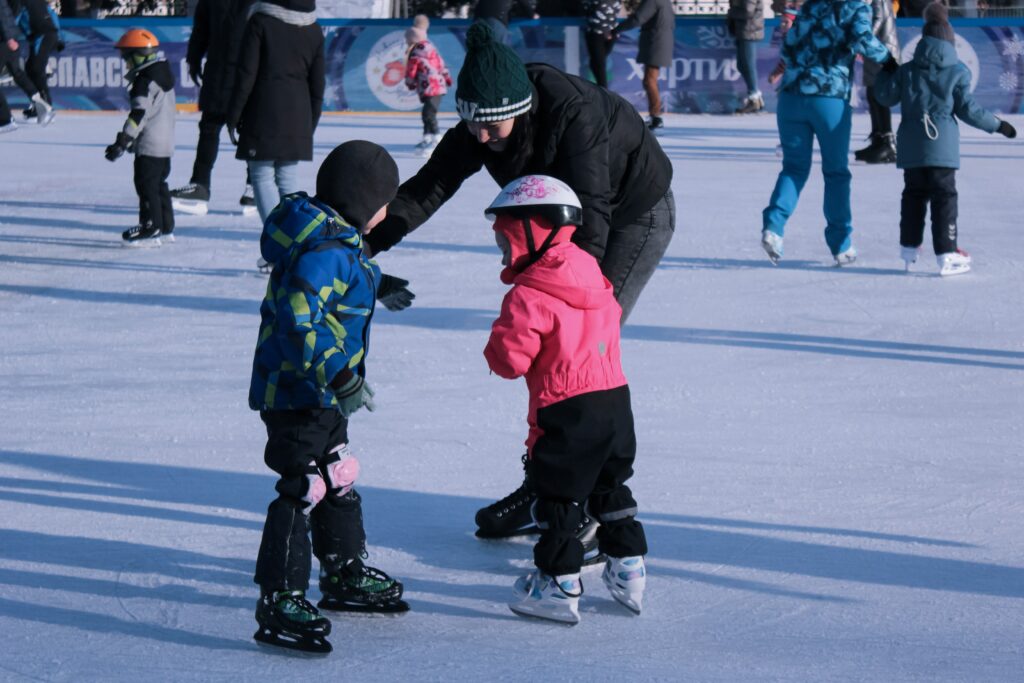
Ice Skating

Whether it’s on a frozen rink in the city or on a high alpine mountain lake, ice skating is a classic winter sport to try out. If you’re a beginner, it will take a good level of humility to be okay with falling and still getting back up, but once you get the hang of it, it can be quite fun.

Just be careful on mountain lakes if you are a beginner. It can be challenging to recognize safe areas with thick enough ice. Only go if you have someone experienced that knows how to determine the safety of the ice. 
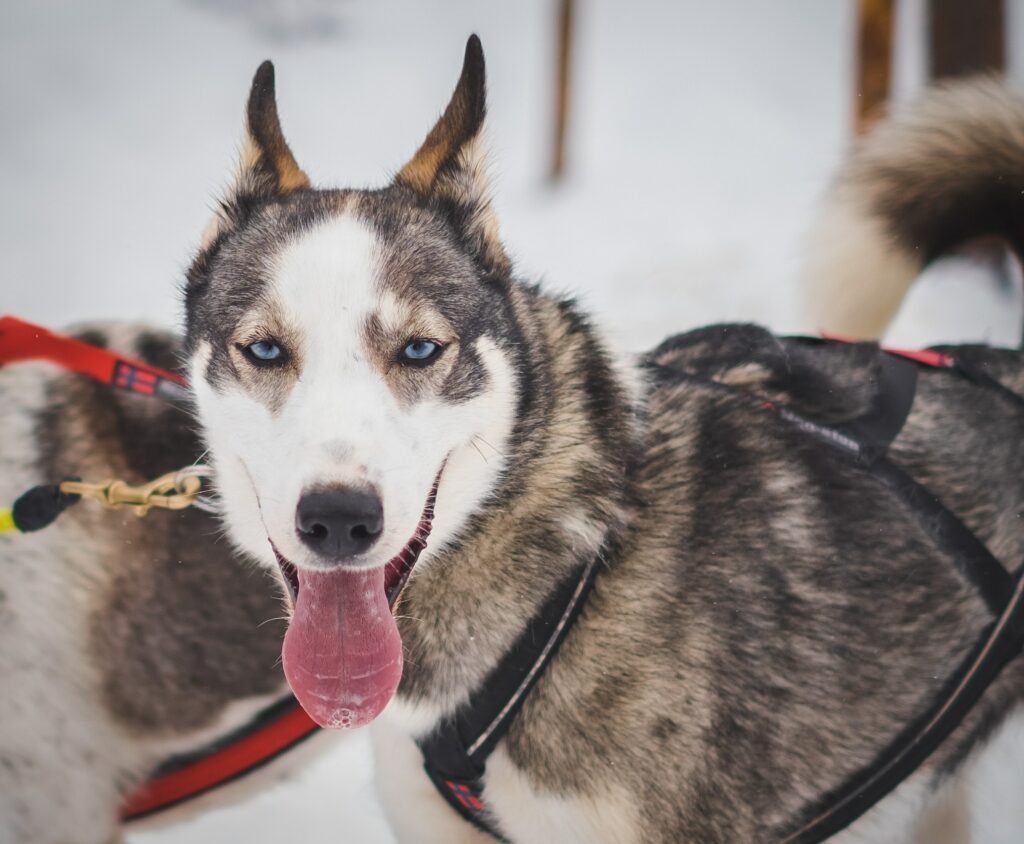
Dog Sledding

Dog sledding isn’t something that many people have access to where they live. Still, it can be an incredibly fun activity to try out if you find the right people to go with. Many professional dog sledders will offer lessons or rides at a price. If you love your furry friend as much as your human child, you’ll understand why this is such a popular winter sport. 

Skijoring

Speaking of your furry friends, skijoring is another fun winter sport to do with dogs, but it isn’t for beginners. Skijoring is a combination of dog sledding and cross country skiing. If you like skiing but hate doing all the work of moving yourself forward, your dog can help pull you forward. You do need a harness for you and your dog to get started, but if you already know how to cross country ski, and your dog loves snow, this can be a great new activity to try. 

Skijoring requires an active and enthusiastic dog who loves running and working hard in the snow. If your chihuahua hates to go out in the cold to use the bathroom, you may want to stick to classic cross country skiing this winter. 

Photo by Jérémy Stenuit on Unsplash

Full Speed Ahead

If you’re looking at this list and feel that you need more, check out the sports listed below. We would categorize these as being closer to the “extreme” (and maybe just bizarre) end of things.

  • Kite skiing
  • Ice yachting
  • Snow kayaking
  • Ice diving
  • Snow machining
  • Ice ballet

There’s something for everyone out there, as humans have become highly creative with what they can do when our world becomes blanketed in snow. 

5 Tips for Staying Warm on Any Winter Adventure

Hiking in winter can quickly turn south if you don’t head out prepared. Sometimes you feel warm and happy until you’re miles from your car and the deep, bone-crushing chill starts to settle down.

A successful winter camping trip, or any winter outdoor activities, rely upon staying warm. 

No matter the conditions, it’s possible to keep warm for a long time. You only need to know-how. Here are five time-proven tips for staying warm on any winter adventure. Happy snow days!

Get your body moving

One of the greatest fallacies of all time is that you can stay warm if you throw on the largest puffy jacket there is and sit still. The truth of the matter is that clothes don’t produce any level of heat. All they do is trap the heat your body produces.

The more you move, the more heat your body makes. 

During winter outdoor activities, your body becomes a furnace. You’re making the heat that will help to keep you warm. Plan a trip that will have your body constantly moving. You want to use all the energy you’ve stored over the holiday season and put it into productive, heat-blasting movement. 

The catch is, you must be careful with how intensely you move. Moving uphill quickly, or putting high cardio levels into your day, can soon lead to sweat. In the winter, sweat is no longer your friend; it is exactly the opposite. Getting wet will increase the speed at which your body enters hypothermia. So, keep your movement consistent, but pace yourself and stop before you start to break a sweat. 

“Be bold, start cold”

The way you dress is also incredibly important for winter hiking. It will always be tempting to start hiking in a puffy jacket and thick fleece pants.

Why not, right?

It’s cold out, so you may as well be warm. Unfortunately, this is one of the quickest paths towards making yourself drastically cold. 

Experienced hikers and winter campers like to say, “be bold, start cold.” What they mean is, if you start hiking with fewer layers, while a bit cold, you’ll quickly warm up and thank yourself for dealing with the cold for a short period. 

Starting cold will help you to manage the sweat situation. When you stop, remember that all of the heat will be quickly sucked from your body to the cold air around you. Have a jacket handy that can be tossed on as soon as you stop moving to help trap the heat. Before you get going again, throw that jacket back in your bag, and then can you start hiking again.

Eat… a lot

Every furnace needs a fuel source. The more you feed the furnace, the more heat it can produce. What we’re saying is, here is the perfect excuse to load up on as many calories as humanly possible while hiking. 

Foods with high fat and calorie counts are optimal for winter camping. Butter becomes your best friend. Extreme mountaineering trips rely on a hearty stash of butter worth every ounce that it adds to a pack. If you aren’t into eating butter without pause, try eating a spoonful of peanut butter before sleeping and reap the warmth and benefits. 

Do your best to take a break from any eating restrictions you may have while at home. Hiking in general demands that you eat far more than normal. Hiking in winter means doubling the daily calories, not worrying about sticking to your New Year’s resolution. This is where brownies become an acceptable and encouraged breakfast food.

Hydrate, hydrate, hydrate

The outdoors can quickly make you tired of hearing people tell you to drink water over and over. It seems to be the only solution to every problem you encounter. People are telling you to drink water to avoid overheating, drink water if you’re sick, drink water every time you breathe, and so on. That being said, if you want to stay warm, drink water.

The trickiest part of drinking water in the winter is wanting to. It seems counterintuitive to drink cold water while it’s cold outside and you want to stay warm. There are a couple of reasons why dehydration can be even more dangerous in the winter than normal temperatures. 

First, your blood relies on hydration to help move heat from your core out to your extremities. With less water in your system, it struggles to move heat around the body, resulting in cold fingers and toes that you may not even feel anymore. 

Not only do you need it to stay warm, but it’s also essential to drink water because you may not even realize that you’re getting dehydrated. Most people associate dehydration with sweating profusely. Contrary to popular belief, we lose most of the water in our bodies through breathing. In the winter, the steam that leaves your mouth is precious water quickly leaving the body.

One of the most helpful tricks to staying hydrated and warm is to bring a Thermos. It’s heavier, but it can often be a game-changer. Warm drinks like tea or hot chocolate will work to hydrate you and provide a separate heat source. It’s one of the few things that makes it easy to forget about weight. 

Bring extras

Extra socks, hats, and gloves should be in every winter camper’s backpack. These are some of the easiest pieces of gear to misplace or get wet. The moment your beanie is gone is the moment you start to lose a considerable percentage of heat. 

Having extras will allow you to keep warm and, more importantly, stay dry. If you get extremely cold feet, try changing socks halfway through the hike to get rid of all the sweat and cold that comes along with it. 

How to Set Up a Tent in the Snow

A winter camping trip brings about a massive list of perks and small adventures. A short, mile-long trek can quickly turn into hours of tromping through deep snow and laughing with each other as you posthole your way to camp. It’s a trip to be remembered, and if you want to remember it fondly, you need to come prepared. 

Your general skills and knowledge will go a long way when you try to get comfortable in a winter wonderland. If you’ve already figured out how to dress for winter hiking, it’s time to continue adding to your toolbox. 

One of the first steps in the entire process is setting up a tent in the snow. It’s a task that becomes drastically different once the snow hits, and you’ll be developing a brand new set of skills than those you need in the summer. 

Site Selection

Once you’ve arrived at camp, it’s time to look around for the best tent site imaginable. The snow brings a lot of new elements you need to navigate to stay safe while asleep at night. In the summer, it’s watching out for bears or other critters, while in the winter, you’re watching for avalanches. 

Pick a site as far as possible from any slopes, and therefore any avalanche potential. Even a lower angle slope can be triggered at night, leaving you to wake up partially or fully buried. A safe winter camp is far away from any possible avalanche terrain. Even if you’re planning on going up the mountain in the morning, basecamp should be a safe distance from any potential slides. 

Another hazard you need to watch out for in the winter is snowfall from trees. If you’re below the treeline, pay even closer attention to what’s above you. Dead trees are less obvious to spot in the winter, and you now need to watch out for trees that may break under the weight of snow and ice. Even the snow sitting on those branches can be dangerous if it’s filled with ice. 

If you’re sleeping in an area with a large amount of snow, you’ll need to consider what’s underneath you. At higher altitudes, you’ll often be sleeping multiple feet above small trees and bushes that have been buried. The plethora of landscapes you can find below the snow can lead to one major issue.

Depending on how the snow has packed down, you may be on top of some voids that are waiting to collapse inward. If this happens while you’re sleeping, you’ll wake up a few feet lower than where you started and probably covered in a decent amount of snow. To avoid this nighttime disturbance, probe around and try to find a spot that seems like it’s above flat ground rather than rocky terrain. 

Pack it Down to Put it Up

Now that you’ve found a spot, it’s time to make the footprint. If you’ve been hiking in snowshoes, you’ve got the best tool for the job strapped onto your feet. Using the snowshoes, stomp around and flatten out the ground where you will soon put the tent. This will help create a more stable, flat surface where you can sleep. 

Expand the footprint out a bit past where the tent will go. This will give you some more stable ground to walk around on. Be careful when you get out of the tent at night for the bathroom, as it’s easy to forget you’re in the snow and will soon be up to your waist in it. 

The snow shouldn’t pack down any further when you start to walk around on it. Remember, this is where you’re sleeping. You don’t want to start sinking while you sleep. 

Once your area is fully packed down, you can set up your tent. 

Tent Setup

In general, a freestanding tent is better than relying on a staking system. With a freestanding design, you don’t need to worry about staking out the tent without access to solid ground to hammer a stake into. Snow can be tricky to work with, but it can also be incredibly useful. If you’re looking to use a tent that requires staking, look at snow tent stakes. 

These stakes are ingenious. First, you dig a small hole and place the stake horizontally in the snow. After you’ve attached your tent line, you will pack the snow down onto the stake firmly to cement it into place. 

The only drawback to this kind of stake is that they can be difficult to remove in the morning. If there has been any level of melting and freezing overnight, they may be inside a solid block of ice that you’ll need an ice ax to get through. 

Set up Your Dream Camp

According to Leave No Trace, snow is the most durable surface you can travel on. This is because it will melt and disappear without a trace of you present. This means that you can do just about anything with your camp in the snow, and you won’t be creating a huge impact. 

With enough snow, time, and shovels, you can create benches, tables, and full-blown snow castles to enjoy your time in. Whatever you can imagine, you can create. This is one of the best things about winter camping. You’re able to create an entire kingdom in the snow without needing to worry about ruining the campsite. It also makes winter camping a fun-filled activity to do with kids. They get to create their winter wonderland, where they can stay overnight. 

Can You Mountain Bike in the Snow?

The appearance of snow on the ground often covers the dirt tracks that we live to ride during the rest of the year. The disappearing trails will move most to put their mountain bikes away for the season and pull out skis or snowboards as a replacement. What many people can often look past is the joy of mountain biking in the snow and how it brings an entirely different level of enjoyment to the sport. 

Winter mountain biking can be challenging for those who struggle with the cold. Many recent trends point towards needing a fat tire bike to go out biking in the snow. Fortunately, you don’t need to make a considerable purchase to go out riding all winter long. With the right precautions and winter biking tips, you can spend beautiful snowy and bluebird days on your bike doing what you love most. 

Photo by Tim Foster on Unsplash

Keep a good attitude

First and foremost, keep your spirits high. Of all the winter biking tips you read, keeping a smile on your face and a resilient attitude will be the most important.

Your winter ride will be slower and most likely filled with a fair number of falls and slides that will get you cold and wet. Regardless, this can be the most fun you’ll have all winter if you remember to keep smiling and focus on the positive.

Lower your tire pressure

If you’re feeling strapped for cash or want to try mountain biking in the snow without spending a huge amount of money on a fat tire bike, you can start by letting some air out of your tires. Take a look at the sidewall of your tires and find the lower number on the pressure range, then drain the tires to that level.

You’re going for more surface area and contact between your tires and the ground. One great way to do this is to lower your tire pressure and let the tires sag a bit more, and hug the ground. 

The biggest thing to look out for when flattening your tires is pinch flats. A great way to avoid this easy problem is to go tubeless. Tubeless tires are relatively new, and replacing the tube with a sealant makes getting a flat much harder. Not only is that great for lower tire pressure, it means you’re much less likely to get stranded on a snowy trail in the middle of winter!

Widen your tires

Winter mountain biking may be your next big sport, and you may feel that it’s worth it to invest. In that case, buying a fat tire bike is the best way to truly enjoy the snowy drifts that the winter months have to offer.

The wide tires on these rigs allow for more surface contact between the bike and the snow. That way, you’re able to float on deeper powder and slide less. It’s pretty much guaranteed that you’ll slide around a bit while biking in the snow, but this way, you can control it some more. 

That being said, fat-tire bikes are expensive. They aren’t totally necessary, and you can bike without them. They’re also incredibly fun to ride and shift the experience to a much easier ride. 

Photo by Tim Foster on Unsplash

Opt for flat pedals

Clip-in pedals aren’t the best option for cruising on slippery trails. You’re going to do some sliding, which means you’ll need the option of throwing a foot down for stability much more often and faster than normal. With flat pedals, you can get a foot in position quickly and keep yourself upright.

Steel-pin flat pedals allow for the extra grip that is mighty helpful in the slick and icy winter. They’ll give you plenty of traction and the ability to dismount. They also allow for a lot more space, which means the potential for bigger, warmer boots is there. Even riding at your hardest, it’s likely to result in cold extremities if you’re tackling trails in the dead of winter. 

Pay attention to trail conditions

One of the most important parts of riding in the snow is getting to know what you’re riding. True, you can go out and check the trail conditions firsthand, but you may want to save yourself some time and choose the right trail from the start. 

With winter mountain biking being one of the most popular winter activities in Colorado Springs, you’ll be able to find loads of trail information on the web. Mountain biking forums and Facebook groups will certainly have someone on them that has checked out the trail before you have. Use their experience to your advantage and look around before throwing your bike on the car and heading out. 

What you’re looking for is a beautiful snowpack that either allows easier access to the ground or a hard pack of snow. In the middle of winter, you’ll be more likely to find the latter. 

Two to three inches of powder is ideal for biking in the snow. It gives you a nice layer of snow to cruise through but allows some interaction with the ground. As it starts to warm up or the snow gets too soft, you may spend more time picking yourself up than biking. The softer the snow, the more your bike turns into a sled.

Trails that take you on a cruise and slightly hilly rides are much better than those that demand steep climbs and fast, aggressive descents. You’ll find your tires slipping as you push to climb, and the moment you hit an icy patch on the descent will be the end of your riding for the day. Choose a moderate trail that will let you stay on flatter terrain. 

How to Dress For a Winter Hike

When the sun is shining, the birds are chirping, and the breeze cools your skin, it’s easy to get outside. Hiking in the winter can be a completely different game. The cold, snow, and often the wind can all come together and make it difficult to motivate yourself to shut Netflix down and head out on the trail. If you are a beginner, be sure to check out guided winter hikes and get a feel for what it’s like before heading out alone!

Your biggest key to success in those cold dark months is learning to wear hiking in the winter. A wardrobe that keeps you warm and dry can be a complete game-changer. It turns a cold and miserable day into a pleasant tromp through the wilderness with breathtaking, snow-capped vistas every way you look. Winter hiking is personally one of my favorite things to do, incredibly as the trails clear of their typical summer crowds and the world seems a bit quieter altogether. 

Dressed in the proper attire, you will end up barely noticing the cold, and soon it can be just you out there trekking through the snow back to your cabin with a warm mug of hot chocolate waiting. 

Photo by Elijah Hail on Unsplash

Layer up

Layering for winter hiking is an absolute must if you want to do it right. Layering allows for temperature regulation that you don’t get from wearing your heaviest coat with a t-shirt underneath. The goal is to add and remove layers as you like. When you stop, it can be easy to want to sit and cool down, but immediately throwing a layer will help trap all the heat your body is producing. 

It helps to think about your body as a furnace. The more you move, the more heat it will produce. When you take layers off, it’s like opening up all the windows. When you’re moving, it’s okay because the furnace is still pumping at its top-notch. Once you stop, the furnace stops, and the heat starts to disappear through those open windows. If you shut them too late (adding a layer after cooling down), your furnace is still shut off until you start hiking again, and it will be tough to warm back up. 

In all honesty, dressing for winter hiking isn’t that different from prepping for some other seasons. It can be similar to what to wear hiking in the Fall, just with a few more mid-layers and remembering to take extra precautions all around.

Get the right shoes on

When the winter comes around, tire shops rejoice because everyone is prepping and putting brand new winter tires on their car. Hiking in the winter should be no different than driving. You need the right shoes for the job. Snow and ice interact with the bottom of your feet much differently than dry dirt or mud. I strongly recommend against going out on a trail with your summer sneakers or even summer hiking boots. They simply don’t have the proper insulation or traction.

One way to add traction is through additional traction devices designed to dig into the snow and ice rather than interact with the surface. YakTrax and other versions of microspikes act like a lighter version of crampons used for mountain climbing. There are great traction devices for hiking, trail running, or running in the city. 

Not only is traction a completely different game, but your feet are also prone to getting much colder, much faster, in the winter. The ground is essentially a heat vacuum, sucking all of the warmth through the soles of your shoes away from your feet. Winter boots have a thick insulating layer in the sole that helps to reduce this heat loss. They also are better insulated all around, ensuring that the heat your feet make stays in the boot. 

Protect your extremities 

Boots are one way to help your feet stay happy and healthy during winter hiking. Feet, toes, and fingers are often at the highest risk of developing frostbite due to the poor levels of circulation and presence of fat in them. That means we have to take extra steps to protect all of our extremities. 

To protect your feet, wear wool socks, or at the very least, wear synthetic socks. Thick wool socks help provide a huge amount of insulation, even if your feet get a little bit wet. Make sure that the thick socks don’t make your boots too tight, as that can quickly lead to a cutoff in circulation and a faster route to frostbite.

Pack at least two extra pairs of socks, and change them halfway through the hike to make sure your feet are dry. In the winter, dry means warm.

Fleece or wool mittens with an outer waterproof layer are the best moves for the hands. I also bring an extra pair of mittens if the interior layer gets wet while I’m out there. 

Included on the list of extremities will be your ears and nose. These spots are also highly susceptible to frostbite or at least frostnip. They can be easily forgotten when dressing, but you’ll feel them get cold quickly on the trail. You can wear a neck gaiter with a fleece layer that covers your nose and cheeks with a hat or headband to take care of your ears. An easy cover-all is a balaclava, but I like to wear these in the extreme cold and add a layer for more ears over that. 

Everything else we’ve all forgotten

Other items to check off your list before hiking would be:

Sunglasses and sunscreen: The sun can be brutal in winter, especially when the snow reflects it. 

Gaiters help keep snow out of your boots and, therefore, keep your feet dry. 

Batteries die much faster in the winter as the cold will drain them. Bring spares and keep the ones you have close to your body. 

Headlamp: Daylight is sparse in the winter, and it will sneak up on you if you aren’t ready for it. Always have a headlamp, so you don’t get stuck in the dark. 

Is It Safe To Hike in the Winter?

Blankets of snow are starting to cover the ground, tucking the world in for a long winter break. Getting out on the trails we have become familiar with over the summer and fall automatically becomes a much more difficult task. Not only are they harder to find, but it can be tremendously difficult to motivate yourself to get out and hike in the winter. There are many steps to getting ready, and the experience is entirely different. 

With the right winter hiking safety tips, you can step outside with the same confidence you take in the summer. A lot of people talk about seasonal depression happening over the winter. Still, the real secret is, getting outside and hiking in the winter is a magical experience that will keep you fit and happy. 

This guide to winter hiking will bring all of the safety tips you need to get up and out with a completely different attitude about winter. 

Photo by Sead Dedić on Unsplash

Winter Hiking Safety

For starters, it’s important to point out that some aspects of winter hiking are the same as going out in the summer. You need to go prepared, check the weather, bring all the proper gear and follow the trail you choose.

While the general ideas are all the same, some specifics make hiking in the winter a completely different game. 

Check the weather

Winter weather is a tricky beast that can sneak up on you anywhere, especially in certain parts of the mountains. You are cautioned against lightning storms and heavy rain in the summer, but the winter brings whiteout snow blizzards that can sometimes last for days. 

Don’t only look at the weather that’s coming, be aware of what the past few days have brought as well. If there was a fresh dump of several feet of snow, it might require taking extra gear or precautions before hiking. A huge snowfall also means increased avalanche risk, so adjustments need to be made to your hiking route. 

When you look ahead at the weather, it can be incredibly tempting to get excited about the first sunny and clear day that winter has brought you after many clouds. What can easily go overlooked here is that clear skies often bring frigid temperatures. Those clouds you hated so much we’re holding the heat in, and now it all has gone. 

So, while the sun can feel like the greatest gift possible, it can also bring some dangerously low temperatures along with it. Don’t forget to pay attention to all the aspects of the weather, not just the little emoticon they paste in by the day of the week. 

Time your hike with the sun

Colorado is chosen by winter lovers all around because of the number of bluebird days it gets. The snow seems to magically appear overnight and leave by the time you wake up, leaving you with fresh snowfall and a bright blue sky to enjoy it under. 

As we get closer and closer to the winter solstice (December 21), the days are getting shorter and shorter. Colorado’s shortest day of the year will see only 9 hours and 21 minutes of sunlight. This is a drastic difference from the longest day of the year, where we see just under 15 hours of daylight every day. 

On top of the fewer hours of sun, the snow can make things a little trickier as well. As the sun sets, there can be an onset of “flat light,” which makes it much more difficult to see the texture of the snow and where there are bumps and grooves, making hiking in the snow a bit more difficult.

Timing your hike with the sun in the winter is incredibly important. Start your hike right when the sun comes up, and make sure you can get off the trail before the sun comes down. It will limit the length of your hikes, especially as you tend to move much slower while trudging through knee-deep snow than you can in the summer. 

Stay hydrated

One of the more challenging winter hiking safety tips to follow is to stay hydrated. No one in the world wants to drink the cold water from the cold water bottle on the exterior of your pack when hiking in the cold. Everything at this point is simply cold, and we’re trying to avoid that.

Well, yes, we’re trying to keep as warm as possible when hiking in the winter. The problem is, you need to stay hydrated to stay warm. Proper hydration allows for your blood to flow around your body smoothly. Your fingers and toes need as much blood as they can get in the wintertime to avoid getting dangerously cold. 

If you’re hiking in the extreme cold, you’ll run the risk of a water bottle freezing while you’re moving. Try wrapping your Nalgene in a wool sock to insulate it. Also, remember to buy an insulating hose cover for your water bladder. Otherwise, the water may freeze in the hose and make drinking is impossible. 

One way to stay hydrated without having to sip on one giant ice cube is to bring a thermos. They may weigh a bit more, but hot liquids will help warm you and make hydrating much more enjoyable. A cup of hot tea on the trail is one of my favorite things about winter hiking. My thermos becomes one of my best friends, going everywhere with me, even into the deepest parts of the winter backcountry. 

Try bringing tea, hot chocolate, spiced chai, or hot cider. The drinks that bring warmth along with calories are a bonus. 

Load up on Snacks

Working through the cold, your body will need to use a significantly higher number of calories to stay warm. That means that hiking in the winter is the greatest excuse this world has ever seen to snack like it’s the last day on earth. Bring all kinds of snacks along with you, especially those you don’t usually let yourself have. 

Calorie-dense snacks that you can eat while you hike are optimal for winter hiking. You can get the 280 calories that a Cosmic Brownie has to offer while on the move. Stopping often means letting your body cool down, especially if you’ve followed the old-time rule of “be bold, start cold.” 

Not only will you feel much colder if you stop more often, but it’s also harder for your muscles to start warming up again after you’ve stopped. That means making your hike even harder on yourself. Eat on the go and forget about whipping up a trailside feast while hiking in the winter. 

Dress the Part

The clothes you choose to wear out are one of the most important parts of winter or any hiking. Knowing what to wear hiking in Colorado is a skill that needs to be mastered all year round but becomes even more important when the cold sets in. 

Utilize the layering system to prepare yourself for the stop-and-go moments of a winter hike. You can throw another layer on quickly when you stop, doing so before you start to feel cold, and take it off right when you start hiking. Layers allow for more controlled temperature regulation while hiking, and that’s an essential aspect of being outside in the winter. 

The main difference in dressing yourself in the winter is that you need to remember to dress your hands and feet. The cold can make your toes and fingers highly susceptible to injury, and wearing the best socks, shoes, and gloves can be a lifesaver. Wool is the winter hiker’s best friend, as it won’t hold sweat and keeps you warmer than most other fabrics. 

Photo by Patrick Schneider on Unsplash

Winter-Specific Safety Risks

There are some specific risks that you will inherently take by being outside in the winter. This is one of the biggest reasons we highly suggest going on any guided winter hikes before setting out on the trail by yourself. If you’ve never hiked in the winter before or maybe want some more experience at it, these guided hikes are one of the best ways to get the knowledge and skills you need. 

Avalanche Risk

Snow-capped peaks are stunning to see and photograph, but they can also be unforgiving. One of the more dangerous aspects of winter hiking is entering into avalanche terrain without knowing it. Avalanches are widespread in Colorado, and the past couple of years have been considerably more dangerous than others. This is only one of the many reasons everyone who goes out in the winter should be well-versed in avalanche safety. 

If you choose to go without a guide, we highly recommend taking an AIARE (The American Institute for Avalanche Research and Education) Level One course before heading into the mountains. This course teaches you how to identify avalanche terrain, what factors increase the risk of avalanches, and how to stay safe in the backcountry. It also is a great resource to learn how to use avalanche safety gear to save yourself and the partners you hike with. 

One of the best things you can do is check conditions before heading out. Avalanche.org is a fantastic resource that shows you the level of risk in particular areas. The trick here is knowing what you are looking for, which brings us back to taking an avalanche safety course. 

To attempt to provide you with enough information about avalanches to provide the level of safety needed. What I can say is, be careful and stay out of avalanche terrain unless you genuinely know what you are doing. There are plenty of beautiful places to go with little to no risk of avalanches. 

Hypothermia and Frostbite

Cold injuries are much more common than we give them credit for. Hypothermia and frostbite are the most common and most well-known cold injuries, but conditions such as Chilblains can happen more quickly and more often. Chilblains is the inflammation of blood vessels that results in swelling, pain, and itchiness from cold exposure. While it isn’t as “serious” as frostbite, the more our bodies are exposed to the cold and not appropriately treated, the easier it is to get more injuries. 

Hypothermia is any time your body temperature starts to drop below 95 F. There are a couple of sure-fire ways that you can distinguish hypothermia from other issues while in the backcountry. 

The main signs of hypothermia will start with uncontrollable shivering that slowly moves towards slurred speech and lethargic movements. Keep in mind that this only describes mild cases of hypothermia, and when your body continues to get colder, you will experience worsening symptoms. 

Preventing hypothermia and frostbite is all about dressing appropriately, staying dry, and keeping your body fueled with food and water. Learn more about treating and preventing these two common cold injuries by taking a wilderness first aid or first responder course. 

Best Winter Activities for Families in Colorado Springs

Colorado becomes such a hotspot in the wintertime, and people flock towards the cities as their home base. Colorado Springs is one of the best locations for any family to choose as the spot to come for a winter vacation. It has each and every type of attraction, from underground tours to mountaintops that bring you into the deepest snow. No matter what you choose to do, you won’t come up short of options when figuring out what to do in the winter in Colorado Springs. 

The list we’ve come up with only grazes the surface of winter activities in Colorado Springs. A family could spend the entire winter tucked away in the city and still have places to go and see by the time the thaw comes.

Here’s a list to get your family started. Think of it as a launching point and winter fun as your destination. 

Photo by Josh Hild on Unsplash

Best Winter Activities for Families in Colorado Springs

Snowshoeing

One of the most classic winter activities that come along with deep snow is snowshoeing. It’s a traditional mode of travel that goes back thousands of years, but technology has come a long way. 

Today, lightweight snowshoes and designated trails make snowshoeing a fun activity rather than an arduous task to get from one place to another. This can fill an entire day with the family and have even the most energetic kids completely wiped out by the end. 

There are plenty of places to visit in Colorado Springs if you’re looking for prime snowshoeing trails. Mueller State Park has a ton of trails that will take hours to fully cover, Horsethief Park will take you around the Pancake Rocks, and the Barr Trail can take you up Pike’s Peak. These are just a few of the trails found within a short distance from the city. 

Ice Skating

No cheesy Christmas movie is complete without the happy couple skating around the ice rink in the local city park. While you may not be filming a cheesy movie, the same goes for a winter family vacation. 

Ice skating is so much fun for beginners and experts alike. Colorado Springs is home to a variety of indoor and outdoor rinks for the public to try out. Monument Ice Rinks, Sertich Ice Center, and Honnen Ice Center are just a few places to visit. 

Within minutes of getting on the ice, the entire family will be slipping and sliding around, which guarantees to put smiles on everyone’s faces. It can be a humbling experience, but ice skating is a great workout and a ton of fun once you get the hang of it. 

Manitou Springs Hot Springs

It’s an easily agreed-upon fact that hot tubs are one of the best parts of the winter. Finding natural hot springs that allow for a chlorine-free experience increases the value ten-fold. Finding natural hot springs isn’t always easy, and you often have to work for the reward. 

Manitou Springs is located just west of Colorado Springs and is filled with various springs to soak in. This small town makes finding hot springs a simple task and getting in them an even easier one. 

This could be done with the family if the kids are a little wiped out already. It’s the kind of space to take a deep breath and let it out slowly, not a water park to splash around in. Get the family to unwind at the end of the day, or get the body loosened at the beginning.

Royal Gorge Suspension Bridge

The Royal Gorge Suspension Bridge used to be the highest suspension bridge in the world until a bridge in China surpassed it. Today, it is still the tallest bridge in the United States and ranks highly on the list of highest bridges worldwide. Needless to say, if heights are not your thing, maybe stay on land. 

Just a short walk across the bridge is even to take in the dramatic views you can get in the wintertime. It can be astonishing to see the way the snow makes its way down the gorge and to feel so small standing above it. 

The park home to the bridge is also home to ziplines, a sky coaster, bungee jumping, and the newest via ferrata. For those unfamiliar with via ferratas, it’s essentially clipping into metal wires, scaling cliff sides, and looking down at the abyss. Maybe it would be best suited for the family that classifies themselves as highly adventurous. 

Colorado Wolf and Wildlife Center

The winter is the best time to visit the Colorado Wolf and Wildlife Center. The center is dedicated to the rescue of wolves, as well as educating the public. The wolves that call this center home are the most active in the winter, which is why we highly recommend putting it on your winter bucket list. 

The Wolf and Wildlife Center is also home to four different foxes. This is an excellent opportunity to throw a bit of education into the mix of other fun on vacation. 

Cave of the Winds Mountain Park

The final destination on our list may be more unexpected in the winter. Why? Because it is completely without snow. That’s what may make it one of the best winter activities in Colorado Springs.

Cave of the Winds Mountain Park is located a short drive west of Colorado Springs in the Pikes Peak region. This complex of intricate caves isn’t just a great relief from the snowy wonderland above ground. It’s full of fascinating geology. The tour takes you through 15 different rooms and on over a half-mile of trails. 

Cave of the Winds also has Christmas Underground, a Christmas celebration full of songs and stories to bring the holiday cheer below ground. It is the perfect thing to do with your family to get that brief escape from the snow without being tucked away in a hotel room. 

Prepping for Ski Season in Colorado Springs

The days are getting shorter, and the cold is settling in. It’s time for a lot of people to head inside, get cozy, and wait for the spring thaw to come around. While they’re all inside, many others have a single thing on their mind: skiing.

Skiing in Colorado Springs is one of the greatest parts of living in the great state of Colorado. The number of bluebird days is unbeaten by anywhere else in the US, and the snow seems to keep coming. 

So instead of preparing to hibernate, most of us know that it’s time to prepare for ski season. With a ski season that can easily run from mid-October to May, it can seem like you were just on the slopes yesterday. It’s important to remember that there’s still a lot to get done before you can comfortably and safely get back out this year.

Get your lift ticket, and get it early

The first step in getting ready for ski season is ensuring that you’ll have a spot on the lifts. Season passes can get picked up quickly, especially in the early months when prices are low. The best move is to decide when exactly you will be skiing.

Will it be weekends only?

How about the weekdays?

Are you just getting out for Christmas vacation?

The amount of time, especially what days of the week that time falls on, will greatly influence the pass that will work best for a skier or snowboarder.

Weekday season passes will be significantly cheaper than passes that can get you on all week long.

Day passes tend only to be good if you’re only going to a resort a few times in a year.

Season passes quickly pay for themselves if you use them regularly. 

The most popular passes in Colorado these days are the Epic and Ikon passes. They have a few significant differences but are both well-known for getting you powder days at resorts across the West. The best option depends on the mountain that will be your go-to.

The prices of season passes can be a huge turnoff that can feel discouraging. When the season hits, though, if you don’t have a season pass, you will second guess spending money every time you want to go ski. Having that season pass allows for freedom and guilt-free (or at least low-guilt) skiing throughout the entire season. 

Get your gear in proper, working order

The second major step necessary to get ready for ski season is to make sure all of your gear is as ready for the snow as you are. Skis left sitting in a garage for months on end after an entire season will need some tender loving care before getting back on the slopes. It’s often easy to get your skis tuned up by a professional. It isn’t too expensive and will make a world of difference. 

If you’re looking to do the job yourself, it’s a difficult skill to pick up but easy to do once you know the basics. A general tune-up will have your skis back with sharpened edges, smoothed-out bottoms, and a full wax job. 

Next up is to make sure your boots still fit and seem to be in good condition. If they’ve been stored away deep in a crawlspace, mice may have used them as temporary housing over the summer, and new liners will be a necessity. Freak growth spurts can also happen, or sometimes the boots need to be remolded to fit your feet. Try them on and make sure no surprises come up when opening day rolls around. 

What about renting gear?

When skiing is just a now-and-again hobby, it can be a bit ridiculous to carry skis around everywhere you go and keep paying to tune them before the ski season. If you aren’t skiing continuously throughout the year, renting gear can have huge advantages over having your setup. 

Renting gear means not having to worry about what happens when you hit a rock, bust a binding, or start to feel the wear and tear happening. You return skis to where you rented them from, and they’re the ones who have to fix them. It’s the best and kindest practice to treat rental gear with love and care, but accidents happen. 

When you own gear, the investment can be worth it to get skis and boots that are more personalized to your skiing style. Certain skis fit the different types of skiing that some people do, but most beginners won’t be able to tell the difference. Owning your gear is like buying a house. Everything that the landlord used to take care of, a leaky faucet or busted heater, is now your responsibility. Every scratch that makes its way onto your skis stays there until fixed by you.

Photo by Kellie Enge on Unsplash

Get your body moving and back in shape

One of the easiest things to get out of shape and need some lubrication in its joints is your body. Six months off can quickly get anyone out of shape if they aren’t constantly running or doing some summer exercise. 

Skiing is far more physically demanding than a lot of people imagine. Even when it’s only downhill, the amount of strength required in your entire body is impressive. The best way to avoid getting injured early on in the season is to go in prepared. 

Set a workout routine that can be followed for a reasonable amount of time before opening day. It will help your body remember what it’s like to move and groove again. There’s no shame in taking the summer off, but there’s no good reason to slack off when winter hits. 

It doesn’t even need to be an extreme workout. Adding some lunges, burpees, and crunches into your daily routine can be enough to remind the body of what you’re about to ask it to do. Fifteen minutes a day can save an entire ski season from being ruined by one silly mistake. 

Photo by Luka Senica on Unsplash

Prepping for Ski Season in Colorado Springs

Getting ready for ski season can often bring up a lot of questions. This is especially true if it’s the first year you have chosen this wonderful city as your base, or if you’ve never skied before. From lessons to opening days, finding all of the answers can be a difficult task.

Here is a quick FAQ to help get everything straight and help to make sure that ski season comes smoothly this year. 

Where to ski in Colorado Springs

While there isn’t much resort skiing right outside Colorado Springs, there is plenty of incredible skiing within a quick drive. Monarch Mountain, Cooper, Copper, Breckenridge, Keystone, and more are reachable in less than three hours. It makes Colorado Springs a great hub for getting to loads of different resorts easily. 

When do the resorts in Colorado Springs open?

Resorts across Colorado have varying start dates, mainly due to their location and snow accumulation. Some of them open as early as mid-October, but some won’t be open until December. For current, up-to-date projections for opening, check out each resort’s website. You can find a general projected opening date here, but it may not be the most accurate. 

Where can you get your skis tuned up?

There are many different places to get your skis tuned within the city limits of Colorado Springs. It makes sense, as so many people choose to live here to have world-class skiing easily accessible. The Ski Shop, Christy Sports, and Colorado Kite and Ski are all popular places to get your skis fixed up in town. There are plenty of other shops that will leave you ready for the season; check out Google or ask around town. 

Can you rent or buy skis in town?

Like we’ve already mentioned, people live to ski in Colorado Springs. It’s a town that’s made to have skiing accessible, and that means being able to buy just about any skis you can imagine or renting a full downhill or touring set up the day you need it. 

Where can you get lessons?

Typically, the best move is to get lessons at the resort you are planning on skiing at. They have lessons for all experience levels and ages and run for different lengths of time. Be sure to arrange lessons ahead of time because the classes can fill up quickly, especially on busy holiday weekends. 

What is Colorado Springs Famous For?

The fame of Colorado spreads far and wide. The entire state is known for its breathtaking mountains, sweeping vistas, and huge amounts of outdoor recreation. There are plenty of cities that you can call home, from Boulder and Denver to Grand Junction and Durango.

Out of all these areas, Colorado Springs tops the charts at number one on lists like America’s Best Cities by Outside Magazine and Best Big City in Money magazine. 

So, with all of the hot spots spread throughout the state, why is Colorado Springs so popular? 

Location, Location, Location

For starters, this big city sits in one of the most prime locations in the entire state. The city is just over 6,000 feet up in altitude and located only 60 miles south of Denver. Not only do they have easy access to the sun and the bigger city here, but there’s also quick access to Pikes Peak, one of the most well-renowned mountains in the entire country.

This location brings the area some of the best weather to be found just about anywhere. The altitude brings a strong and warming sun, and the city only gets an average of 41 inches of snowfall each year. There are rarely huge piles of snow sitting downtown, but you can get to the slopes and ski to your heart’s desire in no time at all. 

The foothills of the Rockies are a pristine example of beautiful locations for outdoor recreation. Colorado Springs is best known for Garden of the Gods, a massive National Natural Landmark with biodiversity as it sprawls from the grasslands up into the mountains. With a playground like this, locals rarely need to travel far to find exactly what they’re looking for.

Strong Sense of Community

Although the city has a population of well over 450,000, there is still a tight-knit community that holds strong regardless of numbers. Any time you visit, there are arts festivals, farmer’s markets, or music events somewhere in the city. There’s constantly something to do because everyone wants to make this a fun and diverse place to live. 

The community shares one main thing in common: the outdoors.

People here are keen on getting out and exploring, which may be why the town’s dress code seems to be “business casual.” Patagonia jackets and Prana pants are the typical attire worn around the city, ready to get out into the mountains at all times. Everyone wants to help others get outside.

That’s also why there are so many great outdoor tours in Colorado Springs

This love for the outdoors transfers into a love for general health. It always finds its way onto lists about the Healthiest Cities in America, and you can see why. Not only is there a ton of access to active weekends, but it also has some of the cleanest air in the entire state. People here care about the environment, and it shows. This is only one of the many reasons that quality of life is so high. 

Home to the Olympics

Another unique part of this majestic city is the Olympic Training Center. The US Olympic Headquarters has made its home here, seeing the opportunity for a great location to train athletes. 

On-site, there is an Olympic museum that displays the past accomplishments of our country’s athletes. You can learn a lot about how athletes train to become the best of the best as they all race to achieve their dreams. 

The 35-acre campus can be a lot to explore on your own, so you can jump onto a guided tour just about any time during the week. There are tours open, and available Monday through Saturday from 9 am to 4 pm. It’s well worth the exploration to get an insight into a completely different lifestyle. 

Pets Rule

If you’re a dog person, a cat person, or even an iguana person, this city is for you.

This is one of the most pet-friendly places out there, with dog parks all around and pet-friendly trails, so you never have to leave anyone at home. 

Education Centered

Colorado Springs is well-known for the focus it places on providing a top-notch education for its residents. The city scores highly on all standardized tests, and its high schools emphasize college preparation as part of their curriculum. 

There are several universities and colleges that call this city home, such as the University of Northern Colorado and the University of Colorado. Plenty of students commute to and from the city just because it is a place worth living, even if you need to drive every day. 

Families and married couples are drawn to this city to raise their children and receive some of the best education around. It’s a phenomenal place to raise children, as you won’t ever be bored or seeking out others to play with. 

Things to Do

There’s so much to do inside and outside the city limits. The list is endless. The downtown has an active nightlife that appeals to night owls that want to get out and dance. It also has cozy coffee houses where you can go and read a book or get work done. All of these bakeries, bars, nightclubs, and restaurants boast a magnificent view of the Rocky Mountains right from your seat.

If you are looking to get outside of the city and explore, the list gets even longer. There are plenty of Colorado Springs attractions near the city limits, like Garden of the Gods and Pikes Peak. There are massive parks all around where you can hike, mountain bike, ride horses, fish, and be. 

It’s time to get out to Colorado Springs and see what it has for you. There’s only so much that words can tell you, and this is a place that you genuinely need to see for yourself. 

Our Favorite Hikes Near Colorado Springs

The landscape of Colorado is calling for everyone to come hiking. The stunning mountains, waterfalls, and red rocks make for a unique experience, no matter your skill level. Undoubtedly, one of the best ways to start your exploration of Colorado is by checking out the hikes near Colorado Springs. 

Nestled in the foothills of the mountains, Colorado Springs gives quick and easy access to some of the most diverse trails in the state. Remember that some hikes in the area may require a permit. For ease of use, we selected trails that match those in beauty, but there are no permits required for hikes.

Best hikes near Colorado Springs

Muscoco

Location: Mount Cutler/Mt. Muscoco Trailhead

Elevation Gain: 1,292 feet

Round Trip Mileage: 4.0 miles

Difficulty: Moderate

Views of the mountains sweep out to your right, and Colorado Springs lays the backdrop to your left as you head up to the summit of Mount Muscoco. This moderate trail is located just southwest of Colorado Springs in the North Cheyenne Cañon Park. It’s a quick drive out to a hike that is well worth the final climb. 

The Mount Muscoco trail is well-known for the wildflowers that it boasts in the springtime, making it a great trail to do as the snow starts to melt. 

The Mount Cutler trail takes you to the trail that you are truly looking for. About a mile down the Mount Cutler trail is the Mount Muscoco trail. This trail will take you straight to the summit, but beware, the final climb is where all of the difficulty lies in this trail. 

For this hike, in particular, quality hiking boots are highly recommended. The final climb is rocky, and sneakers aren’t suitable to give your feet the support they will need. 

The Crags Trail

Location: Near Divide, CO

Elevation Gain: 820 feet

Round Trip Mileage: 4.8 miles

Difficulty: Easy to Moderate

We suggest checking out the Crags Trail for a great introduction to the area. Not only does it display some of the best landscapes of the area, but it also won’t push you too hard and make you not want to hike again. The trail is long enough to make it a workout and is relatively flat, with a total elevation gain of about 820 feet. 

The Crags Trail gives you a view of some of the most unique geological features in all of Colorado. Granite slabs erupt from the ground in large numbers, forming massive cliff sides and sheer-faced walls. The trail also takes you through some huge aspen forests that allow you to see another part of Colorado’s brilliant landscape. Head out on this trail in the fall and be prepared to have your world blanketed in gold by these magnificent trees. 

Another reason why this trail is perfect for beginners is the ease of use. It’s well-marked, as trail number 664, and well-maintained. The forest service has recently constructed new parking, so you don’t need to rush there at 6 in the morning to get a spot. 

If you’re a beginner wanting to start exploring these areas, ensure that you are prepared. Read up on Colorado hiking safety and know before you go. 

Garden of the Gods – The Palmer, Buckskin-Charley, Niobrara, and Bretag Trail Loop

Location: Garden of the Gods Park

Elevation Gain: 449 feet

Round Trip Mileage: 4.0 miles

Difficulty: Easy

When avid hikers think about Colorado Springs, one of the first places that come to mind is Garden of the Gods. This National Natural Landmark is well-known for the sandstone towers that color the sky with their vibrant reds. Come here once, and you’ll be itching to come back and try the climbing, horseback riding, or mountain biking that the park has to offer. 

This trail, in particular, is a phenomenal introduction to the park. It combines four popular trails to make an easy four-mile loop, providing a taste of everything in the park. The route starts on the Palmer Trail and takes twists and turns through the most well-known towers in the park. 

Columbine Trail

Location: North Cheyenne Cañon Park

Elevation Gain: 1,607 feet

Round Trip Mileage: 7.6 miles

Difficulty: Moderate to Difficult

Now, here’s another trail to add to your list of Fall hiking in Colorado Springs. North Cheyenne Cañon is surrounded by mountains (some of which have also made this list) and provides an array of different views and landscapes to please everyone that tags along. 

The Columbine Trail has three different options for where to start. One of the best places to start, in our opinion, is the Starsmore Discovery Center. This center has a wealth of knowledge about the local flora and fauna, making it a great start or end to your hike. 

No matter what you are looking for, you can find it on the Columbine Trail. There are babbling brooks, warbling birds, and huge mountain vistas. While the trail is on the longer side, the elevation gains are evenly spread out, so you will barely notice it. 

Buckhorn

Location: North Cheyenne Cañon Park

Elevation Gain: 859 feet

Round Trip Mileage: 3.9 miles

Difficulty: Moderate

Another hike in North Cheyenne Cañon Park makes the list, showing off what this one place truly has to offer. If you’re trying to figure out where to hike in Colorado Springs, this park is a great place to start. 

Mount Buckhorn Peak is a quick hike up to a beautiful 8,380-foot summit that gives you a full 360-degree view of the world around you. The hike itself takes you through a forested setting that is a must-see in the fall. Once you are at the top, you can turn this trail into a quick out-and-back or continue down Buckhorn trail and return to where you started. 

The summit itself is somewhere you could spend an entire day. Once you are up there, you can scramble around on the huge number of boulders trying to find the highest one. This is an excellent hike if you want to take time to explore.