What is Geocaching and Where Can I Do It?

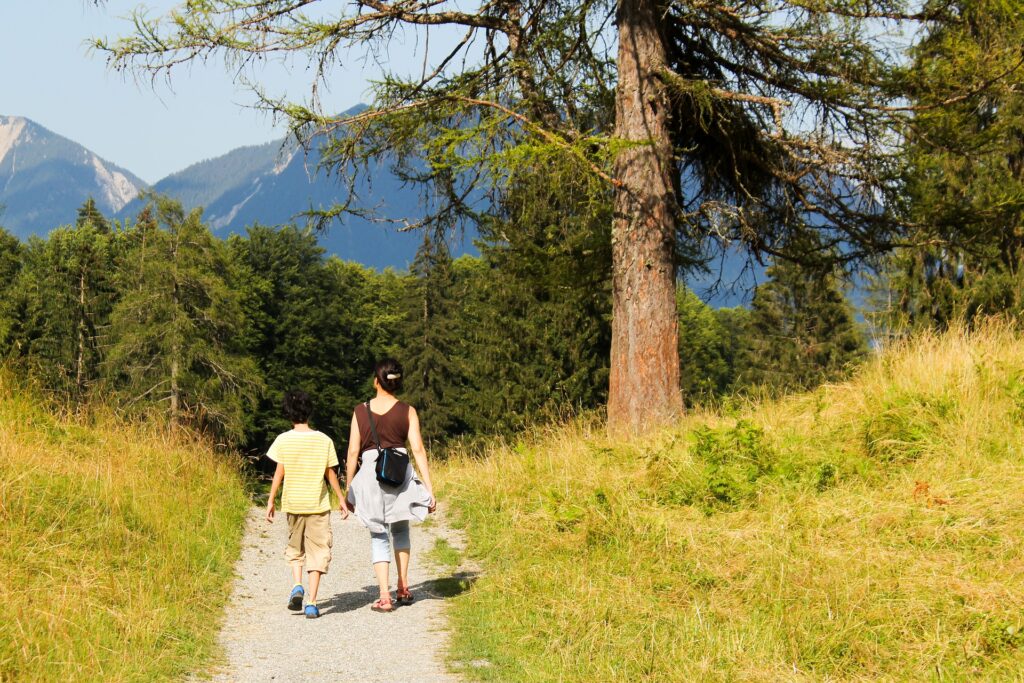
Treasure maps and long-form expeditions to find a secret stash of goods are no longer just for youth ages 3 to 10. Geocaching can be seen as a “grown-up” version of a treasure hunt, and it will take you places you may have never been before.

Not only is it a great form of exercise and exploration, but it also reignites the kid inside of you. Today that may be precisely what we all need.

What is Geocaching?

Yes, a treasure map and exploration sounds great, but that doesn’t tell us exactly what geocaching is. It doesn’t involve digging in random spots to find a buried chest or a compass that points to your one true desire, but rather it gives you a goal to seek out, without compromising the natural integrity of the world around it. Done correctly, it can be enjoyed by hundreds for years on end without making much of an impact at all.

Geocaching is a simple concept made possible and accessible by the technology we all carry around in our pockets. With the Geocaching app, you can find hidden caches just about anywhere around the world, as there are now over 3 million recorded caches worldwide. The sport has become much more popular as a way to get outside and add a bit of flair to your regular daily walk. 

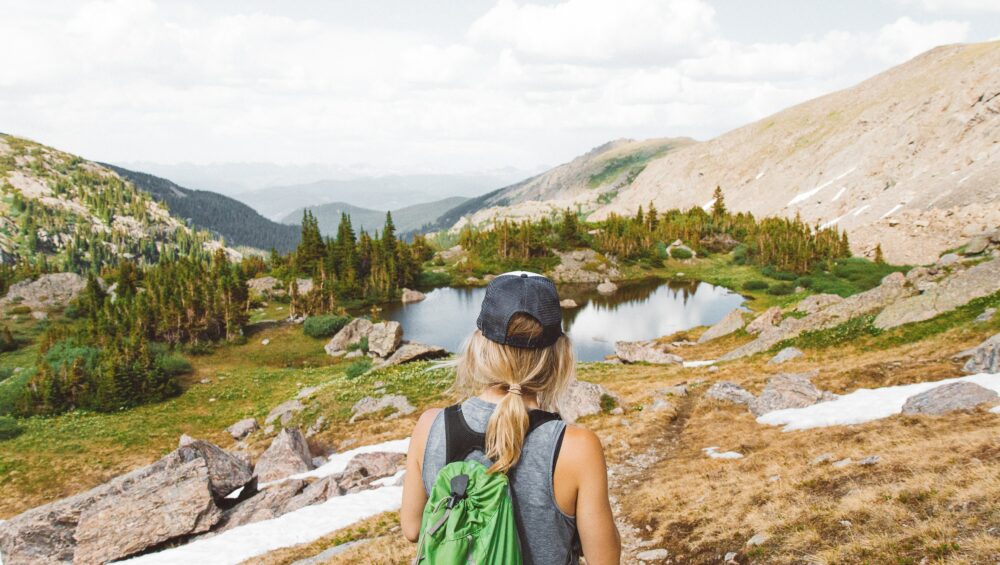
To start, download the Geocaching app, or find a local website that directs you to sites near you. Next, you need to prepare yourself for a long hike that could end up being a long day in the woods. Some geocaches are hidden in downtown, urban areas, while many of them live in more natural environments. You should pack for the unexpected, as geocaching can quickly turn into a true adventure. 

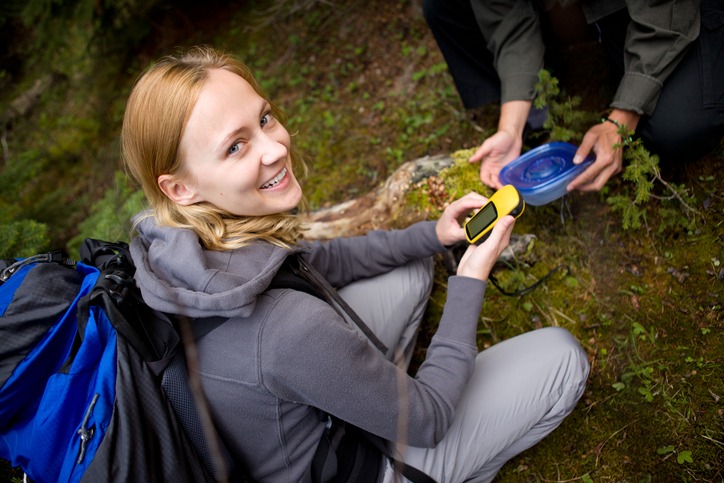
Once you’re out on the trail, you need to channel your powers of observation to spot the camouflaged spot where the geocache lives. Once you find the cache, sign the logbook and add your touch to the cache. Geocaches are most often based on the principle of “take something out, leave something of your own.” 

Getting Started Geocaching

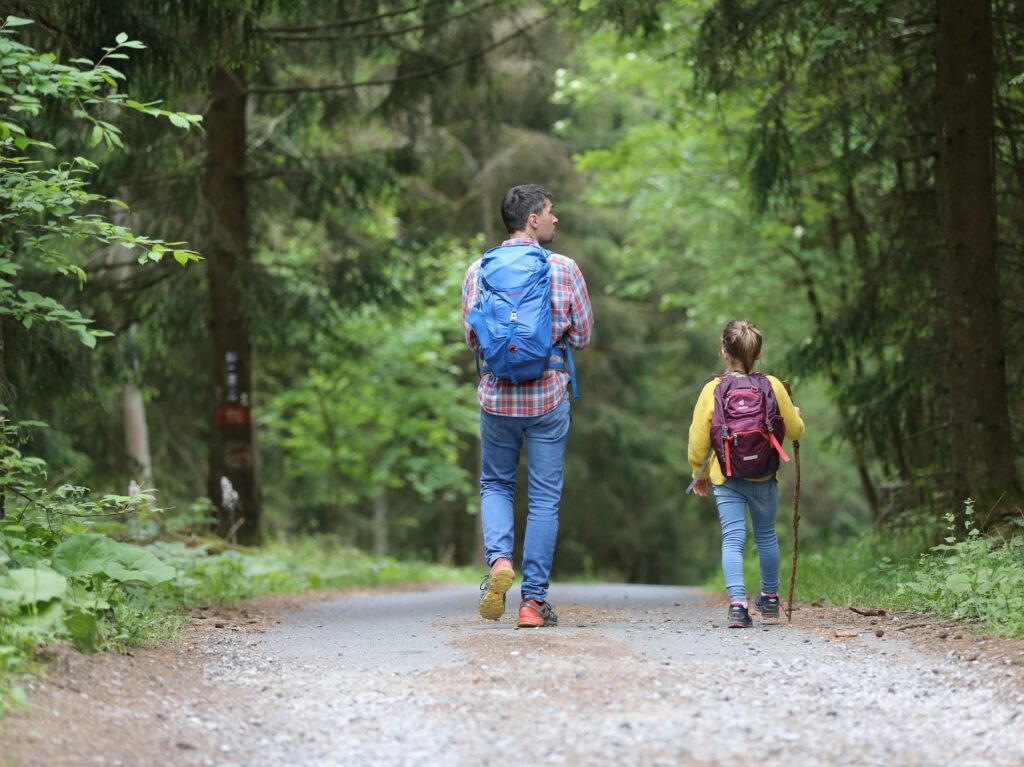
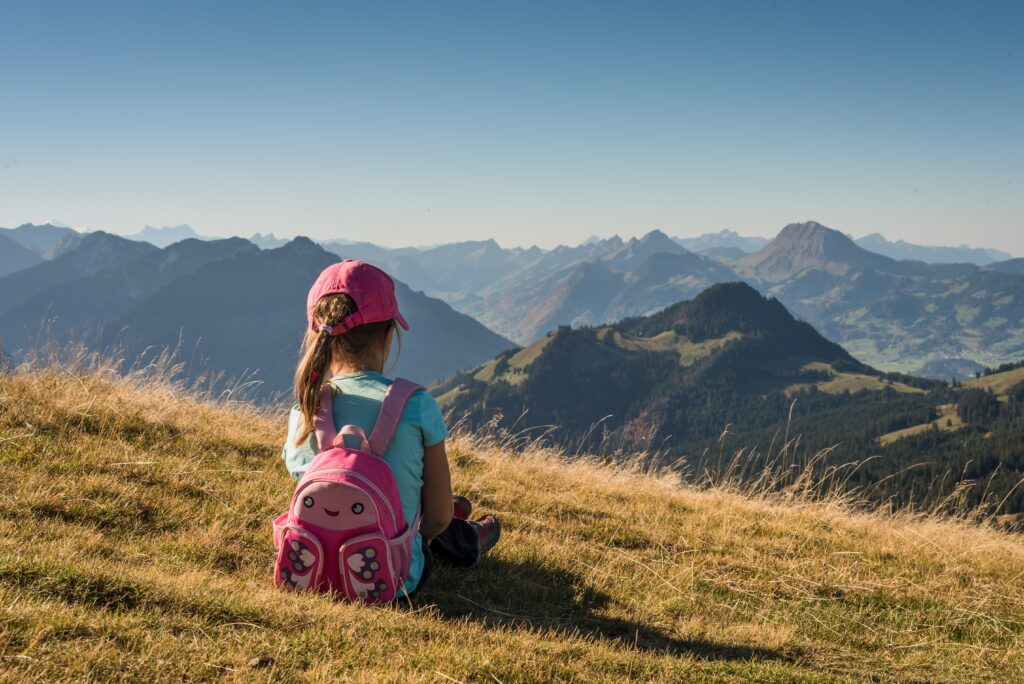
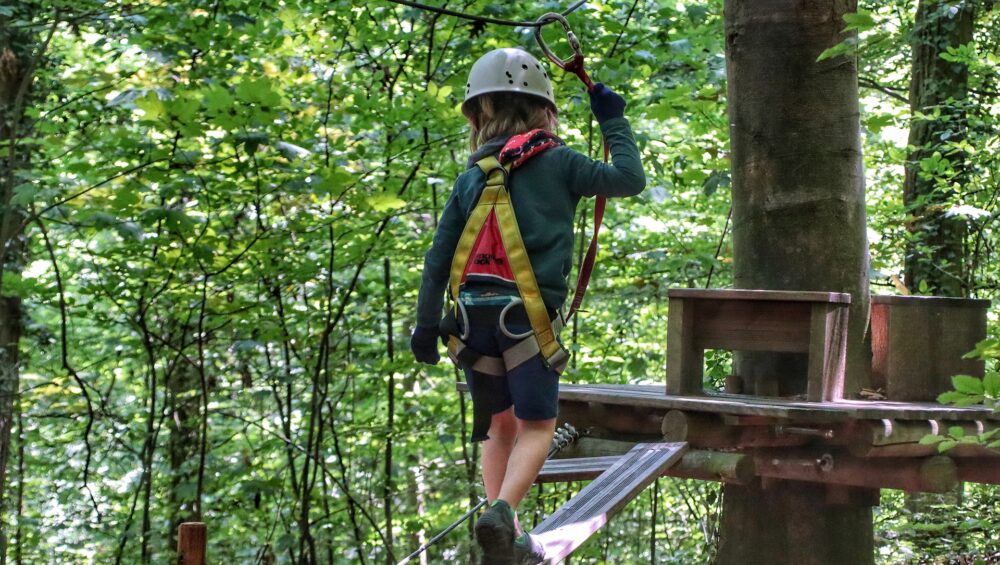
To start, we recommend simply using your smartphone and the Geocaching app. You can buy a GPS unit that will often have geocaching features, but it isn’t fully necessary. Family-friendly geocaching tours are a great way to get started and stoke the entire family for future geocaching adventures. Geocaching for kids builds a sense of adventure and can help to develop helpful skills like navigation. 

Once you have your guidance tech figured out, you can decide on a cache to hunt down from the comfort of your couch. One of the best parts of Geocaching is that you can plan trips around the entire world from a single spot. There are limitless options of where to start as more and more caches are being put out there every day. 

Now that you have a target in mind, you can put in some more prep work. This will not only include packing your backpack for a day hike, but it will also be planning your route to get to the cache. The app will show you where the cache is, but it doesn’t offer you the best route. This means you’ll need to pay attention to the landscape and study how to get to this spot. 

Many caches will not be right off a trail. You’ll need to head off into the forest to find caches that aren’t as commonly found. Remember to take the proper precautions and stay within your experience level. 

Once you’ve found the cache, there are a couple of pieces of etiquette that you need to keep in mind:

  • Grab the cache and examine its contents away from where you found it. Spending too much time where you found it can leave traces that make it too easy for others to discover it, thus removing a lot of the fun. 
  • Sign the logbook and leave a quick note if you want!
  • Take an object (if you want to) only if you are prepared to leave something of equal or greater value. This allows the cache to continue giving to future explorers. 
  • Seal the cache tightly and place it back exactly where you found it so it can wait for the next adventurer to stumble onto it. 
Geocaching with Broadmoor Outfitters in Colorado Springs
A young woman finding a geocache in Colorado Springs

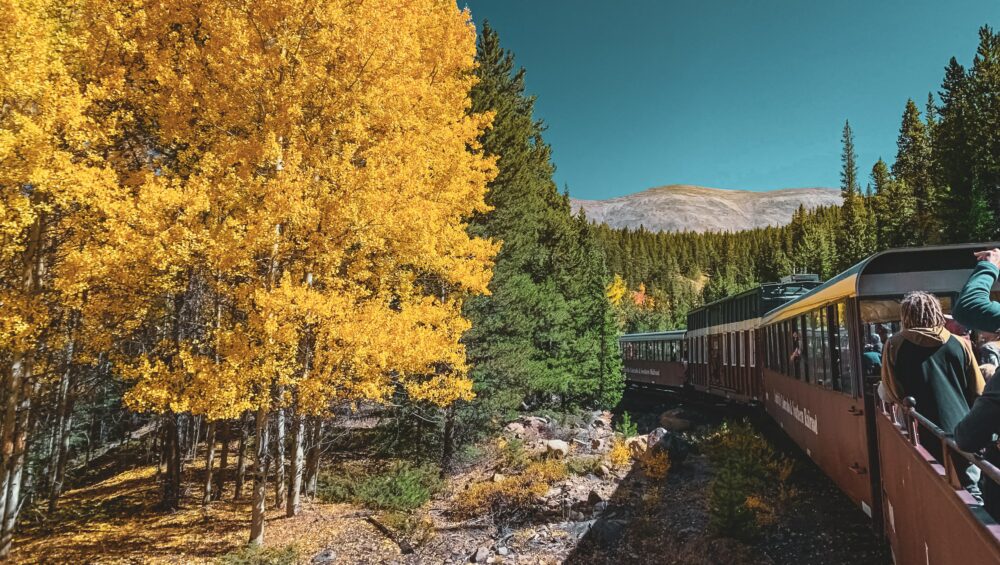
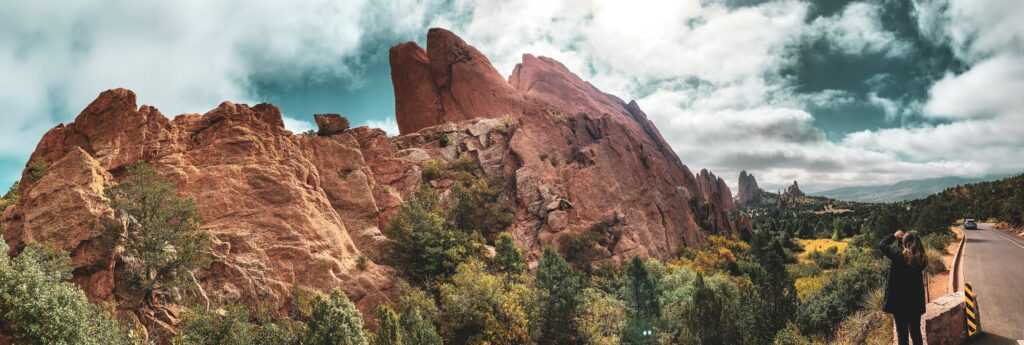
Where can I Geocache in Colorado?

190 countries across the world have geocaches, and over 3 million caches spread out amongst them. Over 22,000 of these caches are located in the state of Colorado. With that many caches out there for you, it makes geocaching a popular sport that can be enjoyed for years without repetition. 

Colorado Parks and Wildlife has an extensive list of where you can find caches in the state parks. They encourage visitors to come and explore the area to find the caches and ask that explorers use Leave No Trace methods to leave everything in pristine condition. 

Parks and Wildlife points out that there are potentially hundreds of more caches that have not been documented with them. Colorado Springs alone has thousands of caches on record. These hunts take you up and down the trails and mountains surrounding the beautiful city and have some of the oldest caches in the state. 

So to answer the question more directly, you can Geocache just about anywhere in Colorado. This is a state that is based on exploration and outdoor adventure. When you start Geocaching and eventually catch the bug, you can expand the sport and bring it to even more distant and remote places throughout the state. The explorations and possibilities are endless. 

How to Pack for a Day Hike in Colorado

The variety of terrain and difficulty found on day hikes requires the skill of adequately packing. 

How to pack for a day hike is a skill that many have been working towards mastering for years and that all hikers need to know the basics of. Before you head out into the backcountry, your pre-trip will always require you to take a look at all of your hiking essentials. 

Day hikes in Colorado Springs can be laid back or some of the more strenuous hikes out there. To take these hikes on safely, you need to pack efficiently and effectively. While optimism and a positive mental attitude should be the first thing you pack, you can’t forget that emergencies do happen. If they happen to you, what’s inside your day pack will often determine how the situation plays out. 

If you’re new to hiking or have never hiked in Colorado before, we recommend booking a hike with a guide. Guided hiking tours will help you feel confident in a new environment and help lower risk while hiking in the mountains.

10 Essentials to pack for a day hike

The Ten Essentials are a great place to start when learning how to pack for a day hike. These were created over 80 years ago and have been modified as our technology and knowledge advance.

To begin, we’ll take a quick look at each of the ten essentials.

1. Navigation

Before you head out, you’ll need to know where you’re going and how to get there.

A map and compass are an excellent pick for navigational aids, but you can up your technology game and bring along any satellite navigation and communication devices. 

2. Sun Protection

The sun will quickly ruin your day hike and potentially lead to more serious problems if you’re unprepared.

If you adequately protect yourself with the proper layers, hats, and sunscreen, you are much less likely to experience heatstroke, dehydration, or any other sun-related illnesses. Even on cloudy days and in the winter, the UV rays can still reach you, so always be prepared!

3. Insulation

If you’re packing for a long day hike or even packing to prepare for potential hazards, extra layers will be key to keeping you safe and comfortable.

The weather flips like a switch in some environments, especially in the mountains. With the proper jackets, hats, and rain shells, you can be ready to take on anything mother nature throws at you. 

4. Illumination

Any day hike can turn into an overnighter if you lose the trail or get turned around unexpectedly (especially if you neglect navigation).

Pack a headlamp or flashlight with spare batteries, so you don’t need to shuffle your way through the dark. 

5. First-Aid

There’s no need for a complicated first aid kid unless you are a professional, but it’s important to have a basic kit ready for any injuries you or other hikers may have.

Remember, not all kits are made for all environments. Buy a basic kit and make changes to it to fit your experience level and the needs of your group. 

6. Fire

Being ready for anything means being prepared to keep yourself warm, cook food, and treat water when in the backcountry.

Fire starting supplies such as waterproof matches, a lighter, or a Ferro rod are great options to help get a fire anywhere. Pick what you are the most comfortable with and pack a spare.

7. Repair kit and tools

Packing a repair kit can seem like overpacking when you’re planning on just going out for the day, but it can be one of the most important things you bring along.

You will find more uses for duct tape and a knife than you ever thought imaginable when you need it out there. 

8. Nutrition

Every day of our lives appears to be driven by, “what meal will we have next?”

When you go out into the backcountry, this question is asked even more frequently as your body works harder than normal to bring you from place to place. Even if you bring out just a few calorie-dense snacks on your day hike, you’ll be grateful. The best practice is to bring at least an extra day’s worth of calories.

9. Hydration

No matter if you’re out in the dead of winter or on one of the guided hiking tours in Colorado Springs during the hottest day of the year, water is always your best friend.

Water keeps you warm in the winter and cools in the summer. Almost every ailment you start experiencing in the backcountry comes with the initial treatment recommendation of “drink some water.” Unsurprisingly, it usually works. 

10. Emergency Shelter

Going out means going out ready for your trip plans to change drastically. In most cases, you’ll never end up spending a night out that was unplanned.

However, if you ever find yourself in that situation, an emergency shelter will be a lifesaver. This can be a small bivy (like a one-person waterproof cocoon) or simply a tarp to protect yourself from the elements. 

More about comfort, less about survival

The Right Pack

The right backpack for day hiking is going to be a complete game-changer when you’re out hiking. A comfortable bag with enough space and support will turn a miserable experience into a walk in the park. For starters, I recommend buying a 30-40 liter pack if you are focused on day hikes.

40-liter packs can be used for short overnight trips but aren’t overkill for just a day. 

Do some research on different packs that give you the back support you need. Certain brands like Osprey will form-fit each pack to your back. This can be helpful, especially if you have a history of back problems. 

Don’t let not having the perfect day hiking pack stop you though! Start with the bag you have and upgrade when you’re ready.

The Right Shoes

Nobody wears flip-flops to the prom, and nobody should wear high heels out on the trail. The right shoes for you will be shoes that are comfortable, sturdy, broken in, and give you good ankle support. After those basics, you can begin looking at the different styles of rubber, traction designs, and waterproof construction.

Wearing the right shoes helps to avoid blisters, which means you won’t need to break into your first aid kit. The more preventative measures you can take to save on supplies will leave you even more prepared for your next day hike. 

How to Pack for a Day Hike

Now that we’ve hit the basics of what you need to pack, it’s important to talk about the process of packing.

The ABCs

The ABCs are a valuable tool for packing a backpack so that it fits comfortably and makes hiking easier. While most people will only use this method with multi-day trips, it’s helpful to consider when you are doing day hikes as well. Like I mentioned earlier, some day hikes in Colorado Springs can push you to your limit. Packing a comfortable bag will take a lot of strain off your back and make these hikes more enjoyable.

Accessibility- When you’re packing, make sure things you’ll need while hiking are packed on top or in an external pocket that you can easily get to. This includes things like rain gear, snacks, and especially a headlamp. Looking for a headlamp without a headlamp can be the most frustrating thing you’ll do all year long. 

Balance- Having a bag that pulls you to one side will end with a cranked back and one leg that takes on a lot more stress throughout the day. The key is to make your pack well-balanced to maximize comfort. The weight should be evenly distributed from side to side, and you want the majority of the weight to be in the bottom third of your bag. 

Compression- Here’s what can save you after packing a long list of essentials to bring on any day hike. Gear that compresses down into a small pouch is the best gear for hiking. After all, you don’t need to buy an 80-liter pack to go out for the day. Invest in a few compression bags to squeeze everything down into a small space. 

Know your Environment

You need to know what kind of a hike you are headed into and what that environment may throw at you. This means looking at the current weather forecast, the weather trends for your location, and reviews of the hike from recent days. 

You can gather information from apps (like AllTrails), with hikers going out onto these trails every day. If one person notices a dried-up river where most hikers rely on water, you wouldn’t know this without their comment. Utilize social platforms to gather as much information as you can before heading out. 

This information will help you greatly when packing your bag. It will tell you if you need extra socks because everything is muddy and wet or if you need to bring a down jacket for when you get up above 11,000 feet of elevation.

If you’re uncertain about reading this information and transferring it into packing, don’t hesitate to reach out for guided trips in Colorado Springs. These are fantastic resources when first learning how to be comfortable in the backcountry. 

Best Places to See the Fall Colors in Colorado Springs

The fall transforms Colorado into a gold-rich state once again. The colors of the aspens flow through like liquid gold, rushing in and out quickly, so you need to know exactly where to see fall colors in Colorado. 

It’s time to cozy up and tackle the brisk Autumn air to let your eyes soak up Colorado Springs at one of its finest moments. These trails will take you to some popular, easy-access views and some hard-to-reach, hidden gems in and around Colorado Springs. 

Best places to see the Fall colors in Colorado Springs

Photo by Devonshire on Unsplash

1. Pikes Peak

One of Colorado Springs’ local Fourteeners brings a wide variety of options for those looking to get one of the best fall colors tours Colorado has to offer. At 14,115 feet of elevation, you are looking down on thousands of acres of national forest. The bird’s eye view lets you grab a completely different perspective from walking down on the ground.

It’s a view that everyone should take the time to see in their lifetime and one that everyone can. You can take the easiest route of driving to the top for a short day or hop on the Barr Trail for a 25-mile trek that will genuinely make you work for the views. The most challenging part of Pikes Peak is determining how you want to experience the mountain. 

Another option for the more adventurous is to hop on a bicycle and give your legs a real workout. Don’t worry. There are plenty of places to stop and catch your breath while enjoying the view. 

Check out our newest Cog Up, Bike Down Tour that shuttles you to the top of Pike Peak and turns the bike ride into a downhill cruise. 

2. Pikes Peak Greenway

In the fall, Pikes Peak Greenway gets a little less green and a whole lot more golden. 

Urban trails offer easy access and many options with how far you want to go and for how long. Plus, you can walk down to one of your favorite restaurants while still getting the feeling of an Autumn hike. 

The Pikes Peak Greenway runs through Colorado Springs. It’s mostly paved, sometimes gravelly, and is a well-maintained trail that connects several other local trails. Most bikes and all feet can take you around town to see how the fall colors transform Colorado Springs. 

The Greenway gives you easy access to loads of the local parks in Colorado Springs. This is the perfect choice for a walk around town that can end in a picnic overlooking beautiful fall colors. Stop off at Monument Valley Park, Boddington Park, or America the Beautiful Park for a great spot to sit and spend the day with a thermos full of warm drinks and a bag of delicious goodies. 

3. Cripple Creek

Just outside of Colorado Springs lies Cripple Creek, a small mining town that sits in a nest of aspen groves shining brightly in the fall. 

You can cruise towards town in several ways that allow you to experience the countryside differently. In town, you can hop onto the Cripple Creek and Narrow Gauge Railroad for a slow crawl through the forests you have been looking at from afar. 

Just make sure to get there in time; the railroad only runs until October each year. 

4. Mount Esther Trail

Just northwest of Colorado Springs sits a relatively small mountain dubbed Mount Esther. While the peak is “only” 9,505 feet above sea level, the climb to get there will test your endurance. 

The Mount Esther trail is 4.2 miles round trip. Trust us, it is worth the energy and the short, but steep climb. 

The treasure at the top of the trail is a golden meadow that reflects all of the colors of Colorado’s autumn season. If you push forward just a bit further, you will find yourself at the Crystal Creek Reservoir. Here, the colors are reflected off the glassy waters, bringing even more color to your world. 

5. Gold Camp Road

While there are loads of great drives in the area, some can be a bit more adventurous than others. Not all roads are smoothly paved yet, and those that aren’t let you get to some of the less traveled, more unique spaces of the Pikes Peak Region. 

If you’re equipped with a 4×4 or an AWD vehicle, be sure to check out Gold Camp Road, as it is where to see fall colors in Colorado with a bit of bump and spicy adventure. 

The name does a pretty good job of encompassing what the drive is going to get you. The rugged drive takes you through tunnels and corridors of aspens that puts you amongst some of the brightest fall colors the area has to offer. 

6. Best Fall Colors Tour in Colorado Springs 

If you’re looking to add in a bit of adrenaline to help warm you up on a brisk autumn day, a zipline tour is one of the best ways to see the fall colors of Colorado Springs. This option gives you a unique view that is constantly changing as you fly through the air. 

This zipline tour will engrain the memories of fall colors into your mind in a way that is hard to find doing anything else. 

An 1800 foot zipline gives you the chance to take in sweeping views of the colors while feeling the breeze across your body. A 1500 foot line takes you over a 150-foot deep canyon, really giving you a unique view of the forests below you.

Beginners Guide to Archery

Have you ever dreamt of riding horseback, firing arrows off to pin apples to the trees behind your target? 

You’re not alone in the fantasy of becoming Legolas, Robin Hood, or the Green Arrow. We all watch these movies and shows and imagine what it would be like to have the skills that these legends have developed over time. 

One wildly misleading part of these archery depictions is the lack of intense training over years and years that one needs to become a professional. There was someone training baby Legolas and giving him archery tips as he missed his target repeatedly. We all have to start somewhere. 

Archery is a great sport to get into as a beginner. There isn’t a huge initial investment, it’s easily accessible, and you don’t need a ton of gear to try it out. There are shooting ranges all around that will gladly let you explore the bow and arrow, even as a beginning archer. While the internet and other resources around you are filled with a wealth of archery tips, we’re going to dive into the best way to get started on your new journey.

So, nock your arrow, take sight, and let’s see what targets we can hit.

Broadmoor Outfitter’s Beginners Guide to Archery

Photo by Sadie Esch-Laurent on Unsplash

Bows

It can’t be said enough that archery is a simple sport at its roots. There aren’t too many moving parts, and you don’t have complicated technology. It’s a tool that people have been using for thousands of years, way before we relied on smartphones to do everything for us.

Now, you can easily Google, “What is archery?” and have your answer in an instant. Still, the bow takes time to practice, learn, and truly master. Fortunately, archery for beginners is much more simple than mastering it. 

You can’t practice archery without is the bow. This may be common knowledge, and you may be sitting there saying, “Duh, of course, you need a bow,” but there’s a little more to it. There are several styles of bow, and each has pros and cons.

So, to get you started on the right foot, here are the two basic designs of bows.

1. Recurve

A recurve bow is the simpler of the two bow styles. In essence, this bow style utilizes the curve of fiberglass, or sometimes wood, limbs to provide power to your shot. These limbs are attached to a handle that houses the arrow rest, where you will be looking while aiming.

A single bowstring attaches these two arms and curves them against their natural direction, amping up the potential force. All of this power goes into the arrow as soon as you pull back the bowstring and take aim. 

A recurve bow looks more like a traditional Robin Hood style bow and is probably what you will want to try using on your first time shooting. They aren’t complicated, they give you a good idea of how to control a bow under pressure. Plus, they are much cheaper than their counterparts.

Recurve bows are typically a relatively low draw weight that won’t make your arms shake uncontrollably while pulling back the first time. If you’re looking to do some more complex or powerful shooting, you can look towards other bow styles. 

2. Compound

A compound bow is an ingenious invention that allows the shooter to hold aim without putting too much strain on their arms and shoulders. This was accomplished by engineers in the 1970s, using cams to relieve the pressure once the string is fully drawn. The bow itself is a bit more complicated, looks much more modern and high-tech, but is perfect for anyone who goes hunting and patiently waits at a full draw for the right moment to fire. 

There are more traditional bows, like the longbow that you may imagine an elf carrying into war. There are bows specially designed to be fired from horseback and bows with all the bells and whistles for Olympic archers, but we’re talking about archery for beginners here.

One of the best archery tips we can give you is to start easy, don’t grab a bow that will be too high of draw weight. You will most likely end up not enjoying the sport because it’s too difficult to come near a target while straining to draw the bow. 

Photo by Laura Crowe on Unsplash

Arrows

While there are many styles of arrows for hunting and target practice, the best idea for starting up is to buy a cheap archery target and some target arrows that are relatively affordable. A lot of these are going to be aluminum or carbon, which are great materials for beginners. 

Learning how to re-fletch your arrows is another invaluable tool. The little feathers, called fletchings, are going to pop off over time. It’s an easy fix with the right glue and tools, and it’s worth getting to know how to do your own maintenance. This will save you money in the long run and keep you shooting for longer. 

Shooting Sequence

As this is a beginner’s guide to archery, having the gear isn’t enough. Learning how to shoot is essential.

You’ve acquired the bow and the arrows, and hopefully, you’ve found some other safety equipment such as an armguard or finger guard. Now you’re ready to shoot! The entire shooting sequence gets down to fine, delicate details when working on becoming a master.

For now, though, we’ll glance over the basics of an archery shooting sequence:

  1. Find a safe area where everyone is clear of down range, mentally prepare, and it’s time to take your stance. 
  2. With your feet shoulder-width apart, extend your bow arm towards your target. 
  3. Nock your arrow on the bowstring and place it in the arrow rest with the index feather (normally the odd colored fletching) pointed away from you. 
  4. Placing one finger above the arrow and two below, draw the bow back and bring your hand to the corner of your smile, all while keeping your elbow high. 
  5. With both eyes open, take aim down the shaft of the arrow towards your target. 
  6. Take a deep breath in, and slowly exhale.
  7. On your exhale, release.
  8. Celebrate.

Okay, maybe you won’t be celebrating the first shot, but keep at it. Learning archery is a process, and it requires a lot of patience and practice. Keep working on your form and pay attention to the little details. 

Where to Practice

Since archery can be pretty dangerous, one of the safest ways to start is with a guided introduction to archery.

When beginner archery in Colorado is done right, it is a fun family activity that everyone can master. Set up a small target range at home if you have the outdoor space. If you don’t, find the closest archery range. The range is a great place to meet fellow archers who can share archery tips and are willing to build community through the sport. 

Soon, you won’t need the beginner’s guide. Nocking an arrow and pinning five into the bullseye in a row will feel natural. Keep on practicing, and remember, we were all beginners at some point. 

Are Ziplines Safe for Kids?

Soaring through the air at top speeds connected to a thin wire and a harness brings worry to any parent. It seems unnatural, but as ziplines continue to become more popular, we must ask the question:

Are ziplines safe for kids? 

We understand your concerns. Ziplines are popping up all across the United States, and with them, there are the typical injuries that follow. This doesn’t immediately tell us that ziplines are unsafe, though. It gives us the ability to have the insight to find the right ziplines for kids.

Every company follows similar, but often different, rules and regulations for ziplines. This means becoming familiar with the guidelines you’ll want to look out for when choosing a place to zipline. To help you do that, we’ll break down ziplines and talk about how they work and their history.

Image by Dragan Tomić from Pixabay

A Brief History of the Zipline

Ziplines were first used to move goods across huge expanses of open air. They originated in mountain communities where moving food or supplies over a river took ages without any form of help. Stringing up a line meant an easy delivery across even the most treacherous terrain. Soon, humans also used the lines rather than face the dangerous swim ahead of them. 

Since their first uses, ziplines have come a long way. One of the largest regulators of zipline codes is the Association for Challenge Course Technology (ACCT). The ACCT certifies challenge courses and ziplines across the world with a strict code of safety regulations. 

Even with these regulations available worldwide, there are shoddy designs and backdoor businesses that you need to look out for as a parent. Zipline systems have moved from a slow crawl across a ravine to a high-speed flight across tremendous gaps in jungles. With the increased risk, there needs to be an increase in safety measures. Luckily, plenty of people are working to fill in the safety gaps and instill a culture of safety. 

Zipline Safety

According to the ACCT, the chances of a zipline breaking are one in a billion. With the proper construction, equipment, and training, a zipline course for kids will be one of the safer activities out there. There is an inherent risk in any adrenaline-seeking activity, but following the proper guidelines can ease the worried mind of parents. 

The ACCT has been taking on the most problematic part of ziplines: the lack of consistent guidelines.

The American National Standards Institute accredited ACCT’s zipline standards, moving the push for consistent regulations forward. While it is often an issue handled on a state-to-state basis, looking for a zipline built by and running on these standards is a great and easy place to start. 

Of course, the safety of sending yourself careening over a large valley at 45 miles per hour is still something to question. No matter the regulations, it can be nerve-racking. With these kinds of activities, we are fighting our human instinct to protect ourselves. To overcome that fear and self-protection, learning about the systems is the best possible way forward. 

Construction and Inspection

The ACCT accredits certain vendors to go out and build challenge courses and ziplines for any company. These vendors are certified to construct courses on-site and often are in charge of training the on-site staff. This is one of the largest factors that anyone concerned about the safety of a course should consider before strapping in and jumping blindly. 

Experiential Systems is another nationwide inspector of ziplines. Any safe zipline course Colorado has to offer will be looked at by the state-based inspection service. They also provide training for instructors that will further ensure the safety of any participant on a zipline. 

Before you send your child off any zipline course, ask for proof of who constructed the zipline and inspected it most recently. These inspections need to be done consistently. Ziplines are most often outdoors, which exposes them to the weather that can slowly decrease safety levels. When an inspection is done, any problem found must be fixed before the operation can resume. 

Image by patrick gantz from Pixabay

Safety Equipment

Just like riding a bike, there are easy ways to avoid most injuries that can occur while on a zipline. While most organizations will provide the proper safety equipment. Familiarize yourself with what is considered the “right” safety equipment. 

The two most essential pieces of gear on a zipline course will be your harness and your helmet. There is also the trolley and tether connected via carabiners, but most of these are in place and much less susceptible to human error. 

Most harnesses are capable of holding over 2000 pounds of weight. At Broadmoor, the weight limit is 250 pounds (with a minimum weight of 90 pounds), so there is nothing to worry about if you are wearing a harness correctly. Listen to the instructors and ensure that all of the harness straps are tightened down.

Nowadays, it’s not a bad idea to wear a helmet to the grocery store. So, naturally, you will wear a helmet while flying through the air at 45 mph. These courses are built inside of the trees where branches will grow in the way of the zipline or can fall from above you. A helmet is the best way to protect yourself. Make sure your child is wearing a helmet. Maybe not at the grocery store, but most definitely on a zipline. 

Training

The final, and arguably the most important, standard to examine when looking for a good zipline course for kids is the training every instructor has received. You can easily get this information by asking the company or camp your kid will be ziplining with. 

There are a couple of different levels of certification that you can be aware of. The ACCT does a great job of offering these trainings and training other companies in instructor training. Your guides should at the very least have a Level I or Level II Practitioner Certification. You can also keep your eye out for a Certified Challenge Course Manager or any Professional Ropes Course Association certifications. These expand beyond just a zipline but often include that Level I or II Practitioner Certification. 

So, are Ziplines Safe? 

Well, “safe” is a problematic guarantee when looking at activities with any inherent risk involved.

Can this, or really anything, be 100% safe? No.

Can we, and do we, consider every professional piece of advice there is to keep our participants as safe as possible? Yes. 


Ensure you are choosing a zipline tour that has followed proper regulations and guidelines. The strict certifications and procedures that are the industry best are the safest place to start, which is precisely what we do here at Broadmoor.

How to Hike With Kids

The trail is where many of us have formed strong bonds and a loving connection with our friends or family. But sharing this space with your children or any group of youth means getting over the mental roadblock of figuring out how to hike with kids. First things first, take a deep breath. Kids can be as stressful, intimidating, and overwhelming as they are cute, fun, or adventurous. Doing this right will end up relieving your own personal stress and create an activity for the kids to tug at your sleeve to do over and over again. 

Before you head out on the trail, take a moment to remember what it was like to be a kid. Everything was exciting, full of mystery and adventure. You were figuring things out for the first time and making mistakes along the way. Try to apply that mindset to the trail now. Hiking with kids won’t be about putting lots of miles under your boots, but it will be about exploring the outdoors and your imagination. 

Now that you’re ready, let’s jump into some more kid-friendly hiking tips that will help you and the youth you are with foster a growing love for the outdoors. And remember, you can always join us for family friendly hiking tours in Colorado Springs for a stress-free adventure.

Photo by Yogendra Singh from Pexels

The Basics

No matter your age, you need your basic comforts to have a good time doing anything. Watching a movie while soaking wet, cold, and hungry will make you hate that movie forever. In order to not do the same for hiking, take care of the basics.

Weather

First off, don’t pick a cold and rainy day to be the first time you go hiking with kids. Not only does it make most adults turn into grumpy children, but it also has the potential to make hiking unsafe. Pay attention to the weather forecast. If it is going to rain, bring rain gear. Remember layers for cold days, and perhaps plan on a lake-side hike if it’s hot.

Clothes

Most weather can be appropriately managed with the right clothing and gear. So, once again, planning ahead is key to make sure you bring proper clothing and layers. Pack a bag full of extra socks and a couple of other layers that will help the kids stay warm and dry. As soon as anyone starts to mention that they are cold or wet, offer some extra clothes to get them comfortable as soon as possible.

Food

Never start a hike on an empty stomach. It would be like going on a road trip without any gas in the car. It won’t work, so don’t expect it to. Have some quick and healthy snacks in the car to fuel everyone up before you even hit the trailhead. 

Kids are so incredibly influenced by food. It can be used as a reward, fuel, or quick break in the day when you need to slow everything down. Also, as all adults learn, hunger can seriously influence our mood. If you notice anyone starting to get a bit grumpy, break out a snack, and it’s guaranteed to bring some positivity back. 

I like to follow a general rule that the kids you’re with are at or below your own level. If you are hungry, they’re hungrier. Cold? They’re colder. If your feet aren’t dry, their boots are puddles. Take care of the basics before they become a problem because that’s when moods start to turn sour.

Photo by Simon Rae on Unsplash

Create Fun

The idea of hiking in Colorado appeals to almost any outdoor enthusiast you can find. There are tons of trails that bring you into a wide variety of terrain and challenges, all the while surrounded by beautiful mountains. But the idea of appreciating nature’s beauty isn’t always at the forefront of a ten-year-old’s mind. To make hiking memorable and enjoyable for younger kids, you need to create fun – perhaps the most important aspect of how to hike with kids.

Terrain

One of the first things you can do to make hiking with kids fun is to choose the right trail. Chances are good that a long flat walkway will bore almost any kid out there. On the other hand, a trail that snakes through the forest and follows a river to a massive waterfall opens up the possibility of exploration and naturally finding fun within the landscape. The forest can be a playground where trees become jungle gyms and creeks become waterslides. You just need to find the right trail.

Encourage Imagination

Don’t be afraid to let your kids run a little wild. Their imagination can take them into worlds where they explore the trees looking for Narnia or digging for buried treasure. Just remember to also teach your kids about proper hiking safety and the rules of the trail.

Not every child has the natural spark of imagination, so you may need to encourage this with different activities. Building a fort is a great way to bring fun into the hike. Or you take the time to see how large of a teepee you can build. The hike becomes an adventure and a challenge when you include a little imagination. Forests are also natural spaces for massive treasure hunts that will bring the excitement of both competition and exploration to everyone involved.

Bring Friends

We all want to be our kids’ best friends, but it isn’t always the case. Kids want to hang out with other kids their own age. Turning a hiking trip into a group activity will make your kids want to come back and do it more often.

Image by StockSnap from Pixabay

Be Intentional

Going out into the forest and having fun while hiking with kids will take a little planning. However, being intentional with the hike will go a long way with the kids you go hiking with. Ten minutes of forethought can completely change the experience you have out on the trail.

It’s Not Hiking

The word “hiking” can get a bad rap with some kids. It sounds difficult and often unpleasant. You may not even need to label the hike. You can get the kids in the car and head off to the woods. Call it an exploration, an adventure, or anything that may have appealed to you as a small child. If you make it sound like work, it will end up being more work for you.

Goals

Very simple goals allow for kids to feel successful during a hike or afterward. Little things like “I want to see a fish” or bigger things like “I want to make it to the top of a mountain” can give kids something to look forward to or challenge themselves on. 

Remember that goals are going to change for every child. For some kids, making it a mile down the trail will be a huge accomplishment. Others may just want to swim in a river or find the biggest, slimiest, scariest bug that they have ever seen. Tailor the goals to each kid and work with them on finding out what they want to accomplish.

Responsibilities

It may sound ridiculous, but kids love having responsibilities. Of course, this excludes when it’s taking out the trash, cleaning their room, or doing dishes. But on the trail, responsibilities can give kids a sense of ownership and control over what they’re doing. 

If your kids are a bit older, you can trust them to carry important pieces of gear or lead the way with a map and compass. For the younger kids, you can have them keep an eye out for any interesting detours, hold the dog’s leash, or be in charge of finding the coolest lunch rock that anyone has ever eaten lunch on.

End on a High Note

After you get done hiking, always end on a high note. Entice your kids with the thought of ice cream in town, a movie back at home, or any reward that gets them excited. Discover other family friendly activities in Colorado Springs that you can let your kids choose from and create their own vacation fun. 

Hiking with kids is one of the most fun things you can do outside. They will naturally push you to see the world differently. No matter what you do, enjoy yourself, and the kids will often follow your lead. Smile, laugh, and become a kid again. Even if you aren’t an avid outdoors person, look for family friendly hiking tours that will take you all on a fun hike. You can pick up some hiking tips and learn the basics of how to hike with kids for your future adventures.