How To Waterproof Your Hiking Boots 

Don’t you just love the snowy season in the Rockies? As you plan some awesome winter activities, one essential piece of gear you’ll need is waterproof boots. Winter hiking boots, that is boots that are waterproof and insulated, are key for staying warm during your time outdoors. If you don’t have waterproof hiking boots (or if your pair has gotten leaky), no worries! It’s easy to apply a waterproof treatment to any pair of hikers. Follow this step-by-step (no pun intended) guide to waterproofing boots so you can stay warm and enjoy the winter wonderland.

How can I tell when I should waterproof my hiking boots?

Waterproof hiking boots don’t stay waterproof forever. The treatment deteriorates over time and will leave your hikers vulnerable to wet conditions. Instead of getting a new pair, you can prolong their lifespan with a simple waterproofing. 

Aside from an unpleasant surprise mid-hike, how will you know when it’s time? You can get a sense of your boots’ waterproof capabilities with a simple test. Grab a spray bottle or put a boot under a trickle of water from the faucet. If you look closely, you should see the water droplets beading up before falling off your boot. If they soak into the boot rather than bead against the fabric, it’s time to reapply your waterproofing treatment.

How often should I give my hiking boots a waterproof treatment?

The frequency of waterproofing treatments depends on how often you use the boots. The waterproofing will go faster if you wear the boots regularly for long and rough hikes. It can also deteriorate faster when you clean the boots. It’s a good idea to apply this waterproofing treatment at the beginning of the season, before a particularly big hike, or after a deep cleaning. Treating your hiking boots at least once a year will keep them in good shape so your feet stay dry on the trail.

Which waterproofing treatment is best for my boots?

When you decide you are ready to waterproof your hiking boots, you’ll immediately be overwhelmed by the number of choices. There are sprays, waxes, and liquid forms of waterproofing treatments that are either wax- or water-based. You will want to choose what’s best based on the material of your boots. (More on the proper treatment for each material is below.)

One important thing to keep in mind here is that solid waxes have become less popular for waterproofing (See liquid wax below). This is because it can limit the ability of adhesives to stick to the material in the event that you need to have the boots re-soled.

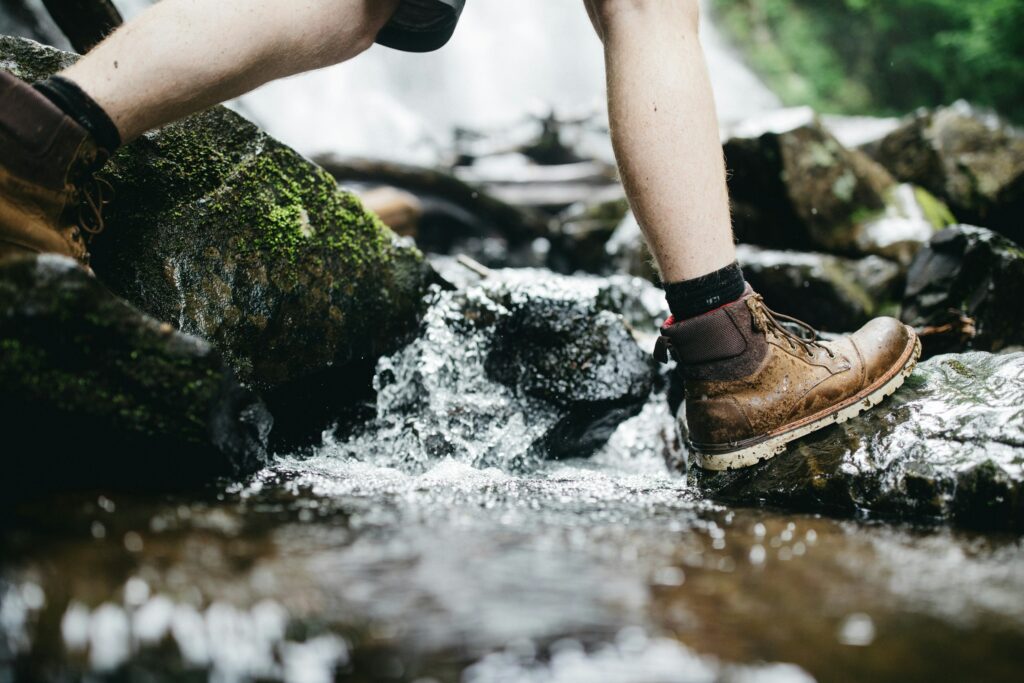
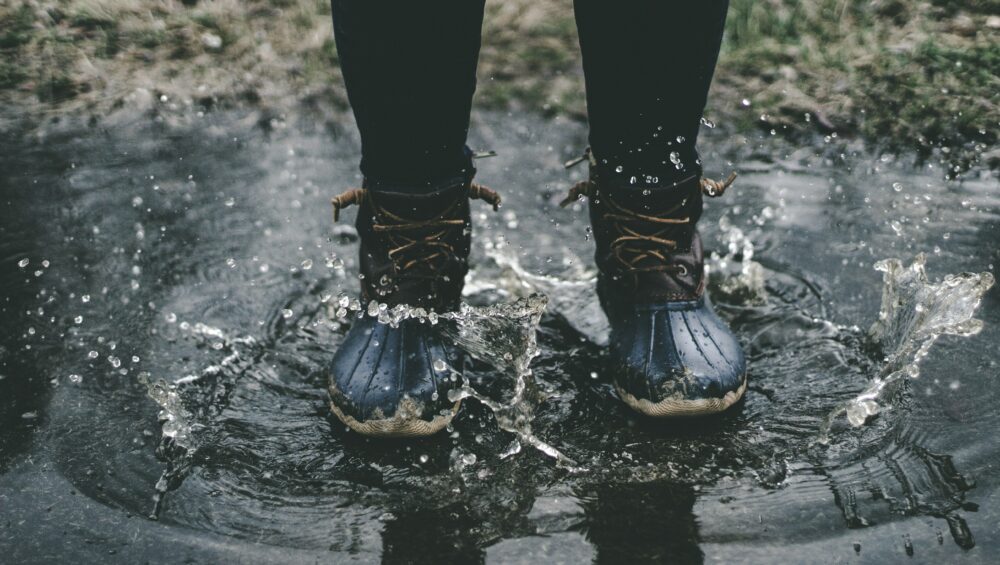
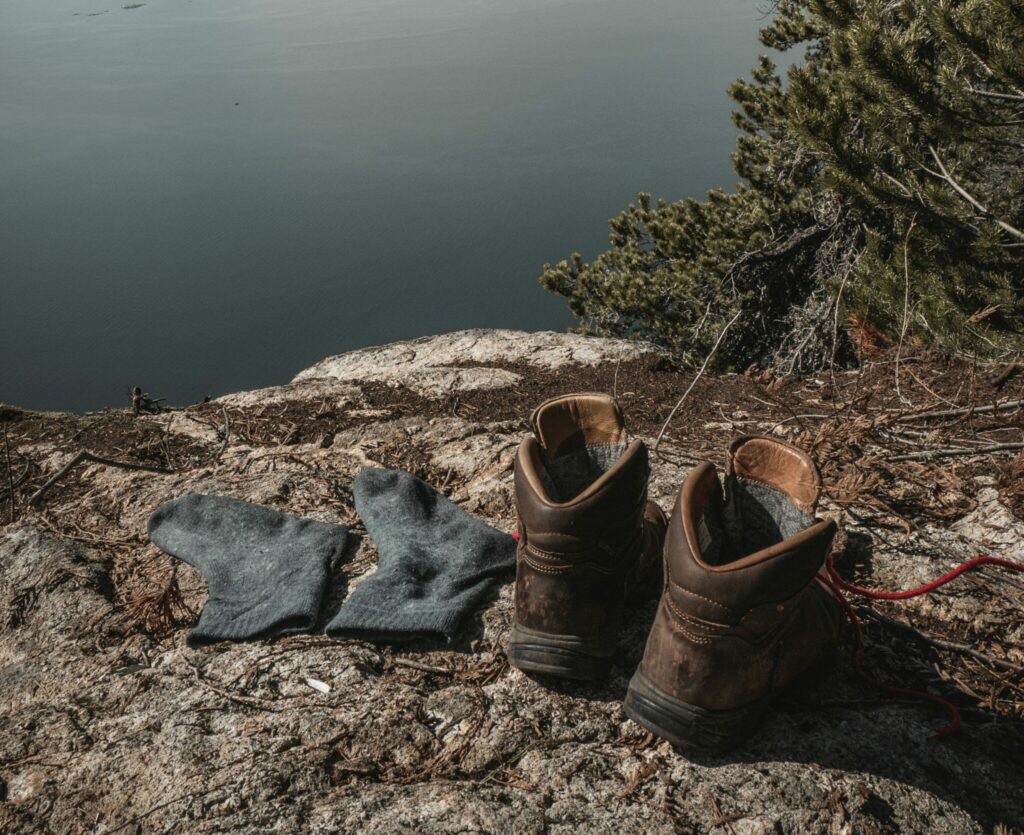
Photo by Wes Hicks on Unsplash

How to Waterproof Your Hiking Boots

Step One: Clean Your Boots

The first thing you need to do before you waterproof your boots is clean them well. Any leftover dirt or grime will keep the waterproofing treatment from thoroughly adhering to your boots. To give your hiking boots a deep clean, first remove the laces and insoles (if removable). Start by brushing away dirt with a toothbrush or any brush with soft bristles. Then, use a mild soap or boot cleaner if you have it to scrub any dirt out of the seams, creases, and tongue. 

If any dirt is really stubborn, you may need to soak your boots in warm water to release the grime. After you give them a good scrub, you will rinse them with warm water anyway, so don’t be afraid of getting them wet. (Do not soak nubuck material – they are allowed to be “damp.”) 

You also may not need to dry them, as most waterproofing treatments work better with wet boots. When you are ready to dry them, you can towel them off and then put crumbled newspaper in the boots to absorb moisture faster. 

Step Two: Apply the Waterproofing Treatment

Below is an overview of a few ways to apply common waterproofing treatments to different hiking boot materials. Be sure to follow the instructions provided by the waterproofing treatment. The process may take time, but it is important to do it correctly so you do not ruin your boots. 

Waterproof Treatments for Leather Hiking Boots

Full-grain leather hiking boots are durable and naturally waterproof. They do not typically have an additional treatment and instead rely on the natural waterproof abilities of the leather. Waxes are the best ways to treat leather, support their waterproofing, and improve their lifespan. As opposed to solid wax, which you need to heat up, liquid wax is a faster and better alternative. 

Both waterproofing treatments should be applied to wet leather, as the water helps the treatment get into the leather better. Liquid wax treatments come with a sponge applicator, and you can work solid wax in with gloved fingers. You will want to buff the leather and repeat the process a couple of times before letting the shoes dry fully. 

Waterproof Treatments for Nubuck Hiking Boots

Unlike full-grain leather, nubuck is a soft material, sort of like suede leather. If your hiking boots have this material, you will need to be more cautious not to scrub too hard or use a treatment that will decolor or ruin the softness.

Additionally, nubuck should not be submerged in water: instead, the boots are allowed to be damp for applying the waterproofing treatment. Most nubuck waterproofing treatments are water-based, and you can find a liquid or a spray. Liquid can be applied liberally as you can wipe the excess off afterward. For a spray application, you will want to do two or three coats to ensure you do not miss an area.

Waterproof Treatments for Synthetic Hiking Boots

Synthetic hiking boots will likely be treated similarly to nubuck material. However, be sure to check the instructions to see if the material should be damp or really wet before application. Sprays tend to be the most popular for waterproofing synthetic materials, and they are easy to find. While you’re at it, you can waterproof your sneakers, backpack, and even a damaged tent.
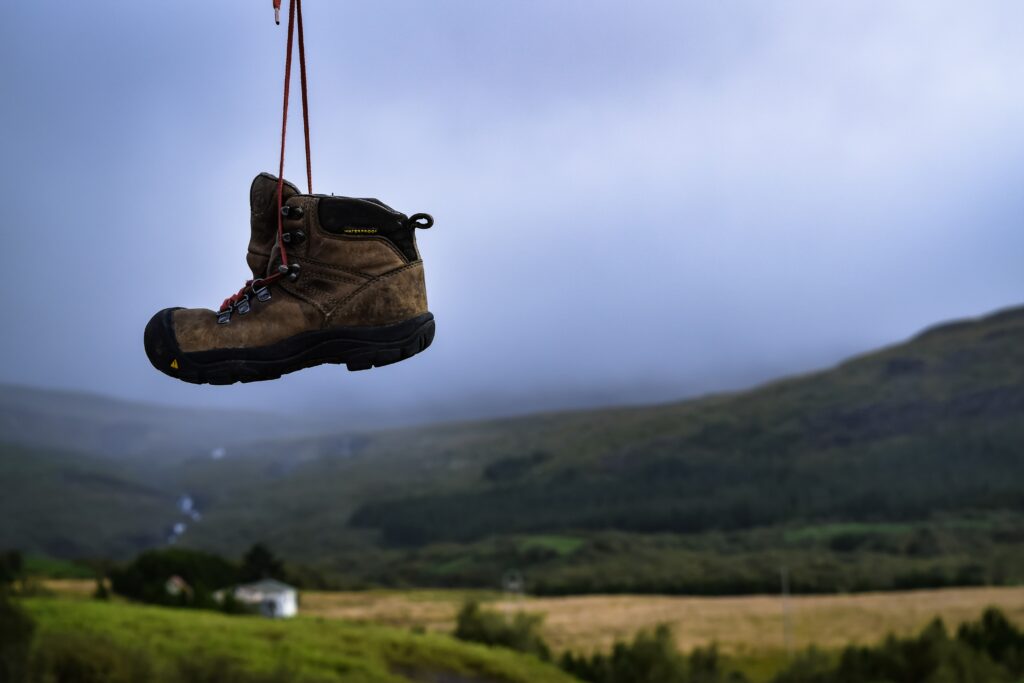
Step Three: Drying Your Boots

After applying the waterproofing treatment, you need to let your hiking boots dry fully before use. If they get scuffed up or dirty mid-process, the treatment may not take as well. There are a few important things to keep in mind when you go to dry your hiking boots. First, too high temperatures, either next to a fire or in direct sunlight, can age leather too quickly and mess with adhesives. You will want to leave them in a dry, warm environment after toweling off excess moisture. Crumpled up newspaper will help, but it will still take a few days to dry fully. 

This is why you need to plan ahead and not try to waterproof your hiking boots the day before a big trip. Taking care of your gear will help it last longer and keep you safer and happier on the trail. Whether you’re trekking through snow or getting caught hiking in the rain, waterproof hiking boots are a lifesaver all season long. With a quick waterproofing treatment, you can make old gear like-new again and ensure a fun and dry time on trail. Happy hiking!

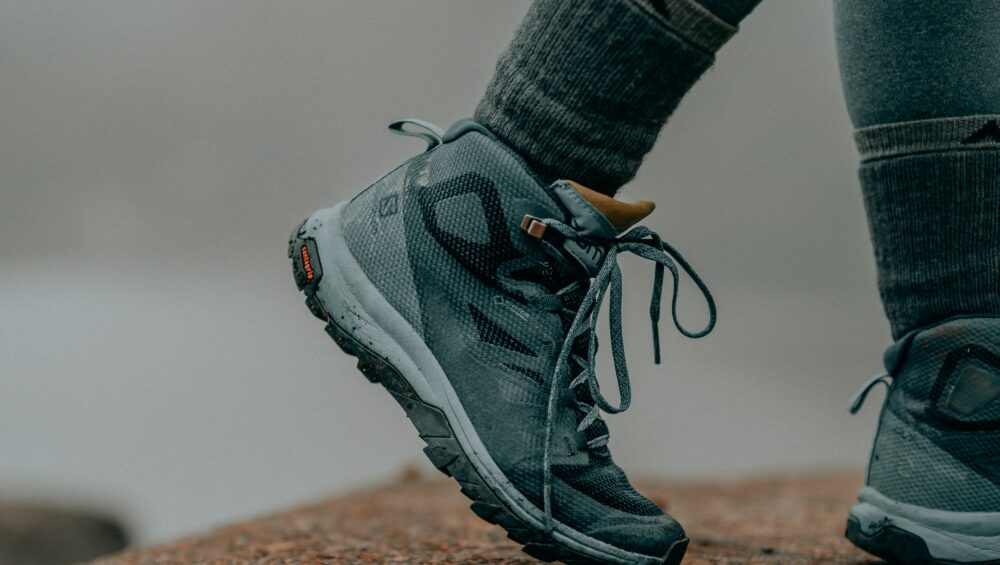
What Does Leave No Trace Mean?

If you’ve spent time in the outdoors, you’ve probably seen the phrase “Leave No Trace.” You might guess that the philosophy has to do with not littering in national parks, but it includes much more. There are seven key principles to Leave No Trace that every hiker and backcountry camper should know. 

What is the point of Leave No Trace?

The goal of Leave No Trace is to ensure that the wilderness stays natural and beautiful for generations to come. Imagine if you went on a hike and found garbage or couldn’t go because the path had been damaged. The principles of Leave No Trace help us to minimize our impact, protect nature, and be stewards of the land. 

What are the seven principles of Leave No Trace?

Now that you understand the reasoning behind Leave No Trace, let’s discuss the seven principles. Keep these in mind as you explore public spaces and interact with nature in your day-to-day life.

Plan Ahead and Prepare

As starts any good outdoor adventure, the first step is preparation. Why? Poor trip planning can lead to decisions made out of necessity that do not follow Leave No Trace principles. For example, if your group gets lost, you may end up camping on an unstable site or building a fire somewhere with fire bans. 

It’s important to prepare for any outdoor adventure by checking the weather forecasts and determining your route. Make sure you know how to check trail conditions for closures or obstacles. Procure the necessary maps, and be sure to check land boundaries, permit requirements, and local regulations. This might sound like a lot of work for a day hike, but a small investment of prep time can save time, injury, or unpleasant conditions on your trip.

Travel and Camp on Durable Surfaces

The idea of durable surfaces is an important one for the philosophy of Leave No Trace. Most places you go for a hike will have trails laid out. You might see logs or stones laid out to mark the trail boundaries. Staying on the trail is essential, not just to avoid getting lost. It also keeps the surrounding vegetation safe from getting trampled. 

If you come across a puddle in the middle of your trail, you may need to skirt it for safety reasons. However, try to stay as close to the trail as possible rather than venturing way out to avoid getting wet. This ties into the first principle of preparing well because you will want to know about wet trail conditions to wear the correct hiking boots.

There are times when it is necessary to walk off-trail, specifically to find a private place to go to the bathroom. In this case, you should keep in mind the durability of different surfaces. It is always best to walk on rocks, gravel, or sand. Grass, especially dry grass, tends to be resistant to trampling, but other vegetation is not. Try to avoid walking on vegetation or soil when possible. If you are in a group or see that someone else has walked the same way, spread out. The fewer footsteps in an off-trail area, the better. 

The same techniques apply to camping. Most parks will have designated campsites. It is important to follow the park’s regulations and camp in the correct location. This keeps the human impact concentrated in one area, preserving the rest of the park in its natural state. 

Dispose of Waste Properly

There are two types of waste to consider with this Leave No Trace principle. The first is human waste and the second is all other garbage. When using the bathroom in the woods, it is important to follow protocols to protect drinking water. First, you should be at least 200 paces from any water source, to avoid contamination. Pick an inconspicuous spot that other hikers are unlikely to visit. Second, the hole you dig should be 6-8 inches deep, and after you are done, cover it with natural materials. Finally, toilet paper, sanitary products, and wipes should be packed out. You can bring along a plastic bag with a spoonful of powdered bleach or baking soda to take care of the odor. 

It is important to pack out all trash. Food packaging, uneaten leftovers, etc, should all be hiked out to a trash can. Burning trash can be dangerous to the atmosphere and risk wildfire. When packing up a campsite, do a sweep, where every member of the group spreads out and walks together across the site. Look for any trash, even organic matter like banana peels, and make sure the campsite looks nicer than when you arrived.

Leave What You Find

It can be so tempting to take a souvenir from your hike, be it a small stone, leaf, or flower. However, if everyone had the same thought, there would be no nature left to enjoy. Not to mention that you might be taking a bite from a wild animal or a stick for a bird’s nest. It is better to take a picture, enjoy the moment, and move on. 

Similarly, many people are tempted to leave their mark. We’ve all seen trees and rocks marred with hearts and initials. While it might feel fun at the moment, keep in mind that future visitors will not get to enjoy a sense of unspoiled nature if the impact of humans is obvious. More importantly, cutting into a tree’s bark can leave it susceptible to fungus that will ultimately rot and kill the tree.

Minimize Campfire Impacts

Campfires are such an iconic part of the camping tradition. Unfortunately, they also consume firewood, risk forest fires, and can leave behind unsightly marks on the landscape. Camp stoves are a great option for cooking as they are lightweight, flexible, and leave no trace. You should only consider building a fire if your campsite has a fire ring and if there is firewood for sale.

You should not gather your own wood unless it is an emergency because dead trees are often home to animals and cutting branches does not follow Leave No Trace principles. It is absolutely essential never to bring firewood from elsewhere to your campsite. As the saying goes, burn it where you buy it. This is an important Leave No Trace principle because firewood may contain critters or diseases that can contaminate and infest local trees. Finally, never leave a fire unattended, and be sure to fully extinguish it with water when you leave.

Respect Wildlife

Respecting wildlife is an important Leave No Trace principle for your own safety, the safety of the animals, and the safety of future visitors. While it is exciting to see wildlife in nature, be sure to keep your distance and observe quietly. Unless your safety is jeopardized by a bear encounter, do not attempt to scare the animal away. 

Do not approach or feed any animal. Animals that get accostumed to human contact or learn that humans will feed them can become dangerous. A harmless encounter with a creature near your campsite could start a problematic pattern with an animal and lead to a campsite closure or an animal’s death. This principle is why it is so important to keep food, toothpaste, deodorant, etc in odor-tight bear-proof containers.

Be Considerate of Other Visitors

The final principle of Leave No Trace has to do with ensuring other hikers and campers enjoy their time in nature. This means keeping noise levels down, being responsible for your children and pets, and not leaving behind evidence that you were there. Finally, be sure to follow trail etiquette, moving aside for horseback riders and giving priority to people going uphill.

Final Thoughts

There are so many amazing hikes near Colorado Springs. Being a good steward of the land will ensure that future generations can appreciate our beautiful state as much as you get to. Learn and follow the seven principles of Leave No Trace and help keep nature natural for everyone.

PLBs vs. Messengers – What You Need to Know For Hiking

As we enter the warmer months, you are surely excited to get back in the saddle and hit the trails. Beginner cyclists and mountain bikers need to be aware that you will need more than just a helmet and water bottle. There are a few biking tools you should carry with you at all times. A simple bike repair kit can keep you from a serious inconvenience on the trail. We’ll go over the essential bike maintenance tools so you can assemble a basic bike repair kit for your trip.

Are you considering getting an emergency beacon or messaging device? These are both great pieces of safety equipment to have if you are a serious hiker. While it is nice to unplug and be in nature, limited connectivity is a serious risk in the event of an emergency. A satellite-connected device can literally be a lifesaver if you need to send a distress signal. If you are looking to learn more about both and figure out which to get, we’ve got a complete breakdown of PLBs vs Satellite Messengers right here.

What are Personal Locator Beacons?

Personal Locator Beacons (PLBs, also called emergency beacons) are the more simple of the two devices. PLBs solely have the capability of sending your location to authorities. Unlike satellite messengers, they do not allow you to send messages to anyone else. Finally, because of their simplicity, once the distress signal is activated, there is no way to recall it.

How do PLBs work?

An emergency hiking beacon is very easy to use. If you find yourself lost in the woods or in an emergency and need to send a distress signal, you simply point the antenna up and turn the device on. This automatically activates the signal, which gets transmitted via satellite to local search and rescue operations. They will then have your exact location via GPS. Because PLBs need to be registered with the authorities, they will also be able to see whatever personal information you provide, such as emergency contact numbers and important medical conditions. Many PLBs also have regular and infrared strobe lighting to assist rescuers in finding you.


How long do PLB batteries last?

Personal Locator Beacons use long-lasting lithium batteries. Because they remain dormant until you turn the device on, it should last for up to five years. These batteries are required to be extra strong so that once turned on, the beacon remains strong for up to 24 hours. Unfortunately, they do need to be mailed back to the manufacturer in order to replace the battery, and this process can be expensive.

What are good Personal Locator Beacon brands?

ACR Electronics is a popular brand for both PLBs and Satellite Messengers. Their products are durable and highly rated, if not a little expensive. Ocean Spray and SpotX are two other brands of emergency beacons to consider.

What are Satellite Messengers?

Satellite Messengers are more capable devices, and as expected, can be more expensive. Not only do they provide the same functionality as PLBs, but they also have the ability to send and receive messages to friends and family. Some models allow communication with rescuers, which also makes it possible to cancel a distress signal.

How do Satellite Messengers work?

Satellite Messengers are similar to personal locator beacons but with more features. Satellite messengers allow users to text anyone, like family and friends. Some models also have color display screens, GPS navigation, and weather reports. They may also have Bluetooth capability to connect to your cell phone or fitness watch. As expected, these added features mean that the prices of satellite messengers vs PLBs are much higher in some instances.

How long do Satellite Messenger batteries last?

Unlike PLBs, satellite messengers have easily rechargeable batteries. Depending on the brand and model, the battery life when turned on may be up to a week, and asleep or in “expedition mode” up to three weeks. These longer battery-life models are a great option for extended backpacking trips.

Why do Satellite Messengers require subscription plans?

Because satellite messengers have more robust features and communication abilities than the simplicity of emergency beacons, they do require users to pay for a monthly subscription. This can be a major expense and is one reason many people opt for the more simple emergency beacons. That said, if you spend a lot of time in remote areas with limited or no cell reception, you may find it worth it to have GPS navigation and be able to communicate with your loved ones.

What are good brands of Satellite Messengers?

There are a lot of options on the market for satellite messengers, and the prices vary considerably based on the display, capabilities, and more. Depending on what features you want and what subscription you are willing to pay for, you can narrow your choices down to a few good options. The most popular Satellite Messengers are available by Garmin, ZOLEO, and SpotX.

Why can’t I just use my phone?

Many people are perfectly fine having just a cell phone on a short day hike. However, if you’ve hiked enough, you have surely experienced a drop in signal somewhere along the way. For serious hikers who like to take multi-day trips or hike miles from civilization, a cell phone will not be good enough. Cell signals can be unpredictable, and your phone could get water damaged, lose battery, or break in an emergency. PLBs and satellite messengers are much more durable than cell phones, more rugged, and typically waterproof to a certain depth. The peace of mind that comes with having a sure-fire form of communication can be worth it for many hikers.

When should I send a distress signal?

It is important that all hikers prepare well for their journeys. This includes packing all the essential safety gear including fire starters, emergency shelter, and first aid supplies. Distress signals should only be sent in true emergencies. It would be appropriate to use search and rescue services if your life is at risk or if you are unable to get back to safety on your own. Keep in mind that many states have penalties for frivolous use of rescue services, so take all the measures possible to prepare against emergencies. This includes not hiking in dangerous weather conditions, on unmarked trails, or in areas that have been closed off by park officials.

Can I hike alone?

If you are wondering if it is safe to hike alone, the answer is sort of. There are certain times when it would not be safe to hike alone, such as in bad weather, at night, or in an area with dangerous animals. If you do want to hike alone, it can be helpful to start small on a trail you know. Building up to longer solo hikes will help you feel more comfortable on the trail. The most important things to do when hiking alone are to pack all essential gear, carry multiple forms of navigation, and be sure to tell someone your planned route.

Final Thoughts

Personal Locator Beacons and Satellite Messengers are two helpful pieces of safety equipment for avid hikers. If you are looking for this extra peace of mind and trying to decide on a PLB vs a Satellite Messenger, consider the different features you would like and the costs. Either is a much safer option than just hiking with a cell phone, so you really can’t go wrong. Happy hiking!
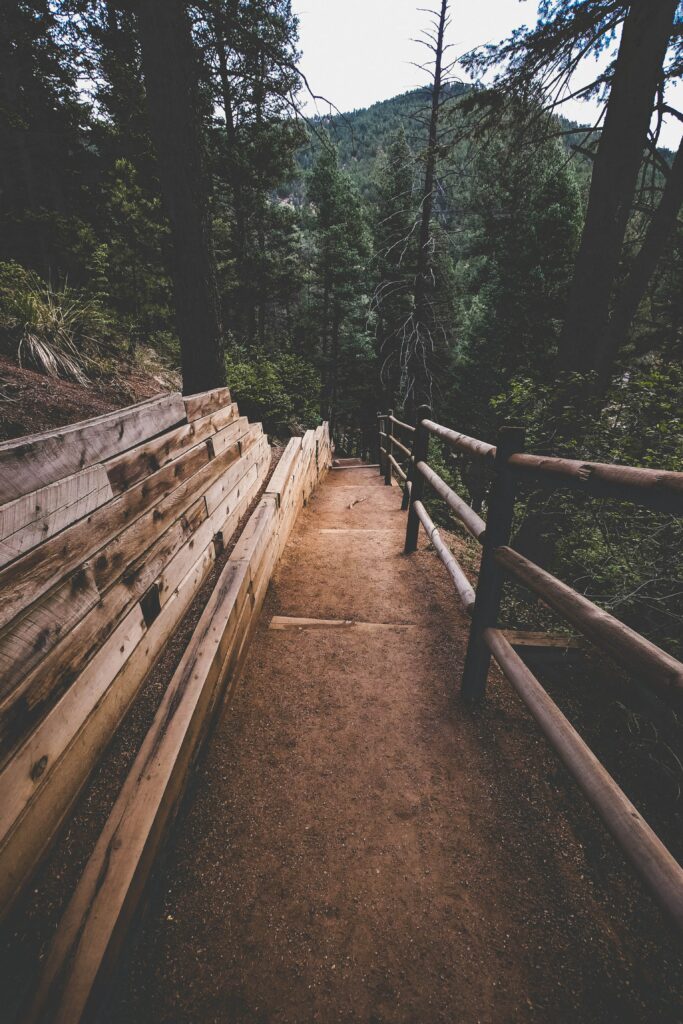
How to Train for Hiking and Backpacking

Many beginner hikers make the easy mistake of under-preparing for their journey. I have certainly heard, “If I can walk, I can hike.” But just going for walks around the neighborhood is not the best way to train for hiking. Long-distance hikes, multi-day hikes, and elevation hikes require a more focused training schedule.

If you are coming to Colorado Springs for a hiking vacation and wondering what you need to do to get ready, we’ve got you covered. We will go over all the essentials of how to train for backpacking – including cardio, strength, and flexibility training – so you can get the most out of your trip. Whether you are planning a solo adventure or scheduling a guided hike, this workout regimen will have you in tip-top shape for whatever part of the great outdoors you will conquer. 

Endurance-Focused Cardio Training for Backpacking

At nearly 6,000 feet above sea level, Colorado Springs is even higher than Denver, which is commonly called the Mile High City for its 5,280-foot elevation. What this means for visiting backpackers is that you need to train for cardio even more. Depending on where you are coming from, your body will not be used to the lessened amount of oxygen in the air at this elevation.

Cardio exercises train your body to use oxygen more efficiently, which is key for hiking at elevation. This can help you prevent muscle cramps, keep you from fatiguing early, and even combat the symptoms of altitude sickness. The best way to train for this is by going on some day hikes near you and working up to higher elevations and longer mileage.

Endurance training for multi-day backpacking in Colorado Springs requires at least an hour of steady-state cardio every other day. Steady-state cardio involves breaking a sweat and maintaining the exercise with minimal rest. You can choose activities that suit you best while prioritizing low-impact exercise. Endurance training in the form of rowing, swimming, or biking will help protect your joints from overuse while giving your lungs the workout they need.

Strength Training for Multi-Day Hikes

Many people do not consider strength training a key part of preparing for backpacking, but it is. If your muscles are not strong enough for the pack you are carrying or the steep incline you are ascending, you will surely get burnt out more quickly. Weight training is a great way to build muscle endurance for multi-day backpacking trips. 

There are two main groups to consider for strength training. The first is your legs for hiking, and the second is your core and upper body for carrying your backpack. Great lower body exercises will focus on stability for your ankles, knees, and hips. You can strengthen your feet with arch workouts like towel scrunches, your lower legs with heel raises, and your upper legs with squats and lunges. Don’t forget to include hip exercises like hip thrusts and deadlifts to build stability in your lower core. You can find more exercises in our guide on how to train to hike a Colorado Fourteener.

Core Exercises for Pack Training

The second area to focus on for strength training is the upper body. When you go on your first multi-day backpacking trip, you will be surprised at the heft of your pack. Backpackers have to carry a lot of weight, including shelter, food, supplies, and more. Luckily, the pack will get lighter as you eat through your supplies. 

To properly prepare for a backpacking journey, you should strengthen your core, shoulders, neck, and back muscles. Lower back exercises are important for preventing injury when carrying heavy loads. You can lie flat on your stomach and raise one arm and the opposite leg. Repeat this exercise from a tabletop position, resting on your hands and knees. Core strengthening like ab workouts and planks are also essential for building upper body stability.

The best way to prepare to carry a pack is, simply, to carry one. Pack training involves venturing out on your training hikes with a pack stuffed full of weight. Depending on the length of your multi-day backpacking trip, your pack could be twenty to forty pounds. Keep in mind that it is not recommended to carry a pack of more than twenty percent of your body weight. With this in mind, you can load your backpack with some heavy household items and practice hiking with it. If you are training by yourself, be sure to follow the best practices for staying safe when hiking alone.

Flexibility Training for Hiking

The final, and arguably most important, part of backpacking training is stretching. While you should alternate cardio and strength training days, you should stretch daily after all of your workouts. You should also begin your workouts with some dynamic stretches but only after you have warmed up for five to ten minutes.

When working on flexibility for backpacking, it is important to focus on the legs and back. You will want to ensure that your legs stay as flexible as possible through miles and miles of hiking. Flexibility training is important for preventing joint injury. This is because when your muscles are overly tight, they pull on your joints and cause stress. Keeping your legs loose will protect your knees and ankles from feeling worn out on your hike.

In addition to the basic toe touches, you will want to stretch your calves, hamstrings, quads, IT bands, and hip flexors. Each stretch should last twenty seconds with a continual effort to reach your limit (without injuring yourself). If you have any previous injuries, be sure to give those areas some extra attention. Any foot pain or arch tightness will require you to stretch and strengthen in order to prepare for the innumerable steps you will take on your backpacking trip.

Final Thoughts

Our beautiful state of Colorful Colorado is one of the most scenic places to take a multi-day backpacking trip. Every beginner can learn how to train for hiking and prepare themselves for this adventure of a lifetime. With a couple of months of dedicated training, you will be ready to take on the elevation and mileage of a multi-day hike in Colorado. Happy hiking!
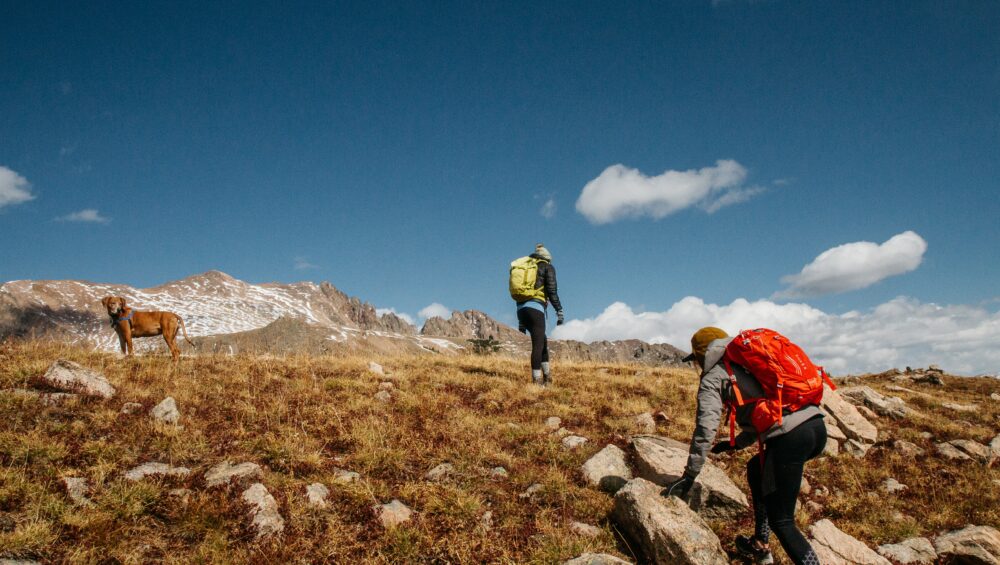
Tips for Hiking in Rain

Are you headed out for a hike and worried about the weather? It’s important to always be prepared for any conditions, so we’ve got some tips for hiking in rain. First, make sure you know how to pack for a day hike in general, and then we’ll discuss specific gear for hiking in rain and other considerations for staying safe and dry.

Image by Drew Tadd from Pixabay 

Do Your Research

First things first, always check weather reports before you head out. There is a difference between a drizzle and a thunderstorm, both in terms of comfort and safety. If there are severe weather warnings or if your hike includes a potential flashflood area like a canyon, consider postponing your trip. Either way, be sure to tell a friend about your planned whereabouts in case the weather becomes hazardous. Lastly, pack the ten essentials to be prepared for every situation.

Pack a Hot Drink

When packing for a day hike, you should always bring plenty of water and snacks. When packing for a rainy day hike, you may want to add a nice warm beverage to the mix. You can prepare a thermos ahead of time and leave it in the car for when you finish the hike. If you are backpacking for a couple of days, drink mixes like hot cocoa can be a real treat to warm you up. 

Wear the Right Rain Gear

As is best practice for every hiking trip, you should wear moisture-wicking inner layers. Dry-fit shirts and wool socks will keep you dry even when you sweat or get caught in the rain. These proper layers insulate body heat, help prevent blisters, and can be the difference between a safe rainy hike and a dangerous wet one. 

Rain Jacket

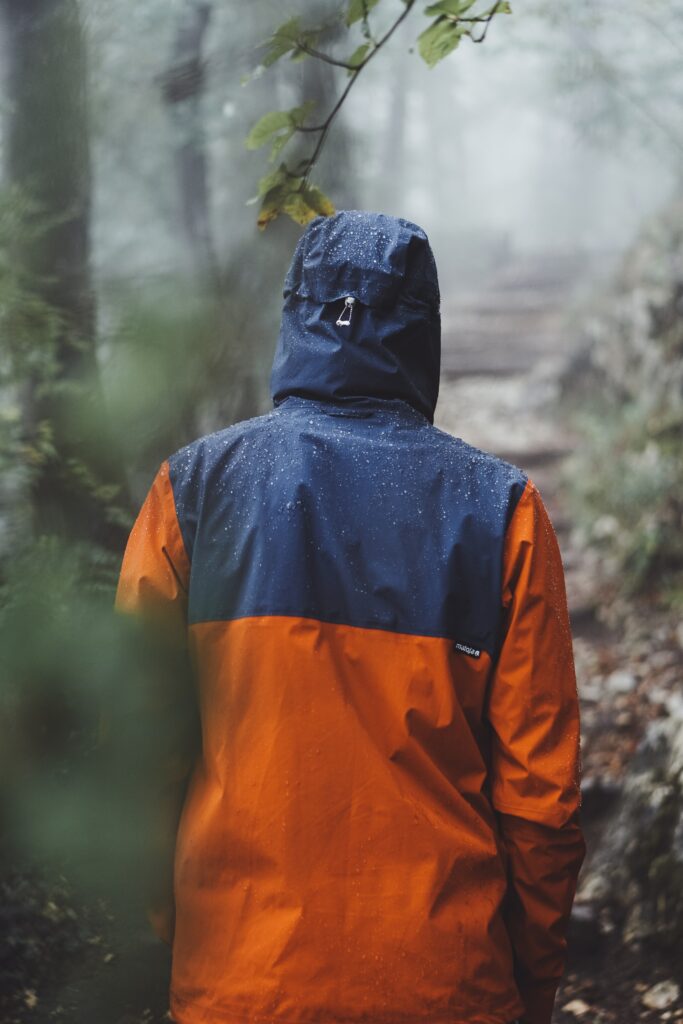
For outer layers, a waterproof rain jacket is a must. Something light that fits in a day pack is a smart choice to avoid bulk in good weather. The most important thing to note is the distinction between water-resistant and waterproof materials. A water-resistant jacket might stay dry if you spill your drink or walk through a sprinkler. However, it is not suitable for hiking in the rain. After a while, the material gets bogged down with water and can become extremely uncomfortable. To avoid being cold, wet, and miserable, a certified waterproof raincoat is an absolute necessity.

Rain Pants and Proper Footwear

Waterproof pants and hiking shoes are the two other essential pieces to stay dry on a rainy day. Waterproof boots are my go-to even on clear days. If I happen to step in a puddle or hop a small stream, my feet stay dry. The one downside with waterproof shoes is that they are not breathable. If rain does get in, it will be extremely hard to get them dry, and you will find yourself walking in puddles the rest of the day. The main concern with wet feet is blisters. When skin gets wet, it is more susceptible to breaking and forming blisters. This is why waterproof pants and shoes (that don’t have a gap at the ankle) are the best way to keep dry.

Two other helpful pieces of gear are a towel and an extra pair of socks. You may choose to leave these in the car to dry off when you return. Having a towel for wet hair and drying off wet skin is really helpful, and there is nothing as comforting as putting on warm, dry socks after a wet hike.

Photo by Andy Køgl on Unsplash

Waterproof Your Gear

Next, unless your day pack is truly waterproof, you will want to make sure the stuff inside is well protected. Your phone, cash, food, and other personal items can be kept dry by putting them in dry bags or plastic baggies. A waterproof phone case will help make sure you always have access to navigation tools and emergency services.

If you are backpacking for a couple of days, rather than just on a day hike, you will especially want to ensure your sleeping bag, clothes, and toilet paper do not get wet. One great way to keep all your gear dry at once is with garbage bags. Rather than put each item individually in small plastic bags, you can line your entire pack with a garbage bag and then pack everything like normal. As long as you secure the bag shut and get the water off before you open it, you should be able to keep your important belongings free from the rain. 

Know Safety Protocols

There are a few important rules to keep in mind for hiking in dangerous weather conditions. First, assume everything will be slippery. Rocks, wooden steps, mossy tree roots: everything is easy to slip on when wet. Be sure to keep your eyes on the trail and tread carefully.

If you find yourself caught in a thunderstorm, seek shelter, head to lower elevation, avoid the tallest trees, and avoid open meadows. If you are with a group, you should spread out to reduce the number of injuries in the event that there is a lightening strike.

Finally, if you were planning on crossing a stream on your hike, remember that it will be larger in the rain. You should always have an established path with branches or rocks to hold onto for safety. Added water means added current, so be extra careful not to get your feet swept out from under you. Check the National Park Serivce advice for river crossings for more information.

Dry Out After a Wet Hike

If you head home after your day of hiking in the rain, you can throw your clothes right in the wash. If you’re out for a couple of days, hang everything to dry. Put your hiking shoes in the sun or near a fire (not too close!). It is easy for mold to develop in gear that does not dry properly, so dry out your boots to extend their life. 

Photo by Yann Allegre on Unsplash

Consider a Guided Hike

One great way to avoid the hassle and confusion of preparing for hiking in the rain is to book a guided hike. You can learn so much from professional hiking guides on how to prepare and navigate a rainy hike, and you’ll also benefit from someone bringing along those essential first aid supplies.

If you are feeling dispirited that the rain ruined your hiking trip, know that it is very possible to have a great time in any weather. With a little preparation and the right gear for hiking in rain, you can ensure a comfortable experience with Mother Nature’s wetter side. Be sure to check out the Colorado Springs trail guide to find your next great adventure, and enjoy your time outdoors! 

Is It Safe to Hike Alone?

We’ve all been there – maybe you’re new in town or have found yourself with an empty weekend and have no one to explore with, or perhaps your schedule just can’t line up with your friends’. But regardless of the reason, this may beg the question, is it safe to hike alone? The answer is yes! Being solo certainly does not need to end your adventure before it begins.

If you are someone with an unusual work schedule, who travels often, or are looking to get outside on your own schedule, hiking alone can be a freeing experience if you do it safely.

Like most new endeavors, hiking alone can seem intimidating; however, with the proper preparation and knowledge, hiking solo is safe and empowering. To help you mitigate and control the potential safety risks, see the below tips to keep you safe while getting started on your solo journey!

Photo by Julien Flutto on Unsplash

1: Start Small

While hiking alone is often depicted through the stories of lengthy endeavors or epic circumstances, hiking alone can be what you make it! Your first hike (and any hikes after that) does not have to be far, extreme, or to unknown places. 

To get used to hiking alone, picking a trail close to home, one you’ve been on before, or one you have walked with a friend first can be helpful. You may also want to consider going on a guided hike in a new area to get a feel for the terrain and to learn a few things from your experienced guide.

Once you’re comfortable, consider hiking on a new to you, well-established,  and populated trail. Some popular trails have maps at intersections (but always bring your own!), and there is often comfort in seeing others around. From here, the possibilities to increase your adventure and push your comfort zone are endless.

2: Know Your Trail

One of the most important aspects of hiking alone is researching your route. The depth of this research may vary depending on the types and lengths of trails you choose. No matter the trail, be sure to note the general direction you will be traveling, the length of the route, possible exits, turnaround options, the type of terrain you’ll encounter, and important features or landmarks such as rivers, intersecting trails, and more. 

Part of knowing your trail is also knowing what you may encounter. This may include wildlife, flora and fauna, exposure, closures, and more. When it comes to wildlife, be sure to inform yourself about the various animals and how to respond if you encounter them. For example, hiking in areas with Grizzy Bears usually means you will need to carry bear spray and know how to use it. Some areas may also have seasonal closures due to conditions, wildlife breeding/nesting patterns, or areas to avoid to due to damage or erosion. No matter the reason, check online, at state park offices, or wherever is needed to get the information you need to prepare for what’s ahead.

3: Carry a Navigation Tool

Some trails have maps for users at the trailhead entrance; some have occasional maps throughout the trail system. However, many trails have no markers or directions for where you are or where the trail goes. Consider using a paper map with a compass, a GPS device, or other technology to navigate as needed. 


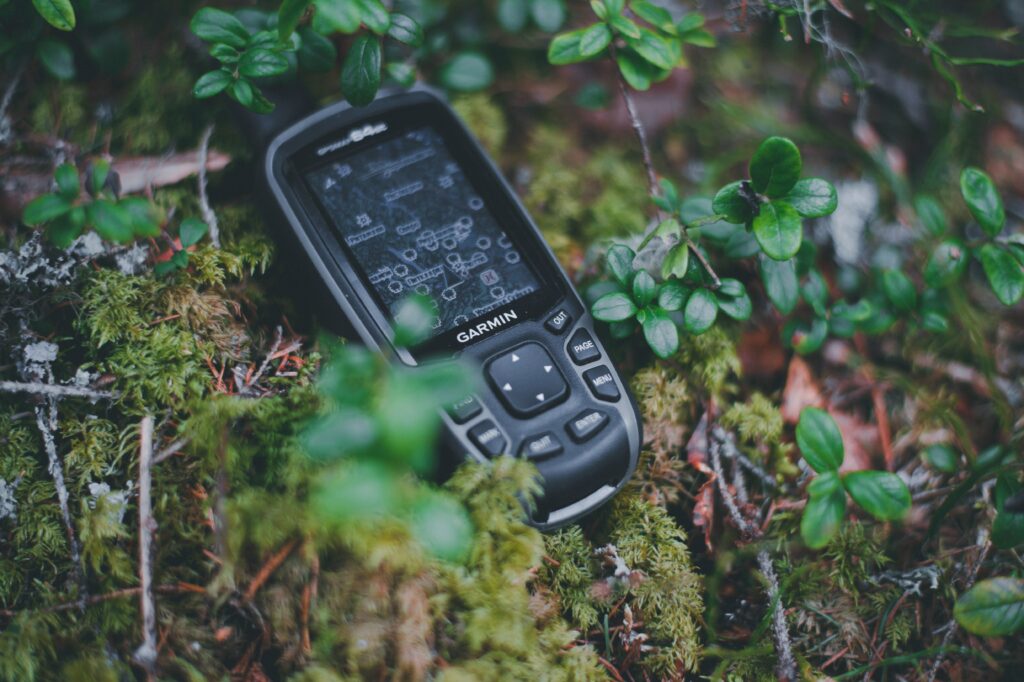
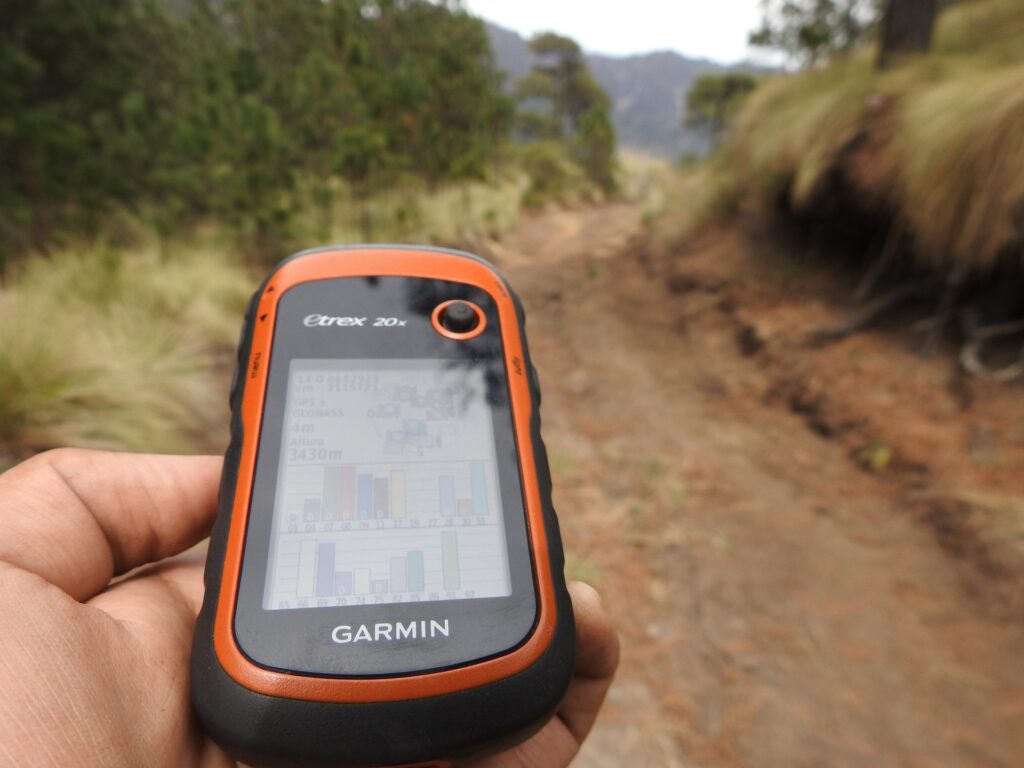
There are many tools available online and via phone applications to help with navigation. Some common resources include Gaia GPS, All Trails, or Hiking Project. If you like gadgets, many smartwatches now offer GPS maps and safety features that allow you to retrace your steps to your starting location. Other options (especially for hikers who venture into more remote territory) worth exploring are handheld GPS devices, satellite phones, and other safety gadgets such as the ones offered by Garmin.

Photo by Annie Spratt on Unsplash

4: Tell Someone Where You’re Going

Sometimes in life, things don’t go as planned, no matter how much you prepare. Therefore, it is imperative that you tell a close, trusted, and available friend or family member about your plan. Be sure to tell them which trail you will be on, the intended direction and length of travel, as well as the approximate time you should return home and contact them. 

The goal, of course, is that this is a backup and never needed. It may seem simple; however, this easy step in planning may just be the one thing that saves your life or gets you the help you need if the unexpected happens.

5: Carry The 10 Essentials

The 10 essentials are made up of various emergency and first aid items. They include navigation items (discussed above), sun protection, insulation and clothing layers, illumination, first aid supplies, fire-starting equipment, repair kit and tools, food/nutrition, hydration, and emergency shelter. 

These are items that, if you need them, you do not want to be caught without them! These items make all the difference when it comes to the safety of hiking alone. Hiking has potential risks, but many of these risks can be mitigated and prepared for with the above items. The degree to which you carry some of these items may vary based on a number of factors specific to your hike, so again, do your research.

6: Know The Weather 

When you are outside, mother nature is in control. Be sure to look up the weather patterns for the area you are hiking. Of course, be sure to look at the weather forecast for the day you plan to hike, but also consider the weather patterns of the previous days to get a better picture of the trail conditions. For example, a week’s worth of rain before your trip may mean muddy conditions and partially flooded trails.

Additionally, mountains can have unique weather patterns such as afternoon storms in the summer, snow, changes in cloud cover, or wind. Therefore, the weather can vary dramatically at different elevations, and it may be challenging to get an accurate forecast. For example, if you are going up to hike at elevation, the forecast and weather patterns may be different up high than from a town or city below. If you plan to hike in the winter or at elevation where there can be winter conditions, be sure to check out Broadmoor’s tips for safely hiking in the winter

Photo by Davide Sacchet on Unsplash

7: Know Your Limits 

 Everyone has different abilities. This spectrum of capabilities can vary from outdoor knowledge, fitness, weather, or time limits. You may want to ask yourself: what am I hoping to get out of this hike? Have I done a comparable hike before? Is this within my knowledge or fitness abilities? Is this within my risk tolerance (distance, technical difficulty, conditions, exposure/ hights)?

A fun aspect of hiking for many people is pushing your own limits. But remember, doing this a little bit at a time is okay. Don’t overwhelm yourself or put yourself at risk by getting too far out of your limits. Trust what feels right to you both before and during your hike, and make sure to listen to your body. Make hiking alone an activity you can return to, love, and enjoy. 

So, is it safe to hike alone? Yes. And by keeping the tips above in mind, hiking alone can be a safe activity and may just open up a whole new world of possibilities.

Colorado Springs Trail Guide – Best Hiking Trails in Colorado Springs

The city and area surrounding Colorado Springs have gorgeous scenery and ample ways to enjoy the great outdoors, perhaps one of the best parts of Colorful Colorado. Whether you are looking for a quick walk or a long, tiring trek, there are plenty of hiking trails in Colorado Springs at every difficulty level. And for those just getting started, be sure to check out our guided hiking tours.

If you are looking for the absolute best trails in Colorado Springs, we have an in-depth review of our top 5 favorite hikes near Colorado Springs. You’ll also see them on this list along with many other excellent options for hikers of all abilities. This list is organized roughly by difficulty level, as determined based on reviews from fellow hikers, length, and elevation gain. So if you are wondering where to hike in Colorado Springs, look no further. 

Easy Hikes

Memorial Park Prospect Lake Loop Trail

Parking: 280 S Union Blvd, Colorado Springs, CO 80910 (Tons of parking available in the park along Memorial Dr)

Elevation Gain: 26 feet

Round Trip Mileage: 1.3 miles

Highlights:

  • Paved loop, very accessible for wheelchairs, strollers, etc.
  • Great views of mountains and scenic lake
  • Beach area and playground

Palmer Park Cheyenne and Grandview Trail Loop

Parking: Palmer Park Trail Cave Outlook, 3120 N Chelton Rd, Colorado Springs, CO 80909

Elevation Gain: 183 feet

Round Trip Mileage: 1.8 miles

Highlights:

  • So much to see here including a botanical reserve, horse stables, canyons, ravines, bluffs, and more
  • Tons of wildlife: Palmer Park is popular among birdwatchers

Stratton Open Space The Chutes, Laveta, and Chamberlain Trail Loop

Parking: North Cheyenne Cañon Park & Stratton Open Space Trailhead, N Cheyenne Canyon Rd, Colorado Springs, CO 80906 (on the right, just past the Starsmore Visitors Center)

Elevation Gain: 705 feet

Round Trip Mileage: 3.8 miles miles

Highlights:

  • Most popular hiking trail in Stratton Open Space
  • Excellent wildflowers and wildlife
  • Beautiful views of the Gold Camp Reservoirs

Garden of the Gods The Palmer, Buckskin-Charley, Niobrara, and Bretag Trail Loop

Parking: 3105 Gateway Rd, Colorado Springs, CO 80904

Elevation Gain: 449 feet

Round Trip Mileage: 4.0 miles

Highlights:

  • Gorgeous views of the National Natural Landmark that is Garden of the Gods
  • Combines four popular trails around the park
  • Access to horseback riding, rock climbing, and biking trails
  • A Top 5 Pick! Learn More.

Ute Valley Park Ute Valley Park Trail

Parking: Ute Valley Trail Head, Ute Vly Trl, Colorado Springs, CO 80919

Elevation Gain: 488 feet

Round Trip Mileage: 4.3 miles

Highlights: 

  • Excellent views of Pikes Peak
  • Plenty of side trails to explore
Photo by Bailey Galindo on Unsplash

Moderate Hikes

North Cheyenne Cañon Park Mount Buckhorn Peak

Parking: Upper Gold Camp parking lot, 4415 Gold Camp Rd, Colorado Springs, CO 80906

Elevation Gain: 859 feet

Round Trip Mileage: 3.9 miles

Highlights:

  • Beautiful views along the way 
  • Boulders to climb at the summit (the tallest offers panoramic views)
  • A Top 5 Pick! Learn More.

North Cheyenne Cañon Park Seven Bridges Trail

Parking: Seven Bridges Trailhead, N Cheyenne Canyon Rd, Colorado Springs, CO 80906 (right before Helen Hunt Falls)

Elevation Gain: 912 feet

Round Trip Mileage: 3.5 miles

Highlights:

  • Very popular trail due to its history and uniqueness
  • Meanders alongside a creek and crosses over via seven charming bridges
  • Close to Helen Hunt Falls and Silver Cascade Falls

Pike National Forest The Crags Trail

Parking: Crags/Devil’s Playground Trailhead, 615 Teller Co Rd 62, Divide, CO 80814

Elevation Gain: 820 feet

Round Trip Mileage: 4.8 miles

Highlights:

  • Awesome views of unique geological features
  • Well marked trail
  • Challenging, but a good introduction for beginner hikers
  • A Top 5 Pick! Learn More.

North Cheyenne Cañon Park Mount Muscoco Trail

Parking: Mount Cutler and Muscoco Trailhead, N Cheyenne Canyon Rd, Colorado Springs, CO 80906 (on the left, 1.5 miles past Starsmore Visitors Center)

Elevation Gain: 1,292 feet

Round Trip Mileage: 4.0 miles

Highlights:

  • Includes a fun scramble at the summit
  • Outstanding views of the surrounding mountains
  • Well marked and well maintained
  • A Top 5 Pick! Learn More.

North Slope Recreation Area North Catamount Reservoir Trail

Parking: Pikes Peak Toll Rd, Woodland Park, CO 80863 (just past the Crystal Reservoir Visitors Center)

Elevation Gain: 262 feet 

Round Trip Mileage: 2.7 miles

Highlights:

  • Short but steep (15% grade around the 1.5-mile marker), so you’ll get a good workout
  • Beautiful views of meadows and wildflowers along the way
Photo by Jonathan Chaves on Unsplash

Hard Hikes

Red Rock Canyon Open Space Sand Canyon, Mesa, Greenlee, Red Rock Canyon Loop

Parking: 3550 W High St, Colorado Springs, CO 80904

Elevation Gain: 882 feet

Round Trip Mileage: 5.4 miles

Highlights:

  • Varied terrain and interesting geology
  • Lots of sun as shade is limited
  • Good views without too difficult an elevation gain

Pike National Forest The Incline Trail

Parking: Barr Trailhead, 98 Hydro St, Manitou Springs, CO 80829

Elevation Gain: 1,978 feet

Round Trip Mileage: 4.0 miles

Highlights:

  • The most popular trail in the Pike National Forest
  • All the elevation is in the first mile – at the hardest point, it’s an extremely challenging 61% grade!

North Slope Recreation Area Limber Pine, Mule Deer, Mackinaw, and Ridge Trails Loop

Parking: Catamount Recreation Area, 3168 Co Rd 28, Woodland Park, CO 80863

Elevation Gain: 1,036 feet

Round Trip Mileage: 8.4 miles

Highlights:

  • Challenging trek around the North Catamount Reservoir with a bunch of elevation changes
  • At times follows the water, and at other times, you’ll be in the forest

North Cheyenne Cañon Park Columbine Trail

Parking: Starsmore Discovery Center, 2120 S Cheyenne Canyon Rd, Colorado Springs, CO 80906

Elevation Gain: 1,607 feet

Round Trip Mileage: 7.6 miles

Highlights:

  • Great views of the surrounding mountains
  • Plenty of wildlife (don’t forget to check out the Starsmore Discovery Center at the trailhead
  • Gradually inclining slope, no huge scrambles
  • A Top 5 Pick! Learn More.

Pike National Forest The DeCaLiBron: Mounts Democrat, Cameron, Lincoln and Bross Trail

Parking: Kite Lake Trailhead, Co Rd 8, Alma, CO 80420

Elevation Gain: 3,136 feet

Round Trip Mileage: 7.0 miles

Highlights:

  • Ability to summit three 14-ers, the highest being Mount Lincoln at 14,295’ (Note that Mount Bross is private property and illegal to summit)
  • Real right of passage for serious Colorado hikers

Final Thoughts

Before you hit one of these awesome hiking trails in Colorado Springs, be sure that you are well prepared for your trip. Bring plenty of water, sunscreen, and other essentials that we cover in how to pack for a day hike. Happy trails!

Our Favorite Hikes Near Colorado Springs

The landscape of Colorado is calling for everyone to come hiking. The stunning mountains, waterfalls, and red rocks make for a unique experience, no matter your skill level. Undoubtedly, one of the best ways to start your exploration of Colorado is by checking out the hikes near Colorado Springs. 

Nestled in the foothills of the mountains, Colorado Springs gives quick and easy access to some of the most diverse trails in the state. Remember that some hikes in the area may require a permit. For ease of use, we selected trails that match those in beauty, but there are no permits required for hikes.

Best hikes near Colorado Springs

Muscoco

Location: Mount Cutler/Mt. Muscoco Trailhead

Elevation Gain: 1,292 feet

Round Trip Mileage: 4.0 miles

Difficulty: Moderate

Views of the mountains sweep out to your right, and Colorado Springs lays the backdrop to your left as you head up to the summit of Mount Muscoco. This moderate trail is located just southwest of Colorado Springs in the North Cheyenne Cañon Park. It’s a quick drive out to a hike that is well worth the final climb. 

The Mount Muscoco trail is well-known for the wildflowers that it boasts in the springtime, making it a great trail to do as the snow starts to melt. 

The Mount Cutler trail takes you to the trail that you are truly looking for. About a mile down the Mount Cutler trail is the Mount Muscoco trail. This trail will take you straight to the summit, but beware, the final climb is where all of the difficulty lies in this trail. 

For this hike, in particular, quality hiking boots are highly recommended. The final climb is rocky, and sneakers aren’t suitable to give your feet the support they will need. 

The Crags Trail

Location: Near Divide, CO

Elevation Gain: 820 feet

Round Trip Mileage: 4.8 miles

Difficulty: Easy to Moderate

We suggest checking out the Crags Trail for a great introduction to the area. Not only does it display some of the best landscapes of the area, but it also won’t push you too hard and make you not want to hike again. The trail is long enough to make it a workout and is relatively flat, with a total elevation gain of about 820 feet. 

The Crags Trail gives you a view of some of the most unique geological features in all of Colorado. Granite slabs erupt from the ground in large numbers, forming massive cliff sides and sheer-faced walls. The trail also takes you through some huge aspen forests that allow you to see another part of Colorado’s brilliant landscape. Head out on this trail in the fall and be prepared to have your world blanketed in gold by these magnificent trees. 

Another reason why this trail is perfect for beginners is the ease of use. It’s well-marked, as trail number 664, and well-maintained. The forest service has recently constructed new parking, so you don’t need to rush there at 6 in the morning to get a spot. 

If you’re a beginner wanting to start exploring these areas, ensure that you are prepared. Read up on Colorado hiking safety and know before you go. 

Garden of the Gods – The Palmer, Buckskin-Charley, Niobrara, and Bretag Trail Loop

Location: Garden of the Gods Park

Elevation Gain: 449 feet

Round Trip Mileage: 4.0 miles

Difficulty: Easy

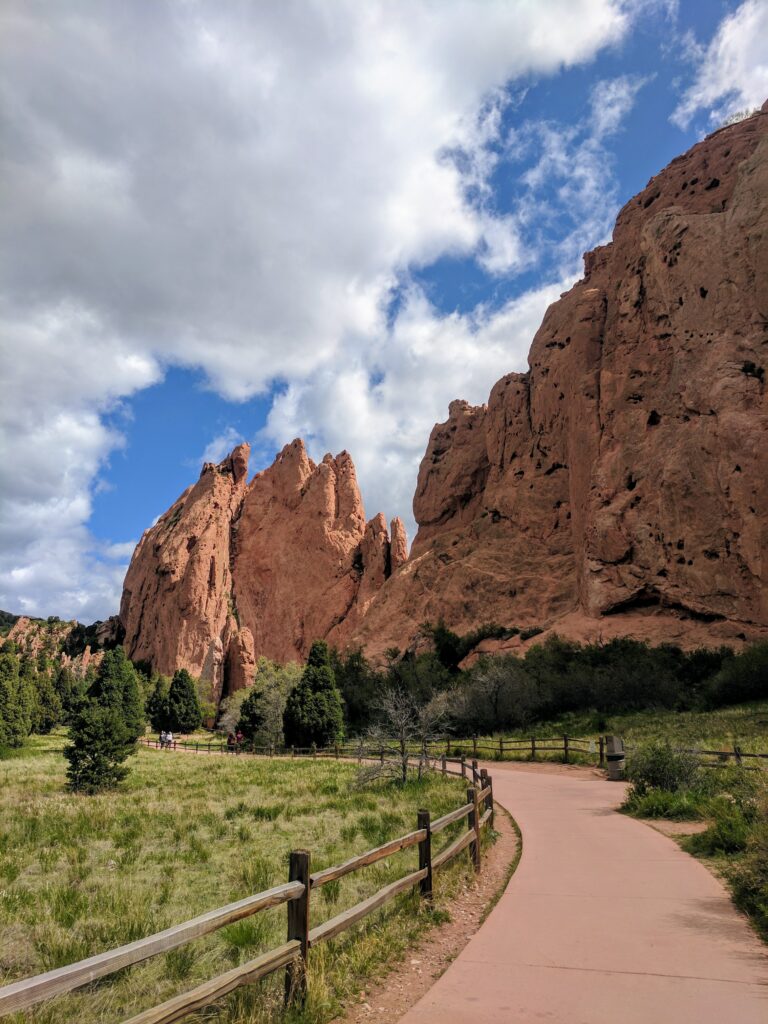
When avid hikers think about Colorado Springs, one of the first places that come to mind is Garden of the Gods. This National Natural Landmark is well-known for the sandstone towers that color the sky with their vibrant reds. Come here once, and you’ll be itching to come back and try the climbing, horseback riding, or mountain biking that the park has to offer. 

This trail, in particular, is a phenomenal introduction to the park. It combines four popular trails to make an easy four-mile loop, providing a taste of everything in the park. The route starts on the Palmer Trail and takes twists and turns through the most well-known towers in the park. 

Columbine Trail

Location: North Cheyenne Cañon Park

Elevation Gain: 1,607 feet

Round Trip Mileage: 7.6 miles

Difficulty: Moderate to Difficult

Now, here’s another trail to add to your list of Fall hiking in Colorado Springs. North Cheyenne Cañon is surrounded by mountains (some of which have also made this list) and provides an array of different views and landscapes to please everyone that tags along. 

The Columbine Trail has three different options for where to start. One of the best places to start, in our opinion, is the Starsmore Discovery Center. This center has a wealth of knowledge about the local flora and fauna, making it a great start or end to your hike. 

No matter what you are looking for, you can find it on the Columbine Trail. There are babbling brooks, warbling birds, and huge mountain vistas. While the trail is on the longer side, the elevation gains are evenly spread out, so you will barely notice it. 

Buckhorn

Location: North Cheyenne Cañon Park

Elevation Gain: 859 feet

Round Trip Mileage: 3.9 miles

Difficulty: Moderate

Another hike in North Cheyenne Cañon Park makes the list, showing off what this one place truly has to offer. If you’re trying to figure out where to hike in Colorado Springs, this park is a great place to start. 

Mount Buckhorn Peak is a quick hike up to a beautiful 8,380-foot summit that gives you a full 360-degree view of the world around you. The hike itself takes you through a forested setting that is a must-see in the fall. Once you are at the top, you can turn this trail into a quick out-and-back or continue down Buckhorn trail and return to where you started. 

The summit itself is somewhere you could spend an entire day. Once you are up there, you can scramble around on the huge number of boulders trying to find the highest one. This is an excellent hike if you want to take time to explore. 

How to Pack for a Day Hike in Colorado

The variety of terrain and difficulty found on day hikes requires the skill of adequately packing. 

How to pack for a day hike is a skill that many have been working towards mastering for years and that all hikers need to know the basics of. Before you head out into the backcountry, your pre-trip will always require you to take a look at all of your hiking essentials. 

Day hikes in Colorado Springs can be laid back or some of the more strenuous hikes out there. To take these hikes on safely, you need to pack efficiently and effectively. While optimism and a positive mental attitude should be the first thing you pack, you can’t forget that emergencies do happen. If they happen to you, what’s inside your day pack will often determine how the situation plays out. 

If you’re new to hiking or have never hiked in Colorado before, we recommend booking a hike with a guide. Guided hiking tours will help you feel confident in a new environment and help lower risk while hiking in the mountains.

10 Essentials to pack for a day hike

The Ten Essentials are a great place to start when learning how to pack for a day hike. These were created over 80 years ago and have been modified as our technology and knowledge advance.

To begin, we’ll take a quick look at each of the ten essentials.

1. Navigation

Before you head out, you’ll need to know where you’re going and how to get there.

A map and compass are an excellent pick for navigational aids, but you can up your technology game and bring along any satellite navigation and communication devices. 

2. Sun Protection

The sun will quickly ruin your day hike and potentially lead to more serious problems if you’re unprepared.

If you adequately protect yourself with the proper layers, hats, and sunscreen, you are much less likely to experience heatstroke, dehydration, or any other sun-related illnesses. Even on cloudy days and in the winter, the UV rays can still reach you, so always be prepared!

3. Insulation

If you’re packing for a long day hike or even packing to prepare for potential hazards, extra layers will be key to keeping you safe and comfortable.

The weather flips like a switch in some environments, especially in the mountains. With the proper jackets, hats, and rain shells, you can be ready to take on anything mother nature throws at you. 

4. Illumination

Any day hike can turn into an overnighter if you lose the trail or get turned around unexpectedly (especially if you neglect navigation).

Pack a headlamp or flashlight with spare batteries, so you don’t need to shuffle your way through the dark. 

5. First-Aid

There’s no need for a complicated first aid kid unless you are a professional, but it’s important to have a basic kit ready for any injuries you or other hikers may have.

Remember, not all kits are made for all environments. Buy a basic kit and make changes to it to fit your experience level and the needs of your group. 

6. Fire

Being ready for anything means being prepared to keep yourself warm, cook food, and treat water when in the backcountry.

Fire starting supplies such as waterproof matches, a lighter, or a Ferro rod are great options to help get a fire anywhere. Pick what you are the most comfortable with and pack a spare.

7. Repair kit and tools

Packing a repair kit can seem like overpacking when you’re planning on just going out for the day, but it can be one of the most important things you bring along.

You will find more uses for duct tape and a knife than you ever thought imaginable when you need it out there. 

8. Nutrition

Every day of our lives appears to be driven by, “what meal will we have next?”

When you go out into the backcountry, this question is asked even more frequently as your body works harder than normal to bring you from place to place. Even if you bring out just a few calorie-dense snacks on your day hike, you’ll be grateful. The best practice is to bring at least an extra day’s worth of calories.

9. Hydration

No matter if you’re out in the dead of winter or on one of the guided hiking tours in Colorado Springs during the hottest day of the year, water is always your best friend.

Water keeps you warm in the winter and cools in the summer. Almost every ailment you start experiencing in the backcountry comes with the initial treatment recommendation of “drink some water.” Unsurprisingly, it usually works. 

10. Emergency Shelter

Going out means going out ready for your trip plans to change drastically. In most cases, you’ll never end up spending a night out that was unplanned.

However, if you ever find yourself in that situation, an emergency shelter will be a lifesaver. This can be a small bivy (like a one-person waterproof cocoon) or simply a tarp to protect yourself from the elements. 

More about comfort, less about survival

The Right Pack

The right backpack for day hiking is going to be a complete game-changer when you’re out hiking. A comfortable bag with enough space and support will turn a miserable experience into a walk in the park. For starters, I recommend buying a 30-40 liter pack if you are focused on day hikes.

40-liter packs can be used for short overnight trips but aren’t overkill for just a day. 

Do some research on different packs that give you the back support you need. Certain brands like Osprey will form-fit each pack to your back. This can be helpful, especially if you have a history of back problems. 

Don’t let not having the perfect day hiking pack stop you though! Start with the bag you have and upgrade when you’re ready.

The Right Shoes

Nobody wears flip-flops to the prom, and nobody should wear high heels out on the trail. The right shoes for you will be shoes that are comfortable, sturdy, broken in, and give you good ankle support. After those basics, you can begin looking at the different styles of rubber, traction designs, and waterproof construction.

Wearing the right shoes helps to avoid blisters, which means you won’t need to break into your first aid kit. The more preventative measures you can take to save on supplies will leave you even more prepared for your next day hike. 

How to Pack for a Day Hike

Now that we’ve hit the basics of what you need to pack, it’s important to talk about the process of packing.

The ABCs

The ABCs are a valuable tool for packing a backpack so that it fits comfortably and makes hiking easier. While most people will only use this method with multi-day trips, it’s helpful to consider when you are doing day hikes as well. Like I mentioned earlier, some day hikes in Colorado Springs can push you to your limit. Packing a comfortable bag will take a lot of strain off your back and make these hikes more enjoyable.

Accessibility- When you’re packing, make sure things you’ll need while hiking are packed on top or in an external pocket that you can easily get to. This includes things like rain gear, snacks, and especially a headlamp. Looking for a headlamp without a headlamp can be the most frustrating thing you’ll do all year long. 

Balance- Having a bag that pulls you to one side will end with a cranked back and one leg that takes on a lot more stress throughout the day. The key is to make your pack well-balanced to maximize comfort. The weight should be evenly distributed from side to side, and you want the majority of the weight to be in the bottom third of your bag. 

Compression- Here’s what can save you after packing a long list of essentials to bring on any day hike. Gear that compresses down into a small pouch is the best gear for hiking. After all, you don’t need to buy an 80-liter pack to go out for the day. Invest in a few compression bags to squeeze everything down into a small space. 

Know your Environment

You need to know what kind of a hike you are headed into and what that environment may throw at you. This means looking at the current weather forecast, the weather trends for your location, and reviews of the hike from recent days. 

You can gather information from apps (like AllTrails), with hikers going out onto these trails every day. If one person notices a dried-up river where most hikers rely on water, you wouldn’t know this without their comment. Utilize social platforms to gather as much information as you can before heading out. 

This information will help you greatly when packing your bag. It will tell you if you need extra socks because everything is muddy and wet or if you need to bring a down jacket for when you get up above 11,000 feet of elevation.

If you’re uncertain about reading this information and transferring it into packing, don’t hesitate to reach out for guided trips in Colorado Springs. These are fantastic resources when first learning how to be comfortable in the backcountry. 

What to Wear Hiking in Colorado

When you’re spending time planning a hiking vacation in Colorado, pouring yourself into the details, you’re envisioning everything goes right. You’re picturing smiles and laughter, time unplugged in nature, and memories made – whether by yourself or with your family. However, there’s a relatively easy way for things to go wrong. 

Being unprepared for Colorado’s weather patterns can not only put a wringer in your vacation – it can compromise your safety, too. We’ve put expert advice together to compile this informative overview of what to wear hiking in Colorado. You can also check out our other post on Hiking Safety in Colorado

Typical Weather

Before you can decide what to wear hiking, accommodate yourself with Colorado’s climate

  • Spring: Spring weather in the Colorado Springs area means pretty drastic temperature shifts from day to night. Highs can be anywhere in the 50s and lows in the 20s. 
  • Summer: Summer in the Colorado mountains is definitely warmer than spring. However, with highs in the mid-80s and lows in the low 50s, these significant shifts in temperature from day to night mean you’ll still need to pack more than just a t-shirt and sunblock. 
  • Fall: Highs in the 60s and lows in the 30s is just about perfect weather for hiking in Colorado, but it doesn’t mean you don’t need to bring plenty of layers – just in case you are hiking later in the day than you planned. 
  • Winter: Temperatures in Colorado Springs hang out in the 40s in the day and high teens at night during the winter.
Photo by Reymark Franke on Unsplash

Layering

Wearing and bringing extra layers with you is crucial when hiking in Colorado’s mountains. At the very least, your basic hiking outfit/packed extras should contain the following:

  • Moisture-wicking base layer.
  • Moisture-wicking undergarments.
  • Insulating layer. In summer, this may be a warm fleece, depending on the weather forecast. In winter, this needs to be a heavyweight insulated synthetic or down stuffed jacket, like a “puffy.”
  • Rain jacket
  • Wool or fleece hat
  • Extra socks. We prefer wool.
Photo by ArtHouse Studio from Pexels

The Problem with Cotton

There’s a phrase in the outdoor world that warns us, “Cotton kills.” While this sounds extreme and is not the case in every climate, it should definitely be kept in mind when hiking anywhere in Colorado. 

Cotton is hydrophilic, which means it loves water; the plant fibers attract moisture and hold onto it, so it dries out very slowly. It’s highly absorbent and can hold up to 27 times its weight in water. This means our bodies must work extra hard to heat ourselves along with the cotton fabric in an attempt to dry it out. This can be dangerous in climates such as Colorado’s that have major temperature shifts from day to night and storms that seem to come out of nowhere. 

Unsafe Cotton Scenarios

Imagine you’re hiking in any season – you’re working hard and exerting yourself physically, so naturally, you work up a sweat. Your hydrophilic cotton shirt is absorbing every drop of sweat your body generates as you’re hiking up and over mountains. 

Now, imagine you’re wearing that sweaty cotton shirt, and it’s getting late in the day, and the temperature is dropping fast. You’re going back down the mountain, and although the descent is brutal on your knees, your body temperature is dropping quickly because you aren’t using much energy hiking downhill. With strong winds that can decrease your body temperature in seconds, things can take a turn for the worse very quickly from here.

However, the good news is that this scenario is entirely avoidable with knowledge, good preparation, and mindful packing. When packing for your hiking trip in Colorado, it’s best to keep the phrase “cotton kills” in your mind.

What to Wear Hiking Instead of Cotton

Head to any outdoor gear store, and you’re bound to see the term “moisture-wicking” on dozens of tags. Moisture-wicking fabrics like synthetic and wool fabrics are the opposite of cotton: they are hydrophobic, meaning they resist water penetration. 

Polyester and nylon are top contenders among synthetic moisture-wicking fabrics, and wool is the leader (and my personal favorite) when it comes to natural fibers. Whether you get soaked in a downpour or sweat profusely on your hike, your moisture-wicking shirt, pants, and socks are going to dry super quickly and not leave you cold and clammy like cotton will. 

Additionally, wool is a superb natural insulator. This makes wool the leader in fabrics that transition from daytime to nighttime hiking in areas where temperatures shift dramatically, like Colorado. 

But isn’t wool too hot for summertime hiking?

You can purchase 100% wool hiking attire that is lightweight enough to wear while hiking in the summer in Colorado. Just look for base layers – they can be pricey but incredibly versatile and suitable for all of Colorado’s seasons.

Things to Remember

When considering what to wear while hiking in Colorado, it’s important to think past just your clothing. 

  • If you have sensitive skin, make sure you bring sunscreen to apply on all exposed skin, following the bottle’s directions. 
  • Sunglasses and hats can protect your eyes, neck, and face from the sun.
  • Bug spray will help keep the gnats at bay.
  • Colorado is home to over 27 types of ticks and 20 tick-borne diseases, including Rocky Mountain Spotted Fever. To prevent ticks from crawling onto your skin, opt out of the shorts, and wear long pants tucked into your socks. Even if it’s hot, your moisture-wicking pants will keep you cool enough to hike. Also, remember to learn more about Colorado tick bite prevention, dangers, and bite protocols.
  • Footwear should be closed-toed and provide adequate ankle support for optimal safety. 

Conclusion

Safety is the most important thing to consider when planning what to wear hiking in Colorado. If you’re unclear on how to hike safely, consider coming on one of our Guided Hiking Tours in Colorado Springs. We’ll make sure you’ve dressed appropriately, show you around Pikes Peak and Garden of the Gods, and keep you safe!