What Should I Do If I Get Lost While Hiking?

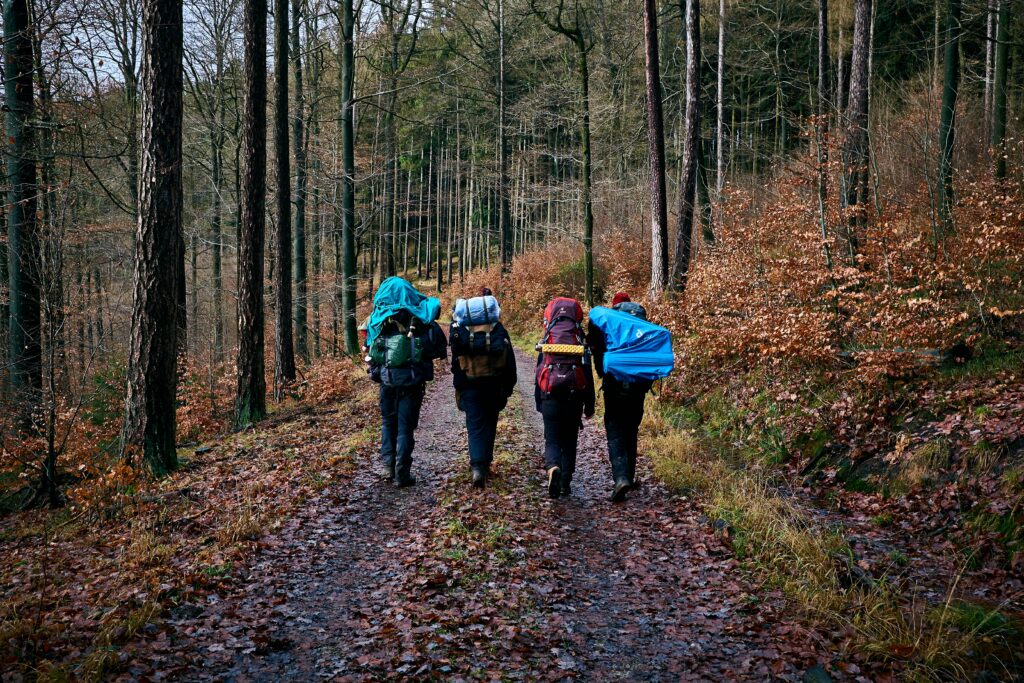
The best hikes may feel like a carefree walk through the woods, but it is important to be prepared and stay sharp anytime you go hiking. Losing yourself in your thoughts could cause you to actually get lost. That is why it is important to know what to do if you get lost hiking. We will go over hiking safety and how to get yourself out of a sticky situation on the trail.

Hiking Safety: Before You Go

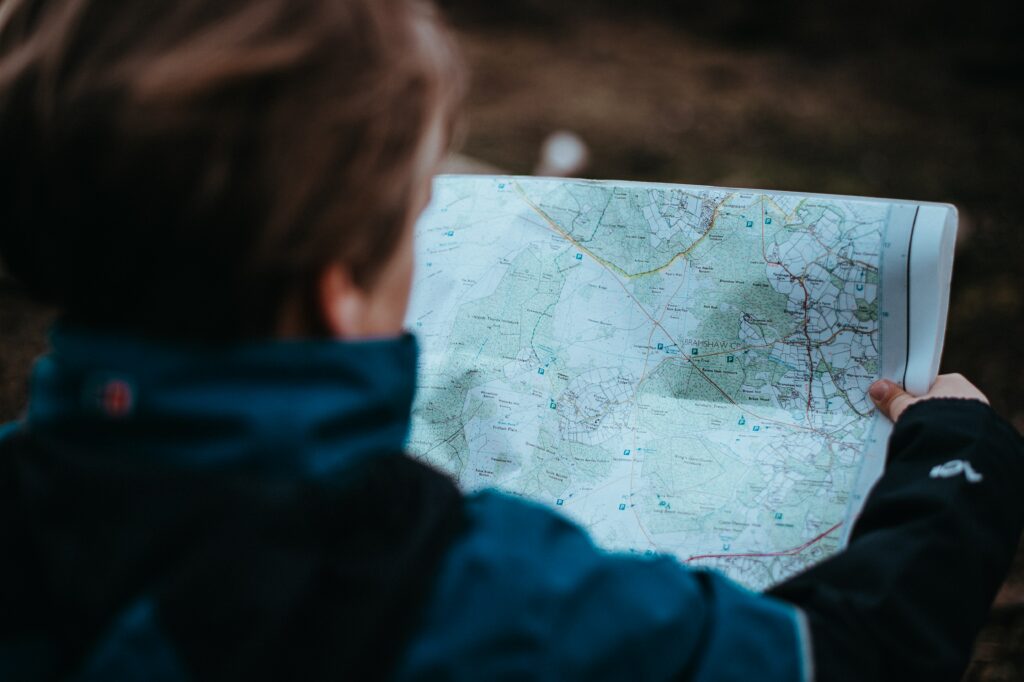
Anytime you go hiking, you should plan your route in advance and be sure to bring a physical map and a compass. It is easy to overlook these elements since cell phones have this information. However, you may not have service, your battery could die, or you could lose or damage your phone. It is essential to have a form of old-school navigation, so you do not have to rely on technology for your safety. If you are not able to find a physical map, you can take a photo on your phone of the map at the trailhead. Also, try to memorize your route, including the color trails and turning points.

Pack for Safety

In addition to navigation, there are a few hiking safety essentials you should always have in your day pack. Be sure to carry a flashlight, matches, emergency shelter, and extra food and water. You never hope to be stuck on the trail longer than expected, but it could happen. If you get lost, you will be glad to have this gear to keep you safe overnight. An easy emergency shelter to carry would be a tarp and rope. Ready shelters like emergency tents are very affordable, pack light, and can be lifesaving. Especially if you are hiking in cold weather, it is essential to have at least an emergency blanket to stay warm and safe when hiking in winter

Be Smart when Hiking Solo

If you are planning to hike alone, there are a few more important steps to take before you leave. If you are wondering if it is safe to hike alone, you will feel better once you’ve taken these precautions to protect yourself. The most essential thing is to tell someone where you are going. You can send a loved one your planned route or even give them access to Find my Friend. Sharing your location this way is not a perfect solution if your phone dies or loses service, but it can be a start if someone needs to find you. You should also let them know when you plan to be back and then check in when you finish your hike. 

When hiking solo, it is even more important to plan in advance. Check the weather and make sure you will not be caught unaware. Choose a route that leaves you plenty of daylight left. You may decide to start small with easier routes that are well-populated. While it is nice to push yourself on a hike, make sure you know your limits and will not be left totally exhausted. Getting back to the trailhead with a little energy left over is safer than the alternative.

Photo by Janis Oppliger on Unsplash

How to Avoid Getting Lost on a Hike

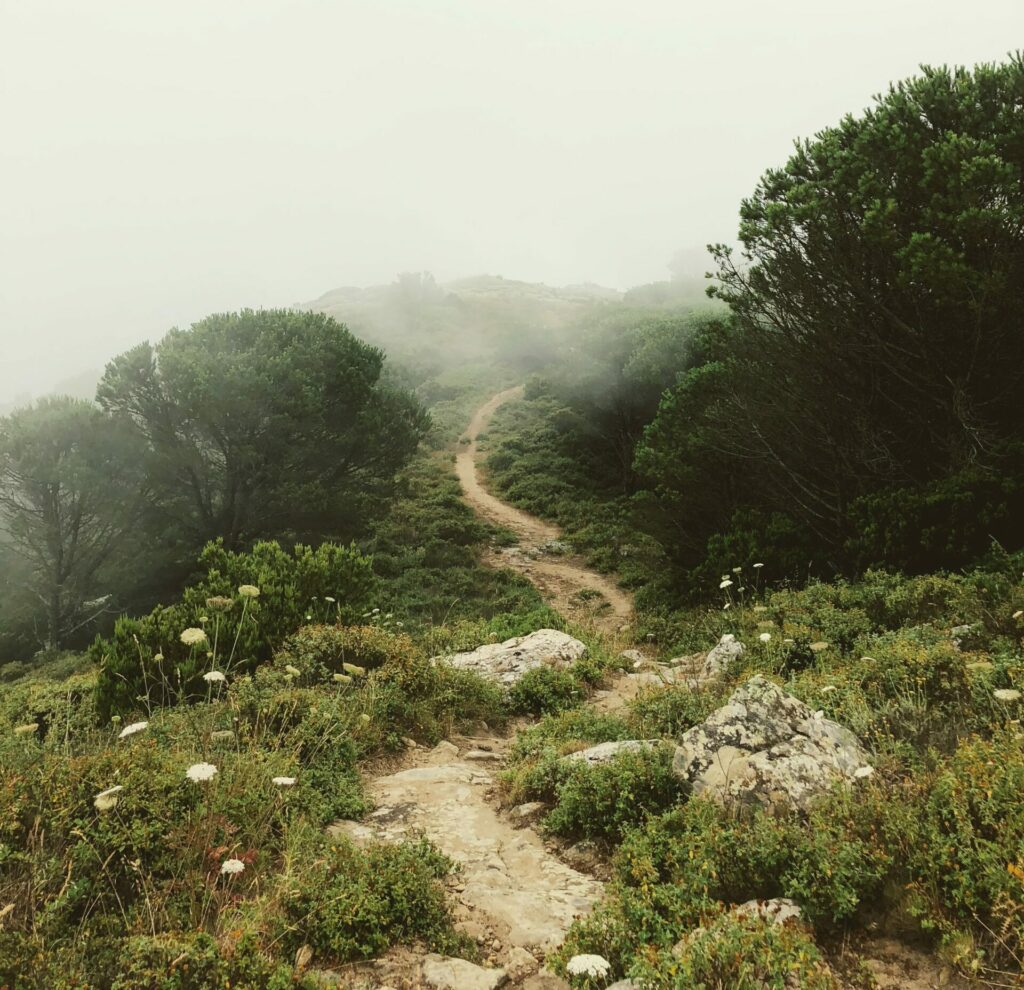
There are a few helpful hints that can keep you safe while on trail. First, plan your route in advance and keep an eye on trail markers, so you stay on the right path. Usually, trail markers will be colored portions of trees, a bit higher than eye level, or signposts at turn-off points. Depending on the trail, markers may be close enough to see two at a time or farther apart but less than a quarter mile. You should note when you see one, either by time or mileage. This way, you can be watchful that you do not continue hiking too far if you haven’t seen one in a while. 

Anytime you come to a fork in the trail, it is important to take a second and think about the path you had in mind. Note some landmarks like nearby rocks or trees that will help you recognize the turn on your trip back. You can even take photos, build your own cairn with rocks, or set a couple of sticks as arrows. When you make your return, be sure to dismantle these, so you leave no trace.

What to Do If You Get Lost Hiking

When you realize you are lost on the trail, just remember the acronym STOP. You need to stop walking, think, observe your surroundings, and plan. With these four actions, you can get yourself back on track and make sure you get out safely.

Step One: Stop

The S conveniently stands for stop. The first thing to do is stop walking so you can assess. Make sure to breathe and maintain your calm. It is essential that you not panic. While it is a normal reaction, you need to be able to keep your head clear and figure out what to do. You can practice breathing exercises to keep your system calm. Take a second to rest, have a snack and some water, and then get to work.

Step Two: Think

The T stands for Think. Try to retrace your steps in your mind. Did you miss a turn? Is there a landmark you remember seeing that you need to look out for? It is essential that you do not keep walking until you have a plan. Take a look at your watch and guess where you expected to be at this point. Should you be circling back by now? Are you not quite to the next turn?

Step Three: Observe

Take a look around and see if you can spot any signage on a post or a tree. You may find someone else’s cairn on the ground or any sign of development like logs used for trail sides or steps. If you are able to figure out what trail you are on, take a look at your map. You might be able to figure out approximately where you are based on where you meant to be and what is around you. Be sure to look further into the distance, too. If the map shows that the trail increases in elevation or curves around a lake, look around to see if you can match these features with the world around you.

Step Four: Plan

When you realize you are lost, there is one decision to be made. Do you turn around and try to retrace your steps or keep going and try to reconnect with a new trail? Depending on how far you have walked already, it may not make sense to turn around. You should also consider the time of day and how you are feeling. If it is late or you are injured or exhausted, you may choose to take a rest or set up a shelter for the night. If you were with a group who will notice your absence, it is always best to stay put and wait to be found.

Photo by Annie Spratt on Unsplash

How to Find a Trail If You Get Lost While Hiking

If you decide to keep walking, there are a few key things to keep in mind that can help direct your path. It can be a good decision to follow a stream or drainage downhill. This may end up leading to a road or trail; however, this could also be difficult and dangerous. If you think you see a road or river in the distance, but there is a steep slope in your way, do not attempt to hike something dangerous. Instead, avoid injury and follow the landmark from a distance.

When you are hiking while lost, you need to remember to take care of yourself. It will be exhausting and stressful to hike longer than expected. Be sure to rest early and often and keep your energy up with snacks and hydration. You should avoid walking in the middle of the day if it is hot out as you do not want to risk dehydration or sunstroke. Be sure to rest in the shade and keep your eyes peeled for signs of a trail.

How to Set Up An Emergency Shelter When Lost on a Hike

There are a lot of circumstances in which it might make sense to set up camp for the night and find your way home in the morning. If you are feeling tired or if you get injured, it is important to rest so you are in your best shape for the hike back. You do not want to keep hiking and risk injury or get yourself more lost because you are not thinking straight.

If it is starting to get dark, you should find a place to set up camp. Hiking in the dark is dangerous, as you are likely to miss important markers and could encounter nocturnal animals. Instead, try to find a natural shelter like a rock outcropping or stand of trees. This natural protection can keep you sheltered from wind and rain during the night.

Lastly, if you get lost while hiking with a group or on a guided tour, it is better to stay in one place and wait for them to find you. You do not need to worry that people don’t know you are missing. Therefore, you do not need to find your way back on your own. If both you and your search party keep walking, you run the risk of getting more lost. Instead, set up camp and relax. It is easier for others to find you if you stay put and make a fire or use something bright as a flag.

Final Thoughts

Even avid hikers may find themselves slightly disoriented at times. Less popular trails and parks may not be well maintained, and markers can be confusing, vandalized, or altogether missing. The most important thing to do if you get lost hiking is to stay calm and remember the acronym STOP. With these helpful tips, you should be able to get your bearings and finish your fun hike with no further issues. Stay safe, and happy hiking!

How to Train to Hike a Colorado Fourteener

Are you hoping to summit one of Colorado’s famed 14ers but don’t know if you’ve got what it takes? It is actually a lot easier than you think to get in shape for a hike, and you can train to go from couch to 14er in a matter of months. Following a consistent and well-rounded exercise plan will prepare you to hike your first 14er and make sure you have a great time doing it. 

There are a few important elements to remember when training for a big hike. They are cardio, strength, and flexibility. In this article, we will go over how to train for all three and what a typical week should look like as you prepare for a hike in Colorado.

Cardio Training for Elevation Hikes

Cardio is important not just for long-distance hiking, but in this case, also for hiking at elevation. As you climb up a mountain, the amount of oxygen in the air decreases. At sea level, the air is about 21% oxygen. At 8,000 feet, it is 15%, and by 14,000 feet, it is 12.3%. This means that you will fatigue faster and get muscle cramps more easily. If you are not prepared physically for the elevation, you will be more susceptible to symptoms of altitude sickness.

Doing cardio training helps combat these symptoms by conditioning your body to use oxygen more efficiently and adapt better to vigorous exercise. When training to hike a 14er, it is best to do cardio every other day. You can strength train in between and of course, have an active rest day (or weekend). Your cardio exercise should last at least an hour and focus on consistent exercise, often called steady-state cardio. This means working hard with minimal rests, to the point where you are breaking a sweat but not risking injury. 

Good cardio exercises for preparing to hike a 14er can be anything from rowing to running or biking to swimming. It is helpful to focus on low-impact exercises so you do not injure or over-stress joints when training.

Strength Workouts for Hiking Training 

Strength training may not be top of mind when you consider hiking a 14er, but it is just as important as training for cardio. Mountain climbing requires endurance from many muscles in your legs, back, and core. Between hiking at an incline (or decline on the way down) and some large steps in a scramble, you will certainly find your legs tested on a Colorado 14er.

Your strength workouts should take at least half an hour. I like to complete three sets of eight to ten exercises on strength training days. A good strength training routine will include full-body and core exercises. You want to focus on building stability and endurance in the ankles, knees, and hips. There is a multitude of different movements you can choose from to work on these areas. For legs, you’ve got squats, lunges, step-ups, step-downs, and heel raises. Hip flexor and lower core strengthening exercises include deadlifts, hip thrusts, and various sit-up workouts. If you have had problems with your feet in the past, be sure to include towel curls (or towel scrunches) to help strengthen your arch and prevent injury.

Pack and Elevation Training

One more important part of strength and cardio training is hiking with weight. When you are hiking a 14er, you will need to bring a day pack with water, food, extra layers, and first aid gear. No matter how light you keep it, your body and your back will notice this extra weight. That is why it is essential to build pack training days into your cardio routines.

My preferred schedule is to work out every day of the week, with cardio Tuesdays and Thursdays. Then, plan Saturdays for practice hikes with pack and elevation training and Sundays as your rest day. When you organize your schedule like this, you will find it takes only a few months to go from couch to 14er.

You should start your training hikes with two or three-hour hikes that have a minimal elevation gain of a couple of thousand feet. There are plenty of great moderate hikes near Colorado Springs to choose from, including the Columbine Trail. Once you build up to six to eight-hour hikes with at least 4,000 feet of elevation gain, you will surely be ready for your first 14er. 

Flexibility Training for Hiking 14ers

The final part of hiking training, one certainly not to be overlooked, is stretching. When training to hike a 14er, you should stretch every single day, even on your rest days. If you do not stretch daily, you will find your muscles tighter, more injury-prone, and sorer. 

It is best to stretch during and after workouts. It is a myth that you should stretch before you start exercising. Stretching when your body is cold can cause microtears in your muscles. Instead, take five minutes to warm up or start light exercises before you get into a deep stretch. 

You should, at the very minimum, stretch your calves, hamstrings, quads, IT bands, hip flexors, and back (by touching your toes). I also like to stretch my feet by extending my toes and my ankles by kneeling and sitting (gently) on my heels. You should hold each stretch for twenty seconds and repeat any that feel tight. While these stretches do take time, your body will thank you, and you will feel more relaxed and able to endure longer workouts. 

Hiking Your First 14er

Don’t feel defeated at the prospect of training for a 14er. You do not actually need to hike 14,000 feet in elevation gain to summit one of Colorado’s peaks. There are many hikes to peaks that are only a few thousand feet of elevation gain, depending on the parking lot and trail you choose. With a few months of hard work and training, you can begin using 14ers to train for other, more strenuous 14ers.

So where should you start? Many people consider Pikes Peak to be the easiest 14er near Colorado Springs. If you are hoping for a little professional guidance before you tackle your first 14er, be sure to check out a guided hiking tour. With 58 peaks over 14,000 feet, Colorado has no shortage of inspiring hikes to add to your bucket list. Be safe, and happy hiking!

History of Famous Colorado Springs Sites

Built around the base of Pikes Peak, Colorado Springs has a long and diverse history in the development of railroad routes, the excitement of the gold rush, and the installation of military facilities. The history of this area takes you to some of the best sites in and around Colorado Springs. These stories will surely inspire you to visit these attractions and enjoy them in a deeper way. 

Garden of the Gods

What is Colorado Springs most famous for? The most popular Colorado Springs site has to be the Garden of the Gods. This 480-acre park surrounds stunning the geological feature which is a National Natural Landmark. The park was conveyed to the city in 1909 after owner Charles Perkins passed away in 1907. He had purchased the land to build a property on it, but he never did. He decided instead to leave the gorgeous natural environment alone so that the public and future generations could enjoy it. Although he never made arrangements for it to become a park, his children knew his wishes and it remains pristine today. 

There are so many fun activities to do in the Garden of the Gods park, which is part of the reason it is such a popular Colorado Springs attraction. It has some of the best trad climbing in Colorado Springs, horseback riding, hiking, and guided e-bike tours. Seeing the Garden of the Gods via bicycle is one of the best ways to explore these rock formations from different angles. The tour is a ride of about five miles and three hours.

Manitou and Pikes Peak Cog Railway

Image of stream and tunnel in forest in manitou springs colorado springs site
Photo by Mikey Frost on Unsplash

This storied railway is the highest in North America, climbing almost 9 miles to the summit of Pikes Peak at 14,110 feet above sea level. It was built as a tourist attraction by the founder of the Simmons Beautyrest Mattress Company after he spent two grueling days on a mule to get to the peak. Zalmon Simmons funded the railway in 1889, and the project finished just two years later and opened in 1891. After the project proved unsuccessful financially, Simmons sold the railroad to the Broadmoor Hotel in 1925. The hotel still owns and manages it today, nearly 100 years later. 

One of the best ways to experience Pikes Peak and the Railway is with the Cog Up, Bike Down Guided Tour, which lets you enjoy views from the summit before biking down the 19.5-mile winding road. The trip is five and a half hours and provides amazing views of the Front Range of the Rockies. This is a popular tourist destination, and it’s no wonder why: these panoramic views make this one of the best sites in Colorado Springs. If you are not able to complete this exhilarating intermediate biking adventure, you can enjoy the newly created Summit Complex, including world-famous donuts and a well-stocked gift shop, before taking the cog railway back down. 

Rocky Mountain National Park

One of Colorado’s greatest outdoor wonders is a short drive from Colorado Springs just past the town of Estes Park. Rocky Mountain National Park is a 415-square-mile park boasting stunning views, exhilarating hikes, and great opportunities to see wildlife like elk and bighorn sheep. Early recordings of park exploration date back to the mid-1800s. Around this time, the area became popular due to the Pikes Peak gold rush. Federal law established Rocky Mountain as a National Park in 1915. Private homes scattered the landscape, but the government removed and replaced them with campsites and facilities.

Today, Rocky Mountain National Park is a gorgeous expanse of wilderness, with five visitors centers and over 100 backcountry campsites. There are opportunities for fishing, rock climbing (one of the most popular spots in Colorado for bouldering), and trail hiking. Serious hikers should check out the 45-mile loop of the Continental Divide National Scenic Trail. You should visit in the summer, as the park closes in the winter due to weather hazards. Most trails in the park also allow horseback riding, so there is no shortage of exciting ways to experience this park.

Rocky Mountain National Park was also one of the first World Biosphere Reserves, designated by UNESCO in 1976. This awards dedication to sustainable development and efforts to encourage human exploration in tandem with conserving the area’s biological diversity. With such a rich history and so much to explore and learn, the park truly is an essential Colorado experience.

Mining and Gold Camp Road

As you now know, Colorado Springs grew out of the Pikes Peak gold rush and subsequent mining. This famous Colorado Springs site was officially founded in 1871 and just celebrated its 150th year. The tunnels throughout Gold Camp Road were constructed in the late 1800s. A railroad called the “Short Line” opened in 1901 to help facilitate mining. The 200-car freight train transported miners, supplies, and minerals from mines near Cripple Creek back to Colorado Springs. 

The best way to explore Gold Camp Road is to hike or bike it. The hike is moderate difficulty, 14 miles and 2,200 feet of elevation gain. Mountain biking is a popular way to explore the trail, too, and it appears on cycling event routes often. It is possible to drive through the first two tunnels, but eventually the road becomes too rocky.

Final Thoughts

Colorado Springs’ unique history is just one more exciting thing to explore. With stunning views, diverse wildlife, and beautiful wildflowers, there are so many ways to enjoy an outdoor adventure and learn something new about Colorful Colorado. No matter what you like to do, there will surely be something awe-inspiring and memorable in your travels. If you are looking for your next adventure, Broadmoor’s guided tours teach new skills and explore new parts of town. 

How to Wear a Hiking Backpack

Are you looking forward to your first backpacking trip? Or maybe you’ve been on the trail and are wondering why your back hurts so much. A poorly fitting backpack can be a real hazard, causing back and hip pain, setting you off balance, and turning a beautiful hike into a miserable slog. 

In this article, we will set you up for success with three important steps: backpack fitting tips, how to properly pack a hiking backpack, and the right way to wear a heavy hiking backpack. Once you have these pieces sorted out, you will be ready to check out some of the best hikes near Colorado Springs with confidence and comfort.

Hiking Backpack Fitting Tips

The easiest way to get a backpack that fits well is to go to an outdoor equipment store where you can try some on with expert guidance. If you are buying a pack online or getting one from a friend, you might not have access to a professional opinion. But don’t worry: you can easily confirm on your own if a pack is a good fit for you.

The first thing you will do is measure your torso and hipbelt (not the same as your pants size!) and choose a pack that fits these dimensions. Whatever site you buy from will offer tips for taking these measurements, and be sure to look at the pack’s sizing guide, as different brands will vary. 

The Many Straps of a Pack, or How to Properly Wear a Hiking Backpack

Once you have your backpack in hand, you will see that there are plenty of adjustments to make. The torso size is key because too short a pack will strain your muscles and too big a pack will destabilize you. When you have that proper torso size, you can move to the hipbelt, which is the most important part of the backpack to adjust. 

Photo by lucas Favre on Unsplash

The Hipbelt

The pads of the hipbelt should sit high on your hips, around where your ‘love handles’ would be. Shrug your shoulders and tighten the hipbelt here. Your hips do a lot of the work in carrying the weight of a backpack, so if you find your shoulders hurting during a hike, you probably need to readjust the hipbelt. 

You do not want this to be too tight that it hurts or too loose that it slips down. It should be snug in order to stay affixed in place while you hike. If you find yourself with bruises (called hip rot) or a rash on the hip, it is probably because there is too much movement of the hipbelt.

The Shoulder Straps

Once the hipbelt is in place, you can use the shoulder straps to make adjustments to get the pack to sit snugly against your body. It is a good idea to do this initial adjustment with a bit of weight, say ten pounds, in the pack. If it is totally empty, you may not get a good feel for how the weight will feel on your shoulders and hip.

Load Lifters and Sternum Strap

There are still a few more straps on the pack, namely the load lifters and the sternum strap. The load lifters are small straps that go from the top of the pack frame to the shoulder straps. When properly tightened to about a 45-degree angle from the pack, these straps bring the load closer to your body, which makes it easier to carry with the pack’s center of gravity closer to your own. The sternum strap should sit about an inch below your collarbones and be just tight enough to keep the shoulder straps off your armpits.

Make sure you do not overtighten any of these straps. If you do, you will feel tension, in your neck as the load lifters pull your head back or in your chest as the sternum strap pulls your body inward. You want the shoulder straps to be snug, but they should not pinch your armpits or restrict your arm movements at all.

Photo by Ali Kazal on Unsplash

How to Properly Pack a Hiking Backpack

You might not realize it matters, but there are actually ergonomic reasons that you should pack in a specific way. This mostly concerns where the backpack’s center of gravity is and how you can bring it closest to your sturdiest parts.

The best place to put heavy gear is in the middle of a hiking backpack. The bottom of the pack is great for bulky items like sleeping bags and pads and maybe your pajamas. Heavy items down here, though, will make the pack sag, and for back safety, you should avoid letting it hang lower than four inches below your waist. Throw these bulky light items in first, especially ones you won’t need to access until camp, and then pack the heavier items like cooking gear and food next. Weighting the core middle area of the pack will help you feel stable on the trail.

Finally, the top of the pack is for trail essentials like your rain jacket, first aid kit, and supplies for water filtration and toilet usage. You don’t want to put anything too heavy up here, as it will throw off your balance and cause unnecessary tension. Hiking backpacks also have plenty of strap pockets and loops for storing headlamps, bug spray, navigation tools, high-calorie snacks, and other small essentials that you might want to access on the move.

How to Adjust a Hiking Backpack on the Trail

Lean Forward

Because the backpack’s weight is mostly behind you, leaning forward slightly will help you feel more balanced. Especially while going up or downhill, be aware of how the backpack’s position can change how heavy it feels. Try making slight adjustments to the straps and backpack’s positioning as you walk so you can learn to identify these stressors and improve your comfort on the trail. If you are wondering if trekking poles are worth it, they can certainly help in this situation to disperse weight better. 

Photo by A.Z on Unsplash

Avoid Load Fatigue

One helpful way to give yourself a rest as you continue hiking is to alternate between backpack positions. It is common to take a few minutes with a hip-heavy load, where you loosen the shoulder straps slightly and give your upper body a rest. Then you can switch, tightening the shoulder straps back up and loosening the hipbelt a little. You don’t want the pack to be in danger of falling off or affecting your ability to walk, but a few moments of small adjustments can help you recover mid-hike and avoid muscle fatigue.

Rest

It is so important to take breaks along your hike. Not only for water and snacks but also to give your body a rest. Even if you are only taking a short water break, you should take the pack off and shake out your shoulders. Take a moment to assess how you are feeling and if there are any sore places on your body that you need to address. If you ignore pain, it will likely only get worse, so pay attention to what your body needs and make changes.

With these backpack fitting tips, you should be ready to hit the trail and conquer Colorado’s beautiful peaks. Make sure you listen to your body, pack smart, and stay safe. If you are looking for a little extra guidance as you begin your hiking journey, check out one of these scenic guided hiking tours around Colorado Springs. Happy hiking!

How to Recognize Early Signs of Altitude Sickness

Are you hoping to hike one of Colorado’s famous fourteeners? There are quite a few beautiful and rewarding 14ers around Colorado Springs, and for beginners, we’ve got a list of the easiest 14ers in Colorado to help you start your mountaineering journey. Before you get on the trail, though, you should learn how to recognize altitude sickness in order to stay safe on the mountain.

Photo by Manish Baral on Unsplash

What Is Altitude Sickness?

What causes altitude sickness? 

At higher altitudes, the pressure in the atmosphere is lower, meaning every breath contains less oxygen. At sea level, the air is about 21% oxygen. But at 8,000 feet, it’s about 15%. As a result, you will experience less oxygenation throughout your body, which is called hypoxia. While lowered oxygenation happens to everyone (who doesn’t carry an oxygen tank), some people experience symptoms more quickly and more severely than others.

How high do you have to hike to get altitude sickness? 

There is no one number that applies to everyone, and it can also depend on environmental factors like humidity and temperature. However, it is possible to get altitude sickness as low as 8,000 feet above sea level. Colorado residents will surely have an easier time, as Colorado Springs is around 6,000 feet. However, you can still be susceptible to altitude sickness at high elevations and over longer periods of time.

How quickly can you get hypoxia?

The likelihood of developing symptoms depends on elevation, rate of ascent, and duration of exposure. It is much easier on the body to hike to elevation for only a day trip. If you sleep at altitude and stay for extended amounts of time, the potential for symptoms gets much higher. It is also dangerous to ascend too quickly. If you are flying into Colorado to hike a 14er, you should wait a couple of days to acclimate to the elevation before beginning your trip.

Photo by Mael BALLAND on Unsplash

What are the symptoms of altitude sickness?

Acute Mountain Sickness (AMS)

AMS is the most common and mildest form of altitude sickness. The most recognizable symptoms of hypoxia are dizziness, shortness of breath, nausea, headaches, extreme fatigue and weakness, mental confusion, and cyanosis (blue lips). More severe symptoms include loss of balance and coordination, vomiting, persistent cough, and rapid pulse.

Some of these early symptoms of altitude sickness, like shortness of breath and fatigue, can be hard to notice. After all, you are hiking a mountain. It is best to take frequent water breaks and see if you can catch your breath. Hopefully, this is not your first extended hike, and you will know when you are tired from exercising versus experiencing something more severe. 

Severe Altitude Sickness

The two more serious varieties of altitude sickness, High-Altitude Cerebral Edema (HACE) and High-Altitude Pulmonary Edema (HAPE), are very severe and can be fatal. Early symptoms of cerebral edema, or swelling of the brain, are fever, altered mental state, confusion, loss of consciousness, and ataxia (poor muscle control). Early signs of pulmonary edema (where the air sacs in the lungs fill with fluid) include chest tightness, cyanosis, persistent cough, and difficulty breathing even when resting.

One thing to keep in mind with altitude sickness generally is that a symptom like mental confusion can make it hard for someone to properly identify their own condition. HACE can develop within a matter of hours, and someone might say they are okay even when they are clearly not. It is important to be able to recognize these symptoms in your fellow hikers when they may not recognize them in themselves. If you are wondering if it is safe to hike a 14er alone, it is for this reason that it is not recommended.

Can you prevent altitude sickness?

Stay Hydrated and Eat Carbs

Drink a ton of water. In addition to less oxygen at elevation, the air is also drier. Some symptoms of dehydration can seem like altitude sickness, so do yourself a favor and stay well hydrated. You will also want to have a high-carb diet while you acclimate. This will give your body the energy it needs for exercise so you do not exacerbate symptoms. 

Pace yourself

Remember to start gradually and let your body dictate the speed. Hiking a 14er is a marathon, not a sprint. If possible, you should train at altitude. Spend a few days on shorter hikes in the area before attempting the big fourteener. This training will help immensely for you to get used to the lower oxygen level.

Plan to Acclimate Properly

As noted, you should not ascend too rapidly. If you are a resident of Colorful Colorado planning a day hike of a fourteener, you should be good to go. If you are visiting from out of state, do not attempt a hike to altitude on your first or second day. Make sure you acclimate to the elevation and feel healthy before you hit the trail.

Photo by Mael BALLAND on Unsplash

How can you treat altitude sickness?

If someone is experiencing mild symptoms of acute mountain sickness, you should set camp for the day and wait at least 24 hours before increasing elevation. At this time, it is important to avoid drugs, alcohol, and tobacco. Make sure you drink enough water and limit exercise and activity. With AMS, your body will be able to recover if given enough time (12-48 hours). If you ignore symptoms, though, and keep gaining elevation, you can make symptoms much worse.

If you think someone is experiencing more serious signs of altitude sickness, especially signs of HAPE or HACE, you need to descend to a lower elevation immediately. It is recommended to go at least 500 meters (1,600 feet) lower and then reassess. If available, treat the person with bottled oxygen and bring them to a hospital as soon as possible.

Final Thoughts

Now that you know how to prevent, recognize, and treat early signs of altitude sickness, you can feel confident getting on the trail. Hiking, especially around Colorado Springs, is an amazing way to see panoramic views of the mountain, spot interesting wildlife, and connect with nature. If you are looking for a little more tutelage as you get started, consider a guided hiking tour with a professional instructor.

National Parks Near Colorado Springs

Colorado Springs is full of beautiful destinations to explore, such as Garden of the Gods or Pikes Peak. But one of the most common questions visitors ask is, are there any National Parks near Colorado Springs as well? The answer is yes! Colorado has many phenomenal national parks, and several are within easy driving distance of Colorado Springs. So, let’s take a look at what these parks are, what they offer, and how to get there.

Additionally, there are several fascinating national historical sites and monuments near Colorado Springs. Therefore, we’ll also cover these destinations and what they offer.

Photo by Wallace Bentt on Unsplash

National Parks Near Colorado Springs

Great Sand Dunes National Park

Distance: ~90 miles southwest (2.5-hour drive)

Only 90 miles from Colorado Springs is the breathtaking Great Sand Dunes National Park. Boasting the tallest dunes in North America, with the stunning Rocky Mountains as a backdrop, this park offers spectacular views that you won’t find anywhere else. Be sure to try sandboarding or sand sledding if you visit! There are also many fascinating and scenic hikes in the area, but be sure to follow the Park Service’s recommendations for a safe hike.

Rocky Mountain National Park

Distance: ~120 miles north (3-hour drive)

Heading north from Colorado Springs and passing the big city of Denver, you’ll encounter Rocky Mountain National Park. This massive park encompasses about 415 square miles and features everything the rocky mountain range has to offer. From rugged peaks to lush meadows and icy alpine lakes to cascading waterfalls, there’s plenty to do and see in this park. Naturally, hiking is one of the primary attractions for this national park, along with multi-day backpacking trips. But don’t worry, there are certainly activities for everyone in this massive park – including RVing, horseback riding, and wildlife viewing.

Black Canyon of the Gunnison National Park

Distance: ~225 miles (4.5-hour drive)

Often overshadowed by Rocky Mountain or Arches National Parks, the Black Canyon of the Gunnison National Park is an underappreciated marvel. This park features a river-carved rock canyon with some of North America’s steepest cliffs. The rock itself is also fascinating, and geology aficionados will love the two million-year-old formations and spires that make up this park. What’s more, it’s one of the national parks near Colorado Springs that’s within a day’s drive.

However, keep in mind that Black Canyon of the Gunnison National Park is very remote. Research your last opportunity for gas and services, and be sure to take everything you need with you for your visit. But the benefit of this remoteness is that you won’t have to jostle with massive crowds at this park.

Mesa Verde National Park

Distance: 336 miles (6-hour drive)

Tucked away in the southwestern corner of Colorado lies this incredible testament to the Pueblo People’s culture and history. For centuries, these peoples built stunning villages in the cliffs and mesas of this area, and these ancient structures are now included in Mesa Verde National Park. This World Heritage Site offers a very unique look into how the Pueblo People lived and what happened to them as the Spanish encroached northward from modern-day Mexico and, afterward, the American frontiersmen westward.

Don’t forget to also stop by Hovenweep National Monument, just North of Mesa Verde, which we will discuss next.

Photo by Lauren Lopes on Unsplash

National Monuments and Historical Sites

Hovenweep National Monument

Distance: ~400 miles (7-hour drive)

Located just northwest of Mesa Verde National Park, Hovenweep offers another rare glimpse into the history of the native American peoples. This series of 6 villages was built sometime between 1200 and 1300 (hundreds of years before the first Europeans arrived in the area) and feature stunning architectural achievements and structures built into the canyons. Modern historians believe that around 2,500 people once lived in these villages, and their construction skill is genuinely something to behold.

Also directly adjacent to Hovenweep is the Canyons of the Ancients National Monument. This sprawling landscape contains the highest concentration of Native American archaeological sites in the country. Experts estimate that the area has been inhabited for over 10,000 years and includes more than 30,000 documented historical sites.

Bent’s Old Fort National Historic Site

Distance: ~115 miles (2-hour drive)

For the history buffs out there, Bent’s Old Fort is a must-see and is close enough for a day trip from Colorado Springs. The Site features a reconstructed adobe trading post from the 1840s period. Complete with tours, demonstrations, and historical recreations and performances, this is a definite stopping point for folks interested in western frontier history.

Sand Creek Massacre National Historic Site

Distance: ~143 miles (2.5-hour drive)

The western frontier history is full of conflict, culture, and controversy. All of this, and more, is preserved at the Sand Creek Massacre National Historic Site, which memorializes the terrible events that occurred on November 29th, 1864, when U.S. cavalrymen attacked the villages of White Antelope, Left Hand, and Black Kettle – leaders of the Cheyenne and Arapaho people. Today, this site offers informative ranger talks that discuss the awful events of that day and their significant impact on the region’s history.


Photo by Himiway Bikes on Unsplash

Final Thoughts

Colorado has so much to offer with its plethora of National Parks, Monuments, and Historical Sites. With almost any outdoor activity imaginable, from boating to hiking, plus its wealth of history, everyone is sure to enjoy a trip here. Best of all, there are several National Parks near Colorado Springs in addition to historical sites, making it an ideal location to visit as a springboard to your greater Colorado adventures.

And don’t forget that Colorado Springs itself offers several fantastic outdoor destinations of its own. Our hiking tours are an easy option to check out the best areas. But if you prefer to explore alone, don’t forget to consult a trail guide for Colorado Springs!