Prepping for Ski Season in Colorado Springs

The days are getting shorter, and the cold is settling in. It’s time for a lot of people to head inside, get cozy, and wait for the spring thaw to come around. While they’re all inside, many others have a single thing on their mind: skiing.

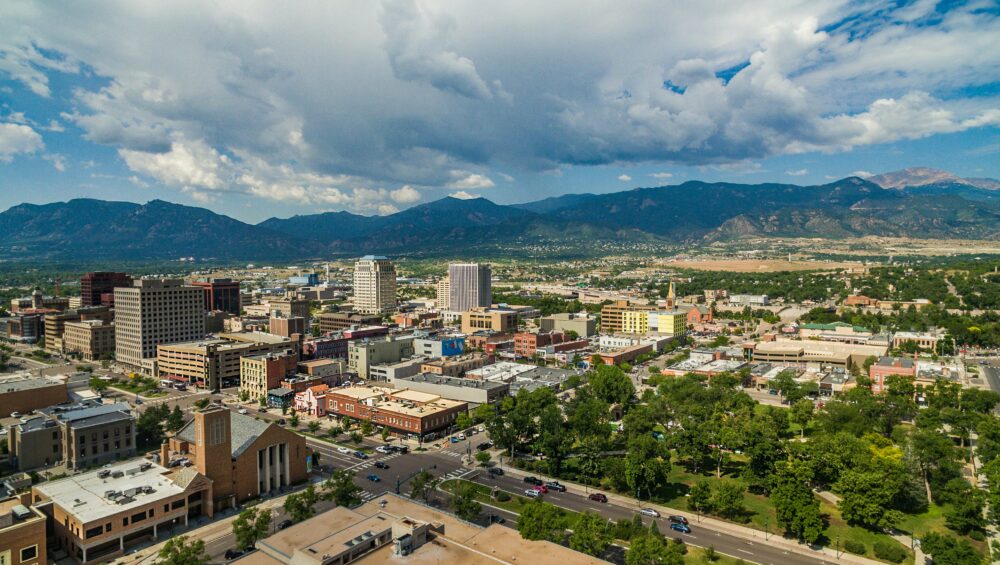
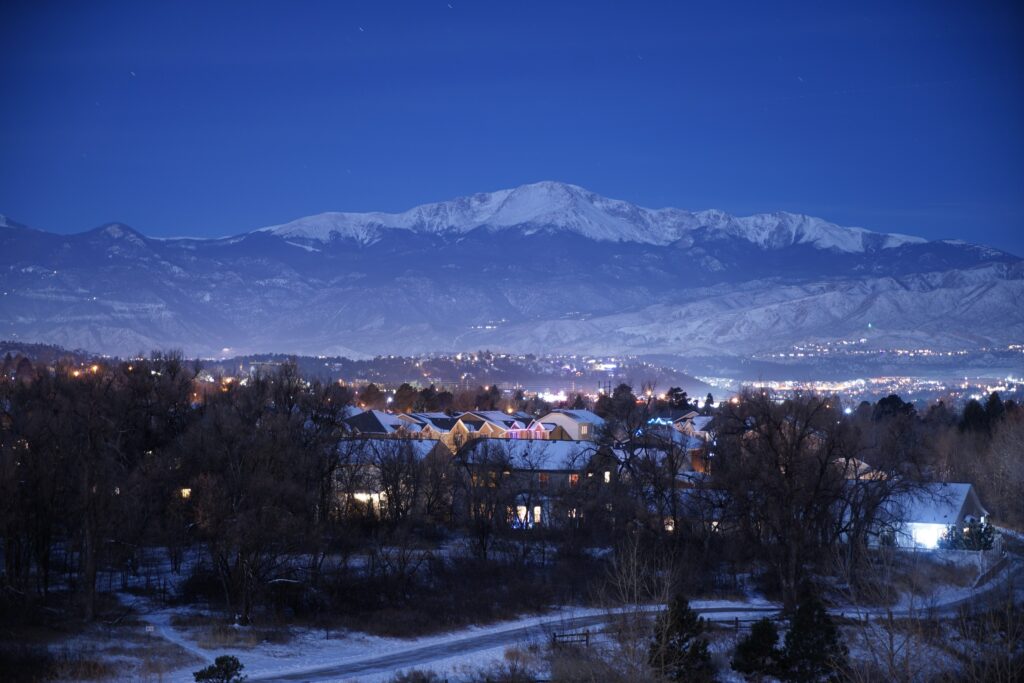
Skiing in Colorado Springs is one of the greatest parts of living in the great state of Colorado. The number of bluebird days is unbeaten by anywhere else in the US, and the snow seems to keep coming. 

So instead of preparing to hibernate, most of us know that it’s time to prepare for ski season. With a ski season that can easily run from mid-October to May, it can seem like you were just on the slopes yesterday. It’s important to remember that there’s still a lot to get done before you can comfortably and safely get back out this year.

Get your lift ticket, and get it early

The first step in getting ready for ski season is ensuring that you’ll have a spot on the lifts. Season passes can get picked up quickly, especially in the early months when prices are low. The best move is to decide when exactly you will be skiing.

Will it be weekends only?

How about the weekdays?

Are you just getting out for Christmas vacation?

The amount of time, especially what days of the week that time falls on, will greatly influence the pass that will work best for a skier or snowboarder.

Weekday season passes will be significantly cheaper than passes that can get you on all week long.

Day passes tend only to be good if you’re only going to a resort a few times in a year.

Season passes quickly pay for themselves if you use them regularly. 

The most popular passes in Colorado these days are the Epic and Ikon passes. They have a few significant differences but are both well-known for getting you powder days at resorts across the West. The best option depends on the mountain that will be your go-to.

The prices of season passes can be a huge turnoff that can feel discouraging. When the season hits, though, if you don’t have a season pass, you will second guess spending money every time you want to go ski. Having that season pass allows for freedom and guilt-free (or at least low-guilt) skiing throughout the entire season. 

Get your gear in proper, working order

The second major step necessary to get ready for ski season is to make sure all of your gear is as ready for the snow as you are. Skis left sitting in a garage for months on end after an entire season will need some tender loving care before getting back on the slopes. It’s often easy to get your skis tuned up by a professional. It isn’t too expensive and will make a world of difference. 

If you’re looking to do the job yourself, it’s a difficult skill to pick up but easy to do once you know the basics. A general tune-up will have your skis back with sharpened edges, smoothed-out bottoms, and a full wax job. 

Next up is to make sure your boots still fit and seem to be in good condition. If they’ve been stored away deep in a crawlspace, mice may have used them as temporary housing over the summer, and new liners will be a necessity. Freak growth spurts can also happen, or sometimes the boots need to be remolded to fit your feet. Try them on and make sure no surprises come up when opening day rolls around. 

What about renting gear?

When skiing is just a now-and-again hobby, it can be a bit ridiculous to carry skis around everywhere you go and keep paying to tune them before the ski season. If you aren’t skiing continuously throughout the year, renting gear can have huge advantages over having your setup. 

Renting gear means not having to worry about what happens when you hit a rock, bust a binding, or start to feel the wear and tear happening. You return skis to where you rented them from, and they’re the ones who have to fix them. It’s the best and kindest practice to treat rental gear with love and care, but accidents happen. 

When you own gear, the investment can be worth it to get skis and boots that are more personalized to your skiing style. Certain skis fit the different types of skiing that some people do, but most beginners won’t be able to tell the difference. Owning your gear is like buying a house. Everything that the landlord used to take care of, a leaky faucet or busted heater, is now your responsibility. Every scratch that makes its way onto your skis stays there until fixed by you.

Photo by Kellie Enge on Unsplash

Get your body moving and back in shape

One of the easiest things to get out of shape and need some lubrication in its joints is your body. Six months off can quickly get anyone out of shape if they aren’t constantly running or doing some summer exercise. 

Skiing is far more physically demanding than a lot of people imagine. Even when it’s only downhill, the amount of strength required in your entire body is impressive. The best way to avoid getting injured early on in the season is to go in prepared. 

Set a workout routine that can be followed for a reasonable amount of time before opening day. It will help your body remember what it’s like to move and groove again. There’s no shame in taking the summer off, but there’s no good reason to slack off when winter hits. 

It doesn’t even need to be an extreme workout. Adding some lunges, burpees, and crunches into your daily routine can be enough to remind the body of what you’re about to ask it to do. Fifteen minutes a day can save an entire ski season from being ruined by one silly mistake. 

Photo by Luka Senica on Unsplash

Prepping for Ski Season in Colorado Springs

Getting ready for ski season can often bring up a lot of questions. This is especially true if it’s the first year you have chosen this wonderful city as your base, or if you’ve never skied before. From lessons to opening days, finding all of the answers can be a difficult task.

Here is a quick FAQ to help get everything straight and help to make sure that ski season comes smoothly this year. 

Where to ski in Colorado Springs

While there isn’t much resort skiing right outside Colorado Springs, there is plenty of incredible skiing within a quick drive. Monarch Mountain, Cooper, Copper, Breckenridge, Keystone, and more are reachable in less than three hours. It makes Colorado Springs a great hub for getting to loads of different resorts easily. 

When do the resorts in Colorado Springs open?

Resorts across Colorado have varying start dates, mainly due to their location and snow accumulation. Some of them open as early as mid-October, but some won’t be open until December. For current, up-to-date projections for opening, check out each resort’s website. You can find a general projected opening date here, but it may not be the most accurate. 

Where can you get your skis tuned up?

There are many different places to get your skis tuned within the city limits of Colorado Springs. It makes sense, as so many people choose to live here to have world-class skiing easily accessible. The Ski Shop, Christy Sports, and Colorado Kite and Ski are all popular places to get your skis fixed up in town. There are plenty of other shops that will leave you ready for the season; check out Google or ask around town. 

Can you rent or buy skis in town?

Like we’ve already mentioned, people live to ski in Colorado Springs. It’s a town that’s made to have skiing accessible, and that means being able to buy just about any skis you can imagine or renting a full downhill or touring set up the day you need it. 

Where can you get lessons?

Typically, the best move is to get lessons at the resort you are planning on skiing at. They have lessons for all experience levels and ages and run for different lengths of time. Be sure to arrange lessons ahead of time because the classes can fill up quickly, especially on busy holiday weekends. 

Best Time of Year to Visit Colorado Springs

As tourism across Colorado continues to rise, Colorado Springs has become a popular destination during all seasons of the year. However, like any tourist destination, there are peak seasons, shoulder seasons, and off-seasons. 

Are you trying to avoid crowds?

Do you like to whitewater raft?

Are you thinking more of a foodie city tour?

The best time to visit often revolves around the type of activities you like to do, when you have time, and your personal preferences. To match your travel needs, find out when the peak tourist season is as well as our favorite time of the year.

What is the peak tourist season in Colorado Springs?

Like many areas of the United States, summer tends to be the peak tourist season. The reason summer is peak tourist season is because that’s when children are off of school and families can vacation together. There also happens to be some pretty stellar weather for outdoor activities.

Although summer is a beautiful time of the year, summer in Colorado Springs is hot and dry. The average temperatures range from 70-80 degrees Fahrenheit, which is warm but not too hot to stop outdoor activities. In this region of Colorado, summer is also a popular time for festivals and special events, drawing in even more visitors and providing more options for activities.

When visiting at the peak of the summer tourist season, remember that we have afternoon thunderstorms in the mountains. So, hiking in the mountains can be cut short without proper planning. If you’re new to hiking in Colorado, the safest option is to book a hiking tour with experienced guides and locals that can keep tabs on essential things like weather for you. 

If you’re not a fan of crowds, it is a safe bet to steer clear of visiting during the summer months. Overcrowding at popular destinations like Pikes Peak or Garden of the Gods is expected in the summertime, so if you are seeking solitude, try a different time of the year. 

Best time of year to visit Colorado Springs

In our opinion, the best times of the year to visit Colorado Springs are March to May and September to October. The Spring and the Fall still see a decent number of visitors but won’t be as crowded as Summer. 

The temperatures tend to be colder in both shoulder seasons, but they are still quite comfortable for outdoor activities. Visiting Colorado Springs in the shoulder seasons also means fewer crowds and potentially lower prices on lodging and tours. 

Spring in Colorado Springs

Visiting in the Spring is a great option, especially if you are looking for outdoor activities to do. The temperatures range from 45-65 degrees Fahrenheit most days, which is excellent for those that want cool hiking temperatures. 

Another popular attraction during the Spring is the whitewater. With the mountain snow melting, the water rises and quickens in rivers and streams around the area. The higher water levels mean an increase in the opportunity for kayaking and rafting. 

Fall in Colorado Springs

Fall in Colorado Springs has begun to grow in popularity with tourists as many visitors enjoy the fall colors in the mountains. The Fall colors bring in a lot of day-trippers and weekenders, but as the temperatures begin to drop, so do the number of visitors. 

The average temperature in the Fall ranges from 45-70 degrees Fahrenheit. This is decent weather for hiking well through the first weeks of October. One of the best ways to see the Fall colors is to join one of our zip line tours. You’ll get a unique view of the foliage and get the best overlook in the area. 

If a zip line isn’t your scene, the views are still breathtaking when taking a trip up Pikes Peak by car, hiking, or choosing a Cog tour

Photo by Matt Noble on Unsplash

The offseason

While we enjoy the Spring and the Fall for outdoor activities, do not discount Winter vacations in Colorado Springs! Winter in this part of Colorado is not too cold. The average temperatures sit around 40 degrees Fahrenheit. When it does snow, the snow tends to melt quickly as well. 

The only catch with visiting in the winter is that some of the hotels and other tourist attractions are closed. So, if you plan to visit in the winter, check-in in advance and book ahead of time to make sure that you can find a hotel during your stay. Plus, the hotels that remain open tend to have much better prices than any other time of the year. 

With more affordable prices in the winter, it is one of the best times to stay at the Broadmoor Hotel. If you love the holidays, you’ll enjoy the city, and the Broadmoor decorated for the season’s festivities. A winter vacation in Colorado Springs is ideal for those that like quiet winter hikes, snowshoeing, and cozy activities like cooking classes, fine arts, and food tours. 

Although it doesn’t tend to be a primary winter sports destination, it is still close enough to take a trip up the pass to ski or snowboard in Vail, Keystone, or Breckenridge. 

Best Lodging in Colorado Springs for Hikers

There are many great reasons to stay in Colorado Springs, but the main draw for tourists is outdoor recreation. If you’re coming into town to hike, bike, climb, or do any of the other many exciting outdoor activities in our area, you also need a place to stay. 

Websites and services like Airbnb or even Glamping Hub have made it easier to customize your experience to fit your needs. There are pros and cons to all types of lodging in Colorado Springs. So, first, identifying your personal travel needs and budget can help you narrow down the options. 

Since Colorado Springs has grown to be such a popular travel destination, you have a variety of options to choose from, including, hotels, lodges, vacation rentals, campgrounds, van rentals, cabins, and resorts. 

To help you get the best of all of the options, we’ve put together a list of our top choice for hotels, lodges, and resorts. That way, you’ll have only the top recommendations in each category to contend with, helping you get one step closer to the best experience Colorado Springs has to offer. 

Our Favorite Hotel for Hikers: Best Western Plus Peak Vista Inn & Suites

Booking a lodge or staying at a resort isn’t for everyone. That’s why we’ve included one of Trip Advisor’s Traveler recommendations as our top hotel choice for hikers. 

The Best Western is in the prime location for families and other travelers to check out local attractions like Garden of the Gods and Manitou Springs. You’re also in a prime location to enjoy many of the local restaurants and shops. You’ll have easy access to main roads, hiking, tours, and more.

This hotel is pet-friendly and has lots of green space for walking your pet around when you’re at the hotel. So, consider this an optimal stop-over point for those of you who always travel with your dog. 

Like most standard hotels, you can enjoy a complimentary breakfast, wi-fi, guest laundry, a pool, and a fitness center. We will say, if you’re looking for a clean and affordable place that has friendly staff and a good location, this hotel is a top contender. You’ll also be relatively close to the Broadmoor Outfitters meeting location if you stay here. 

Do not expect additional perks or services when staying in a hotel, though. Consider our recommendations below if you’re looking for a more “all-inclusive” stay in Colorado Springs. 

Top Rated Lodge in Colorado Springs: The Lodge at Flying Horse

As a 2020 TripAdvisor Traveler’s choice lodge, we felt the need to include the Lodge at Flying Horse on our list. Adventure couples especially enjoy this facility with the two private 18-hole golf courses, access to swimming pools, an athletic club and spa, and attractions within driving distance. 

As far as a lodge experience goes, this one is excellent. We will say that the drive is about 25 minutes to Garden of the Gods and Pikes Peak Railway from here. So, you’ll want to make sure you have a vehicle or book a tour.

The lodge itself is picturesque, and many guests enjoy rooms with a patio and mountain views. There is on-site dining, so after a day hiking or biking on nearby trails, you can head back to the lodge to freshen up, enjoy dinner, and relax. 

The Broadmoor Resort

The Best Resort for Outdoor Families: The Broadmoor

Although our first two options offer amazing experiences, if you are looking for a gorgeous resort, wilderness experience, and you want to discover adventure, look no further than The Broadmoor. As far as places to stay in Colorado Springs, The Broadmoor offers longstanding impeccable accommodations, services, and distinct amenities. 

You’ll rediscover the spirit of adventure with the unique opportunities and proximity to mountains, streams, and canyons. What’s even better is that The Broadmoor is home to countless outdoor adventure tours. 

Experience Colorado Springs like never before with once-in-a-lifetime zipline tours, guided hikes, and family-friendly adventures. When you get back to the resort, relax at the spa and enjoy the personalized luxury only The Broadmoor can provide. 

If you book any adventures with Broadmoor Outfitters, our trips leave from basecamp as a Broadmoor guest, making the adventure even more convenient. Non-hotel guests meet at the activity booth located across from Golden Bee restaurant on 6 Lake Ave. 

Best Places to See the Fall Colors in Colorado Springs

The fall transforms Colorado into a gold-rich state once again. The colors of the aspens flow through like liquid gold, rushing in and out quickly, so you need to know exactly where to see fall colors in Colorado. 

It’s time to cozy up and tackle the brisk Autumn air to let your eyes soak up Colorado Springs at one of its finest moments. These trails will take you to some popular, easy-access views and some hard-to-reach, hidden gems in and around Colorado Springs. 

Best places to see the Fall colors in Colorado Springs

Photo by Devonshire on Unsplash

1. Pikes Peak

One of Colorado Springs’ local Fourteeners brings a wide variety of options for those looking to get one of the best fall colors tours Colorado has to offer. At 14,115 feet of elevation, you are looking down on thousands of acres of national forest. The bird’s eye view lets you grab a completely different perspective from walking down on the ground.

It’s a view that everyone should take the time to see in their lifetime and one that everyone can. You can take the easiest route of driving to the top for a short day or hop on the Barr Trail for a 25-mile trek that will genuinely make you work for the views. The most challenging part of Pikes Peak is determining how you want to experience the mountain. 

Another option for the more adventurous is to hop on a bicycle and give your legs a real workout. Don’t worry. There are plenty of places to stop and catch your breath while enjoying the view. 

Check out our newest Cog Up, Bike Down Tour that shuttles you to the top of Pike Peak and turns the bike ride into a downhill cruise. 

2. Pikes Peak Greenway

In the fall, Pikes Peak Greenway gets a little less green and a whole lot more golden. 

Urban trails offer easy access and many options with how far you want to go and for how long. Plus, you can walk down to one of your favorite restaurants while still getting the feeling of an Autumn hike. 

The Pikes Peak Greenway runs through Colorado Springs. It’s mostly paved, sometimes gravelly, and is a well-maintained trail that connects several other local trails. Most bikes and all feet can take you around town to see how the fall colors transform Colorado Springs. 

The Greenway gives you easy access to loads of the local parks in Colorado Springs. This is the perfect choice for a walk around town that can end in a picnic overlooking beautiful fall colors. Stop off at Monument Valley Park, Boddington Park, or America the Beautiful Park for a great spot to sit and spend the day with a thermos full of warm drinks and a bag of delicious goodies. 

3. Cripple Creek

Just outside of Colorado Springs lies Cripple Creek, a small mining town that sits in a nest of aspen groves shining brightly in the fall. 

You can cruise towards town in several ways that allow you to experience the countryside differently. In town, you can hop onto the Cripple Creek and Narrow Gauge Railroad for a slow crawl through the forests you have been looking at from afar. 

Just make sure to get there in time; the railroad only runs until October each year. 

4. Mount Esther Trail

Just northwest of Colorado Springs sits a relatively small mountain dubbed Mount Esther. While the peak is “only” 9,505 feet above sea level, the climb to get there will test your endurance. 

The Mount Esther trail is 4.2 miles round trip. Trust us, it is worth the energy and the short, but steep climb. 

The treasure at the top of the trail is a golden meadow that reflects all of the colors of Colorado’s autumn season. If you push forward just a bit further, you will find yourself at the Crystal Creek Reservoir. Here, the colors are reflected off the glassy waters, bringing even more color to your world. 

5. Gold Camp Road

While there are loads of great drives in the area, some can be a bit more adventurous than others. Not all roads are smoothly paved yet, and those that aren’t let you get to some of the less traveled, more unique spaces of the Pikes Peak Region. 

If you’re equipped with a 4×4 or an AWD vehicle, be sure to check out Gold Camp Road, as it is where to see fall colors in Colorado with a bit of bump and spicy adventure. 

The name does a pretty good job of encompassing what the drive is going to get you. The rugged drive takes you through tunnels and corridors of aspens that puts you amongst some of the brightest fall colors the area has to offer. 

6. Best Fall Colors Tour in Colorado Springs 

If you’re looking to add in a bit of adrenaline to help warm you up on a brisk autumn day, a zipline tour is one of the best ways to see the fall colors of Colorado Springs. This option gives you a unique view that is constantly changing as you fly through the air. 

This zipline tour will engrain the memories of fall colors into your mind in a way that is hard to find doing anything else. 

An 1800 foot zipline gives you the chance to take in sweeping views of the colors while feeling the breeze across your body. A 1500 foot line takes you over a 150-foot deep canyon, really giving you a unique view of the forests below you.

Pikes Peak Railway: Cog Up, Bike Down

If you’re visiting Colorado Springs, chances are you’ve heard of Pikes Peak. It is famous for its hiking trails and downhill mountain biking, but did you know there was a railway that went to the top?

While riding to the top and back down may not seem like much of a thrill, what if we told you that Broadmoor Outfitters added a twist with their newest tour? Now, you can Cog up to the top of the famous Pikes Peak and mountain bike back down. 

Yep! You skip the grueling uphill pedal and simply can take in the views as you Cog Up Pikes Peak, but you get the adrenaline rush of biking down the mountain. 

The Broadmoor Manitou & Pikes Peak Cog Railway

In Colorado Springs, CO, the Cog Railway has recently reopened after being closed for reconstruction the last three years. The rebuild of the Cog Railway features all-new trains, a new track, a new depot, and a new visitor center. 

This particular railway was built back in June of 1891 as the highest rack railway in the world at the time. Now, the Pikes Peak Cog Railway remains the world’s highest and longest cog railroad, and it is the highest railroad in the entire Northern Hemisphere. 

There are only two cog railways in the United States, and Pikes Peak Cog Railway is one of the most unique railway experiences you can have in the world. 

Cog Up and Bike Down Pikes Peak

Not only is riding the railway up an exhilarating and unique experience but biking down the mountain will be one for your bucket list. While it may be tempting to try and book a ride up the mountain with your bike, the Manitou and Pikes Peak Cog Railway does not allow bicycles on board due to a limited amount of space. 

The only way to combine the railway experience with downhill mountain biking is to book with Broadmoor Outfitters. 

You will enjoy the 5.5-hour ride to the top of Pikes Peak. Then you will have a chance to check out the newly constructed Summit House at the top. We give you plenty of time to enjoy the view before the next stage of your adventure starts. 

Biking down the mountain takes you on a 19.5 miles journey. While that is a daunting distance at an exhilarating incline, we provide safety gear and safety information to help minimize risk on the descent. We provide full-face helmets, biking gloves, high visibility vests, and GT 29” cruisers. 

The bike down Pikes Peak is a supported ride. You will have a guide to lead you down the mountain and a van that is available to take any rider back down in case they choose to leave the ride early. 

The Pikes Peak Railway Cog Up, Bike Down tour is one of our most challenging tours and does require a fair level of fitness. Most biking abilities will be able to do the ride. However, we do require some biking experience to ensure you can navigate the terrain and control your bike. 

Please consult a physician before booking your Cog Up, Bike Down tour with Broadmoor Outfitters and ask them about your fitness for a high-altitude biking adventure.

Beginners Guide to Archery

Have you ever dreamt of riding horseback, firing arrows off to pin apples to the trees behind your target? 

You’re not alone in the fantasy of becoming Legolas, Robin Hood, or the Green Arrow. We all watch these movies and shows and imagine what it would be like to have the skills that these legends have developed over time. 

One wildly misleading part of these archery depictions is the lack of intense training over years and years that one needs to become a professional. There was someone training baby Legolas and giving him archery tips as he missed his target repeatedly. We all have to start somewhere. 

Archery is a great sport to get into as a beginner. There isn’t a huge initial investment, it’s easily accessible, and you don’t need a ton of gear to try it out. There are shooting ranges all around that will gladly let you explore the bow and arrow, even as a beginning archer. While the internet and other resources around you are filled with a wealth of archery tips, we’re going to dive into the best way to get started on your new journey.

So, nock your arrow, take sight, and let’s see what targets we can hit.

Broadmoor Outfitter’s Beginners Guide to Archery

Photo by Sadie Esch-Laurent on Unsplash

Bows

It can’t be said enough that archery is a simple sport at its roots. There aren’t too many moving parts, and you don’t have complicated technology. It’s a tool that people have been using for thousands of years, way before we relied on smartphones to do everything for us.

Now, you can easily Google, “What is archery?” and have your answer in an instant. Still, the bow takes time to practice, learn, and truly master. Fortunately, archery for beginners is much more simple than mastering it. 

You can’t practice archery without is the bow. This may be common knowledge, and you may be sitting there saying, “Duh, of course, you need a bow,” but there’s a little more to it. There are several styles of bow, and each has pros and cons.

So, to get you started on the right foot, here are the two basic designs of bows.

1. Recurve

A recurve bow is the simpler of the two bow styles. In essence, this bow style utilizes the curve of fiberglass, or sometimes wood, limbs to provide power to your shot. These limbs are attached to a handle that houses the arrow rest, where you will be looking while aiming.

A single bowstring attaches these two arms and curves them against their natural direction, amping up the potential force. All of this power goes into the arrow as soon as you pull back the bowstring and take aim. 

A recurve bow looks more like a traditional Robin Hood style bow and is probably what you will want to try using on your first time shooting. They aren’t complicated, they give you a good idea of how to control a bow under pressure. Plus, they are much cheaper than their counterparts.

Recurve bows are typically a relatively low draw weight that won’t make your arms shake uncontrollably while pulling back the first time. If you’re looking to do some more complex or powerful shooting, you can look towards other bow styles. 

2. Compound

A compound bow is an ingenious invention that allows the shooter to hold aim without putting too much strain on their arms and shoulders. This was accomplished by engineers in the 1970s, using cams to relieve the pressure once the string is fully drawn. The bow itself is a bit more complicated, looks much more modern and high-tech, but is perfect for anyone who goes hunting and patiently waits at a full draw for the right moment to fire. 

There are more traditional bows, like the longbow that you may imagine an elf carrying into war. There are bows specially designed to be fired from horseback and bows with all the bells and whistles for Olympic archers, but we’re talking about archery for beginners here.

One of the best archery tips we can give you is to start easy, don’t grab a bow that will be too high of draw weight. You will most likely end up not enjoying the sport because it’s too difficult to come near a target while straining to draw the bow. 

Photo by Laura Crowe on Unsplash

Arrows

While there are many styles of arrows for hunting and target practice, the best idea for starting up is to buy a cheap archery target and some target arrows that are relatively affordable. A lot of these are going to be aluminum or carbon, which are great materials for beginners. 

Learning how to re-fletch your arrows is another invaluable tool. The little feathers, called fletchings, are going to pop off over time. It’s an easy fix with the right glue and tools, and it’s worth getting to know how to do your own maintenance. This will save you money in the long run and keep you shooting for longer. 

Shooting Sequence

As this is a beginner’s guide to archery, having the gear isn’t enough. Learning how to shoot is essential.

You’ve acquired the bow and the arrows, and hopefully, you’ve found some other safety equipment such as an armguard or finger guard. Now you’re ready to shoot! The entire shooting sequence gets down to fine, delicate details when working on becoming a master.

For now, though, we’ll glance over the basics of an archery shooting sequence:

  1. Find a safe area where everyone is clear of down range, mentally prepare, and it’s time to take your stance. 
  2. With your feet shoulder-width apart, extend your bow arm towards your target. 
  3. Nock your arrow on the bowstring and place it in the arrow rest with the index feather (normally the odd colored fletching) pointed away from you. 
  4. Placing one finger above the arrow and two below, draw the bow back and bring your hand to the corner of your smile, all while keeping your elbow high. 
  5. With both eyes open, take aim down the shaft of the arrow towards your target. 
  6. Take a deep breath in, and slowly exhale.
  7. On your exhale, release.
  8. Celebrate.

Okay, maybe you won’t be celebrating the first shot, but keep at it. Learning archery is a process, and it requires a lot of patience and practice. Keep working on your form and pay attention to the little details. 

Where to Practice

Since archery can be pretty dangerous, one of the safest ways to start is with a guided introduction to archery.

When beginner archery in Colorado is done right, it is a fun family activity that everyone can master. Set up a small target range at home if you have the outdoor space. If you don’t, find the closest archery range. The range is a great place to meet fellow archers who can share archery tips and are willing to build community through the sport. 

Soon, you won’t need the beginner’s guide. Nocking an arrow and pinning five into the bullseye in a row will feel natural. Keep on practicing, and remember, we were all beginners at some point. 

Top 5 Outdoor Tours in Colorado Springs, CO

Colorado Springs, located an hour south of Denver, CO, attracts many outdoor enthusiasts, families, and thrill-seekers to explore and play in its rugged wilderness each year. The city sits at the eastern foot of the Rocky Mountains and is home to some of the state’s most iconic sights, such as the Garden of the Gods. The area is ripe with opportunities for outdoor adventure. So ripe that when planning your excursion, you may be wondering which Colorado Springs outdoor tours to experience.

Luckily, there is no shortage of premium tours in the area to match its diverse opportunities for outdoor recreation. Outdoor tours are a unique way to experience wild places and activities through the eyes of a seasoned guide. Regardless of one’s experience level, partaking in a guided tour is a gratifying and fun experience. On a tour, you can expect to learn a new skill, meet new people, and gain firsthand knowledge that you will carry with you long after it ends. 

So whether you’re planning your first or thirty-first trip, check out these Top 5 Outdoor Tours in Colorado Springs, CO.

Image by Dragan Tomić from Pixabay

Guided Hiking Tours

Guided hikes are an enriching and memorable way to explore new trails beyond simply following signs, maps, or apps. Based out of Colorado Springs, Broadmoor Outfitters provides top-of-the-line guided hikes on the city’s most iconic trails. Visitors of all ages can explore Colorado Springs’s breathtaking mountains in small groups of up to 12 people.

For those who would like to learn about the Rocky Mountains’ flora and fauna while immersed in it first-hand, Broadmoor Outfitters also offers the option to have a naturalist as your guide! Tours take place daily at 9:30 am and 1:30 pm and last about 3 hours, with the opportunity to extend the hike’s duration when booking a reservation. Visitors are encouraged to let the staff know the kind of hiking they’d like to experience so that the guides can curate an itinerary aligned with each group’s wishes. This tour has something to offer for anyone looking to explore the Rockies on foot, regardless of if you’re a solo traveler or a family of four.

The Broadmoor Hunt

If a mild hike that combines problem-solving and a bit of history sounds like a blast, then look no further than the exciting and one-of-a-kind Broadmoor Hunt. The Broadmoor hunt is not your typical outdoor tour but instead a thrilling app-based scavenger hunt. During the hunt, individuals will put on their metaphorical Indiana Jones hat to learn about the historic Broadmoor Hotel while solving problems as they explore the hotel grounds and surrounding landscape.

This tour is open to individuals of all ages but is the perfect fun outing for families with children looking to stretch their minds (and imaginations). The tour runs daily from 10 am to 3 pm and lasts 1.5 to 2 hours. Broadmoor Outfitters also offers a corporate version of the scavenger hunt for businesses looking to strengthen teamwork among coworkers.

https://pixabay.com/photos/pikes-peak-mountain-1269035/
Image by Beverly Lussier from Pixabay

E-Bike Tours 

If the idea of cruising down scenic roads with the wind in your hair and mountains to your left and right sounds like a dream, but steep inclines and never-ending hills sound like a nightmare, then Colorado Springs E-Bike Tours are a perfect happy medium. E-bikes are gaining popularity as a fun and accessible way to experience the thrill of conventional bike tours with ease and speed.

This tour takes attendees on a 5-mile ride through the Garden of the Gods on Trek Rail 7 E-Bikes. The 3-hour tour runs daily at 9:30 am and 1:30 pm and is open to individuals over the age of 10. As a heads-up for any mountain bikers (or purists) reading this article, you can also find epic guided mountain bike tours in Colorado Springs.

Stand Up Paddle Boarding Tours

Our Stand Up Paddle Boarding Tours in Colorado Springs are the perfect option for individuals looking for an aquatic adventure despite being 1,200 miles from the nearest coastline. Stand Up Paddle Boarding developed as a relaxing and fun sister sport to surfing in landlocked areas. During this 2.5 hour tour, individuals of all ages will glide atop Colorado Springs Lake as the Rocky Mountain ridgeline reflects along the water’s edge. Seasoned SUPers know that the sport can have a big learning curve, which is why joining a tour your first time is essential for learning proper technique and form.

Tour guides will teach attendees foundational skills, such as paddle strokes, footwork, self-rescue, and how to get on the paddleboard (which is more challenging than one might think). Tours run daily in groups of 8 at 9:30 am and 1:30 pm. The tour is open to all ages, but individuals who love sports that involve balance and coordination and being on the water will likely enjoy this tour the most.

Image by Gero Birkenmaier from Pixabay

Fins Course Zip Line Tour

Last but certainly not least,  Fins Course Zip Line Tour is the perfect option for adventurous souls looking to experience Colorado Springs from the sky. You will zip through the crisp blue Colorado sky, surrounded by high peaks, and soar over Seven Falls Canyon as the waterfall roars below. This tour is not for the faint of heart. The Fins Course Zip Line consists of a staggering five zip lines, 250 to 1800 ft long that reach heights of 500ft, two rope bridges, and a 180 ft assisted rappel.

Due to its technical nature, this tour is rated intermediate to advanced and is only open for individuals aged 10-80. Tours run hourly each day from 9:30 am to 3:30 pm and last a total of 3-4 hours. So if you’ve ever looked up at the sky and wondered what the mountains looked like from the perspective of the birds flying overhead, this tour is your chance to finally find out. 

This list only covers the Top 5 Outdoor Tours in Colorado Springs, so make sure to check out all of the other outdoor tour offerings in Colorado Springs to find the experience that is right for you.

Should I Book a Mountain Bike Tour or Rent a Mountain Bike?

Headed out to Colorado Springs for a family vacation? Or are you traveling solo and looking to pack as much outdoor activity into your trip as possible? Perhaps you’re a nature lover and want to spend some time leisurely exploring the Garden of the Gods, Red Rock Canyon, or Ute Valley Springs. No matter where you fall in these categories, mountain biking is a fantastic way to make the most of your time in world-renowned Colorado Springs! 

Now, your adventure boils down to two options:

A mountain biking tour in Colorado Springs

Or, 

A mountain bike rental in Colorado Springs 

On a bike tour, you’ll have various trails to choose from and get to do your exploring with a knowledgeable guide. On the other hand, if you rent a bike, you’ll have free reign over your trip length and can hit the trail without a guide. 

At Broadmoor Outfitters, you’ve got both options! The main points to consider when deciding are skill level, budget, and interests. This article will help you decide which route to choose so your mountain biking in adventure in Colorado Springs is a wonderful experience.

So, let’s dive into what to consider when deciding on a mountain bike tour vs. mountain bike rental.

Skill Level

For people who can ride a bike but aren’t super skilled at navigating curves and rocks, a mountain bike tour in Colorado Springs, CO is definitely the way to go. 

Did a young family member recently ditch their training wheels? Our bike tour is perfect for families with children. Our tour guides are happy to speak with you about your comfort on a bicycle in order to fine-tune the tour to suit everyone’s unique needs. Your guide will also factor in how long you want to ride, and they’ll be able to navigate you back to “base” easily if anyone decides they’re done with the ride early.

Photo by Darcy Lawrey from Pexels

For athletic or even semi-athletic folks who are looking to pack in as much scenery as possible or can comfortably work up a sweat, a mountain bike rental might be the way to go. 

The rental option can also be ideal for families who have children that are close in age and riding level. It can be a fun and unique bonding experience for families to decide which trails to explore, navigate the trails together, and even choose when to take breaks for water and snacks.

Cost

Mountain biking in Colorado Springs is something anyone can enjoy on any budget. No matter how much you’re able to spend, there’s an experience for you. Here are some items to keep in mind as you consider your budget.

 How much time do you want to spend mountain biking? If it’s just one item on a long list of adventures you’re preparing to go on at Broadmoor Outfitters, you should go with a mountain bike tour.

Image by Fabricio Macedo FGMsp from Pixabay

Seeing as you’ll have lots to do and only want to spend a few hours on a bike, a guided tour is a cost-effective way to optimize your time. You pay for a few hours of riding versus renting a bike for an entire day when you plan to use it only for a short time. Your guide will help you make the most out of your trip. Then, you’ll have plenty of time left in the day for other activities. 

If mountain biking is your thing and you want to dedicate a day – or even more – to biking, then consider mountain bike rentals in Colorado Springs, CO. When renting, you’ll have a whole day or more to ride your bike to multiple areas of your choosing. You won’t pay for a guide, and you’ll have total freedom to make it an epic and unforgettable ride.

Interests

What do you want out of your trip and, specifically, this mountain bike ride?

If the purpose of your trip is to spend some solo time in nature, and you enjoy looking at trail maps and selecting your route, you’ll enjoy mountain bike rentals in Colorado Springs, CO. Just make sure you’re comfortable with navigating the area and, of course, follow all safety protocols. 


If your goal is to relax and let someone else do the planning, consider mountain bike tours in Colorado Springs, CO. We’ll take all the fuss out of figuring out which trail is perfect for you and your family. That way, all you’ll have to do is show up and enjoy the ride!

Image by Fabricio Macedo FGMsp from Pixabay

Bringing it Together 

Mountain Bike Tour in Colorado Springs

Pros

  • Efficient method to see the beautiful sights.
  • Stress-free! It’s already planned out.
  • There’s a guide with you – you won’t get lost, and you’ll have someone who knows the area in case of an emergency.
  • The trail is well-maintained. 

Cons:

  • The tour may not cover the area you want to see. 
  • Can only ride for a few hours or the duration of the tour

Mountain Bike Rental in Colorado Springs

Pros: 

  • Total control over where to ride. 
  • You can rent the bike for a whole day or more. 
  • Great for people looking to ride for exercise. 

Cons: 

  • It may be difficult to transport bike(s) depending on where you plan to ride. 
  • The trail may not be maintained/easily navigable. 

Still not sure? Don’t worry; you can’t choose wrong! The main characteristic that both mountain bike tours and mountain bike rentals have in common is that they’re a great way to experience nature and make memories that’ll last a lifetime. Have any questions before making your decision? Feel free to contact us and we’ll help you pick the perfect activity for your trip.

Beginners Guide to Stand Up Paddleboarding

Beginners Guide to Stand Up Paddleboarding

If you’ve ever watched people gracefully paddling on water and wondered how to stand up paddleboard, you’ve come to the right place. Stand up paddleboarding is a fun way to enjoy the outdoors, and it’s easy for beginners to learn. Check out our stand up paddleboarding tips below, and when you’re ready to join us, book your spot in our Stand Up Paddleboard Tour in Colorado Springs.

What Is Stand Up Paddleboarding

Stand up paddleboarding involves standing on a paddleboard, which is not unlike a surfboard, and using a paddle to propel yourself across the water. Unlike surfing, however, these boards are wide and stable, so it’s easier to stay upright. Beginner paddleboards are usually 10’6” long and 31” wide. They are easy to maneuver and don’t require as much balance as you might think. Plus, the benefits of learning how to stand up paddleboard are totally worth the potential of falling off in front of your kids.

Image by ivabalk from Pixabay

There are plenty of benefits to this fun watersport. First, stand up paddleboarding is an excellent full-body workout, using core muscles for balance and paddling. Second, it’s a great way to enjoy the beauty that Colorado Springs has to offer. You can paddleboard on a river, ocean, or – as we do here – a lake. Since you are standing, you can easily take in the sights while relaxing on the water. Finally, it’s a fun social activity for friends and families. This is an excellent adventure for older kids to tackle alone, and little ones can stand on a board with a parent.

Gear Needed for Stand Up Paddleboarding

Your Paddleboard 

There are three required pieces of equipment for learning how to stand up paddleboard, and we provide them all on our tours. The first is a paddleboard, and we use only high-quality and reliable boards. These solid boards with slip-proof coating are ideal stand up paddleboards for beginners to learn on. All boards come with a velcro leash to secure around your ankle. This prevents the board from drifting away if (and when) you tackle a tumble into the water. 

The Paddle 

The second is a paddle, and our lightweight paddles are comfortable to use. The paddles are adjustable and should be nine or ten inches taller than you. One simple trick for sizing your paddle is to raise your hand straight up above your head and put the paddle handle in your palm. When you can comfortably grip the paddle from this position, that’s the perfect height for you. It’s easy to learn how to use the paddle to navigate through the water, and our Stand Up Paddleboarding Tour in Colorado Springs covers this and other techniques. 

Personal Flotation Device (PFD)

The third piece of gear is a personal flotation device (PFD), which is essential while paddleboarding. A PFD allows you to stay safe while paddleboarding over deeper waters, and it also makes it easier to remount the paddleboard from the water. PFDs come in multiple sizes for adults and children, so be sure to get one that fits snugly without being restrictive. 

Finally, let’s talk about clothing. If it’s cold, you may want a wet suit or rash guard. You can also wear water shoes to keep your feet warm while paddleboarding. Make sure to pick shoes that will stay on (flip flops are sure to get lost) and won’t slip on wet surfaces. In warmer weather, don’t forget to lather up with sunscreen before hitting the water.

Image by Dimitris Vetsikas from Pixabay

Stand Up Paddleboarding Tips and Techniques 

When you first get on the water, you’ll do so from a kneeling position. Having your center of gravity a little lower keeps you more balanced and prevents falling in shallow waters. You can stay kneeling or sitting the whole time, but then you wouldn’t be stand up paddleboarding. What’s the fun in that? So the first thing you need to learn about how to stand up paddleboard is, well, standing up!

Standing Up on Your Paddleboard

The key to standing up on a paddleboard is to go slowly from kneeling, to squatting, to standing. When you stand from a kneeling position on solid ground, you move all your body weight to one foot and then the other. If you tried this on a paddleboard, you would tip over and end up in the water. This is an easy enough mistake to make, but it’s also avoidable if you know the proper technique!

Photo by Elise Bunting from Pexels

To maintain your balance, first move into a low squat to keep your center of gravity closer to the paddleboard. It’s easiest to put down your paddle first – across the paddleboard in front of you. Then, place a hand (or both) on the board while you move into a squat. Place your foot in the same place your knee just left to ensure balance and stability in your stance. 

Once you’ve made it to a low squat, you can stand straight up. Don’t forget to bring the paddle with you! Now standing, make sure your feet are hip-width apart with your toes facing forward. Keep your knees bent and engage your core for balance. This is especially important while paddling, which is next on the list.

How to Paddle a Stand Up Paddleboard

First, let’s go over the proper technique for holding a paddle. If the paddle is to the right of your board, your left hand should be on top, holding the T-grip in your fist. Place your right hand a few feet down the shaft. To keep the paddleboard moving straight, switch sides every few strokes. When you do this, also change your hand positions so the opposite hand is always on top. 

The Forward Stroke 

Let’s start moving with a forward stroke. Both of your arms should be fully extended, with your top arm parallel to the board and your bottom arm at a forty-five-degree angle. The angle of the paddle blade should point away from you. Bury the whole blade in the water to get maximum power with each stroke. Be sure to pull your paddle back as far as you can; try to get your body past the paddle before you take it out of the water for the next stroke.

Image by thelester from Pixabay

Reverse Stroke 

Once you’ve got the forward stroke down, you can also do a reverse stroke. As the name implies, it’s just the forward stroke backward with the paddle starting next to or slightly behind you. Make sure to bend your knees and engage your core! Doing so provides stability and power as well as protecting your back from injury in this twisted position. You’ll most often use the reverse stroke for stopping or slowing down.

The Sweep Stroke – For Turning 

The last aspect to paddling a stand up paddleboard for beginners is the sweep stroke. This stroke allows you to turn quickly, even when your board is standing still. Start by placing the paddle near the nose of your board with the blade perpendicular to the paddleboard. Then, using your legs and hips for power, sweep the paddle in a semicircle backward towards the tail of your board. This motion will cause you to turn away from the paddle. If you do a reverse stroke, starting at the tail and sweeping toward the nose, you will turn toward the paddle. 

This technique gives you a couple of options for turning in the water. If you want to turn to the right, for example, you can do a sweep stroke on the left side of the board or a reverse sweep on the right.

How to Get Back on a Stand Up Paddleboard from the Water

The last of our stand up paddleboard tips, especially important for beginners, is how to get back onto a board after you’ve fallen in the water. The first step is to locate your paddle and place it across the nose of your paddleboard. If it has drifted too far away, you’ll need to get back on your stand up paddleboard first (since you’re connected via leash) and paddle with your hands to retrieve it.

Join an intro to paddleboarding class today!
CLimb the Manitou Incline with Broadmoor Outfitters

THRILL SEEKING ADVENTURES IN COLORADO SPRINGS

Wow! After a grueling week of work, you want some thrill-seeking adventure! You are in the perfect location for that!

Is white water rafting enough of an adventure? While Canon City is around an hour away from Colorado Springs, this is where some of the region’s best white water lies.  The best time of day for some incredible moments is early. In fact, the earlier, the better. Grab a quick bite to go at Taco Express and head to the water!

Should this be your first or fifteenth time on the rapids, enjoy three to four hours with Echo Canyon River Expeditions. Book their 9:00 a.m. trip. They love this one because the air is a little warmer, and it is not blazing hot from the sun.

After an incredible run on the rapids, stop for some lunch and continue the day with even more adventure.

Hop on a bike and hit the road for Pike’s Peak. That is right, challenge yourself with Challenge Unlimited for a ride to remember. After meeting them in Old Colorado City, fitted for gear and equipment, load up in the van for a ride to the summit.

This thrill-seeking moment will have you screaming down the mountain in no time with the wind in your hair. The best part is you did not have to push yourself up the 8,000 feet elevation.

This sweet adventure is about six hours, so plan accordingly.

For the second day of your outdoor excursion, start by heading to Manitou Springs for some Huevos Rancheros from Adam’s Mountain Café.

After you recharged, hit the Manitou Incline, a unique adventure that is less than one mile. Oh, do not let that fool you! You will need plenty of water to conquer this elevation rise, as you will go up 2,000 plus feet in elevation, and most of it is straight-up! Think of it this way; you will be going 500 feet more than the Empire State Building is tall.

That is ok if this kind of thrill is not in the cards for you. The summit of Red Mountain and Intemann Trail’s Manitou section has you covered.

Plan on spending about three or four hours on the Incline. There are all kinds of restaurants and shops to pick up some souvenirs after you have conquered the Incline. There is even a t-shirt that says, I conquered the incline.

End your day with the ultimate of all adventures at Cave of the Winds Mountain Park. The Wind Walker is where you want to test your skills. This three-story rope challenge course lurks over Williams Canyon. Oh, did we tell you, it is a 600-foot drop, so do not look down.

Should this not have quenched your thrill-seeking hunger, continue with the TERROR-dactyl. That is right, drop down in the canyon going 100 miles an hour on a giant pendulum swing. Oh, be sure to purchase that photo package to have a remarkable memory of the face you had as soon as you drop in the swing.

Why stop now? After all, you have just conquered some incredible feats. How about some Iron Road? Gear yourself up for the Via Ferrata. Conquer the canyon as you scall the walls over trails of ladders and cables. There is a zipline at the end, so hold on tight.

The zipline portion may be purchased separately if that is all the thrill you want.

Plan for one hour or one day, the adventure is up to you. Reservations are available, so this will help you to get in, enjoy some moments with friends, and move on to the next thrill-seeking excursion you have in mind.