How To Waterproof Your Hiking Boots 

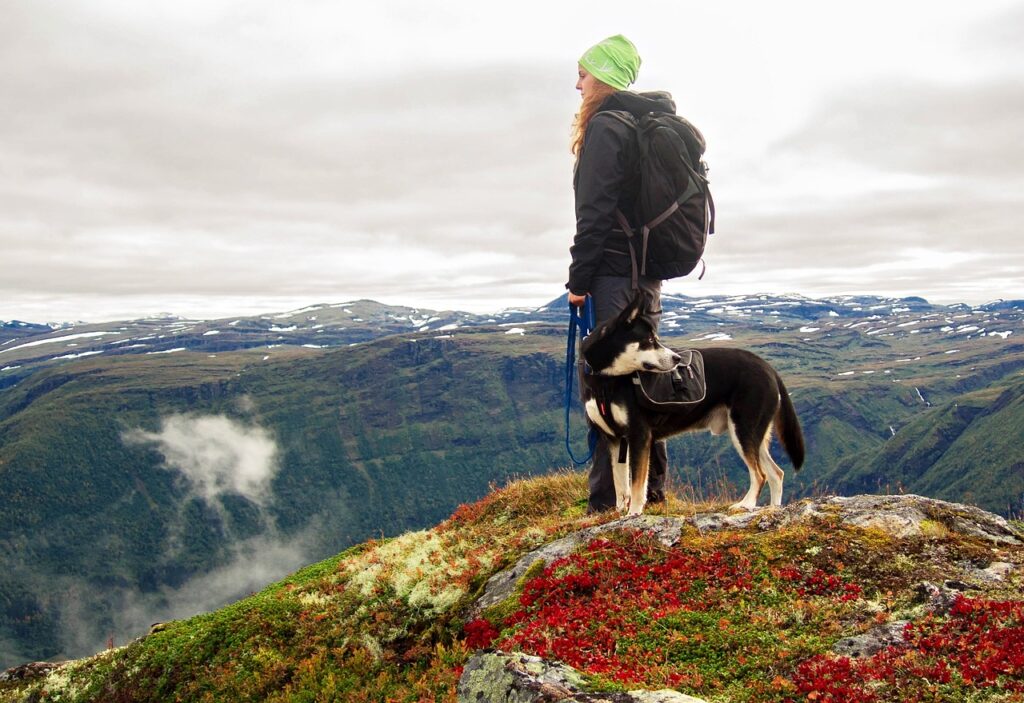
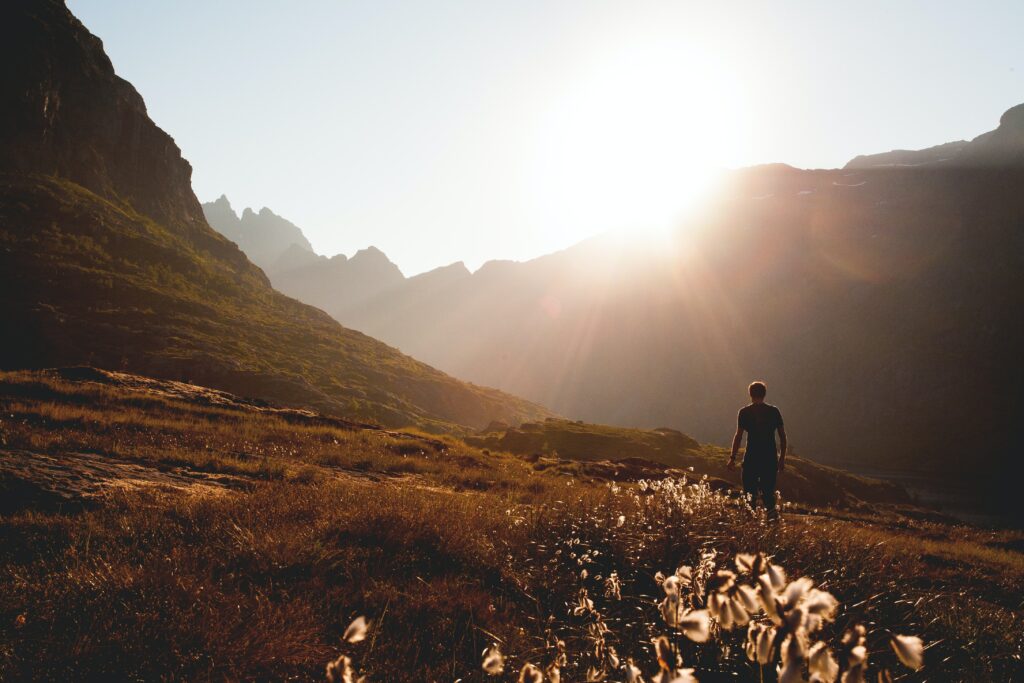
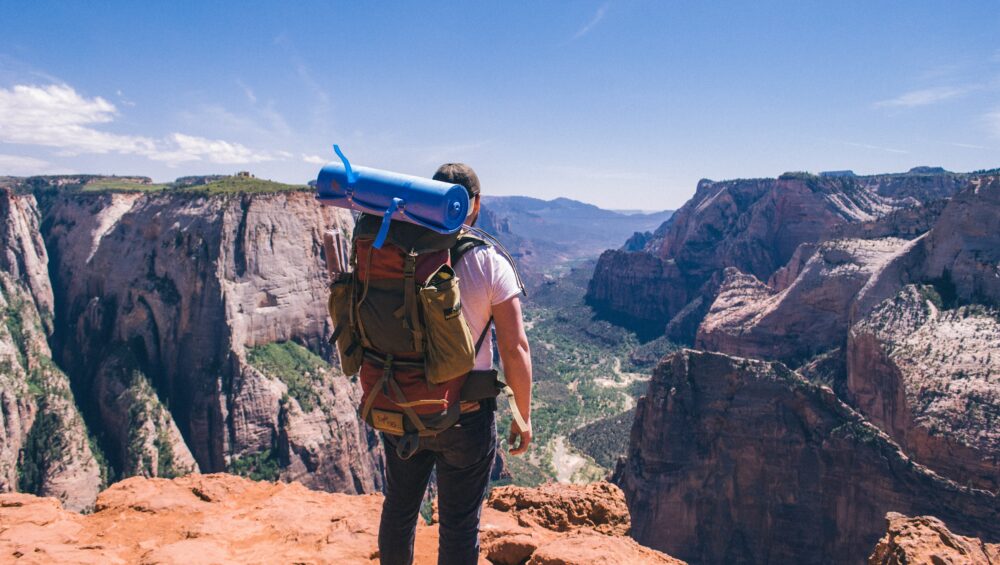
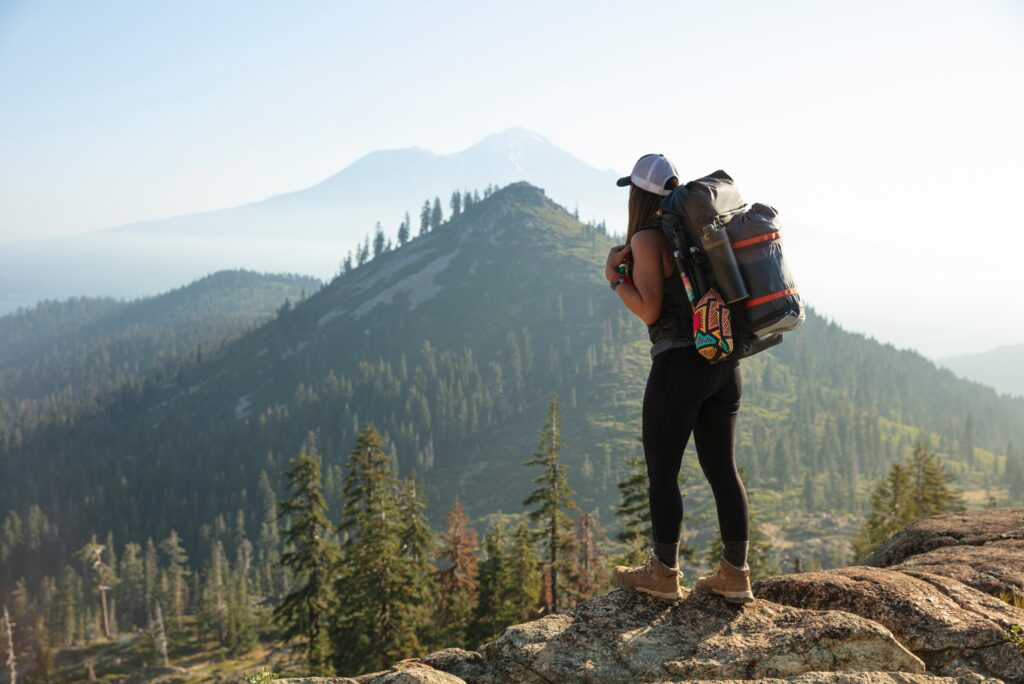
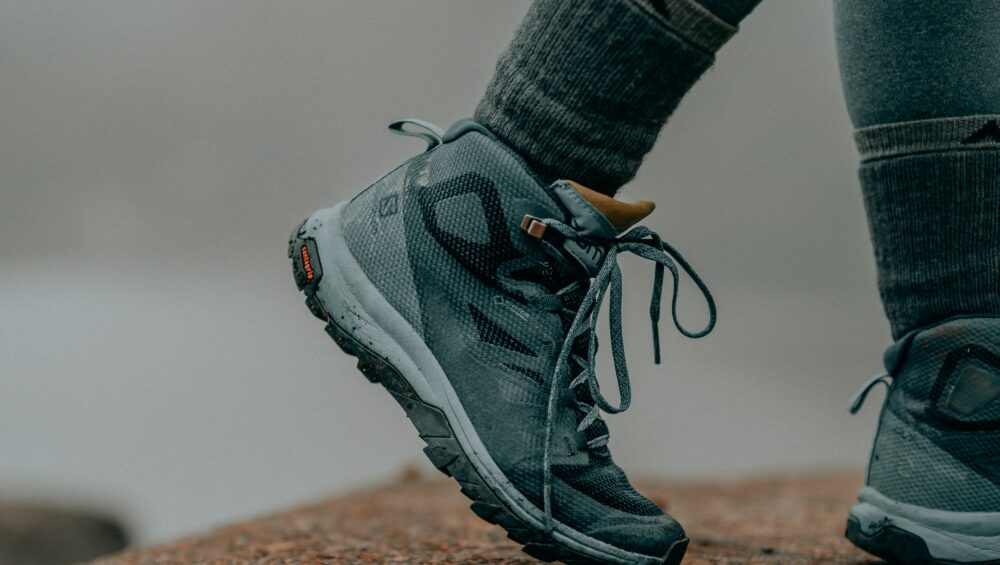
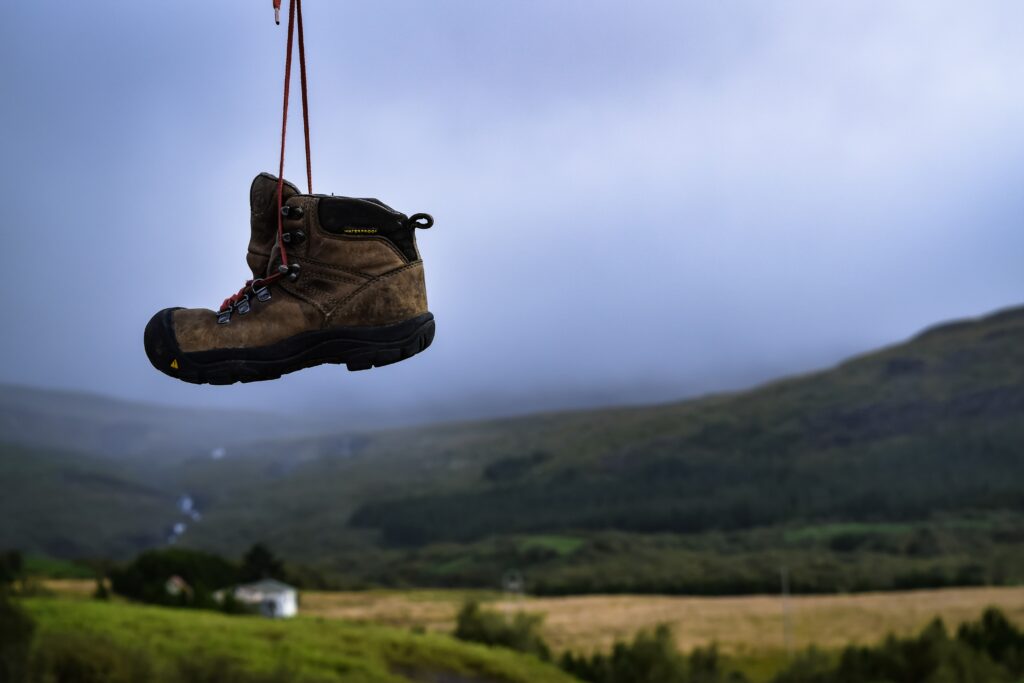
Don’t you just love the snowy season in the Rockies? As you plan some awesome winter activities, one essential piece of gear you’ll need is waterproof boots. Winter hiking boots, that is boots that are waterproof and insulated, are key for staying warm during your time outdoors. If you don’t have waterproof hiking boots (or if your pair has gotten leaky), no worries! It’s easy to apply a waterproof treatment to any pair of hikers. Follow this step-by-step (no pun intended) guide to waterproofing boots so you can stay warm and enjoy the winter wonderland.

How can I tell when I should waterproof my hiking boots?

Waterproof hiking boots don’t stay waterproof forever. The treatment deteriorates over time and will leave your hikers vulnerable to wet conditions. Instead of getting a new pair, you can prolong their lifespan with a simple waterproofing. 

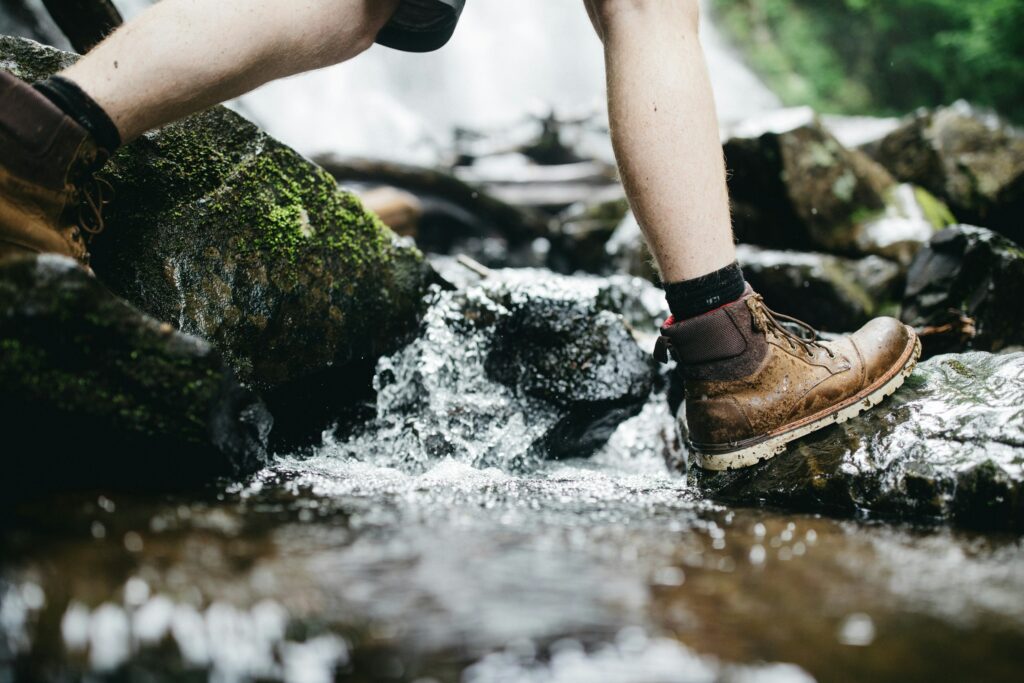
Aside from an unpleasant surprise mid-hike, how will you know when it’s time? You can get a sense of your boots’ waterproof capabilities with a simple test. Grab a spray bottle or put a boot under a trickle of water from the faucet. If you look closely, you should see the water droplets beading up before falling off your boot. If they soak into the boot rather than bead against the fabric, it’s time to reapply your waterproofing treatment.

How often should I give my hiking boots a waterproof treatment?

The frequency of waterproofing treatments depends on how often you use the boots. The waterproofing will go faster if you wear the boots regularly for long and rough hikes. It can also deteriorate faster when you clean the boots. It’s a good idea to apply this waterproofing treatment at the beginning of the season, before a particularly big hike, or after a deep cleaning. Treating your hiking boots at least once a year will keep them in good shape so your feet stay dry on the trail.

Which waterproofing treatment is best for my boots?

When you decide you are ready to waterproof your hiking boots, you’ll immediately be overwhelmed by the number of choices. There are sprays, waxes, and liquid forms of waterproofing treatments that are either wax- or water-based. You will want to choose what’s best based on the material of your boots. (More on the proper treatment for each material is below.)

One important thing to keep in mind here is that solid waxes have become less popular for waterproofing (See liquid wax below). This is because it can limit the ability of adhesives to stick to the material in the event that you need to have the boots re-soled.

Photo by Wes Hicks on Unsplash

How to Waterproof Your Hiking Boots

Step One: Clean Your Boots

The first thing you need to do before you waterproof your boots is clean them well. Any leftover dirt or grime will keep the waterproofing treatment from thoroughly adhering to your boots. To give your hiking boots a deep clean, first remove the laces and insoles (if removable). Start by brushing away dirt with a toothbrush or any brush with soft bristles. Then, use a mild soap or boot cleaner if you have it to scrub any dirt out of the seams, creases, and tongue. 

If any dirt is really stubborn, you may need to soak your boots in warm water to release the grime. After you give them a good scrub, you will rinse them with warm water anyway, so don’t be afraid of getting them wet. (Do not soak nubuck material – they are allowed to be “damp.”) 

You also may not need to dry them, as most waterproofing treatments work better with wet boots. When you are ready to dry them, you can towel them off and then put crumbled newspaper in the boots to absorb moisture faster. 

Step Two: Apply the Waterproofing Treatment

Below is an overview of a few ways to apply common waterproofing treatments to different hiking boot materials. Be sure to follow the instructions provided by the waterproofing treatment. The process may take time, but it is important to do it correctly so you do not ruin your boots. 

Waterproof Treatments for Leather Hiking Boots

Full-grain leather hiking boots are durable and naturally waterproof. They do not typically have an additional treatment and instead rely on the natural waterproof abilities of the leather. Waxes are the best ways to treat leather, support their waterproofing, and improve their lifespan. As opposed to solid wax, which you need to heat up, liquid wax is a faster and better alternative. 

Both waterproofing treatments should be applied to wet leather, as the water helps the treatment get into the leather better. Liquid wax treatments come with a sponge applicator, and you can work solid wax in with gloved fingers. You will want to buff the leather and repeat the process a couple of times before letting the shoes dry fully. 

Waterproof Treatments for Nubuck Hiking Boots

Unlike full-grain leather, nubuck is a soft material, sort of like suede leather. If your hiking boots have this material, you will need to be more cautious not to scrub too hard or use a treatment that will decolor or ruin the softness.

Additionally, nubuck should not be submerged in water: instead, the boots are allowed to be damp for applying the waterproofing treatment. Most nubuck waterproofing treatments are water-based, and you can find a liquid or a spray. Liquid can be applied liberally as you can wipe the excess off afterward. For a spray application, you will want to do two or three coats to ensure you do not miss an area.

Waterproof Treatments for Synthetic Hiking Boots

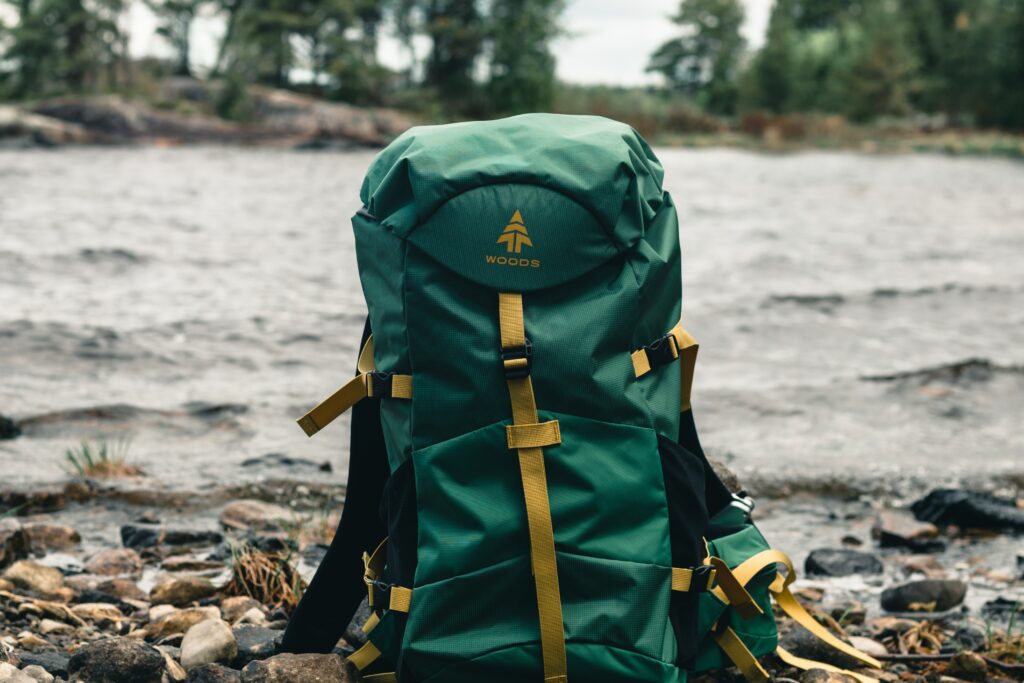
Synthetic hiking boots will likely be treated similarly to nubuck material. However, be sure to check the instructions to see if the material should be damp or really wet before application. Sprays tend to be the most popular for waterproofing synthetic materials, and they are easy to find. While you’re at it, you can waterproof your sneakers, backpack, and even a damaged tent.

Step Three: Drying Your Boots

After applying the waterproofing treatment, you need to let your hiking boots dry fully before use. If they get scuffed up or dirty mid-process, the treatment may not take as well. There are a few important things to keep in mind when you go to dry your hiking boots. First, too high temperatures, either next to a fire or in direct sunlight, can age leather too quickly and mess with adhesives. You will want to leave them in a dry, warm environment after toweling off excess moisture. Crumpled up newspaper will help, but it will still take a few days to dry fully. 

This is why you need to plan ahead and not try to waterproof your hiking boots the day before a big trip. Taking care of your gear will help it last longer and keep you safer and happier on the trail. Whether you’re trekking through snow or getting caught hiking in the rain, waterproof hiking boots are a lifesaver all season long. With a quick waterproofing treatment, you can make old gear like-new again and ensure a fun and dry time on trail. Happy hiking!

Layering for Winter Adventures

Before you head out for some fun winter activities here in Colorado Springs, you need to make sure you have the proper gear to stay warm. Layering is a common and essential system for making sure you stay dry and warm in this winter wonderland we call home. Let’s dive into the basic principles of winter layering as well as some key pieces of clothing for winter hiking. 

What Is Layering?

Layering is a system of wearing specific types of clothing in a specific order to best insulate yourself from the cold. Typically, it includes a moisture-wicking base layer, an insulating middle layer, and an outer shell that protects against wind and rain. 

Image by 2999607 from Pixabay

The Base Layer of Cold Weather Clothing

The key to staying warm when you’re out in the cold is to stay dry. Moisture, either from rain or sweat, will steal your body heat quickly and can leave you dangerously cold. A good base layer will be moisture-wicking so sweat doesn’t get a chance to build up. 

Another key feature of a base layer is that it should be snug to the skin. It does not need to be tight, but make sure it’s not baggy. Extra material, crammed into a tight squeeze by your middle layers, will chaff as you hike. This is the same principle as why hikers often wear liner socks beneath their bulky insulating socks to prevent blisters.

Important Material Considerations for Base Layers

One key thing to keep in mind for your base layer is the material. Expert hikers know that cotton is a no-no. Cotton is not a moisture-wicking material. It absorbs sweat and keeps it. You can opt for a synthetic dry-fit material, polyester, or merino wool. 

The Middle Layers for Winter Hiking

The purpose of the middle layers of winter hiking clothes is insulation. You can go for one bulky jacket or two or three lighter layers. This is a matter of personal preference as long as you know what will keep you warm. If you are starting at a lower elevation and hiking into the mountains, it’s a good idea to start a little chilly and pack an extra middle layer for the inevitable temperature drop. 

Good materials for middle layers are down, synthetic down, and fleece. You may want to go for your favorite sweatshirt here, but cotton, again, is not a good material for winter hiking. Cotton is too breathable, and the key to a good middle layer is to keep your body heat close to your body. If you let your body heat escape from non-insulating layers, even vigorous exercise will not keep you warm enough.

The Outer Layer for Hiking in Winter

Now that you are dry and warm, the goal of the outer layer is to keep you that way. This layer protects against wind and weather to make sure you stay comfortable. As you know, many downs and synthetic downs are not supposed to get wet, so you need a waterproof outer layer to keep that insulation from bunching together and not working.

A waterproof shell is a good option for a more casual hike. There are many options that fold into very compact packages and don’t take up much room in your hiking bag. You can pull it out only if the weather sours. These thin waterproof layers are great for protection, but most don’t tend to be breathable.

For a longer hike or an alpine hiking trip, you will definitely want a legit outer layer. Something that is windproof and waterproof will keep you from feeling the winter’s chill. It is also important for it to be breathable to keep from accumulating moisture that will soak your middle layer. One thing to look for, to keep you from overheating, is armpit vents. These little zippers will let off heat without exposing you to the frigid air.

Layering Pants for Winter Hiking

In terms of bottoms, you will want to start with the same skin-tight base layer. Long underwear is key for keeping the cold air off your legs and wicking sweat. The material should be stretchy, so you can move freely on your hike. Wool and polyester are great options, and you can grab a lightweight or heavier base layer depending on the temperature. You can find pretty thick base layers here, especially in wool long underwear, so you can skip the middle layer.

Most winter hikers wear two pairs of pants: long underwear and an outer shell. Similar to the rain jacket, you will want your pants to be weatherproof to keep rain out. For pants, a breathable material is preferable, so you avoid moisture build-up. You can also find outer layers with vents in the inner thigh or through the pockets to disperse a little extra heat.

Other Clothing Considerations for Winter Hiking

Keeping your core comfortable is the most important way to stay safe on a cold hike. But you also need to protect your hands and feet from frostbite injuries. You can find any number of mittens, including liners and waterproof outer layers to keep your fingers dry and warm. 

For your feet, you will want to start with a liner sock to keep your feet dry and then something super warm like heavy wool. In addition to a nice pair of insulated, waterproof hiking boots, you can consider adding gaiters. A pair of mountaineering gaiters will bridge the gap between your pants and your hiking boots and make sure no snow or rain finds its way to your ankles. 

Finally, don’t forget about your head and face. Your clothes for winter hiking should always include a hat, as heat dissipates quickly off our heads and you want to protect your ears from the cold. In extreme temperatures, consider a neck gaiter or balaclava to keep your nose and cheeks safe from frostbite, too.

Final Thoughts

If you’re like me, you don’t like being cold, but you love being outside. There is nothing quite as peaceful as a trail covered in snow. Luckily, with the right fabrics and the correct layers, you can stay warm on a glorious cold-weather hike. Brush up on some key tips for staying safe on a winter hike, and enjoy the great outdoors all year round!

Hiking Dehydration and Heat Stroke – How to Recognize and Treat Symptoms

It’s no secret that we have had some extremely hot weather the past few summers. As much as we want to be out on the trails, it’s important to stay safe, too. If you are planning on hiking in hot weather, make sure you know how to prevent, recognize, and treat dehydration and heat stroke. In this article, we’ll go over both dehydration symptoms and heat stroke symptoms so you can treat these conditions before they get worse and enjoy a safe hike.

The Risks of Hiking in Hot Weather

Staying safe in hot weather means hiking shady trails, drinking extra water, and wearing the right fabrics. These hot-weather hiking tips will help protect you, but it’s also essential to know the risks you face. The most common problem summer hikers will face is dehydration. The more serious risks, however, are heat exhaustion and heat stroke. Dehydration is a common problem most of us have experienced to one degree or another. Heat exhaustion and heat stroke, however, are much more serious conditions where the body’s temperature is elevated to dangerous levels.

Photo by Marvin Meyer on Unsplash

Dealing with Dehydration in Hot Weather Hiking 

While dehydration is a common problem, it can be quite serious if left untreated. If you are hiking in hot weather and sweating, it can be hard to figure out how much water you need to take in to compensate for sweat and stay hydrated. Recognizing dehydration symptoms in yourself and your hiking companions is the best way to treat it early and prevent more serious symptoms down the line. 

How to Recognize Dehydration Symptoms

The first and most overlooked symptom of dehydration is a headache. If you are on a trail in hot weather and start getting a headache, pull over and hydrate. Many people try to push through a headache, but later symptoms include dizziness, disorientation, and nausea. These unpleasant dehydration symptoms can be very dangerous on a hike, especially if you are hiking alone. Know your limits, listen to your body, and don’t hesitate to turn around if you need to.

How to Prevent Dehydration

You may think the best way to prevent dehydration is to drink plenty of water. It’s actually not that easy since sweat isn’t just water. Our bodies need salts as well, and that is why you see sports drinks advertising electrolytes. Preventing dehydration means having a salty snack in addition to water or adding a hydration tablet to your drinking water. Be wary of consuming actual sports drinks as many contain sugar which increases urination and therefore, dehydration.

Preventing dehydration on a hot weather hike should begin before you get to the trail. Starting that morning, avoid caffeinated beverages and make a conscious effort to drink enough water. While urine is not supposed to be perfectly clear, the less yellow it is, the better hydrated you are. On trail, you will want to consume about a quart (or 32 fluid ounces) of water per hour. This metric will need a little tweaking based on your exertion level, how much you are sweating, and how hot it is.

How to Treat Dehydration

Once you have noticed a dehydration symptom like a headache coming on, it is important to pull over and hydrate. Do not get back on the trail immediately after a sip of water. If you are feeling unwell, take five or ten minutes in a shady spot to relax and let your body cool off. A salty snack or electrolyte water should help you feel better, and you can decide then if you want to continue. Keep in mind that untreated dehydration can lead to heat exhaustion and heat stroke: If you are not sure if you are feeling better, don’t risk it. 

Photo by Dennis Ottink on Unsplash

What Are Heat Exhaustion and Heat Stroke

Heat exhaustion is a condition caused by excessive loss of water. This is why dehydration is a precursor to heat exhaustion. Similarly, heat stroke comes on when heat exhaustion continues untreated for a period of time. Heat stroke means that the body can no longer regulate temperature effectively, and this makes it extremely dangerous. Luckily, all of these can be prevented and treated effectively once symptoms are recognized.

How to Recognize Heat Exhaustion Symptoms

Heat exhaustion is the body’s response to severe dehydration and starts with profuse sweating, lightheadedness, and nausea. Other heat exhaustion symptoms include chills, muscle cramps (known as heat cramps), unquenchable thirst, and abnormal heartbeat. While some of these symptoms seem common on a strenuous hike in hot weather, it is important to recognize when there are multiple symptoms appearing together, when they become extreme, and when they affect your state of mind. 

How to Recognize Heat Stroke Symptoms

If a hiker ignores heat exhaustion and continues exerting themself, the condition may turn into heat stroke. One obvious sign of heat stroke is that the person will stop sweating. Heat stroke is also characterized by shallow breathing, hot skin, delirium, and eventually unconsciousness. Falling unconscious is the body’s final attempt to prevent further exertion and allow the body to cool off. Heat stroke is a life-threatening condition that requires medical attention.

How to Prevent and Treat Heat Exhaustion and Heat Stroke

The best way to prevent these dangerous conditions is by addressing dehydration symptoms and not letting it get worse. Recognizing dehydration symptoms and heat stroke symptoms as they happen can help you treat them sooner and feel better faster.

If your hiking companion is exhibiting symptoms of heat exhaustion, they need to get to shade and rest immediately. You can remove whatever clothing is in the way of a nice breeze but do not do this in the sun where further damage can occur. The best way to cool the body down is by submerging yourself in water. If this isn’t possible, wet a towel or cotton fabric for the back of the neck and head to help cool off faster. Be sure to hydrate and take a good long break before hiking back out to the car. If anyone exhibits symptoms of heat stroke, they need medical attention as soon as possible. This may require a medical evacuation, as the person should not continue exerting themself.

Final Thoughts

While heat stroke symptoms are scary and very serious, it is comforting to know that this condition is completely preventable. Paying attention to your body, learning proper hydration techniques, and recognizing dehydration symptoms are important ways to stay safe when hiking in hot weather. Keep in mind that children and older adults are more susceptible to dehydration, and hiking at altitude exacerbates these risks and has its own dangers. 

Hot Weather Hiking Tips

If you are looking for some fun summer adventures, there are plenty of things to do in the Colorado Springs area. That said, there may be some hot days ahead, and it is important to know how to stay comfortable and safe while hiking in extreme temperatures. We’ll go over the best hot weather hiking tips so you can get on the trail and enjoy a safe and fun time.

The Right Clothes for Hot Weather Hiking

It’s important to dress properly for the weather. In hotter climates, you will be tempted to wear less. But you also need to consider the sun exposure and the potential for sunburn. The best option is breathable and lightweight fabrics. Also, some hiking clothes have vents for those warmer months. Consider finding hiking clothing with these helpful little zippers! 

I always avoid cotton when hiking because I don’t like feeling wet. While the moisture can help cool you down in the summer, it can also be dangerous if the weather drops suddenly and you don’t have a clean, dry shirt. Temperatures in Colorado Springs can change quickly, especially as you gain altitude. The area is also known for afternoon rain, so keep this in mind as you dress and pack dry alternate clothing. 

The same definitely goes for socks. Having wet socks during any season is a surefire way to end up with blisters since damp skin is more susceptible to chaffing. Grab a pair of lightweight wool socks and breathable hiking boots. Keep in mind that in most cases, breathable and waterproof do not go together. Most waterproof hiking boots are stuffy, and it can be hard for your feet to stay dry when you sweat in such boots. If this is the case, carry a change of socks on your trip so you can stop, let your feet dry out, and change socks.

Wear Light Colors

It is worth noting that light colors do not absorb sunlight the way dark colors do. Keep this in mind when choosing your dry-fit shirt for the hike, and you will notice that you stay a little cooler. Next time you’re shopping for hiking clothes, instead of black, opt for white, tan, or khaki.

Wear UPF-rated clothing

While all clothing blocks out some of the sun’s rays, there is the option of wearing specially designed clothes that have UV protection. This is a great option for people with fairer skin or hikers out for a long day. Look for clothes with a UPF rating to ensure skin protection on your hike.

The Best Places to Hike in Hot Weather

If you are planning to go out despite some steamy conditions, there are a few ways to ensure a more comfortable time. One way is to find a hike near a body of water. You can benefit from a nice cool breeze, and you can wet a bandana to cool you down on the trail.

It is fairly obvious, but hiking in shady spots is a must in hot weather. Staying out in the sun too long at the exertion level hiking requires can be dangerous. If you start feeling the heat, pull over in the shade until you feel your body temperature come back down.

Photo by Hans Ott on Unsplash

The Best Times to Hike in Hot Weather

Another way to avoid overexposure is by picking a good time for your summer hike. The hottest time of the day is between noon and 2 pm. You can get an early start or consider an evening-time hike to avoid the worst of the hot weather. 

Staying Hydrated During Hot Weather Hiking

The Importance of a Hydration Pack

Keeping your hydration levels steady is essential when hiking in hot temperatures. One thing to note is that you will stay better hydrated with a hydration pack rather than a water bottle. It is easier to reach for, and you can take a sip without pulling over on the hike and fishing out your water bottle. 

How Much Water Should I Drink on a Hike?

When hiking in hot temperatures, you need to account for a few factors. You can’t just drink what you normally would when sitting at home, or even on a more temperate hike. You will be sweating, and the temperature and humidity affect how much water you need to take in. 

A general recommendation is about a half liter of water per hour of moderate activity in moderate temperatures. Half a liter is about 16 fluid ounces, if you have a water bottle with measurements on it. What this means in hot weather hiking is a gulp or two every five to ten minutes. Keep in mind the saying that if you feel thirsty, you’re already dehydrated. Your body generally knows when you need fluids, but on a hike, it’s important to stay on top of this and not get to the point of feeling thirsty.

Don’t Forget about Salt!

One dangerous mistake hikers make is drinking just water. You should try to drink enough to make up for what you are sweating, but regular water is not the same as what we sweat. Our bodies need electrolytes, aka salt. It is possible to drink too much water and be “overhydrated.” This is just as dangerous as dehydration, so make sure your water consumption is balanced. It is also a good reason to consider not hiking alone in dangerously hot temperatures. If you want to stay safe while hiking alone, be sure to tell someone where you are going, carry the ten essentials, and know your limits. 

There are a few ways to add salt to make sure you don’t overhydrate on water alone. You can get salt tablets or “hydration tablets” that dissolve in water in effervescent and fruity flavors. You can bring along a sports drink that has a healthy mix of electrolytes. You can get a trail snack like salted peanuts, pretzels, or granola bars. 

Final Thoughts

Unfortunately, climate change is causing more extreme temperatures. We need to adapt and learn how to stay safe in these hotter months so we can continue to enjoy the great outdoors. Wearing weather-appropriate clothing, using sunscreen, and staying properly hydrated are all key ingredients in safe and comfortable hot weather hiking. Be sure to know your limits, take breaks in the shade when needed, and use a wet hat or bandana to cool off along the way. You can also join a guided hike for practical, on-trail tips for hiking safety. 

What is Good Hiking Etiquette?

Are you hoping to enjoy the summer weather on some hiking trails? If you are new to hiking, there are a few things you should know before you go. Hiking etiquette is one way to ensure safety on hiking trails, and these introductory tips will help you negotiate with any other hikers you may encounter on your journey. 

Right of Way

The most important part of trail etiquette to keep in mind is the principle of Right of Way. Right of Way on a trail dictates who should yield and let others pass. Not only is Right of Way about being respectful and friendly, but it is also about keeping the trail safe for everyone.

The three main groups you might encounter on a hiking trail are hikers, bikers, and horseback riders. (In winter weather, you may also find cross-country skiers, snowshoers, or snowmobile riders, and you can read more about snowy trail etiquette here.) 

Trail Etiquette around Horses

It is important for everyone to always yield to horses and other pack animals, as they can scare easily. If you encounter a horseback rider on your hike, step to the side to give the animal plenty of room to pass on the trail. Let the rider know of your presence as early as possible, and follow their lead since they know their animal best.

Trail Etiquette Near Mountain Bikers

Bikers yield to both hikers and horseback riders. Bicyclists need to be aware of their surroundings at all times, bike within their abilities, and keep control of their bikes around hikers. That said, one rule of hiking etiquette is to be aware of the trail you are on. There are mixed-use trails and trails specifically for mountain bikers, e-bikers, etc. If you find yourself accidentally hiking on a single-track mountain biking trail, you need to be careful to avoid causing a collision.

Trail Etiquette with Other Hikers

Finally, there are suggested rules with regard to Right of Way between two hikers. Downhill hikers should always yield to uphill hikers. This rule is kind to those hiking up a hill in order to allow them to keep their momentum. It is easier for downhill hikers to stop and move to the side. Finally, I try to always yield to hikers with dogs or small children in order to avoid separating a group or causing confusion.

Passing on the Trail

Another rule of trail etiquette suggests the best way for hikers to pass others on the trail. As noted, providing other hikers advance notice of your presence is the best way to avoid an accident. It is also a good way to create a friendly environment for everyone to enjoy nature. Horses and pets may scare easily, so letting owners know you are coming upon them is important for everyone’s safety. 

If the trail is wide enough, you can simply announce that you are passing on whichever side, similar to biking etiquette. If you are hiking on a narrow trail or the group in front of you is large, you may need to ask “May I pass” and wait for the group to move. 

Leave No Trace Principles

When yielding space to others on a hiking trail, you want to keep the principles of Leave No Trace in mind. It is always preferred for hikers to stay on the trail when possible in order to preserve the surrounding landscape. If you see other hikers coming, especially coming up a hill, you can choose the widest spot on the trail and step aside early. If you need to step off-trail, avoid stepping on fragile foliage or wildflowers. Find the most durable surface, like a rock, to step on instead. 

Trail Etiquette for the Trail

Leave No Trace means protecting nature and minimizing human impacts. Look at the trail conditions before you leave, and if you see that it is wet and muddy, consider rescheduling your hike. Choosing to continue in suboptimal conditions could be dangerous and can easily damage the trail. Sometimes hiking etiquette means being respectful of nature and finding a different place to hike. 

Hiking with Kids

Taking the little ones hiking is a great way to introduce them to nature and get some exercise. If you are wondering if you can take kids hiking, I believe you absolutely should! That said, don’t forget to teach them these important rules of trail etiquette. It is essential for children’s safety that they yield properly to horseback riders. 

It is also important to teach your kids to be good stewards of the land. Teaching Leave No Trace principles to your children on hiking trips will help them learn early how to respect nature and take care of our planet. Make sure your little ones know that yielding off-trail does not give them free rein to trample the surrounding landscape. Keep kids within trail boundaries, and make sure they know to leave nature intact.

Hiking with Pets

Like most dogs, your furry friend probably enjoys joining you on the trail. If you plan to bring your pet on your next hike, there are a few other trail etiquette rules you should keep in mind. First, in most instances, you should keep your dog on a leash. Unless you are in a specifically designated no-leash area, this is best for everyone’s safety. If your dog happens upon a biker, it could easily cause an accident. Dogs and their barking can also startle horses easily. Therefore, keep your dog close to be respectful to all other trail users. 

Next, try to keep your dog’s barking to a minimum. This is easier said than done, but hikers love the peace and quiet of nature, and barking can disturb both wildlife and other visitors. Finally, keep your dog close to the trail. This Leave No Trace principle applies to humans and pets alike. You do not want your dog eating random plants, and hikers do not want to find their surroundings trampled, dug up, or destroyed. Train your dog to be a good hiking companion, and you will ensure a safe and enjoyable experience for everyone. 

Final Thoughts

Hiking etiquette is about respect for others and respect for nature. It is also about safety. Most hikers know the Right of Way protocols, and they will be expecting you to behave accordingly. Being friendly and courteous on the trail will foster a safe and pleasant atmosphere on your hike.

How to Bear Proof Your Campsite

Colorado is home to many interesting and exciting species of wildlife, and that includes black bears. If you are planning to camp in bear country, there are some things you should know in order to be well prepared. We’ve compiled a list of the most important tips for bear proofing a campsite as well as how to stay safe while hiking in bear country.

Why Bear Proofing is Important

There are an estimated 16,000 black bears in the state of Colorado. Though they are not endangered, it is still important to protect them. When bears get into campsites and learn they can find food around humans, it becomes a risk for everyone. Even though black bears do not typically attack humans, they will still be put down if they start frequenting campsites. It is essential to bear proof your campsite to avoid bear encounters and keep these animals safe.

Photo by T L on Unsplash

How to Bear Proof a Campsite

What Needs to Be Bear Proofed

The main objective of bear proofing is to prevent bears from smelling anything near your campsite. Keep in mind that this includes more than just food! Scented hygienical products like toothpaste, mouthwash, sunscreen, bug repellent, hand cream, and deodorant should be included in this group. Don’t forget about anything that might have the scent of food on it, including trash and cooking supplies: food remnants, wrappers, pots and pans, utensils, gum, etc should be included. As you think about everything in your backpack, consider anything scented that you have with you. It all needs to go in a bear bag or food locker.

Methods for Bear Proofing Your Campsite

Now that we’ve discussed what to bear proof, let’s cover how. There are a few methods for keeping bears out of campsites. The easiest would be if your campsite has a bear locker. These metal food storage lockers are impossible for bears to get into, and you’ll often find similar mechanisms for campsite trash receptacles. If these are not available, you will need to hang a bear bag from a tree to keep it out of a bear’s reach.

How to Hang a Bear Bag

Bear bags are a great way to keep odorous and enticing items away from bears. You can get waterproof and odor-proof bags or, at minimum, double bag all your goods. Seal everything in a bag with a string or rope so you can hang it from a tree. Once you choose a tree with a sturdy enough branch, throw the rope over using a stick or something weighted. Then, raise the bear bag and tie the rope off around the tree trunk. Bear bags should be hung at least 12-15 feet in the air and 6-10 feet from the trunk.

100-Yard Campsite Triangle

One of the best ways to protect yourself from a curious bear is with a campsite triangle. First, make sure you see no evidence of bears, from footprints to clawed trees to scat. Next, you will want to designate a campsite that is at least 100 yards from your cooking site and 100 yards from where you hang your bear bag. Cooking smells tend to linger, especially in clothes. This is why it is recommended to cook away from your tent and change clothes after. Also, remember to camp upwind of your cooking site for the same reason.

Do Not Store Food in Your Car

You should never store scented items in your tent. Some campers might think it is better to sleep with their important belongings, but this is very dangerous as bears can easily enter tents. Similarly, do not store food items in a vehicle. Bears have proven that they know how to break windows, open car doors, etc. If they are able to smell something tucked away in your trunk, you are sure to find your car damaged the next morning.

How to Stay Safe Hiking in Bear Country

Some of the best hiking safety tips, like hiking in a group and not after dark, are helpful for hiking in bear country. Hiking in a group is more likely to alert a bear to your presence before you get too close. If you are hiking alone, playing music or singing are good options for alerting wildlife to your presence and giving them time to move away. When camping in bear country, be sure to use a headlamp at night and check your surroundings before leaving the tent.

What to Do if You Encounter a Black Bear

If you spot a black bear while hiking in Colorado, stay calm. Black bears are not likely to attack unless they feel threatened. There are a few things you can do to keep a bear encounter from escalating into an attack. 

Don’t Run or Yell

First, you want to avoid doing anything that would remind a bear of its prey. Do not scream; rather, talk to the bear in a calm voice with low tones. Avoid running away or trying to climb a tree as these will provoke the bear to chase you. Black bears can climb trees, and they can also run faster than humans, so these are not good strategies for de-escalating a bear encounter. If you are hiking with kids, you should pick them up, as a bear might interpret small children as prey.

Evaluate the Scene

One important thing to recognize during a bear encounter is the presence of cubs. If you see a mother bear with cubs, you need to be extra cautious. A mother bear will not hesitate to attack if she perceives her cubs are threatened. The best thing to do is to note the positions of all the bears and avoid stepping between the mother and her cubs.

Back Up Slowly

If the bear is to the side of your trail, you may be able to continue your hike by walking slowly. Never walk in the direction of the bear; walk sideways or backward so it does not feel threatened. If your only option is to backtrack, then do so and wait for the bear to leave. Always make sure the bear has ample space and an exit route away from your position.

Escape to Safety

If a black bear enters your campsite, get into your car and lock the doors. Hiding in a tent is not suggested, as bears can get into tents if motivated to do so. The final resort for protection against attacks is bear spray. Check local regulations of your hiking or camping sight to see if it is permitted. If so, carry the bear spray on the outside of your backpack so it is always easily accessible.

Final Thoughts

Now that you know these tips for hiking and camping in bear country, you will be both safer and more able to protect the local bear population. Bear proofing a campsite might seem like a lot of work, but it is often required by park regulations, and it is important for everyone’s safety. Kids can enjoy the challenge of hanging the bear bag, and everyone can rest easy knowing they aren’t attracting wildlife to the tent.

How to Train for Hiking and Backpacking

Many beginner hikers make the easy mistake of under-preparing for their journey. I have certainly heard, “If I can walk, I can hike.” But just going for walks around the neighborhood is not the best way to train for hiking. Long-distance hikes, multi-day hikes, and elevation hikes require a more focused training schedule.

If you are coming to Colorado Springs for a hiking vacation and wondering what you need to do to get ready, we’ve got you covered. We will go over all the essentials of how to train for backpacking – including cardio, strength, and flexibility training – so you can get the most out of your trip. Whether you are planning a solo adventure or scheduling a guided hike, this workout regimen will have you in tip-top shape for whatever part of the great outdoors you will conquer. 

Endurance-Focused Cardio Training for Backpacking

At nearly 6,000 feet above sea level, Colorado Springs is even higher than Denver, which is commonly called the Mile High City for its 5,280-foot elevation. What this means for visiting backpackers is that you need to train for cardio even more. Depending on where you are coming from, your body will not be used to the lessened amount of oxygen in the air at this elevation.

Cardio exercises train your body to use oxygen more efficiently, which is key for hiking at elevation. This can help you prevent muscle cramps, keep you from fatiguing early, and even combat the symptoms of altitude sickness. The best way to train for this is by going on some day hikes near you and working up to higher elevations and longer mileage.

Endurance training for multi-day backpacking in Colorado Springs requires at least an hour of steady-state cardio every other day. Steady-state cardio involves breaking a sweat and maintaining the exercise with minimal rest. You can choose activities that suit you best while prioritizing low-impact exercise. Endurance training in the form of rowing, swimming, or biking will help protect your joints from overuse while giving your lungs the workout they need.

Strength Training for Multi-Day Hikes

Many people do not consider strength training a key part of preparing for backpacking, but it is. If your muscles are not strong enough for the pack you are carrying or the steep incline you are ascending, you will surely get burnt out more quickly. Weight training is a great way to build muscle endurance for multi-day backpacking trips. 

There are two main groups to consider for strength training. The first is your legs for hiking, and the second is your core and upper body for carrying your backpack. Great lower body exercises will focus on stability for your ankles, knees, and hips. You can strengthen your feet with arch workouts like towel scrunches, your lower legs with heel raises, and your upper legs with squats and lunges. Don’t forget to include hip exercises like hip thrusts and deadlifts to build stability in your lower core. You can find more exercises in our guide on how to train to hike a Colorado Fourteener.

Core Exercises for Pack Training

The second area to focus on for strength training is the upper body. When you go on your first multi-day backpacking trip, you will be surprised at the heft of your pack. Backpackers have to carry a lot of weight, including shelter, food, supplies, and more. Luckily, the pack will get lighter as you eat through your supplies. 

To properly prepare for a backpacking journey, you should strengthen your core, shoulders, neck, and back muscles. Lower back exercises are important for preventing injury when carrying heavy loads. You can lie flat on your stomach and raise one arm and the opposite leg. Repeat this exercise from a tabletop position, resting on your hands and knees. Core strengthening like ab workouts and planks are also essential for building upper body stability.

The best way to prepare to carry a pack is, simply, to carry one. Pack training involves venturing out on your training hikes with a pack stuffed full of weight. Depending on the length of your multi-day backpacking trip, your pack could be twenty to forty pounds. Keep in mind that it is not recommended to carry a pack of more than twenty percent of your body weight. With this in mind, you can load your backpack with some heavy household items and practice hiking with it. If you are training by yourself, be sure to follow the best practices for staying safe when hiking alone.

Flexibility Training for Hiking

The final, and arguably most important, part of backpacking training is stretching. While you should alternate cardio and strength training days, you should stretch daily after all of your workouts. You should also begin your workouts with some dynamic stretches but only after you have warmed up for five to ten minutes.

When working on flexibility for backpacking, it is important to focus on the legs and back. You will want to ensure that your legs stay as flexible as possible through miles and miles of hiking. Flexibility training is important for preventing joint injury. This is because when your muscles are overly tight, they pull on your joints and cause stress. Keeping your legs loose will protect your knees and ankles from feeling worn out on your hike.

In addition to the basic toe touches, you will want to stretch your calves, hamstrings, quads, IT bands, and hip flexors. Each stretch should last twenty seconds with a continual effort to reach your limit (without injuring yourself). If you have any previous injuries, be sure to give those areas some extra attention. Any foot pain or arch tightness will require you to stretch and strengthen in order to prepare for the innumerable steps you will take on your backpacking trip.

Final Thoughts

Our beautiful state of Colorful Colorado is one of the most scenic places to take a multi-day backpacking trip. Every beginner can learn how to train for hiking and prepare themselves for this adventure of a lifetime. With a couple of months of dedicated training, you will be ready to take on the elevation and mileage of a multi-day hike in Colorado. Happy hiking!

How to Wear a Hiking Backpack

Are you looking forward to your first backpacking trip? Or maybe you’ve been on the trail and are wondering why your back hurts so much. A poorly fitting backpack can be a real hazard, causing back and hip pain, setting you off balance, and turning a beautiful hike into a miserable slog. 

In this article, we will set you up for success with three important steps: backpack fitting tips, how to properly pack a hiking backpack, and the right way to wear a heavy hiking backpack. Once you have these pieces sorted out, you will be ready to check out some of the best hikes near Colorado Springs with confidence and comfort.

Hiking Backpack Fitting Tips

The easiest way to get a backpack that fits well is to go to an outdoor equipment store where you can try some on with expert guidance. If you are buying a pack online or getting one from a friend, you might not have access to a professional opinion. But don’t worry: you can easily confirm on your own if a pack is a good fit for you.

The first thing you will do is measure your torso and hipbelt (not the same as your pants size!) and choose a pack that fits these dimensions. Whatever site you buy from will offer tips for taking these measurements, and be sure to look at the pack’s sizing guide, as different brands will vary. 

The Many Straps of a Pack, or How to Properly Wear a Hiking Backpack

Once you have your backpack in hand, you will see that there are plenty of adjustments to make. The torso size is key because too short a pack will strain your muscles and too big a pack will destabilize you. When you have that proper torso size, you can move to the hipbelt, which is the most important part of the backpack to adjust. 

Photo by lucas Favre on Unsplash

The Hipbelt

The pads of the hipbelt should sit high on your hips, around where your ‘love handles’ would be. Shrug your shoulders and tighten the hipbelt here. Your hips do a lot of the work in carrying the weight of a backpack, so if you find your shoulders hurting during a hike, you probably need to readjust the hipbelt. 

You do not want this to be too tight that it hurts or too loose that it slips down. It should be snug in order to stay affixed in place while you hike. If you find yourself with bruises (called hip rot) or a rash on the hip, it is probably because there is too much movement of the hipbelt.

The Shoulder Straps

Once the hipbelt is in place, you can use the shoulder straps to make adjustments to get the pack to sit snugly against your body. It is a good idea to do this initial adjustment with a bit of weight, say ten pounds, in the pack. If it is totally empty, you may not get a good feel for how the weight will feel on your shoulders and hip.

Load Lifters and Sternum Strap

There are still a few more straps on the pack, namely the load lifters and the sternum strap. The load lifters are small straps that go from the top of the pack frame to the shoulder straps. When properly tightened to about a 45-degree angle from the pack, these straps bring the load closer to your body, which makes it easier to carry with the pack’s center of gravity closer to your own. The sternum strap should sit about an inch below your collarbones and be just tight enough to keep the shoulder straps off your armpits.

Make sure you do not overtighten any of these straps. If you do, you will feel tension, in your neck as the load lifters pull your head back or in your chest as the sternum strap pulls your body inward. You want the shoulder straps to be snug, but they should not pinch your armpits or restrict your arm movements at all.

Photo by Ali Kazal on Unsplash

How to Properly Pack a Hiking Backpack

You might not realize it matters, but there are actually ergonomic reasons that you should pack in a specific way. This mostly concerns where the backpack’s center of gravity is and how you can bring it closest to your sturdiest parts.

The best place to put heavy gear is in the middle of a hiking backpack. The bottom of the pack is great for bulky items like sleeping bags and pads and maybe your pajamas. Heavy items down here, though, will make the pack sag, and for back safety, you should avoid letting it hang lower than four inches below your waist. Throw these bulky light items in first, especially ones you won’t need to access until camp, and then pack the heavier items like cooking gear and food next. Weighting the core middle area of the pack will help you feel stable on the trail.

Finally, the top of the pack is for trail essentials like your rain jacket, first aid kit, and supplies for water filtration and toilet usage. You don’t want to put anything too heavy up here, as it will throw off your balance and cause unnecessary tension. Hiking backpacks also have plenty of strap pockets and loops for storing headlamps, bug spray, navigation tools, high-calorie snacks, and other small essentials that you might want to access on the move.

How to Adjust a Hiking Backpack on the Trail

Lean Forward

Because the backpack’s weight is mostly behind you, leaning forward slightly will help you feel more balanced. Especially while going up or downhill, be aware of how the backpack’s position can change how heavy it feels. Try making slight adjustments to the straps and backpack’s positioning as you walk so you can learn to identify these stressors and improve your comfort on the trail. If you are wondering if trekking poles are worth it, they can certainly help in this situation to disperse weight better. 

Photo by A.Z on Unsplash

Avoid Load Fatigue

One helpful way to give yourself a rest as you continue hiking is to alternate between backpack positions. It is common to take a few minutes with a hip-heavy load, where you loosen the shoulder straps slightly and give your upper body a rest. Then you can switch, tightening the shoulder straps back up and loosening the hipbelt a little. You don’t want the pack to be in danger of falling off or affecting your ability to walk, but a few moments of small adjustments can help you recover mid-hike and avoid muscle fatigue.

Rest

It is so important to take breaks along your hike. Not only for water and snacks but also to give your body a rest. Even if you are only taking a short water break, you should take the pack off and shake out your shoulders. Take a moment to assess how you are feeling and if there are any sore places on your body that you need to address. If you ignore pain, it will likely only get worse, so pay attention to what your body needs and make changes.

With these backpack fitting tips, you should be ready to hit the trail and conquer Colorado’s beautiful peaks. Make sure you listen to your body, pack smart, and stay safe. If you are looking for a little extra guidance as you begin your hiking journey, check out one of these scenic guided hiking tours around Colorado Springs. Happy hiking!