Stretches for Rock Climbing

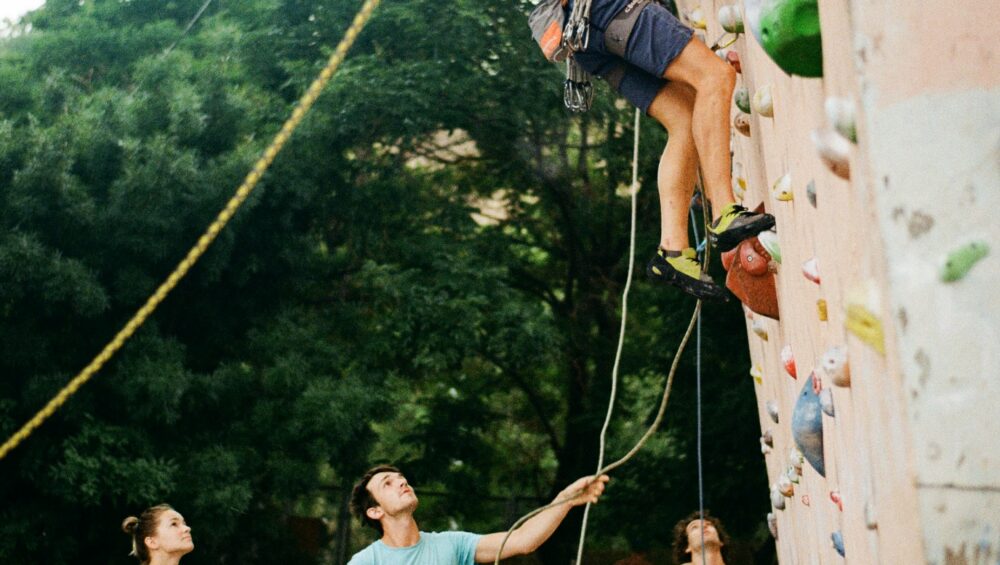
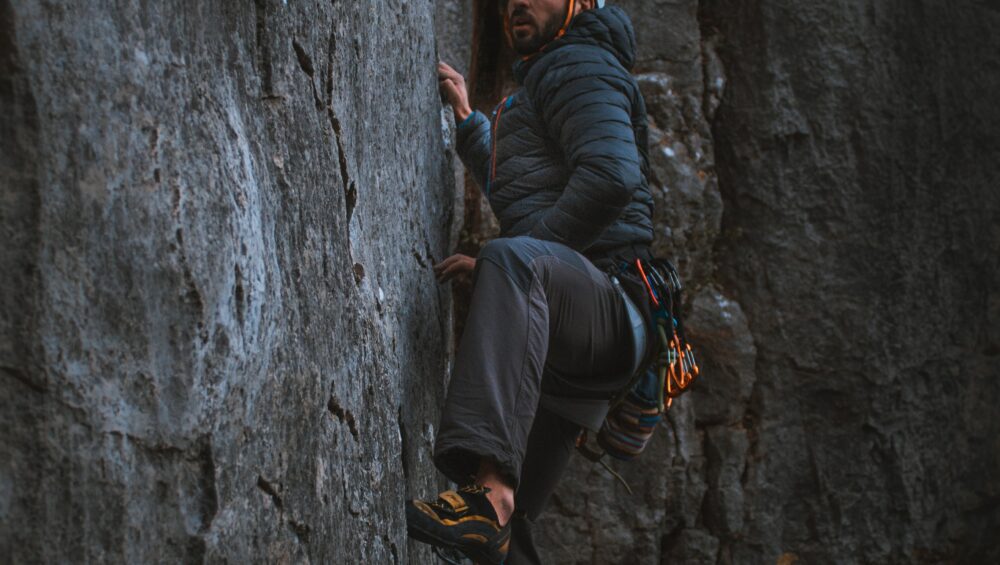
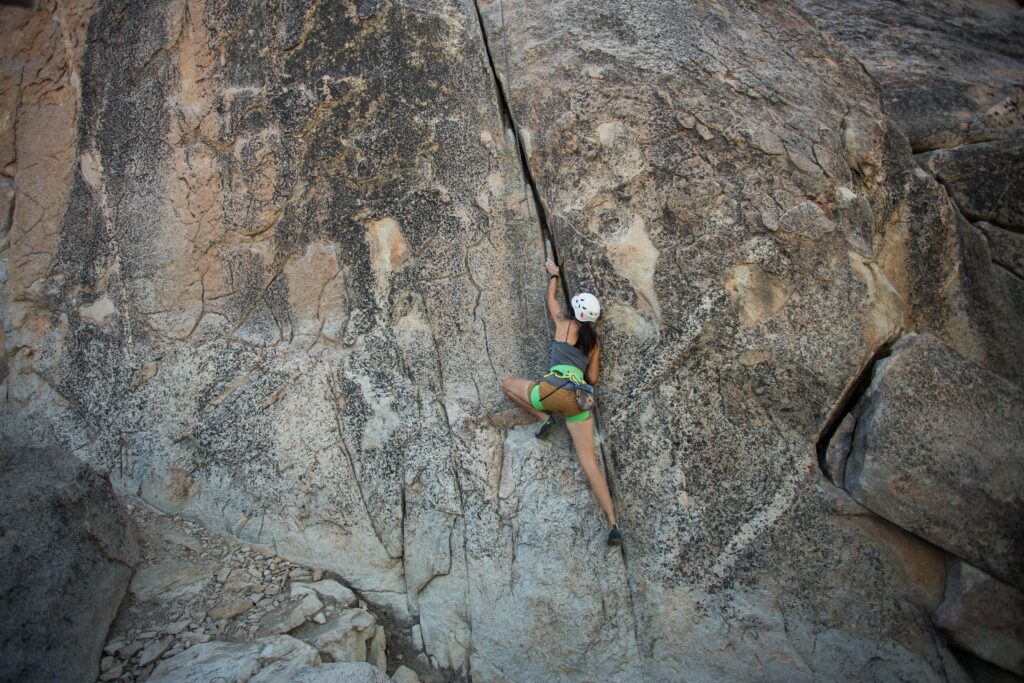
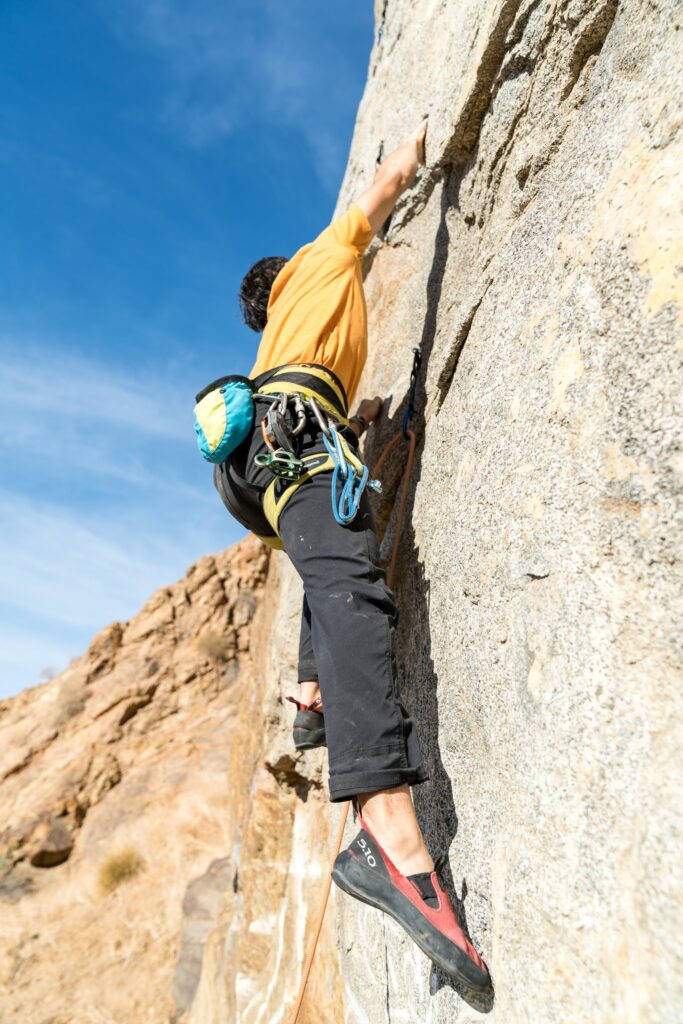
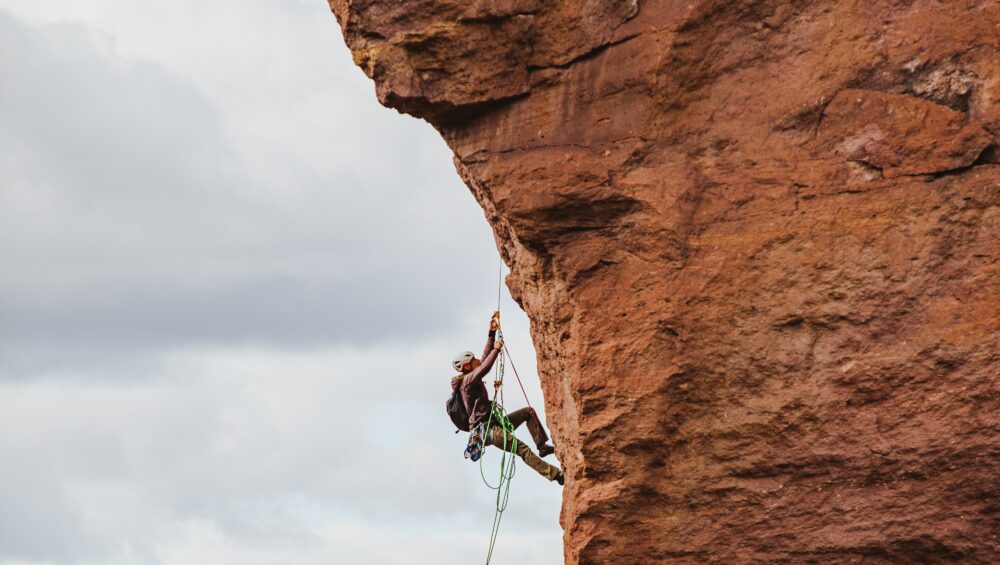
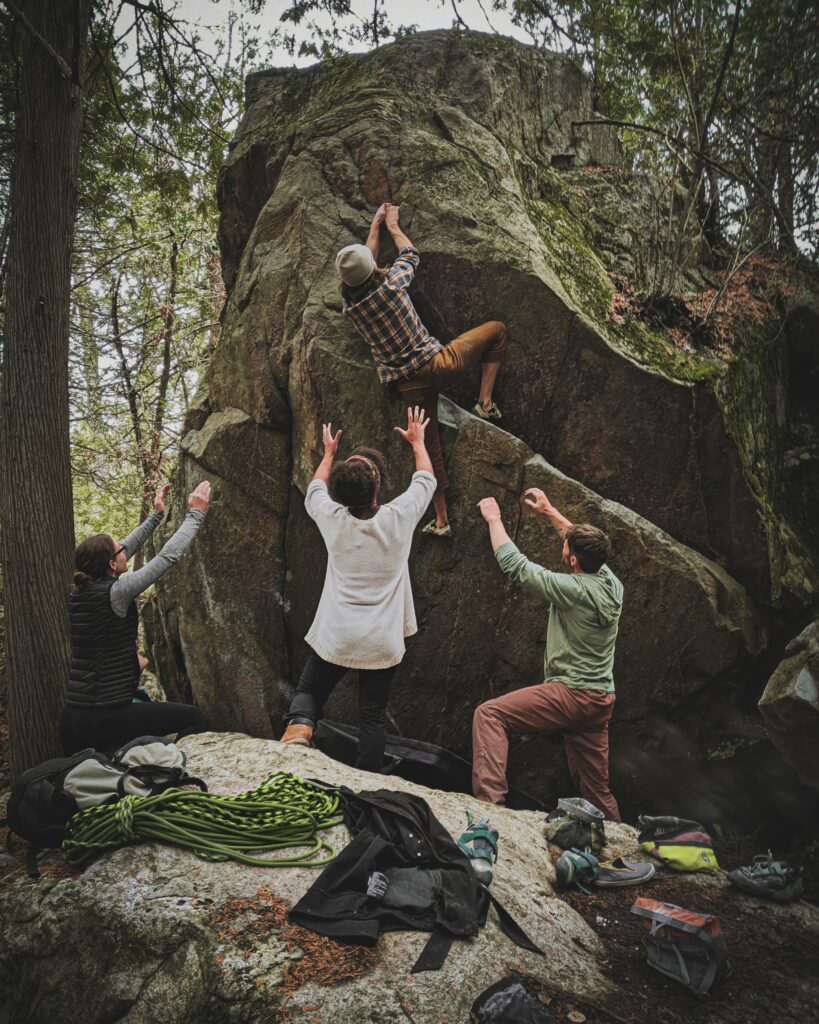
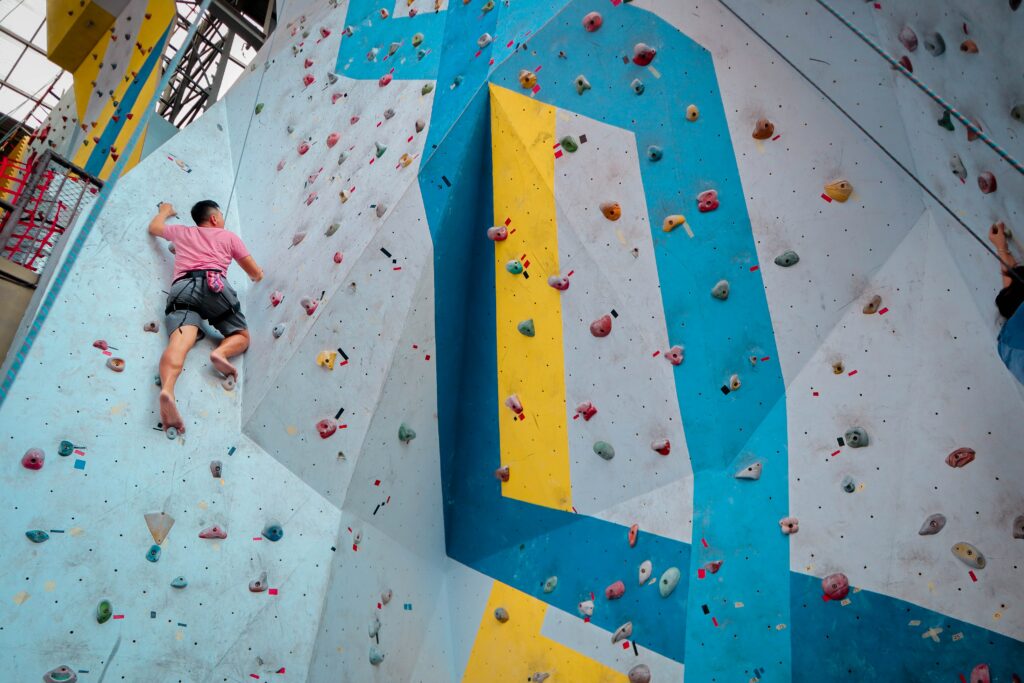
Are you getting into rock climbing and want to make sure your body is ready? Maybe you are realizing that a lack of flexibility can impact you on the wall. You may not expect it, but there are specific stretches for climbing, and we’ll go over them here. Rock climbing uses a lot of muscles you may not use regularly, especially in the forearms, wrists, hands, and fingers. 

It is normal for beginner rock climbers to get burned out early, or as we say “pumped.” Just like any physical activity, it is important to stretch beforehand to prevent injury. Flexibility training is also a great way to improve performance in exercise, build endurance, and expand your abilities. So without further ado, let’s get into the essential rock climbing stretches you should be doing before and after your workouts.

Before You Stretch

Before we get started, it is important you know not to stretch cold. Stretching is meant to length your muscles by comfortably finding and challenging your limits. If your muscles are cold from sitting around, stretching can actually cause damage like microtears. For this reason, you should always warm up for at least five minutes before stretching. 

Good warm ups include a light jog, jumping jacks, or an easy climbing route that is well below your grade level. Once you are feeling warmed up, the best pre-workout stretches are dynamic ones. As opposed to stationary, static stretches, you can move through positions when doing dynamic stretches. These will ensure your muscles are loose and amenable to odd positions and movements. 

Pre-workout Dynamic Stretches 

Dynamic climbing stretches are a good way to loosen the joints and lengthen your muscles through their comfortable range. It is most important to work on the shoulders and arms, spine, and hips. You can start with knee pull ups, touching your toes, torso rotation, side stretches, and neck stretches. Once your back is open, focus on stretching the joints to prepare for your climbing workout.

One of my favorite stretches is joint circles. I say “joint” because you can and should do this with your shoulders, wrists, hips, and ankles. Shoulder circles, both backward and forward, are key for warming up the shoulder muscles and rotator cuffs. These are common injuries among rock climbers, so make sure to give your shoulders the attention they need. 

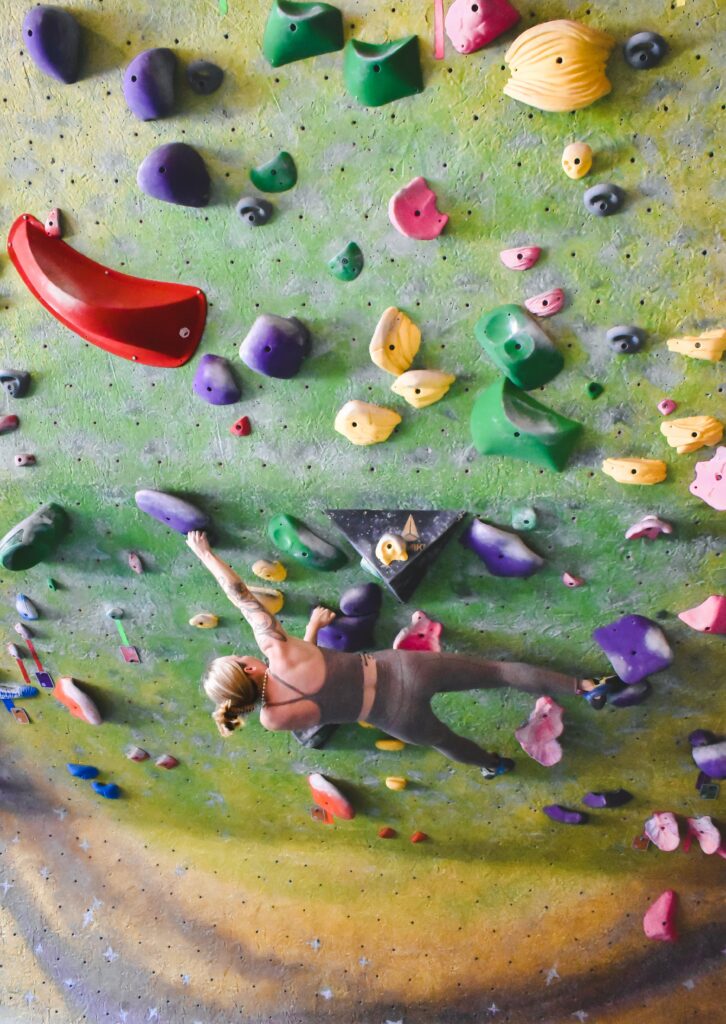
Opening and closing your hips is another exercise key for rock climbing flexibility. Make big circles with your knees going ten times in each direction. Taking little steps between circles is a good way to reset your hips and make the stretch the most effective. This will ensure you can maneuver on the wall into whatever position is needed to reach the holds. A key beginner rock climbing technique is about hip rotation, so make sure your body is prepared for the movements.

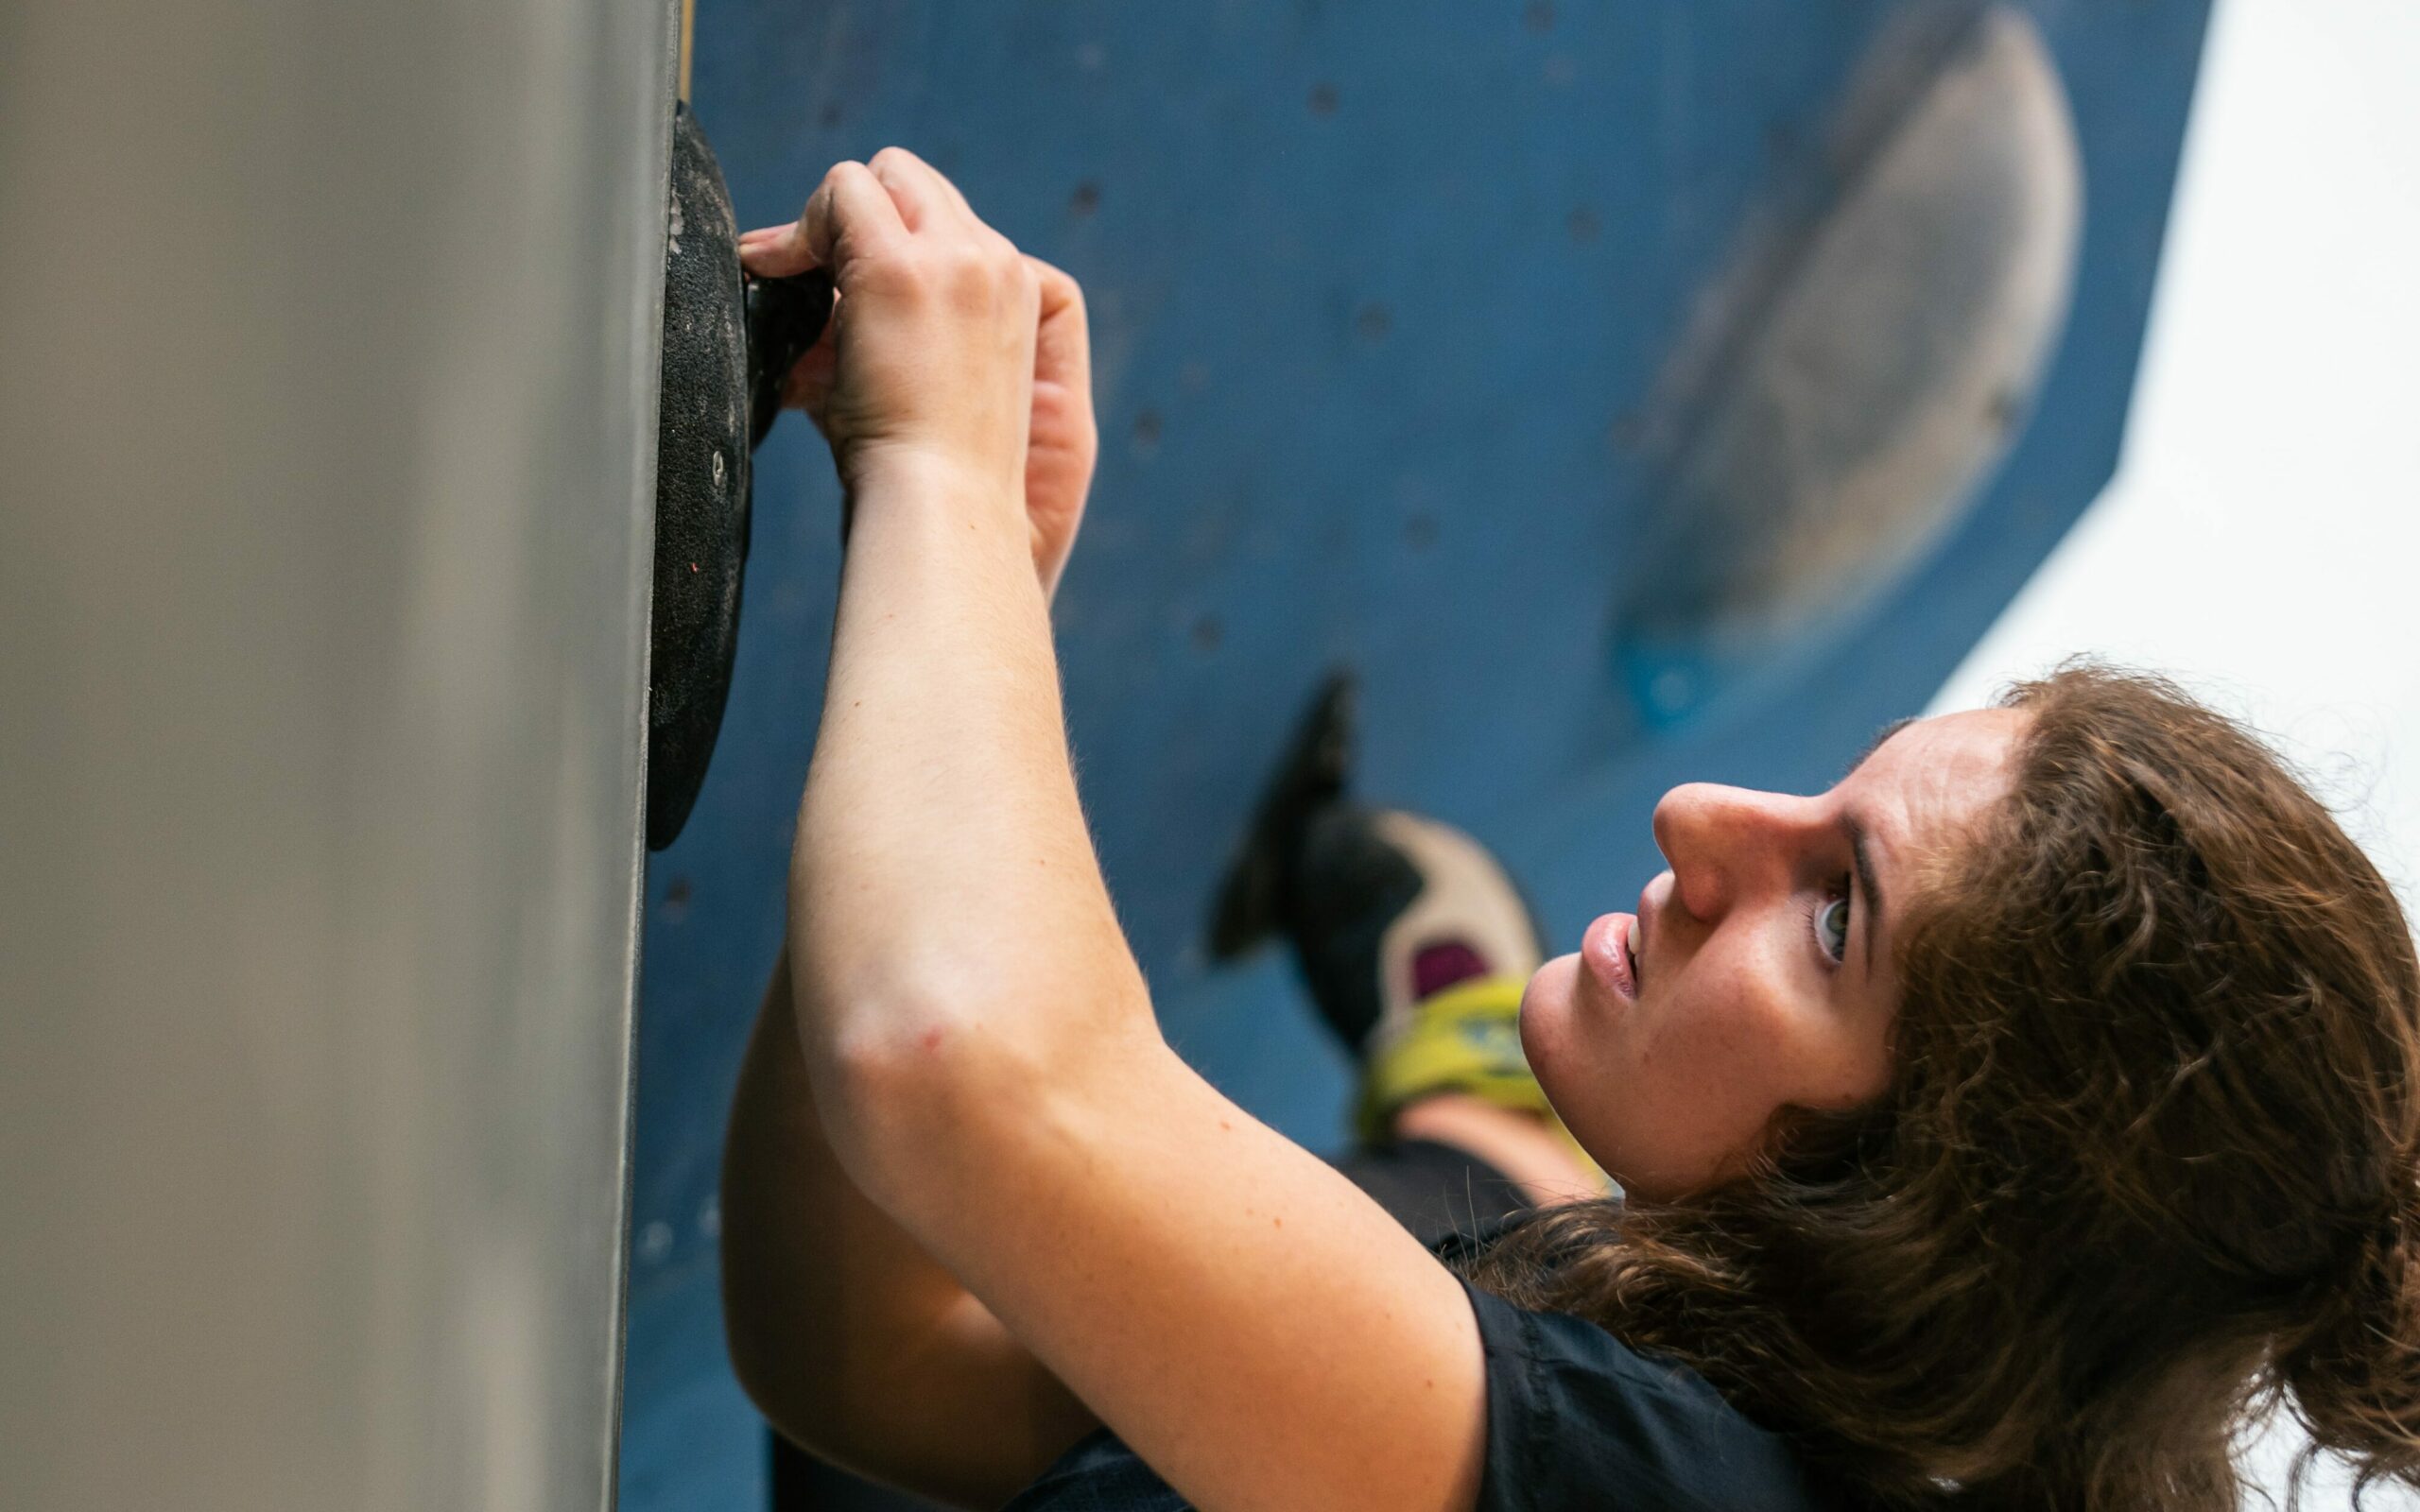
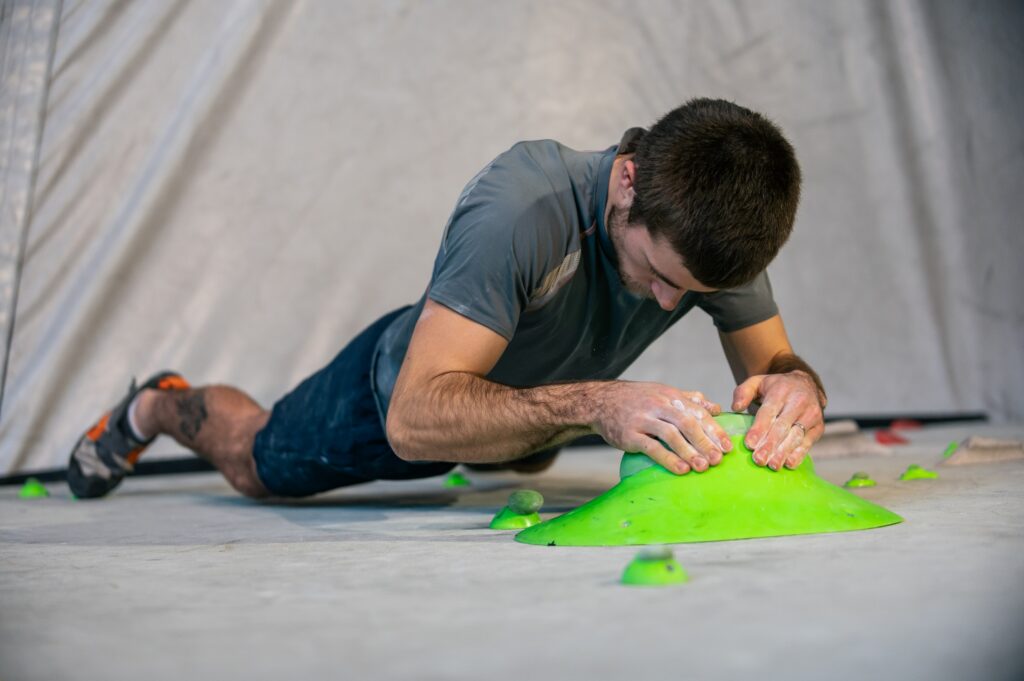
Finally, give some extra focus to your forearms, wrists, hands, and fingers. You will find these muscles easily exhausted when you first start climbing. Begin by shaking everything out, reaching for the ceiling, and wiggling your fingers. You can stretch by gently pulling your fingers back, bending your wrists forward, and pushing your hands together with raised elbows.

Post-workout Static Recovery Stretches

If you feel any tightness or pain, post-workout climbing stretches are absolutely essential. Static stretches focus on holding an elongated position for 20-30 seconds. As your muscles cool off and switch into recovery mode, it is important they do not tighten up. These static stretches for climbing will help repair muscles, improve flexibility, and prevent injury.

Many of these static stretches will be done on the ground, so it is best to grab a yoga mat for your post-workout cool down. I like to incorporate hatha yoga in my recovery stretching, as many of the positions are restful and provide the needed muscle elongation. I also tend to work in reverse from my pre-workout stretch, starting with the arms, then the joints, then the spine.

Start in a tabletop position, and gently move your weight over your hands to get a nice forearm stretch. You can then switch this by resting on your knuckles and stretching the backs of your wrists. Certain rock climbing holds, like pinches, really burn out the forearms so make sure to stretch well during and after these climbs. Next, feed an arm under the other and rest on your shoulder for a great back and shoulder stretch. 

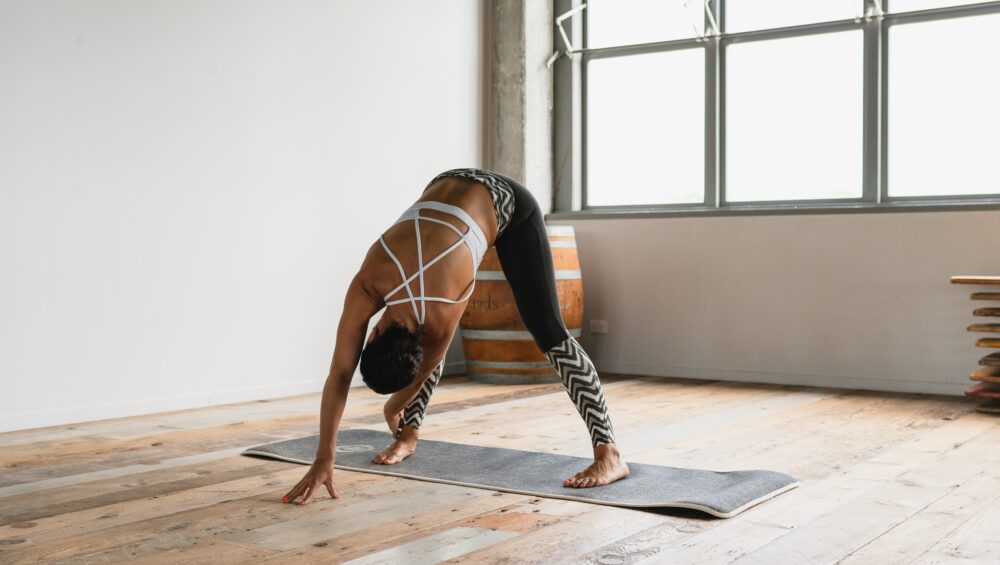
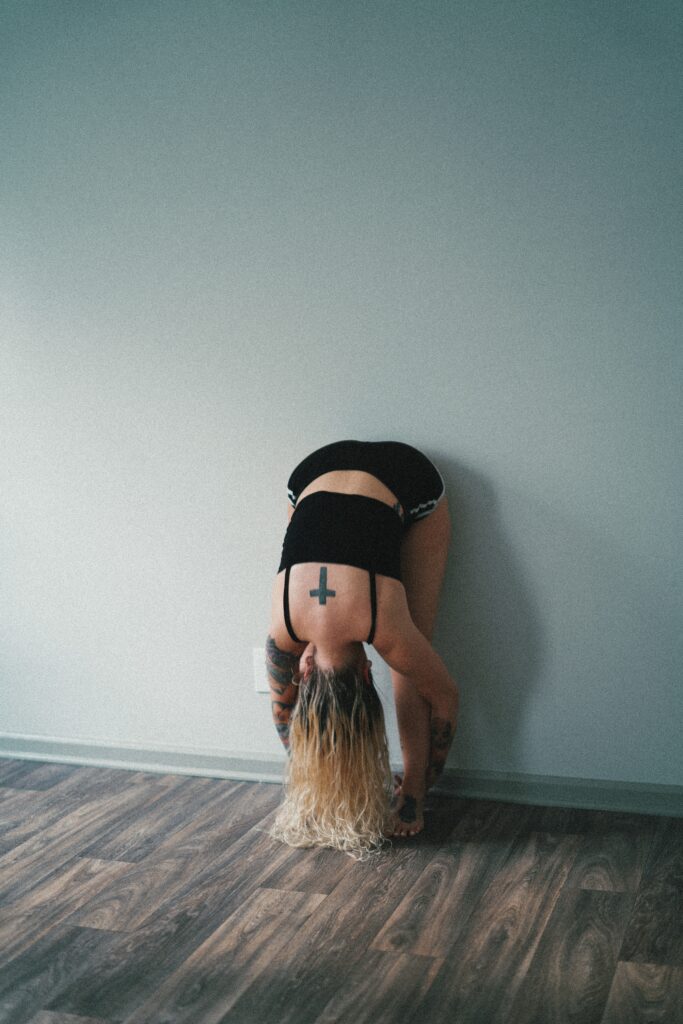
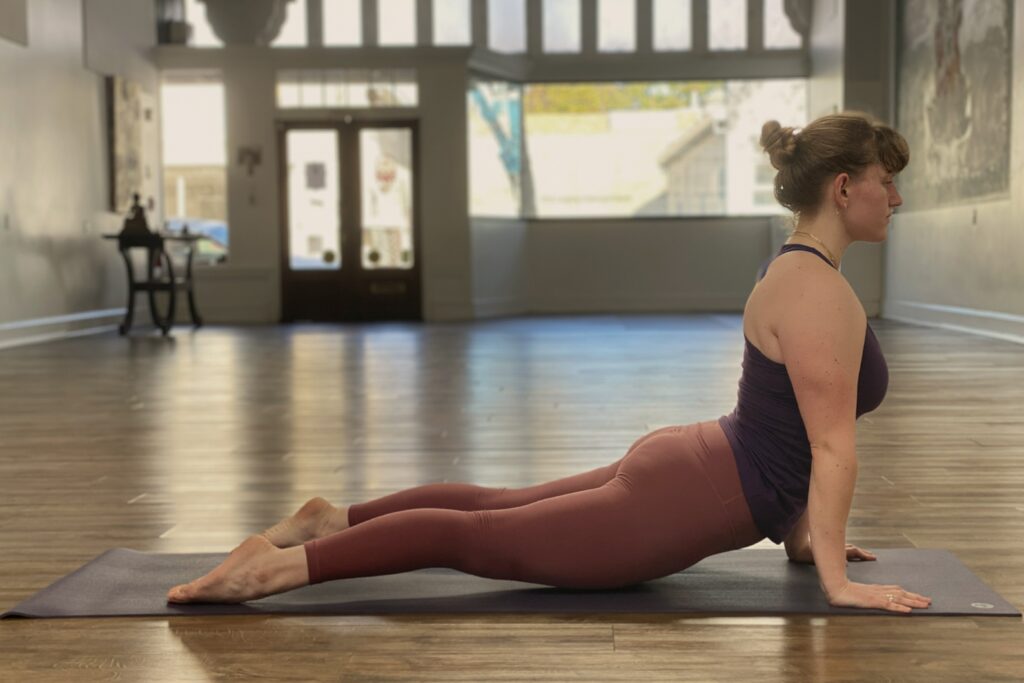
Rocking backwards to sit on your heels, you can lengthen the spine to get a deep stretch and walk your fingers to the right and left to stretch your sides. Moving up into downward dog, take time to stretch your hamstrings, calves, and feet. Many people overlook stretching the arches of the feet, but you should do these if they are sore after wearing climbing shoes. Finally, transition into a cobra pose to stretch your chest and abs. The most important element of a post-workout stretch is a minute of rest to sit and listen to your body. If you have any other areas of tension, you should stretch both that area directly and the surrounding muscles and joints. 

Other Tips for Climbing Recovery

You will find that stretching once after a climb is not enough. If you are new to climbing, or go out on a full day climbing tour, you will likely be tight the next day or two. You will need to continue doing these climbing stretches, especially forearm ones, for a couple days as you recover. Keep shaking out the arms and flicking your fingers to release the tightness in your joints. 

Aside from stretches for rock climbing, the best thing you can do for your post-workout recovery is drink plenty of water. This is true for any physical activity, but especially climbing. Being well hydrated helps with injury recovery and muscle healing. On top of this, the tendons in your arms (and whole body) are very sensitive to changes in water and tighten up when dehydrated. If you are feeling tendonitis in your elbows, shoulders, or wrists after climbing, staying well hydrated will help.

With ten minutes of thoughtful stretching before and after climbing, you can set yourself up for a better workout and a safer recovery. Over time, you will find these stretches for climbing help you both on and off the wall. 

12 Terms Rock Climbers Love: An Intro to Climbing Lingo

If you are getting into rock climbing, one important thing to learn is the vocabulary. When you are hanging around other climbers and working on similar bouldering problems, you are likely to strike up a conversation that includes some odd rock climbing terms. We’ll go over some of the most popular lingo so you can fit right in as you start your climbing journey.

Beta

Getting beta on a climb means receiving advice. It could be a hint about the route, the starting position, the quality of a handhold, or anything. It could even be watching another climber complete the route so you can see what works. There is no shame in getting beta on a hard climb that you are projecting.

Before you ask someone for beta, make sure you know the names of climbing holds. That way, when someone tries to point out the route to you, you will be able to follow which holds they are talking about.

Crux

The crux of a climb is the hardest move or section. When you look at the rating of a climb, it is most likely based on the crux. This is especially true for bouldering routes. For more help figuring out how climbing route ratings work, be sure to check out our beginner’s guide to climbing techniques.

The difficulty of the crux can be hard to pinpoint. It can be due to a mixture of things including the type of hold, the distance between them, and the wall. For example, many overhung climbs have a crux at the overhang since transitioning from below the overhang to the wall above it is a particularly strenuous and difficult move. Another crux might be due to a particularly tough handhold and the next handhold being far away.

Projecting

Working on a climb as a project is known as projecting. This can be a climb above your skill level that takes many days and many tries until you can successfully climb it in one try without falling. It is always good to have a project when you climb so you can keep pushing yourself to improve. Typically climbers may have a couple projects going at the same time.

Sending

Sending a route means getting to the top in one go without falling. This can be done with or without practice, with or without beta. It is meant to be a catch-all term to describe getting to the top of a climb. Other terms used are more specific, like on-sighting, which is successfully climbing a route the first term you try it with no beta, no prior knowledge, no watching someone else do it. 

Slack and Take

These are two important terms and the most common ways for climbers to direct their belayer. Slack means that you want more slack in the rope. Take means that you want the belayer to take slack and make the rope tighter. As a belayer, you may hear a climber yell ‘take’ if they think they will fall or when they need a rest so they do not lose height on the route. To learn more belay terms, you can check out a guided climbing tour. In addition to enjoying a unique outdoor climbing experience, you will learn climbing safety, belay techniques, and more. 

Spotter

Spotting someone on a climb is very important. This is common at the beginning of lead climbs before the climber gets to the first anchor and on outdoor bouldering routes. The goal of a spotter is to make sure that if the climber falls, they do not hit their head. You are not standing directly under the climber trying to catch them if they fall. In this case, you will end up getting hurt yourself. Instead, a spotter stands back with their arms outstretched, elbows slightly bent, and thumbs in. If your climber falls, your main goal is to keep them upright, protect the head and neck, and make sure they fall safely onto the crash pads.

In outdoor bouldering, the role of a spotter or multiple spotters is essential. You may reposition crash pads as the climber moves, so they can land safely on it if they fall. You also may direct the climber as they fall to make sure they get on the crash pad and do not bounce off. If your climber is smaller than you, you can catch them around the waist and ease their fall. If the climber is bigger than you, you will more likely direct them with your hands on their butt to ensure they fall onto the crash pad. 

Types of Walls

Face and Slab

While a perfectly vertical wall, sometimes called a face, is the easiest to climb, many walls are not so simple. Especially if you are climbing outdoors, you are likely to encounter walls at different angles, even ones that change angle throughout the climb. A wall that tilts back away from you, and is thus less steep than vertical, is called a slab. 

Climbing a slab requires balance and confidence in your footholds. It can be scary for beginners to climb slabs because you may feel like if you fall, you’ll fall into the wall. To avoid scraping yourself on the wall, be sure to hop backward when you feel like you are going to fall. 

Overhangs, Roofs, and Caves

The opposite of a slab is an overhang. An overhang is any section of a wall that is more than vertical. Overhung walls tend to be a little more challenging because they require more strength to stay on the wall. 

If an overhung route is so angled that it juts out over your head and forces you to climb nearly horizontally, it is called a roof. A large section of this might be called a cave, and these are generally found in bouldering or lead climbing areas. With gravity working directly against you, climbing a roof requires a lot of strength and endurance. 

Final Thoughts

There are unlimited slang terms that different people use in different types of climbing. What is most important is that you are able to pick up enough to communicate effectively with other climbers when sharing route information. When climbing outdoors, another important safety tip is to establish non-verbal communication solutions with your group members. Over time, you will surely pick up more and more terms, so be patient and happy climbing!

Rock Climbing Holds: A Beginner’s Guide

When you are just getting started rock climbing, it can be hard to get on the wall and stay there. Some aspects of rock climbing are not intuitive, and if your only previous climbing exposure is with ladders, there are sure to be types of rock climbing holds you haven’t encountered before.

In this article, we will go over the various indoor climbing holds, how to approach and hold on to them, and what you should know about your center of gravity while rock climbing. Once you learn how to grip different rock climbing holds, you will be much more comfortable on the wall and easily move past beginner rock climbs into early intermediate routes.

Although this article will focus on indoor rock climbing holds, these skills are transferable to outdoor climbing as well. Once you know how to recognize and respond to different holds, you will be prepared for many different types of climbing, including sport climbing, bouldering, and top rock climbing, indoors and out.

The Five Main Types of Rock Climbing Holds

Jugs

The easiest rock climbing hold for beginners to use is the jug. These holds have large, ergonomic shapes that you can grip with your whole hand. They will typically look like a large pocket at the top, big enough to put all four fingers in. For extra stability, I hold these with my thumb out to the side, as pictured below, although you can also keep it flush against your forefinger.

With jugs, as well as the rest of the basic climbing holds in this first list, it is easiest to hold on when your center of gravity is below the hold. Pulling yourself up to the hold employs the bicep and tricep, and you can continue to use the hold once your center of mass changes. Pulling on the hold will keep your weight close to the wall and help you stand up, and pushing off the hold from above (in a move called a “mantle”) provides extra height for reaching the next hold.

Photo by Bastien Plu on Unsplash

Crimps (and Edges and Chips)

The next most common rock climbing hold is the crimp. Crimps are small holds that have a thin ledge only big enough for the pads of your fingers. Edges are similar holds with less-defined lips to keep your fingers in place. Chips are even tinier holds that you see used mostly as foot holds and in advanced climbing routes. These are also easily the most common holds you will find outdoors on a guided rock climbing tour.

These tiny holds are hard for beginner climbers because they require a lot of finger and hand muscles that, prior to climbing, I hadn’t developed. Sometimes you will only be able to fit a couple of fingers on these holds, and this will stress your tendons. Crimps are the reason it is important to stretch your fingers and wrists before climbing. With these holds, they are almost exclusively usable from below. When reaching for a crimp, remember to move your hips and adjust your body weight accordingly. Keep your wrist straight to avoid injury and use your shoulder and elbow to maneuver into the necessary position.

There are three different ways to grip a crimp. An open hand position, in which the tips of your fingers stay above the other knuckles is the safest to avoid injury. It is also often weaker until you develop these muscles. This is primarily useful for the sloper, another rock climbing hold we’ll get to soon. A closed crimp (shown below) tends to be the strongest position, but it is also the most stressful for the joints. Imagine making a fist, but uncurling the last knuckle. In this hand position, your fingertips are almost touching the top of your palm, and this can cause tendonitis if you are not careful. The most common hand position is the half-open hand, where your fingers wrap around an imaginary circular ladder rung.

Photo by Bastien Plu on Unsplash

Pinches

With a similar hand position as the crimp, pinches require you to keep your fingers mostly straight. Pinches can be horizontal, vertical, or somewhere in between. These are hard for beginner rock climbers, as they require hand and thumb strength that take time to develop.

Photo by Bastien Plu on Unsplash

Slopers (and Guppies)

Slopers are large rounded holds that, at first encounter, appear impossible to grab. These tricky rock climbing holds rely on friction more than strength. They also tend to make beginner climbers nervous because it is impossible to feel secure on a sloper. You grab a sloper with an open-hand grip similar to crimps, though you can spread your fingers and thumb out for better coverage. 

Slopers are one of the most important holds to consider body position and center of gravity. They are simply impossible to hold onto if you are in the wrong place. Read more about managing your center of gravity in our beginner’s rock climbing technique guide. Consider where your fingers are as a horizontal line, and keep your wrist and elbow perpendicular to that line. This will protect your tendons and joints from injury and provide the best opposite force to keep you on the climbing hold.

A guppy is similar to a sloper, except it works best when you grip it on the side. Whereas slopers have your palm facing the wall, guppies require you to turn your hand ninety degrees. It is easy to grab wrong at first, but you’ll find a sideways grip necessary to get the best friction.

Photo by Bastien Plu on Unsplash

Pockets

Pocket holds are sort of like jugs, but with the pocket facing forward. They also tend to be smaller, only big enough for a couple of fingers. Both of these factors make them a lot tougher for beginner climbers to manage.

Be sure to have a slow approach to a pocket. This is not a rock climbing hold you should grab from a dyno, as that is likely to cause jammed fingers. It is also important not to push yourself too much on a pocket. If you feel like you are injuring yourself trying to hold weight on two fingers, you probably are.

Photo by Bastien Plu on Unsplash

Top Three Secondary Climbing Movements

The Sidepull

There are three more basic climbing holds that you will likely encounter. These are distinguished by the movements required to use them. The first, the sidepull, is any hold out to the side of the route that is turned vertically. To hold a sidepull, put your arm parallel to the ground and employ core and tricep muscles to pull the arm toward you.

If you try to hold a sidepull from below, you will slip off the wall. Instead, rotate your hips and feet in order to turn toward the sidepull and create more opposite action. It is this tension that keeps you on the wall. You’ll see this is true for the last two holds as well. Because it is more about the movement, sidepulls can technically be any hold, but they are most likely either edges or pinches.

Photo by Bastien Plu on Unsplash

The Gaston

Now that you can visualize a sidepull, the gaston is this in reverse. It is again most likely to be a crimp, pinch, or sloper-type hold. You will have the same sideways-facing hold but positioned closer to the center of the route, where your body is. As a result, the gaston requires climbers to push down or outward away from the body with a fully bent elbow. Similar to the sidepull, it is essential to manage your center of gravity and align your arm perpendicular to the climbing hold.

This is one of the hardest rock climbing holds because it is one of the few that relies on pushing away rather than pulling toward. Depending on the angle, this mechanism can stress the shoulder. The gaston is the most common cause of a shoulder injury, specifically rotor cuff injury, among climbers.

Photo by Bastien Plu on Unsplash

The Undercling

The final rock climbing hold you need to know is the undercling. This will look like a jug but upside down. Underclings are most often found as starting holds and at the base of overhangs. Underclings are another not-particularly intuitive hold for beginner rock climbers. To use one, you need to balance on your foot holds and use the undercling to pull up and keep yourself close to the wall. If you find an undercling in the middle of a route, you will need to lean away from the wall (as shown below) in order to get a good grip on it and not slip off.

Photo by Bastien Plu on Unsplash

Now that you know the different types of indoor rock climbing holds, you can head to the gym and get some hands-on experience. Before you jump on the wall, stretch your arms and look at the route. Examining the holds and envisioning how you will approach them will help you spend less time on the wall getting tired. Be sure to check out our overview of the beginner rock climbing gear you will need, and you will be all set. Happy climbing!

Rock Climbing Techniques: A Beginner’s Guide

If you are wondering how to get into rock climbing, there is no wrong way to go about it. You can take a class at your local gym, try a guided rock climbing tour, or try it out with a friend and get some hands-on experience. 

It is admirable to learn something new, and rock climbing is a rewarding activity. It builds self-esteem, provides instant gratification, and exercises your full body. Still, it is always hard to get used to new movements, so we’ve prepared some helpful rock climbing techniques for beginners just starting out with the sport.

Photo by Tommy Lisbin on Unsplash

Before You Climb

Stretch

The most important thing to do, both before and after rock climbing, is to stretch. Be sure to stretch your fingers, wrists, and shoulders. You want to stay loose to avoid over-gripping the wall and tiring out quickly. I often stretch between climbs, too, once my muscles are warmed up and again when I am starting to feel tense. Keep your muscles relaxed as much as possible, and you will have an easier climb.

Plan Your Route

When rock climbing in an indoor gym, there will be color-coded routes to guide you. You can find beginner routes around 5.5 – 5.9 for top rope or V0 – V3 for bouldering. Before you jump right on the wall, take a moment to look at the route. You can climb with your eyes, and you should continue this practice as you move up the wall. Look at each hold and the movements between holds. Is that a right hand or a left? Is there a foothold to help boost you up?

Rock climbing routes are placed with intention. There may be multiple ways to do it, but there is likely one way the route setter intended. Understanding their plan will help you complete the route more efficiently and save time and energy. Plan out the climb before you start so you can go in with confidence. As for transitioning to outdoor climbing, there will not be set holds, but it is still important to look at the route before you begin and try to plan your movements.

Photo by Stephanie Cook on Unsplash

On the Wall – Rock Climbing Technique Tips

Move Your Feet As Much As Your Hands

Beginner rock climbers tend to think climbing is a sport of upper body strength. They forget that they can (and need to) move their feet, too. A good way to use your arm muscles less is to remember that you have other options!

Imagine climbing a ladder. You can stretch your arms to their full extension to reach the highest possible rung, or you can move your feet up and reach that same rung much more easily.

My rule is that you should move your feet just as often as your hands. Alternate hand, foot, hand, foot, if the climb allows for it. This will keep you from overusing your arms and getting tired more quickly.

Hang on Your Skeleton

Another way to avoid burning your arms out too quickly is to use your skeleton more. You can hang with straight arms to give your biceps a rest on the wall. You should pay attention to how your body feels on the wall. Maybe there are spots you can balance and don’t need to use too much upper body strength at all.

Control Your Center of Gravity

When you are on a climb, play around with where your body weight is. Pull your body closer to the wall, or relax your weight lower on bent knees. You will notice that it makes a big difference. When you are farther away from the wall, you will feel that it requires more arm strength to stay on the holds. Learning to recognize where your center of gravity is and how it affects your grip and endurance on a route will help massively while rock climbing.

Rotate Your Hips

In the same vein, be sure to move your hips while climbing. You can redirect your weight in order to reach the next handhold more easily. Sometimes you will want your hips facing the wall. Other times, your will need to put one hip into the wall in order to bend your knees and reach a higher foothold.

Take a Rest

Sometimes there are nice handholds or balance-dependent footholds that make for good break spots. There is no shame in taking a rest on the wall, and when you find a place to do it, take it. You can shake your arms out, stretch, or chalk up. A small, minute-long break can give you that extra ounce of energy to get you to the end.

Photo by Tommy Lisbin on Unsplash

After Your Climb

Review What You Did

The best way to learn to be a better climber is to take a moment after each climb to go over what you did. Were there parts where you had to backtrack or switch hands? It’s possible that you did not complete the route as efficiently as possible. Was there a move that felt too hard or too much of a stretch? It’s possible that you missed a small foothold or a handhold around the corner of the route.

Practice the Same Route

You do not necessarily need to forget about a route the second you send it (“ascend,” or climb without falling). You can climb the same route again and again until you feel confident on each hold and smooth and precise in each movement. As you become accustomed to the most efficient route, you will be able to focus more on your center of gravity, breathing, proper positioning of your feet, and moving with intention between holds.

Stretch Again

For the first few weeks after you begin rock climbing, your forearms will hurt. Everyone goes through this. Continuing to stretch daily will protect you from injuries like tendonitis and make sure your muscles develop in a healthy way.

These beginner rock climbing tips apply equally to bouldering or top rope climbing and indoor or outdoor climbing. If you are looking to get into bouldering, it will also be important to learn to fall safely. In order to be safe while bouldering outdoors, be sure to use a crash pad and have a spotter. If you are planning to head outdoors, make sure you have the proper outdoor climbing safety equipment.

How to Transition to Outdoor Climbing

With rock climbing gyms popping up around the country, indoor climbing has become more popular than ever. Still, there is nothing like the thrill and challenge of climbing real rock faces in nature. If you are used to climbing indoors, you may be wondering how to get started climbing outdoors. 

There are a few important differences between indoor and outdoor climbing to keep in mind before you make the switch. There are more technical skills and gear requirements, but transitioning to outdoor rock climbing is a worthwhile endeavor. If you are excited to test your indoor climbing abilities on an actual rock face, let’s get started discussing how to climb outdoors.

Photo by Patrick Hendry on Unsplash

Differences between Indoor and Outdoor Rock Climbing

Prepare for No Defined Holds

When transitioning from indoor to outdoor rock climbing, there are a few key differences you will note right away. First, because you will be climbing on actual rock faces, there will be no specific holds for you to grab. Instead of gym walls with color-coded holds, you will have to decide for yourself where to put your hands and feet. While some climbs will have obvious solutions, others will have fewer potential hand holds. 

Before starting an outdoor climb, you should prepare your route, mentally envisioning each move, noting potential hard spots, and planning your approach. You can also refer to climbing guide books which might provide additional information on the climb’s crux, or hardest parts, and beta, which are technique suggestions.

Move Carefully on Rough Rocks

Regarding the holds themselves, depending on the type of rock, outdoor climbing tends to be less comfortable than gym climbing. Rocks can cut up your fingers and wear away at calluses, so be prepared with a first aid kit and move a little more cautiously. Especially if the weather is colder, you will likely want fingerless gloves to protect yourself from the elements.

Anticipate Harder Climb Ratings

While all the climbs use the same rating system (aside from bouldering problems), outdoor climbs will feel a lot harder. Many climbing gyms rate a bit generously, and the lack of structure outdoors is at first challenging.

Start off with beginner routes to figure out your outdoor climbing abilities. If you climb an 11a in your gym, maybe start with an 8 or 9 outdoors, and don’t be hard on yourself if you can’t meet your expectations right away.

How to Pack for an Outdoor Rock Climbing Trip

Now that you know what to expect when switching to outdoor climbing, let’s talk about how to prepare. Aside from where to go, which we will cover soon, you will need extra gear (on top of your harness and climbing shoes) and food for an outdoor rock climbing trip.

As safety is key, the first things on your list are a helmet and a first aid kit. These are two items you wouldn’t need in a climbing gym but are essential when climbing outdoors. In addition to your other essential rock climbing gear, you should add a comfortable and reliable half-dome helmet to your basic climbing kit.

Another difference will be clothes and footwear. If you have a long walk to your climbing area, you’ll want to bring hiking boots with you on the trip. When you learn how to set your own climbs, you will especially need good footwear for the scrambles to the tops of climbs. 

You should also check the weather for the day and bring rain gear and cold-weather gear. It takes a while to set up outdoor climbs. Therefore, you may find an indoor hour-long climbing session is more like a half-day outdoors. On this same note, prepare for your outdoor climbing trip with enough water and snacks for the day. There won’t be water fountains on the trail! If you are looking for other helpful tips, check out how to pack for a day hike

How to Set Up Top-Rope Climbing Routes Outdoors

The last key difference between indoor and outdoor rock climbing is that outdoor climbs are not usually ready for you to just start climbing. Unlike rock climbing gyms, which have fixed anchors and ropes already dropped for you, outdoor rock climbers have to prepare the protection themselves. While it can seem overwhelming at first, the skills needed to set your own top rope climbs are very attainable.

For beginners, top rope is the best introduction to the outdoor climbing world. You would need to set anchors, using nearby trees or rocks, to create a reliable place to attach your top rope. For lead climbers, you would need to learn how to use trad gear, like cams and nuts, in order to create the points along the climb where you can clip in. Both of these options require a lot of additional gear, including static and dynamic ropes and loads of carabiners. 

You should try outdoor climbing a few times with experienced friends before worrying about these pieces. But if you are still interested in learning how to set your own climbs, you’ll need to find a friend or professional guide to help you learn the knots and safety rules.

Photo by Patrick Hendry on Unsplash

Where to Get Started Rock Climbing Outdoors

There are multiple ways to find good outdoor rock climbing spots. Guidebooks are an excellent resource for identifying available climbs at different skill levels, and there are so many great rock climbing spots near Colorado Springs. Garden of the Gods and Cheyenne Cañon Park are two locations that offer a variety of challenges. Both of these locations also include beginner-friendly climbing routes. Once you have identified somewhere to check out, be sure to get the proper rock climbing permits for Colorado Springs parks

Outdoor rock climbing is an invigorating experience that brings you closer to nature and rewards you with stunning views once you finish the climb. Transitioning from indoor to outdoor climbing requires planning, learning to create anchors, and buying additional climbing gear. Before committing, you can experience outdoor rock climbing with a skilled professional guide. Get started and enjoy some of Colorado Springs’ best climbing spots on a guided rock climbing day trip.

image of rock climbing gear

Rock Climbing Gear – A Beginner’s Guide

Rock climbing has had an explosion of growth over the last couple of decades. The unique sport offers excitement, a challenge for all abilities, and different ways to explore and play in both indoor and outdoor spaces. Sometimes a new sport can be intimidating: the gear, systems, and language can be a lot to learn. If you are uncertain about what comes first, it can be helpful to research and learn more about how to get into rock climbing

As a beginner rock climber, consider familiarizing yourself with the sport through a guided rock climbing tour. Guided excursions come with all the gear you will need and allow you to get comfortable with proper climbing gear use. If you have never climbed before or want to upgrade from rental gear, this rock climbing gear list has all the beginner climbing essentials you need to start your journey into the vertical world.

Rock Climbing Shoes

Rock climbing shoes are an important part of climbing. The special rubber sole and snug shape allow you to grip the rock, offer protection for your feet, and give you the ability to place your feet on small holds. There are various shoes for all styles of climbing, and climbing shoes can be organized into the following categories: neutral “flat” sole, moderate “slightly downturned” sole, aggressive “very downturned” sole. Many shoes also offer options of “slip-on,” laced, or velcro closures.

As a beginner, you should go with more neutral shoes as they tend to be the most comfortable and least expensive. Downturned, aggressive shoes are tight, uncomfortable, and typically reserved for more technical terrain. When you are just getting started, comfort is key as you get used to wearing these new shoes. Climbing shoes should be snug, but not so tight that they cause pain. Due to the fit, you should not walk in the shoes or wear them if you are not climbing.

Some examples of beginner rock climbing shoes include:

Black Diamond Momentum, La Sportiva Tarantulace, Mad Rock Drifter

Rock Climbing Harness

Just like climbing shoes, a harness is an essential piece of protective rock climbing gear for any rock climbing with ropes. All harnesses come with basic features of holes for your waist and legs, gear loops, and a belay loop. There are many differences between harnesses such as adjustable leg loops, weight, material, and fit. These features become more important if you choose to specialize in a style of climbing down the road.

For a beginner rock climbing harness, look for an “all-around” harness that is comfortable and affordable. Fit will be one of the most important factors when buying your first harness. Make sure it has a snug fit around your upper legs and waist. Some people prefer the ease of non-adjustable leg loops but if you are looking to get used to the fit and feel of a harness, the ability to adjust your leg loops can be helpful.

Some examples of all-around rock climbing harnesses include:

Black Diamond Momentum, CAMP Energy, Petzl LUNA 

Chalk & Chalk Bag

Whether bouldering or top-rope climbing, chalk can be a game changer while climbing, especially if it is hot or humid. Chalk comes in a variety of forms: block, loose, and liquid. An easy way to start is by purchasing a “chalk ball,” which is a small cloth pouch filled with loose chalk. You chalk up simply by grabbing the chalk ball and easily refill the ball when it gets low with separately purchased loose chalk. 

It’s not a great idea to just dump loose chalk into your bag without a ball, and in fact prohibited at some gyms, as it is messy, wasteful, and annoying for your belayer to have chalk dropped on them when you use it mid-climb. Liquid chalk is preferred by some but not as common for top-rope climbing. Also, “eco” chalks, most often reserved for outdoor climbing, vary in color to match the rock.

Most chalk bags are pretty small with a closure mechanism and a waist loop. A bouldering-specific chalk bag or “buckets” will be larger, without a waist strap, and often come with a brush. If you are new to climbing, an affordable waist belt chalk bag with a chalk ball inside should be all you need. Chalk bags come in all sorts of colors, designs, patterns, and shapes so have fun. You can’t go wrong with this piece of rock climbing gear!

Belay Device

If you want to rope climb, belaying will be necessary. You will need a locking carabiner and a belay device. Again, there is a multitude of devices to choose from. Belay devices often come in the following broad categories: tube style, semi-assisted braking, auto-locking, and figure 8 (not commonly used). The most traditional and entry-level option is a “tube style” device such as an ATC. Most climbers learn to belay with an ATC and then switch to an assisted or auto-braking device. No matter which device you choose, be sure to seek instruction on how to use the device safely and appropriately.

Some examples of common belay devices:

Black Diamond ATC- XP, Edelrid Mega Jul, Petzl GRIGRI

Helmets for Outdoor Rock Climbing

While helmets are not commonly used inside, they are a must-have piece of rock climbing gear for any outdoor climbing. This important piece of gear protects you from anything that may fall from above – or protect you from the ground in the event that you fall. You will want to look for a designated rock climbing helmet as they are designed to protect your head from specific injuries that could be encountered in the sport.

There are generally two types: hard shell and shell-foamed helmets. Hardshell helmets are generally more affordable and more durable, making them great for beginners. Shelled foam helmets tend to be more expensive and have less longevity but are more breathable and lightweight. As with most types of gear, fit and comfort are top priorities when selecting your gear. 

Some examples of rock climbing helmets include:

Black Diamond Half Dome, CAMP Armor, Petzel BOREO

Final Thoughts

There is so much more to know about the sport of climbing aside from the rock climbing gear, but it is all worth it to take the time and learn. Rock climbing is one of the most invigorating and satisfying challenges. For an introductory experience, try a guided rock climbing tour. Once you have your own rock climbing gear, the technique and knowledge, and some confidence, be sure to check out the best beginner rock climbing in Colorado Springs and enjoy the views from new heights!

Rock Climbing in Colorado Springs – Where to Go

Situated against the foothills of the Rocky Mountains lies the City of Colorado Springs. Just south of Denver, this city is a premier gateway to adventure, offering access to various activities and awe-inspiring landscapes. Of these activities, rock climbing in Colorado Springs is one of our favorites.

Colorado Springs has it all, from unique sandstone rock formations to glistening glaciated peaks. Rock climbing in Colorado Springs is an activity you do not want to miss! But with so many options, it can be hard to know where to go. To save you time, we have laid out a quick guide to Colorado Springs rock climbing locations to suit climbers of all skill levels.

Before heading to the crag, remember to review the rules and regulations for rock climbing in Colorado Springs. These include very important safety information and general rules for each park to make sure all climbers have a fun and safe adventure.

Photo by Patrick Hendry on Unsplash

A Quick Note

Climbing is inherently dangerous. However, it can be a safe, enjoyable, and memorable activity with the proper equipment and skills. If you have never climbed before, first try climbing in an indoor space or seek a guided tour. To learn more about rock climbing safety for outdoor climbing, check our rock climbing safety guide.

If you’re ready to try climbing outdoors and don’t have the necessary skill and equipment, try going with a guide! Broadmoor Outfitters offers several guided rock climbing tours in Colorado Springs to phenomenal climbing locations in the area. This is also an excellent option for those looking to transition from indoor climbing to outdoor climbing. Or for those who have never climbed before but would like to immerse themselves into new landscapes and exciting rock climbing experiences in Colorado Springs.

Beginner Rock Climbing in Colorado Springs

City Rock (Indoor Climbing Gym)

Location: 21 N Nevada Ave., Colorado Springs

Parking: There is metered parking on downtown streets and many parking garages nearby. See parking information here. 

Approach: Easy walk in town from street or garage parking.

City Rock offers fantastic indoor rock climbing in Colorado Springs. This gym includes bouldering, auto-belays, sport climbing, and top-roping for all ages and ability levels. In addition to the climbing, City Rock also features a yoga studio, fitness training, a kids’ area, and more. This is a great option for first-time climbers or those seeking an alternative activity due to inclement outdoor weather.

Intermediate Rock Climbing in Colorado Springs

Ute Valley Park – Excellent Bouldering Opportunity

Location: 1705 Vindicator Dr, Colorado Springs

Parking: A parking lot is available at the Ute Valley Park Entrance at the address listed above.

Approach: Per Mountain Project, it is best to access the boulders by following Mule Deer Drive past Pinon Valley Park and turning left onto Pinon Park Drive. Pinon Park deadends at a gate; park along the street and walk up the dirt road. After about 100m, you will be at the boulders.

Ute Valley Park is primarily comprised of bouldering – short climbs with hard movements. No ropes or belays for this style of climbing. However, having enough crash pads, a confident partner to spot you, and some practice falling will make this more enjoyable.

While this climbing style is safe and accessible to most, we rank this location as intermediate due to the difficulty of the “problems” (routes). These problems typically range from V1-V12, which can be challenging for beginners. In this scale, V0 is the easiest (or VB for ‘beginner’), and the routes get harder as the number increases towards V12. Therefore, this is an excellent place to improve your climbing strength or challenge yourself on a tricky problem.

Red Rock Canyon Open Space – Sport Climbing

Location: 3550 W High St., Colorado Springs

Parking: Designated parking areas on the right side of W. High St. – Exact directions on Mountain Project

Approach: Find the trailhead by turning south from US 24 at the only turnoff between 30th Street and the first Manitou Springs exit.

Red Rock Canyon Open Space offers accessible and friendly climbing to novice and expert alike. With 80+ routes from 4th class to 5.13, there is a route for everyone. This area is primarily sandstone climbing with face holds, offering holds and movement very similar to gym climbing. Most climbs are bolted sport routes with lowering and rappelling anchors. 

NOTE: A free permit is required before climbing and is obtainable online. Be sure to watch the video on the climbing permit page, as this includes very important rules and regulations for the area.

Photo by Mark McGregor on Unsplash

Advanced Colorado Springs Rock Climbing

Cheyenne Cañon Park – Primarily Sport with Crack and Trad Options

Location: 4682 Gold Camp Rd, Colorado Springs

Parking: Enter near the Starmore Discovery Center, drive along the road, and park at various pullouts. There is also parking at the Powell parking lot on Gold Camp Road – See Mountain Project for more directions.

Approach: Most approaches are short and accessible from the parking lot or pullouts.

Situated in a narrow canyon with beautiful views, this fantastic granite crag contains a mixture of climbing styles. The options include bouldering, trad, and sport routes of varying difficulties. Although primarily a sport climbing location, there are a handful of crack climbs and trad routes offering a place to learn crack climbing techniques and trad climbing skills. 

This rock is also known to be of varying quality, so be sure to assess your routes. Cheyenne Cañon is an excellent option for hot days as it tends to stay cooler in the canyon shade. If you happen to be around in the winter months, this area is also known for its Ice Climbing.

NOTE: A free permit is required before climbing and is obtainable online. Be sure to watch the video on the climbing permit page, as this includes very important rules and regulations for the area.

Garden of the Gods – Great Trad Climbing

Location:  180 N. 30th St., Colorado Springs

Parking: Parking is available in the Visitor Center lots

Approach: From the parking lot along well-marked and traveled paths. See Mountain Project for specific route information.

Garden of the Gods is the most well-known rock climbing area in Colorado Springs. This area comprises beautiful towering sandstone formations with picturesque snowy peaks in the background. This area is well protected, so obtaining a park permit and learning about rules and regulations is mandatory before entering. 

While there are some beginner routes, this area is best known for traditional “trad” climbing – often reserved for advanced climbers only. Trad climbing grades range from 5.3 to 5.12. Climbing in this area requires advanced rope system knowledge, gear placement techniques, crack climbing skills, and more. Many famous and historical “test pieces” are available to measure your skill. While mostly known for traditional climbing, this area also offers bouldering up to V8 and sport climbing up to 5.13.

Photo by Sean Benesh on Unsplash

Final Thoughts

No matter where you go or what style you choose, rock climbing in Colorado Springs will be an unforgettable experience. Whether you are testing your abilities, trying out a new sport, going on a guided climbing tour, or searching for the perfect view, Colorado Springs will meet your needs. Grab a friend or guide, be safe, and climb on!

How To Get In To Rock Climbing

As a fun and challenging all-body workout, it is no surprise that rock climbing is such a popular sport. With indoor gyms popping up in cities all over the country, you might be wondering how to get into rock climbing.

We will explore the different types of rock climbing that you can try as a beginner, whether you plan to climb indoors or outdoors, as well as the gear you will need to get started. With some of the best beginner rock climbing routes right here in Colorado Springs, outdoor climbing is a fun way to explore nature, get access to some beautiful views, and learn a new athletic skill.

Also, don’t forget that a Guided Rock Climbing Trip with Broadmoor can also be an excellent introduction to this exciting sport.

Photo by Patrick Hendry on Unsplash

Types of Rock Climbing

Top-Rope Climbing

There are two types of climbing that are suitable for beginners, top-rope climbing and bouldering. In top-rope, as the name suggests, a rope hangs down from above, and as you climb, a belayer takes in the excess slack to keep the rope taut in case you fall. In an indoor gym, ropes hang from anchors like large pulleys. If you climb outdoors, a guide or qualified friend will create an anchor system using ropes and trees or rocks. 

Top-rope climbing routes range in difficulty from 5.0 to 5.15d, with 5.10s and above using a, b, c, and d to further distinguish difficulty. Where a 5.10a is easier than a 5.10d. Based on strength and athleticism, beginner climbers can generally climb up to a 5.4 or 5.6 on their first go. Climbers who are tall or strong might get away with these higher routes upfront, but as you move into intermediate climbs, technique and precision become more important than brute force.

Bouldering

Bouldering is a rope-free experience, with climbs typically up to fifteen feet maximum. If you are at a gym, the bouldering area will be padded to keep you safe when you jump down or fall. Learning how to fall correctly (stay loose and bend your knees!) will keep you safe from injuries. I generally downclimb to protect my knees, but it’s still important to know how to fall safely. If you are climbing outdoors, crash pads are essential for rock climbing safety.

The bouldering rating system is different from top-rope. Bouldering routes go from V0 to V17, with V2 being the hardest I’ve seen first-timers accomplish. Not only are these ratings different from top-rope, but they also don’t translate easily. Some people are much better at the big, power moves that many bouldering problems have. Others are more skilled with finesse and balance – challenges that are also more common to top-rope. Top-rope climbs at indoor gyms also range from 30 to 60 feet, making them a lot more of a cardio workout than bouldering climbs.

Photo by yns plt on Unsplash

Advanced Climbing Options

For more advanced climbers, lead climbing, sport climbing, and trad climbing are fun options that you can look forward to after learning to climb. Once you know what type of climbing you are looking to start with, you can get out there and take the first step.

Getting Started with Rock Climbing

The Gear

Whether you decide to top-rope or boulder, you’ll need rock climbing shoes and a chalk bag. The shoes are crucial for proper technique and movement while the chalk keeps your hands dry and grip secure. Rock climbing shoes are meant to be snug; generally one size below the sneakers you wear. Keep in mind that climbing shoes should not be worn anywhere but for climbing. Their extra snug fit emphasizes this point and generally makes them uncomfortable to walk around in. Also, you will stretch out the shoes and ruin the grippy soles if you wear them for non-climbing activities. 

If you are top-rope climbing, you will also need a belaying harness to be properly tied in and secured to the rope. You can take a belay class to learn how to belay a partner, and then you can switch climbs with a friend. To belay, you’ll need a carabiner and a belay device. Many climbing companies sell beginner-friendly packages with harnesses and belay equipment together.

If you are climbing outdoors, you should always wear a helmet to protect your head in the event of a fall or a rock tumbling down from above you. It’s also common to be so focused on your climbing that you forget to look up and climb right into a rock sticking out of the wall. It has certainly happened to me! Other outdoor equipment involves crash pads for bouldering, as mentioned above, a first aid kit, sunscreen, and maybe fingerless gloves if it’s a cold day.

Indoor Rock Climbing

If you want to get started at a gym, most have classes on rock climbing basics. Most also have rental gear available, so you don’t need to buy everything up front before trying rock climbing. You can also head to the gym and start bouldering right away; no help needed. Watch other people do the routes and even ask for “beta” if you need advice on how to get up.

If you’re interested in trying top rope climbing but don’t yet have a belay partner – no need to worry! Many gyms have several auto-belays. These devices clip into your harness and function just like a human belayer, allowing you to test out top-rope climbing as a beginner.

You can easily search for local climbing gyms in your area online, or take a look at this gym directory on Mountain Project to find a place to visit.

Outdoor Rock Climbing

In order to get started with climbing outdoors, you need a guide or, as mentioned above, a qualified friend. The most surefire way to have a fun and safe adventure is with a guided rock climbing tour, which will take you rock climbing in Colorado Springs at a popular local spot. On a guided trip, you’ll learn climbing techniques and safety and have a chance to try different climbs. 

If you want to get into rock climbing via a more DIY style, you’ll need to find a friend who has the necessary gear and know-how to set up climbs. You’ll also want to research the different climbs available in your area to find the best sites for outdoor bouldering or top rope spots with anchor points.

Photo by Ben Kitching on Unsplash

Rock Climbing Basics

The best way to learn how to rock climb is to get on a route and give it a try. It’s easier to learn rock climbing techniques once you experience the grips and movements. Rock climbing also involves using your forearms, wrists, and hands in ways that most people haven’t developed through other athletics, so it takes time to build these muscles.

My favorite advice for beginner rock climbers is to remember to use their legs and hips. Beginners often overuse their arms and tire quickly. Using all limbs available will help your endurance and give you a good leg workout. My general rule is to make sure I move my legs just as much as I move my arms. There are enough holds on a beginner indoor climbing route to climb a route almost like a ladder.

Similarly, if you find yourself in a tough spot, pivot your feet and move your hips. These small adjustments can get you more reach and flexibility to find that next hold. Keeping your hips closer to the wall also brings your center of gravity closer to minimize the strain on your arms.

Now that you know how to get into rock climbing, I hope you’ll give it a try! Even people who are nervous of heights can overcome this fear by learning belay safety or bouldering. Outdoor rock climbing is a truly unique way to experience nature, and the views from the top of a climb are like nothing else. Enjoy!