How to Clean and Maintain Hiking Boots

There comes a time in every hiker’s journey when they finally decide to invest in a pair of quality hiking boots. Once they are worn in and fit comfortably, you want to be able to keep them as long as possible. We’ll go over how to clean your hiking boots after each adventure as well as longer-term maintenance that will extend the life of your favorite hikers.

How Often Should I Clean My Hiking Boots

Keeping your hiking boots clean will improve their lifespan and ensure a safe and comfortable hike every time you hit the trail. There are different considerations for cleaning the soles versus the rest of the boot. It is a good idea to clean the tops of your hiking boots any time they get dirty. Dirt and debris can deteriorate the waterproofing of the material and lead the boots to degrade faster. Cleaning the bottoms of your boots after every hike is not necessary; however, you will want to get the muck out when it starts impacting your hike.

Why You Should Clean Your Hiking Boots after Every Hike

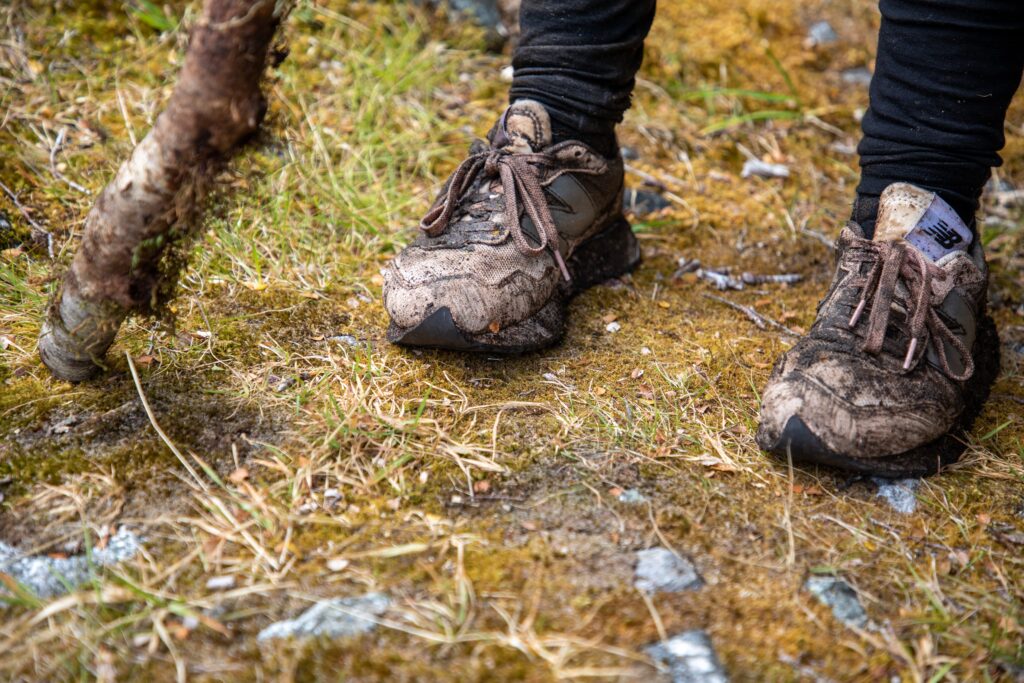
Although it may be tedious, you really should give your hiking boots a cleaning every time you get mud or dirt on them. You especially want to look out for debris near the laces. Every seam in your hikers – notably in the tongue and the eyelets for the laces – is susceptible to getting small particles of dirt stuck in there. 

As you continue hiking with dirty boots, the debris rubs on the material and breaks it down. This will first affect the boots’ waterproofing, but over time, you may see the material break down or tear. To ensure your boots will last as long as possible, you need to take care to clean them frequently. Especially if you are hiking in muddy terrain, be sure to give your hiking boots a deep clean when you get home. 

Why You Should Clean the Soles of Hiking Boots Between Hikes

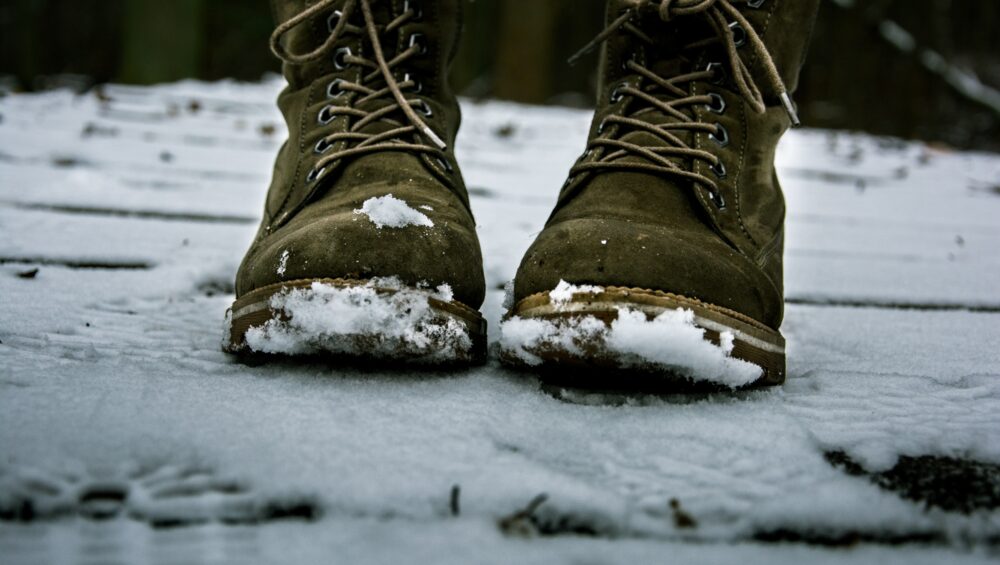
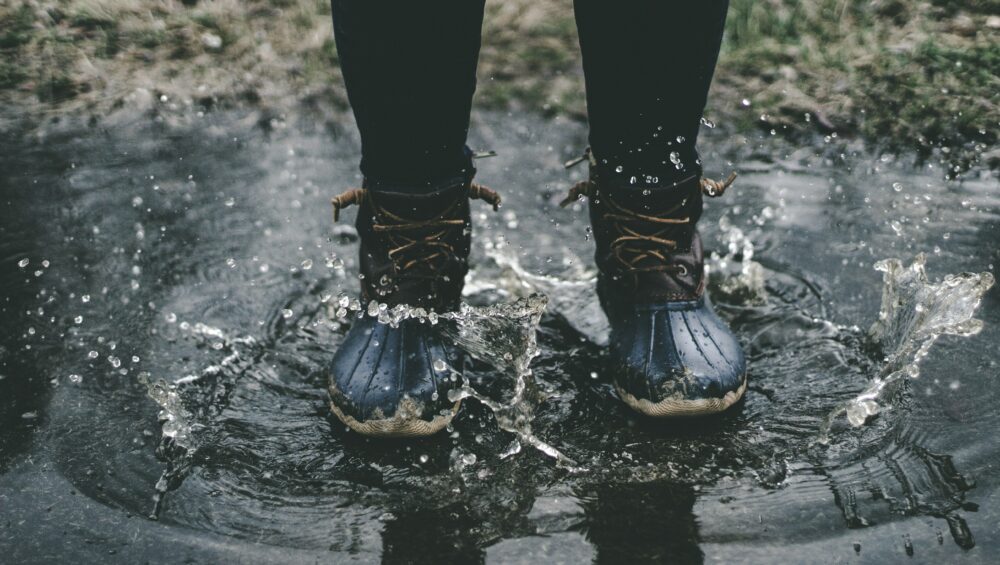
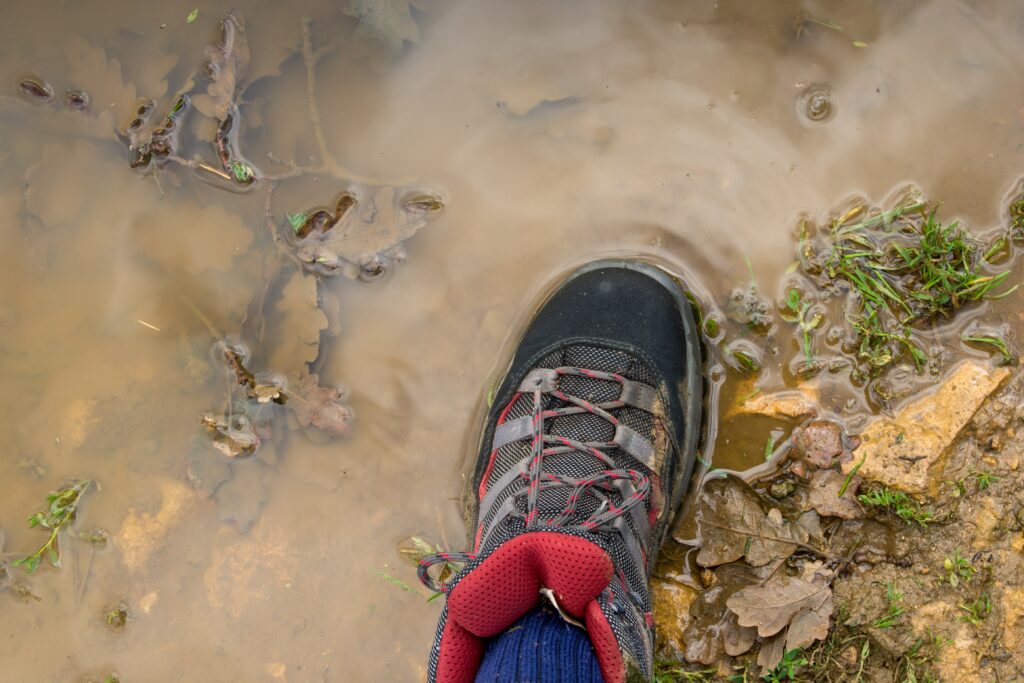
The bottoms of your hikers are very durable, and caked-on mud won’t impact the material. However, there are two instances in which you will want to get the dirt out and have clean boots. First, if there is a lot of dried mud in your hikers, they will not have proper traction. When they start getting slippery or uncomfortable to walk on, you will know it’s time to clean that dirt out. 

Second, if you are hiking in different locations, it is important not to track in mud. Microscopic invasive species can live in the soil or muck on your boots, and you don’t want to spread these dangerous species around different areas. Cleaning your boots between hikes can protect the land and make sure you leave no trace on your hike

Photo by Liisa Tervinen

How to Deep Clean Hiking Boots

Giving your hiking boots a deep clean doesn’t need to take more than an hour. This simple process is well worth it in the long run to keep your hikers in good shape and save you money on replacements. The first step is to take the laces off and remove the insole. You can wash these separately with some dish soap and warm water. 

Cleaning the material of your hiking boots will require a brush, maybe an old toothbrush, to get rid of dirt and get into the nooks and crannies of the material. Especially for nubuck leather, do not scrub too hard as you can damage the material. 

If you do not have a special shoe-cleaning solution, you can use dishwashing soap. Do not use detergent or bar soap, as additives in these products can be harmful to the boots. You will need to thoroughly rinse the boots off after cleaning. Some materials can be submerged in water, while others (nubuck and some synthetics) can only get damp. In these cases, sponging the material with warm water will be best.

How to Prepare Your Hiking Boots for the Season

Once a year, it is a good idea to give your boots a deep clean and re-apply waterproofing treatment and/or conditioner to the material. Before you start, it is important to know what material your boots are made from. 

What Are the Different Materials of Hiking Boots

There are three main materials used for hiking boots, and maintenance varies for each type. Mostly any quality pair of hiking boots will be from one of these three materials as they are the best for providing waterproofing and durability.

The three main materials for hiking boots are leather, full-grain or nubuck, and synthetic. Nubuck leather is sort of like suede and generally has similar care instructions to synthetic materials. The main difference in caring for nubuck leather is that it should not be submerged in water, only damp. 

If you don’t know what kind of hikers you have, you can look up the brand online and find out. If you have a care guide for your hiking boots, you should refer to that. Always be sure to test a new cleaning product on a small, inconspicuous part of your boots before applying it fully. 

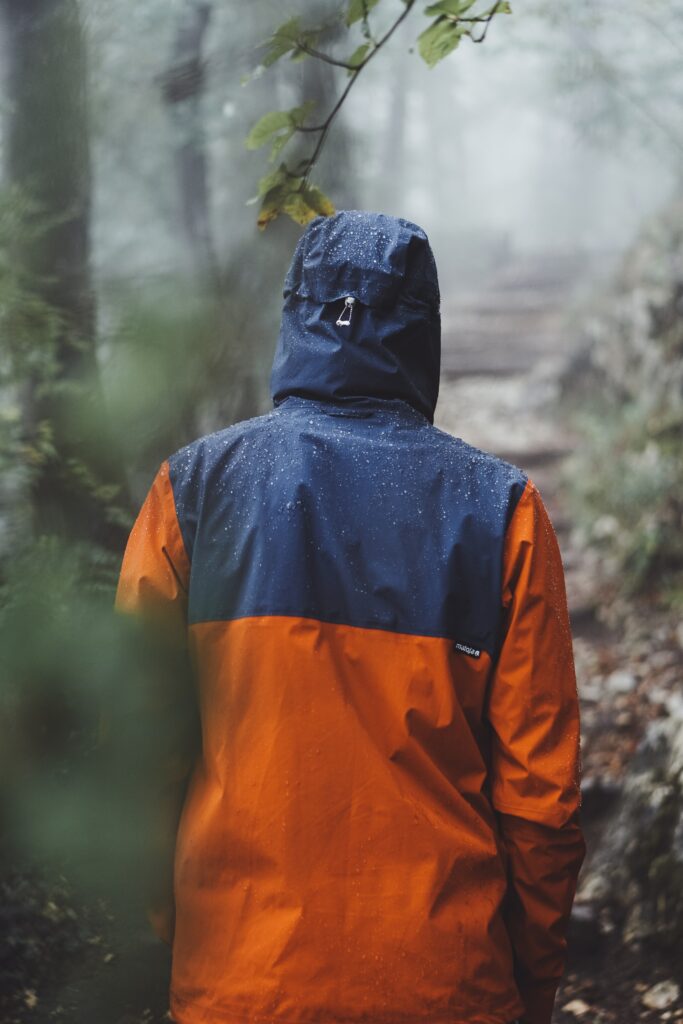
How to Waterproof Hiking Boots

Waterproofing your boots at least once a year will keep your feet cozy and dry and ensure the boots stay in shape longer. Waterproofing hiking boots does not take as long as you might think. After a thorough cleaning, you can generally apply waterproofing treatments while the boots are still wet. Read up on how to waterproof hiking boots for more details on caring for boots of different materials.

Conditioning Leather Hiking Boots

If you have full-grain leather boots, you do not need to apply a waterproofing treatment as full-grain leather is naturally waterproof. Instead, you just need to condition the material once a year to keep it looking its best and functioning properly. This will keep the boots from drying out and cracking, which will ruin their waterproofing and generally require replacements sooner. When conditioning leather, be sure to follow the instructions exactly. Using too much conditioner can cause the leather to be too soft, which will impact the boots’ sturdiness. 

Photo by Ali Kazal on Unsplash

How to Get Your Hiking Boots Dry

Once you’ve given your boots a deep clean, you need to let them dry thoroughly before wearing them again. First, take the insoles out to dry separately. Next, you can use a fan if you need to dry your boots a little quicker, but do not leave them too close to a heater or a campfire. Extremely high heat can break down the waterproofing agents and prematurely age leather. You also do not want to leave them exposed to high sun, as this can also discolor and age leather. 

Because it does take time for hikers to dry all the way, be sure to plan ahead! Don’t save your boot maintenance until the day before your big trip. Finally, it is especially important to ensure your hikers are all the way dry before storing them for the season. Store them in a dry location (maybe not the basement) to protect them from mold forming. If your boots do smell moldy, a simple concoction of four parts water and one part vinegar will do the trick.

Final Thoughts

With these simple steps, you can ensure your boots will last longer and keep your feet protected from the elements. Getting a quality pair of hiking boots can be costly, but if you take care of your investment, you can make sure to get your money’s worth. Happy hiking!

Layering for Winter Adventures

Before you head out for some fun winter activities here in Colorado Springs, you need to make sure you have the proper gear to stay warm. Layering is a common and essential system for making sure you stay dry and warm in this winter wonderland we call home. Let’s dive into the basic principles of winter layering as well as some key pieces of clothing for winter hiking. 

What Is Layering?

Layering is a system of wearing specific types of clothing in a specific order to best insulate yourself from the cold. Typically, it includes a moisture-wicking base layer, an insulating middle layer, and an outer shell that protects against wind and rain. 

Image by 2999607 from Pixabay

The Base Layer of Cold Weather Clothing

The key to staying warm when you’re out in the cold is to stay dry. Moisture, either from rain or sweat, will steal your body heat quickly and can leave you dangerously cold. A good base layer will be moisture-wicking so sweat doesn’t get a chance to build up. 

Another key feature of a base layer is that it should be snug to the skin. It does not need to be tight, but make sure it’s not baggy. Extra material, crammed into a tight squeeze by your middle layers, will chaff as you hike. This is the same principle as why hikers often wear liner socks beneath their bulky insulating socks to prevent blisters.

Important Material Considerations for Base Layers

One key thing to keep in mind for your base layer is the material. Expert hikers know that cotton is a no-no. Cotton is not a moisture-wicking material. It absorbs sweat and keeps it. You can opt for a synthetic dry-fit material, polyester, or merino wool. 

The Middle Layers for Winter Hiking

The purpose of the middle layers of winter hiking clothes is insulation. You can go for one bulky jacket or two or three lighter layers. This is a matter of personal preference as long as you know what will keep you warm. If you are starting at a lower elevation and hiking into the mountains, it’s a good idea to start a little chilly and pack an extra middle layer for the inevitable temperature drop. 

Good materials for middle layers are down, synthetic down, and fleece. You may want to go for your favorite sweatshirt here, but cotton, again, is not a good material for winter hiking. Cotton is too breathable, and the key to a good middle layer is to keep your body heat close to your body. If you let your body heat escape from non-insulating layers, even vigorous exercise will not keep you warm enough.

The Outer Layer for Hiking in Winter

Now that you are dry and warm, the goal of the outer layer is to keep you that way. This layer protects against wind and weather to make sure you stay comfortable. As you know, many downs and synthetic downs are not supposed to get wet, so you need a waterproof outer layer to keep that insulation from bunching together and not working.

A waterproof shell is a good option for a more casual hike. There are many options that fold into very compact packages and don’t take up much room in your hiking bag. You can pull it out only if the weather sours. These thin waterproof layers are great for protection, but most don’t tend to be breathable.

For a longer hike or an alpine hiking trip, you will definitely want a legit outer layer. Something that is windproof and waterproof will keep you from feeling the winter’s chill. It is also important for it to be breathable to keep from accumulating moisture that will soak your middle layer. One thing to look for, to keep you from overheating, is armpit vents. These little zippers will let off heat without exposing you to the frigid air.

Layering Pants for Winter Hiking

In terms of bottoms, you will want to start with the same skin-tight base layer. Long underwear is key for keeping the cold air off your legs and wicking sweat. The material should be stretchy, so you can move freely on your hike. Wool and polyester are great options, and you can grab a lightweight or heavier base layer depending on the temperature. You can find pretty thick base layers here, especially in wool long underwear, so you can skip the middle layer.

Most winter hikers wear two pairs of pants: long underwear and an outer shell. Similar to the rain jacket, you will want your pants to be weatherproof to keep rain out. For pants, a breathable material is preferable, so you avoid moisture build-up. You can also find outer layers with vents in the inner thigh or through the pockets to disperse a little extra heat.

Other Clothing Considerations for Winter Hiking

Keeping your core comfortable is the most important way to stay safe on a cold hike. But you also need to protect your hands and feet from frostbite injuries. You can find any number of mittens, including liners and waterproof outer layers to keep your fingers dry and warm. 

For your feet, you will want to start with a liner sock to keep your feet dry and then something super warm like heavy wool. In addition to a nice pair of insulated, waterproof hiking boots, you can consider adding gaiters. A pair of mountaineering gaiters will bridge the gap between your pants and your hiking boots and make sure no snow or rain finds its way to your ankles. 

Finally, don’t forget about your head and face. Your clothes for winter hiking should always include a hat, as heat dissipates quickly off our heads and you want to protect your ears from the cold. In extreme temperatures, consider a neck gaiter or balaclava to keep your nose and cheeks safe from frostbite, too.

Final Thoughts

If you’re like me, you don’t like being cold, but you love being outside. There is nothing quite as peaceful as a trail covered in snow. Luckily, with the right fabrics and the correct layers, you can stay warm on a glorious cold-weather hike. Brush up on some key tips for staying safe on a winter hike, and enjoy the great outdoors all year round!

Hiking Dehydration and Heat Stroke – How to Recognize and Treat Symptoms

It’s no secret that we have had some extremely hot weather the past few summers. As much as we want to be out on the trails, it’s important to stay safe, too. If you are planning on hiking in hot weather, make sure you know how to prevent, recognize, and treat dehydration and heat stroke. In this article, we’ll go over both dehydration symptoms and heat stroke symptoms so you can treat these conditions before they get worse and enjoy a safe hike.

The Risks of Hiking in Hot Weather

Staying safe in hot weather means hiking shady trails, drinking extra water, and wearing the right fabrics. These hot-weather hiking tips will help protect you, but it’s also essential to know the risks you face. The most common problem summer hikers will face is dehydration. The more serious risks, however, are heat exhaustion and heat stroke. Dehydration is a common problem most of us have experienced to one degree or another. Heat exhaustion and heat stroke, however, are much more serious conditions where the body’s temperature is elevated to dangerous levels.

Photo by Marvin Meyer on Unsplash

Dealing with Dehydration in Hot Weather Hiking 

While dehydration is a common problem, it can be quite serious if left untreated. If you are hiking in hot weather and sweating, it can be hard to figure out how much water you need to take in to compensate for sweat and stay hydrated. Recognizing dehydration symptoms in yourself and your hiking companions is the best way to treat it early and prevent more serious symptoms down the line. 

How to Recognize Dehydration Symptoms

The first and most overlooked symptom of dehydration is a headache. If you are on a trail in hot weather and start getting a headache, pull over and hydrate. Many people try to push through a headache, but later symptoms include dizziness, disorientation, and nausea. These unpleasant dehydration symptoms can be very dangerous on a hike, especially if you are hiking alone. Know your limits, listen to your body, and don’t hesitate to turn around if you need to.

How to Prevent Dehydration

You may think the best way to prevent dehydration is to drink plenty of water. It’s actually not that easy since sweat isn’t just water. Our bodies need salts as well, and that is why you see sports drinks advertising electrolytes. Preventing dehydration means having a salty snack in addition to water or adding a hydration tablet to your drinking water. Be wary of consuming actual sports drinks as many contain sugar which increases urination and therefore, dehydration.

Preventing dehydration on a hot weather hike should begin before you get to the trail. Starting that morning, avoid caffeinated beverages and make a conscious effort to drink enough water. While urine is not supposed to be perfectly clear, the less yellow it is, the better hydrated you are. On trail, you will want to consume about a quart (or 32 fluid ounces) of water per hour. This metric will need a little tweaking based on your exertion level, how much you are sweating, and how hot it is.

How to Treat Dehydration

Once you have noticed a dehydration symptom like a headache coming on, it is important to pull over and hydrate. Do not get back on the trail immediately after a sip of water. If you are feeling unwell, take five or ten minutes in a shady spot to relax and let your body cool off. A salty snack or electrolyte water should help you feel better, and you can decide then if you want to continue. Keep in mind that untreated dehydration can lead to heat exhaustion and heat stroke: If you are not sure if you are feeling better, don’t risk it. 

Photo by Dennis Ottink on Unsplash

What Are Heat Exhaustion and Heat Stroke

Heat exhaustion is a condition caused by excessive loss of water. This is why dehydration is a precursor to heat exhaustion. Similarly, heat stroke comes on when heat exhaustion continues untreated for a period of time. Heat stroke means that the body can no longer regulate temperature effectively, and this makes it extremely dangerous. Luckily, all of these can be prevented and treated effectively once symptoms are recognized.

How to Recognize Heat Exhaustion Symptoms

Heat exhaustion is the body’s response to severe dehydration and starts with profuse sweating, lightheadedness, and nausea. Other heat exhaustion symptoms include chills, muscle cramps (known as heat cramps), unquenchable thirst, and abnormal heartbeat. While some of these symptoms seem common on a strenuous hike in hot weather, it is important to recognize when there are multiple symptoms appearing together, when they become extreme, and when they affect your state of mind. 

How to Recognize Heat Stroke Symptoms

If a hiker ignores heat exhaustion and continues exerting themself, the condition may turn into heat stroke. One obvious sign of heat stroke is that the person will stop sweating. Heat stroke is also characterized by shallow breathing, hot skin, delirium, and eventually unconsciousness. Falling unconscious is the body’s final attempt to prevent further exertion and allow the body to cool off. Heat stroke is a life-threatening condition that requires medical attention.

How to Prevent and Treat Heat Exhaustion and Heat Stroke

The best way to prevent these dangerous conditions is by addressing dehydration symptoms and not letting it get worse. Recognizing dehydration symptoms and heat stroke symptoms as they happen can help you treat them sooner and feel better faster.

If your hiking companion is exhibiting symptoms of heat exhaustion, they need to get to shade and rest immediately. You can remove whatever clothing is in the way of a nice breeze but do not do this in the sun where further damage can occur. The best way to cool the body down is by submerging yourself in water. If this isn’t possible, wet a towel or cotton fabric for the back of the neck and head to help cool off faster. Be sure to hydrate and take a good long break before hiking back out to the car. If anyone exhibits symptoms of heat stroke, they need medical attention as soon as possible. This may require a medical evacuation, as the person should not continue exerting themself.

Final Thoughts

While heat stroke symptoms are scary and very serious, it is comforting to know that this condition is completely preventable. Paying attention to your body, learning proper hydration techniques, and recognizing dehydration symptoms are important ways to stay safe when hiking in hot weather. Keep in mind that children and older adults are more susceptible to dehydration, and hiking at altitude exacerbates these risks and has its own dangers. 

PLBs vs. Messengers – What You Need to Know For Hiking

As we enter the warmer months, you are surely excited to get back in the saddle and hit the trails. Beginner cyclists and mountain bikers need to be aware that you will need more than just a helmet and water bottle. There are a few biking tools you should carry with you at all times. A simple bike repair kit can keep you from a serious inconvenience on the trail. We’ll go over the essential bike maintenance tools so you can assemble a basic bike repair kit for your trip.

Are you considering getting an emergency beacon or messaging device? These are both great pieces of safety equipment to have if you are a serious hiker. While it is nice to unplug and be in nature, limited connectivity is a serious risk in the event of an emergency. A satellite-connected device can literally be a lifesaver if you need to send a distress signal. If you are looking to learn more about both and figure out which to get, we’ve got a complete breakdown of PLBs vs Satellite Messengers right here.

What are Personal Locator Beacons?

Personal Locator Beacons (PLBs, also called emergency beacons) are the more simple of the two devices. PLBs solely have the capability of sending your location to authorities. Unlike satellite messengers, they do not allow you to send messages to anyone else. Finally, because of their simplicity, once the distress signal is activated, there is no way to recall it.

How do PLBs work?

An emergency hiking beacon is very easy to use. If you find yourself lost in the woods or in an emergency and need to send a distress signal, you simply point the antenna up and turn the device on. This automatically activates the signal, which gets transmitted via satellite to local search and rescue operations. They will then have your exact location via GPS. Because PLBs need to be registered with the authorities, they will also be able to see whatever personal information you provide, such as emergency contact numbers and important medical conditions. Many PLBs also have regular and infrared strobe lighting to assist rescuers in finding you.


How long do PLB batteries last?

Personal Locator Beacons use long-lasting lithium batteries. Because they remain dormant until you turn the device on, it should last for up to five years. These batteries are required to be extra strong so that once turned on, the beacon remains strong for up to 24 hours. Unfortunately, they do need to be mailed back to the manufacturer in order to replace the battery, and this process can be expensive.

What are good Personal Locator Beacon brands?

ACR Electronics is a popular brand for both PLBs and Satellite Messengers. Their products are durable and highly rated, if not a little expensive. Ocean Spray and SpotX are two other brands of emergency beacons to consider.

What are Satellite Messengers?

Satellite Messengers are more capable devices, and as expected, can be more expensive. Not only do they provide the same functionality as PLBs, but they also have the ability to send and receive messages to friends and family. Some models allow communication with rescuers, which also makes it possible to cancel a distress signal.

How do Satellite Messengers work?

Satellite Messengers are similar to personal locator beacons but with more features. Satellite messengers allow users to text anyone, like family and friends. Some models also have color display screens, GPS navigation, and weather reports. They may also have Bluetooth capability to connect to your cell phone or fitness watch. As expected, these added features mean that the prices of satellite messengers vs PLBs are much higher in some instances.

How long do Satellite Messenger batteries last?

Unlike PLBs, satellite messengers have easily rechargeable batteries. Depending on the brand and model, the battery life when turned on may be up to a week, and asleep or in “expedition mode” up to three weeks. These longer battery-life models are a great option for extended backpacking trips.

Why do Satellite Messengers require subscription plans?

Because satellite messengers have more robust features and communication abilities than the simplicity of emergency beacons, they do require users to pay for a monthly subscription. This can be a major expense and is one reason many people opt for the more simple emergency beacons. That said, if you spend a lot of time in remote areas with limited or no cell reception, you may find it worth it to have GPS navigation and be able to communicate with your loved ones.

What are good brands of Satellite Messengers?

There are a lot of options on the market for satellite messengers, and the prices vary considerably based on the display, capabilities, and more. Depending on what features you want and what subscription you are willing to pay for, you can narrow your choices down to a few good options. The most popular Satellite Messengers are available by Garmin, ZOLEO, and SpotX.

Why can’t I just use my phone?

Many people are perfectly fine having just a cell phone on a short day hike. However, if you’ve hiked enough, you have surely experienced a drop in signal somewhere along the way. For serious hikers who like to take multi-day trips or hike miles from civilization, a cell phone will not be good enough. Cell signals can be unpredictable, and your phone could get water damaged, lose battery, or break in an emergency. PLBs and satellite messengers are much more durable than cell phones, more rugged, and typically waterproof to a certain depth. The peace of mind that comes with having a sure-fire form of communication can be worth it for many hikers.

When should I send a distress signal?

It is important that all hikers prepare well for their journeys. This includes packing all the essential safety gear including fire starters, emergency shelter, and first aid supplies. Distress signals should only be sent in true emergencies. It would be appropriate to use search and rescue services if your life is at risk or if you are unable to get back to safety on your own. Keep in mind that many states have penalties for frivolous use of rescue services, so take all the measures possible to prepare against emergencies. This includes not hiking in dangerous weather conditions, on unmarked trails, or in areas that have been closed off by park officials.

Can I hike alone?

If you are wondering if it is safe to hike alone, the answer is sort of. There are certain times when it would not be safe to hike alone, such as in bad weather, at night, or in an area with dangerous animals. If you do want to hike alone, it can be helpful to start small on a trail you know. Building up to longer solo hikes will help you feel more comfortable on the trail. The most important things to do when hiking alone are to pack all essential gear, carry multiple forms of navigation, and be sure to tell someone your planned route.

Final Thoughts

Personal Locator Beacons and Satellite Messengers are two helpful pieces of safety equipment for avid hikers. If you are looking for this extra peace of mind and trying to decide on a PLB vs a Satellite Messenger, consider the different features you would like and the costs. Either is a much safer option than just hiking with a cell phone, so you really can’t go wrong. Happy hiking!

What Should I Do If I Get Lost While Hiking?

The best hikes may feel like a carefree walk through the woods, but it is important to be prepared and stay sharp anytime you go hiking. Losing yourself in your thoughts could cause you to actually get lost. That is why it is important to know what to do if you get lost hiking. We will go over hiking safety and how to get yourself out of a sticky situation on the trail.

Hiking Safety: Before You Go

Anytime you go hiking, you should plan your route in advance and be sure to bring a physical map and a compass. It is easy to overlook these elements since cell phones have this information. However, you may not have service, your battery could die, or you could lose or damage your phone. It is essential to have a form of old-school navigation, so you do not have to rely on technology for your safety. If you are not able to find a physical map, you can take a photo on your phone of the map at the trailhead. Also, try to memorize your route, including the color trails and turning points.

Pack for Safety

In addition to navigation, there are a few hiking safety essentials you should always have in your day pack. Be sure to carry a flashlight, matches, emergency shelter, and extra food and water. You never hope to be stuck on the trail longer than expected, but it could happen. If you get lost, you will be glad to have this gear to keep you safe overnight. An easy emergency shelter to carry would be a tarp and rope. Ready shelters like emergency tents are very affordable, pack light, and can be lifesaving. Especially if you are hiking in cold weather, it is essential to have at least an emergency blanket to stay warm and safe when hiking in winter

Be Smart when Hiking Solo

If you are planning to hike alone, there are a few more important steps to take before you leave. If you are wondering if it is safe to hike alone, you will feel better once you’ve taken these precautions to protect yourself. The most essential thing is to tell someone where you are going. You can send a loved one your planned route or even give them access to Find my Friend. Sharing your location this way is not a perfect solution if your phone dies or loses service, but it can be a start if someone needs to find you. You should also let them know when you plan to be back and then check in when you finish your hike. 

When hiking solo, it is even more important to plan in advance. Check the weather and make sure you will not be caught unaware. Choose a route that leaves you plenty of daylight left. You may decide to start small with easier routes that are well-populated. While it is nice to push yourself on a hike, make sure you know your limits and will not be left totally exhausted. Getting back to the trailhead with a little energy left over is safer than the alternative.

Photo by Janis Oppliger on Unsplash

How to Avoid Getting Lost on a Hike

There are a few helpful hints that can keep you safe while on trail. First, plan your route in advance and keep an eye on trail markers, so you stay on the right path. Usually, trail markers will be colored portions of trees, a bit higher than eye level, or signposts at turn-off points. Depending on the trail, markers may be close enough to see two at a time or farther apart but less than a quarter mile. You should note when you see one, either by time or mileage. This way, you can be watchful that you do not continue hiking too far if you haven’t seen one in a while. 

Anytime you come to a fork in the trail, it is important to take a second and think about the path you had in mind. Note some landmarks like nearby rocks or trees that will help you recognize the turn on your trip back. You can even take photos, build your own cairn with rocks, or set a couple of sticks as arrows. When you make your return, be sure to dismantle these, so you leave no trace.

What to Do If You Get Lost Hiking

When you realize you are lost on the trail, just remember the acronym STOP. You need to stop walking, think, observe your surroundings, and plan. With these four actions, you can get yourself back on track and make sure you get out safely.

Step One: Stop

The S conveniently stands for stop. The first thing to do is stop walking so you can assess. Make sure to breathe and maintain your calm. It is essential that you not panic. While it is a normal reaction, you need to be able to keep your head clear and figure out what to do. You can practice breathing exercises to keep your system calm. Take a second to rest, have a snack and some water, and then get to work.

Step Two: Think

The T stands for Think. Try to retrace your steps in your mind. Did you miss a turn? Is there a landmark you remember seeing that you need to look out for? It is essential that you do not keep walking until you have a plan. Take a look at your watch and guess where you expected to be at this point. Should you be circling back by now? Are you not quite to the next turn?

Step Three: Observe

Take a look around and see if you can spot any signage on a post or a tree. You may find someone else’s cairn on the ground or any sign of development like logs used for trail sides or steps. If you are able to figure out what trail you are on, take a look at your map. You might be able to figure out approximately where you are based on where you meant to be and what is around you. Be sure to look further into the distance, too. If the map shows that the trail increases in elevation or curves around a lake, look around to see if you can match these features with the world around you.

Step Four: Plan

When you realize you are lost, there is one decision to be made. Do you turn around and try to retrace your steps or keep going and try to reconnect with a new trail? Depending on how far you have walked already, it may not make sense to turn around. You should also consider the time of day and how you are feeling. If it is late or you are injured or exhausted, you may choose to take a rest or set up a shelter for the night. If you were with a group who will notice your absence, it is always best to stay put and wait to be found.

Photo by Annie Spratt on Unsplash

How to Find a Trail If You Get Lost While Hiking

If you decide to keep walking, there are a few key things to keep in mind that can help direct your path. It can be a good decision to follow a stream or drainage downhill. This may end up leading to a road or trail; however, this could also be difficult and dangerous. If you think you see a road or river in the distance, but there is a steep slope in your way, do not attempt to hike something dangerous. Instead, avoid injury and follow the landmark from a distance.

When you are hiking while lost, you need to remember to take care of yourself. It will be exhausting and stressful to hike longer than expected. Be sure to rest early and often and keep your energy up with snacks and hydration. You should avoid walking in the middle of the day if it is hot out as you do not want to risk dehydration or sunstroke. Be sure to rest in the shade and keep your eyes peeled for signs of a trail.

How to Set Up An Emergency Shelter When Lost on a Hike

There are a lot of circumstances in which it might make sense to set up camp for the night and find your way home in the morning. If you are feeling tired or if you get injured, it is important to rest so you are in your best shape for the hike back. You do not want to keep hiking and risk injury or get yourself more lost because you are not thinking straight.

If it is starting to get dark, you should find a place to set up camp. Hiking in the dark is dangerous, as you are likely to miss important markers and could encounter nocturnal animals. Instead, try to find a natural shelter like a rock outcropping or stand of trees. This natural protection can keep you sheltered from wind and rain during the night.

Lastly, if you get lost while hiking with a group or on a guided tour, it is better to stay in one place and wait for them to find you. You do not need to worry that people don’t know you are missing. Therefore, you do not need to find your way back on your own. If both you and your search party keep walking, you run the risk of getting more lost. Instead, set up camp and relax. It is easier for others to find you if you stay put and make a fire or use something bright as a flag.

Final Thoughts

Even avid hikers may find themselves slightly disoriented at times. Less popular trails and parks may not be well maintained, and markers can be confusing, vandalized, or altogether missing. The most important thing to do if you get lost hiking is to stay calm and remember the acronym STOP. With these helpful tips, you should be able to get your bearings and finish your fun hike with no further issues. Stay safe, and happy hiking!

How to Keep Your Feet Warm While Hiking

If you are hoping to hit the trails this winter, you will need to know how to keep your feet warm while hiking. With treacherous temperatures and feet of snowfall not uncommon in the area, warm boots and warm socks are essential pieces of hiking gear here in Colorado. 


We’ve got some of the best fall hikes near Colorado Springs, so let’s dive into the proper gear for your feet and tips for keeping warm so you can get out there and enjoy.

Photo by Oziel Gómez on Unsplash

Gear Necessities for Staying Warm on a Hike

Sock Strategy for Cold-Weather Hiking

In order to keep your feet happy and warm on a hike, you need to wear multiple layers and consider all factors. The first and most important way to keep your feet warm is to keep them dry. Therefore, a moisture-wicking base layer needs to be the first thing you put on your feet. These thin moisture-wicking socks will keep your feet dry no matter how sweaty they get. 

The second layer is insulation. You can wear thick wool socks, which come in different weights (lightweight, midweight, or heavyweight) depending on how cold you are anticipating temperatures will go. If you own insulated hiking boots, these can be worn with just a thinner lightweight wool sock. 

When you are purchasing insulating socks for hiking, there are a few things to keep in mind. In terms of comfort, you want to find socks that fit a little looser. This will help them fit well over your moisture-wicking layer and make sure that your feet are not being squeezed at all. In terms of value, investing in quality socks will definitely make your life easier in the long run. Wool socks tend to be expensive, but they are the best option here as cotton holds moisture and does not insulate as well for the same thickness. 

The Best Boots for Cold-Weather Hiking

The final layer is the boot, and its main job is protection. A good hiking boot protects you from all sorts of injuries, rolling an ankle, stepping on something sharp, and hopefully, preventing frostbite. As noted, insulated hiking boots are a great option for folks who often hike in colder weather or find themselves standing around a lot while on a hike. 

Another must for Colorado hikers is waterproof hiking boots. Many people do not like their boots to be waterproof because it limits breathability. However, if you are hiking in winter or changing elevation substantially, there is a good chance you will come across snow. There is nothing worse than getting your boots wet, from rainy weather or a water crossing, when you are on a hike. If your feet do not have time to dry, you will be risking frostbite, blisters, and surely general discomfort. Even having snow land on your boot can be dangerous, as your body heat will melt it and allow the water to seep in through the tongue. On a very cold day, you could watch your boots freeze up, thus ending your hike.

You may wonder how to fit multiple pairs of thick socks in your hiking boots. When hiking in cold weather, you need to size up on boots. This will allow room for the socks without compressing your feet. You should aim to be able to wiggle your toes in the boots. If you do go for insulated hiking boots, the sizing will understandably vary as well, so it is helpful to go to a physical store to figure out what size will work for you. 

Tips and Tricks for Keeping Your Feet Warm While Hiking

Be Prepared: Watch the Weather

Before you head out on your cold-weather hike, be sure to check the weather and trail conditions. It is easy to learn how to check trail conditions for hiking safety, and it will save you a disappointing and potentially dangerous hike. 

What to Pack to Keep Your Feet Warm

In addition to the warm socks and warm hiking boots already discussed, there are a few specific items that should go in your daypack for your feet. It is always a good practice to have a first aid kit, a blister kit, and in winter weather, chemical warmers for your hands and feet. These will allow you to warm back up in an emergency. You could also consider getting thermal insoles to redirect your body heat back up if you do not have insulated boots. Finally, you should always pack an extra pair of socks: you never know when you will need them, and at the very least, putting on clean socks at the end of the day will be a great reward for your hard work.

Don’t Put Your Boots On Too Early


It is always good to have a second pair of shoes, in case of emergency and for comfort in the car or at the campsite. When you are getting ready for your hike, changing into your boots should be one of the last things you do. This way, your feet will not get sweaty in those waterproof boots before you even get going. 

Don’t Lace Your Hiking Boots Too Tight

The reason that it is so important to have enough wiggle room in your shoes, literally, is because compressing your feet can lead to frostbite. When you are cold, the blood vessels closest to the skin and out in your limbs constrict in order to keep your core at the proper temperature. If you were to tie your shoes too tight, you are only further cutting off blood flow. This will make your feet feel colder sooner, and it can worsen symptoms of frostbite. 

Keep Your Core Warm

This feels obvious, but because your body prioritizes core temperature, your feet will be the first to get cold if you aren’t dressed warmly enough. Therefore, one of the best ways to ensure your feet stay warm while hiking is to make sure the rest of you stays warm, too.  

Get Your Feet off the Ground

The cold, hard ground is going to be one of the coldest places you can step. Even in the snow, the reflection of the sun’s rays makes the ground slightly warmer. When you take a water break or rest on your hike, try to stand on a rock or a tree trunk instead of the ground below. You will find the ground saps the heat from your idle feet faster than anything else.

Always Be Willing to Turn Around

One of the best winter hiking tips (that I believe is applicable year-round) is to always be willing to turn around. If you feel yourself getting too cold, if the trail conditions have changed, or if the weather is taking a turn for the worse, you should head back. The risk of frostbite or other injuries is not worth it.

Photo by Greg Rakozy on Unsplash

How to Warm Your Feet Back Up After Hiking

Get Dry

As keeping your feet dry is one of the most important tips for staying warm, it should be obvious that drying your feet off would be the first step for warming back up if your feet do get cold while hiking. Let your feet air dry for twenty minutes before putting warm socks on. This will make sure your skin is thoroughly dry to prevent blisters. This is especially true if you got your feet wet from something more than sweat, say wading through a river or hiking in a rainstorm.

It can be hard to let your feet dry out properly if it is cold outside. You can dry them off with a towel and then cover them loosely in a blanket or sit inside your tent. This will give them a little space to dry off without getting too cold in the process. 

Go Slow

One thing people often do is try to warm up too quickly. It is tempting to jump in a hot bath when you are cold, but if your toes are cold to the bone, it is not a good idea to try to warm up too quickly. If you’ve done it before, you know it is very painful. The transition from very cold to even tepid can be painful and actually harmful to your vascular system, sending cold blood to the heart.

Rather than shock your system with a quick transition, you can reacclimate to the warmth slowly. If you are camping and building a fire, take a seat far away and get closer as you warm up. Let your feet tell you if you get too close too fast. If you want to warm up with water, make sure you start with colder water and warm it up slowly with your feet.

Skin-to-Skin Contact

The best way to warm up cold feet is with skin-to-skin contact. Use your hands or thighs (sitting cross-legged) to warm your ankles and feet. If your skin is truly frozen, you should not massage or rub it as you can break the skin, but just hold it there to let heat transfer. Or, even better, if there is someone with you who can help, warm breath and skin-to-skin contact with someone else’s warmer body areas like the torso, thighs, and armpits are quick ways to safely warm skin.

If you are looking for some fun and rewarding hiking destinations this season, check out our Guided Hikes near Colorado Springs. You will get expert advice from a certified guide and plenty more real-world experience hiking in the great outdoors in colder weather. 

How to Check Trail Conditions for Hiking in Colorado

Because our state can have such extreme and diverse weather, it is essential to do some research before you go hiking in Colorado. You should always be aware of weather, trail conditions, and wildlife before you leave for a hike, in part so you can pack accordingly.


There are so many stunning hiking options around the state. If you don’t know where to go, be sure to check out our Colorado Springs trail guide. Once you have a hike in mind, this article provides all the best resources for where to check Colorado trail conditions in order to be properly prepared for your hike.

Photo by Backroad Packers on Unsplash

Trail Condition Resources

All Trails

This amazing community-driven resource has everything you need to ensure a great day on the trail. It is personally one of my favorites on this list because it makes it easy to find variations of trails. This is particularly helpful if you are looking for a shorter mileage or less strenuous option. You can search for accessible trails (for wheelchairs, strollers, etc), parks that allow dogs, mountain biking trails and more. Listed information about trails includes mileage, elevation, reviews, difficulty level, parking information, and pictures.

This is a great resource for figuring out the proper trail for what you want out of the hike as well as staying informed along the way. As you hike, the app shows waypoints and elevation changes and tracks your metrics. You can review the hike, save your favorites, and share helpful tips with others. The app is particularly helpful for popular trails that other users are commenting on regularly. You can read recent reviews for relevant updates on the Colorado trail conditions and also check the weather and UV index for the day.

National Park Service

If you are looking to hike a trail within a national park, you can check the National Park Service’s website for everything you need. They list trail closures, conditions, and other important safety notices regarding wildlife and weather. Trail availability can change rapidly, whether from a storm, maintenance work, or high risk of fire. It is helpful to check the park’s website for updates day-of. This way, you can plan your hike and route around any closures or potentially dangerous areas.

One other especially important factor when visiting national parks is parking and permits. Depending on the time of year, parking can fill up fast. Once you know what hiking trail you want to explore, you can find trailheads and the closest parking lots. Grab the necessary permits or parking lot reservations in order to save time on the drive-in and help your day go smoothly.

Colorado Trail Explorer

Similar to All Trails, Colorado Trail Explorer is a comprehensive resource for exploring the outdoors in Colorado. You can find routes for hiking, horseback riding, skiing, ATV riding and more. Their filtering function also includes so much more than just dog-friendly and wheelchair-accessible options. You can search for special interests like geology or mining or things you’d like to see like wildflowers or waterfalls. 

Once you’ve identified a trail, the website pulls in Google Maps for directions and Weather.gov for forecasts. My favorite feature, though, is the custom ability to see the different sections of the hike. Rather than simply listing the mileage and elevation change, you can look at it step-by-step and see how each leg of the hike will test you. They even have a measure tool that allows you to check out a custom length of the trail. This is very useful if the different sections they list are not specific enough for you. From grade to elevation to mileage, you will get a good sense of the trail’s difficulty before you even get out of the car. 

The crowdsourced trip reports allow you to get updates on trail conditions, crowding, bathroom availability, and insect presence. Once you get the app and download the trail for offline access, you can keep notes on your experiences and track your progress in real-time. There are also fun challenges like identifying wildflowers and noting scenic lookouts to keep you engaged with all the beauty of Colorado’s trails. If you are an outdoor enthusiast, this resource is a fun and informative way to stay updated on Colorado trail conditions and track all your progress hiking around the state.

Colorado Trail Foundation

The 567-mile Colorado Trail between Denver and Durango is an accomplishment of massive proportions. Efforts to build the trail started in 1974 and took over ten years. It is a unique adventure that travels through six wilderness areas, eight mountain ranges, five major river systems, and some of the best views the Rockies have to offer. All up, the trail climbs nearly 90,000 vertical feet, but you don’t have to do it all at once. The trail is divided into 28 segments plus an additional 5-segment, 80-mile trail variation called Collegiate West.

If you are looking to hike any part of the Colorado Trail, the guidebook is strongly recommended. It includes mile-by-mile trail descriptions, driving directions and access points, mileage and elevation stats, and even information on towns to resupply if you do the whole trail at once. The website is also a great resource for information on packing, finding natural water sources along the trail, and preparing for the high elevation. There is a lot of research and preparation necessary before hitting the Colorado Trail. However, with the help of the Foundation, it has been completed in full by nearly 5,000 people.

Photo by Taylor Brandon on Unsplash

How to Interpret Trail Conditions

It is not enough to just check on trail conditions and make sure the trail is still open. There can be some crucial information in these updates that will help you pack well and be properly prepared for your day. If there is a trail closure, you can check out All Trails or Colorado Trail Explorer to find variations or nearby trails with similar stats.

Common information about trail conditions can include obstacles and downed trees, muddy or snowy sections, and standing water. In the case of wet trails, you will want to wear waterproof hiking boots (or boot liners). Additionally, pack extra socks, and read up on some tips for hiking in mud. If you know you will encounter obstacles on your hike, hiking poles can be helpful for extra stability, and gloves will protect your hands from rough tree bark or scrapes from branches.

Other conditions may include loose soil, exposed tree roots, or damage from a mudslide or flash flood. These conditions tell you to be cautious and watch where you step. Wearing your best hiking boots with good grip will help you overcome a damaged trail.

Other Resources to Check

In addition to looking for updates on trail conditions, there are a few other things to research in order to be fully prepared for a hike. First, checking the weather reports for the day will help you pack and dress properly. You should also know about weather changes when hiking to a higher elevation or hiking between different climatic zones.

Next, be sure to check the park or county’s website for guidance on permits and parking. Some parks may require permits for backcountry hiking, in order to limit hikers and protect the landscape. Many places especially around Colorado Springs have limited parking lots and use reserved tickets to control overcrowding. Be sure to look into these aspects of your day hike as well so you do not show up unprepared and miss out on your adventure.

No matter where you go, it is always important to be aware of Leave No Trace guidelines in order to be a good steward of the land. There are plenty of resources available to learn about how best to pack out trash and get rid of waste so you can protect the trails for future generations.

Finally, I like to prepare for hikes by checking information on local wildlife and the flora of the area. I find this information heightens the experience because I am able to identify and appreciate the nature around me more. It can also be important to be aware of wildlife near hiking areas. For example, if bears have been spotted from the trail, make sure you are aware of bear safety tips and don’t go on the hike during their peak hours. You can prepare by learning what wildlife you might encounter and reading up on how to watch wildlife safely

Final Thoughts

Colorado has some of the best hiking in the country. It includes over 5,600 miles of hiking trails according to Colorado Trail Explorer. No matter what type of view or how strenuous a hike you are looking for, you can surely find an exciting and awe-inspiring hiking trail near you. If you are just getting started on your hiking journey, consider going on a Guided Hiking tour in order to become familiar with best practices and helpful techniques while on the trail. Hiking with experienced friends or a professional is the best way to start hiking and get comfortable with packing and preparing for a hike in Colorado.

Tips for Hiking in Rain

Are you headed out for a hike and worried about the weather? It’s important to always be prepared for any conditions, so we’ve got some tips for hiking in rain. First, make sure you know how to pack for a day hike in general, and then we’ll discuss specific gear for hiking in rain and other considerations for staying safe and dry.

Image by Drew Tadd from Pixabay 

Do Your Research

First things first, always check weather reports before you head out. There is a difference between a drizzle and a thunderstorm, both in terms of comfort and safety. If there are severe weather warnings or if your hike includes a potential flashflood area like a canyon, consider postponing your trip. Either way, be sure to tell a friend about your planned whereabouts in case the weather becomes hazardous. Lastly, pack the ten essentials to be prepared for every situation.

Pack a Hot Drink

When packing for a day hike, you should always bring plenty of water and snacks. When packing for a rainy day hike, you may want to add a nice warm beverage to the mix. You can prepare a thermos ahead of time and leave it in the car for when you finish the hike. If you are backpacking for a couple of days, drink mixes like hot cocoa can be a real treat to warm you up. 

Wear the Right Rain Gear

As is best practice for every hiking trip, you should wear moisture-wicking inner layers. Dry-fit shirts and wool socks will keep you dry even when you sweat or get caught in the rain. These proper layers insulate body heat, help prevent blisters, and can be the difference between a safe rainy hike and a dangerous wet one. 

Rain Jacket

For outer layers, a waterproof rain jacket is a must. Something light that fits in a day pack is a smart choice to avoid bulk in good weather. The most important thing to note is the distinction between water-resistant and waterproof materials. A water-resistant jacket might stay dry if you spill your drink or walk through a sprinkler. However, it is not suitable for hiking in the rain. After a while, the material gets bogged down with water and can become extremely uncomfortable. To avoid being cold, wet, and miserable, a certified waterproof raincoat is an absolute necessity.

Rain Pants and Proper Footwear

Waterproof pants and hiking shoes are the two other essential pieces to stay dry on a rainy day. Waterproof boots are my go-to even on clear days. If I happen to step in a puddle or hop a small stream, my feet stay dry. The one downside with waterproof shoes is that they are not breathable. If rain does get in, it will be extremely hard to get them dry, and you will find yourself walking in puddles the rest of the day. The main concern with wet feet is blisters. When skin gets wet, it is more susceptible to breaking and forming blisters. This is why waterproof pants and shoes (that don’t have a gap at the ankle) are the best way to keep dry.

Two other helpful pieces of gear are a towel and an extra pair of socks. You may choose to leave these in the car to dry off when you return. Having a towel for wet hair and drying off wet skin is really helpful, and there is nothing as comforting as putting on warm, dry socks after a wet hike.

Photo by Andy Køgl on Unsplash

Waterproof Your Gear

Next, unless your day pack is truly waterproof, you will want to make sure the stuff inside is well protected. Your phone, cash, food, and other personal items can be kept dry by putting them in dry bags or plastic baggies. A waterproof phone case will help make sure you always have access to navigation tools and emergency services.

If you are backpacking for a couple of days, rather than just on a day hike, you will especially want to ensure your sleeping bag, clothes, and toilet paper do not get wet. One great way to keep all your gear dry at once is with garbage bags. Rather than put each item individually in small plastic bags, you can line your entire pack with a garbage bag and then pack everything like normal. As long as you secure the bag shut and get the water off before you open it, you should be able to keep your important belongings free from the rain. 

Know Safety Protocols

There are a few important rules to keep in mind for hiking in dangerous weather conditions. First, assume everything will be slippery. Rocks, wooden steps, mossy tree roots: everything is easy to slip on when wet. Be sure to keep your eyes on the trail and tread carefully.

If you find yourself caught in a thunderstorm, seek shelter, head to lower elevation, avoid the tallest trees, and avoid open meadows. If you are with a group, you should spread out to reduce the number of injuries in the event that there is a lightening strike.

Finally, if you were planning on crossing a stream on your hike, remember that it will be larger in the rain. You should always have an established path with branches or rocks to hold onto for safety. Added water means added current, so be extra careful not to get your feet swept out from under you. Check the National Park Serivce advice for river crossings for more information.

Dry Out After a Wet Hike

If you head home after your day of hiking in the rain, you can throw your clothes right in the wash. If you’re out for a couple of days, hang everything to dry. Put your hiking shoes in the sun or near a fire (not too close!). It is easy for mold to develop in gear that does not dry properly, so dry out your boots to extend their life. 

Photo by Yann Allegre on Unsplash

Consider a Guided Hike

One great way to avoid the hassle and confusion of preparing for hiking in the rain is to book a guided hike. You can learn so much from professional hiking guides on how to prepare and navigate a rainy hike, and you’ll also benefit from someone bringing along those essential first aid supplies.

If you are feeling dispirited that the rain ruined your hiking trip, know that it is very possible to have a great time in any weather. With a little preparation and the right gear for hiking in rain, you can ensure a comfortable experience with Mother Nature’s wetter side. Be sure to check out the Colorado Springs trail guide to find your next great adventure, and enjoy your time outdoors! 

Is It Safe to Hike Alone?

We’ve all been there – maybe you’re new in town or have found yourself with an empty weekend and have no one to explore with, or perhaps your schedule just can’t line up with your friends’. But regardless of the reason, this may beg the question, is it safe to hike alone? The answer is yes! Being solo certainly does not need to end your adventure before it begins.

If you are someone with an unusual work schedule, who travels often, or are looking to get outside on your own schedule, hiking alone can be a freeing experience if you do it safely.

Like most new endeavors, hiking alone can seem intimidating; however, with the proper preparation and knowledge, hiking solo is safe and empowering. To help you mitigate and control the potential safety risks, see the below tips to keep you safe while getting started on your solo journey!

Photo by Julien Flutto on Unsplash

1: Start Small

While hiking alone is often depicted through the stories of lengthy endeavors or epic circumstances, hiking alone can be what you make it! Your first hike (and any hikes after that) does not have to be far, extreme, or to unknown places. 

To get used to hiking alone, picking a trail close to home, one you’ve been on before, or one you have walked with a friend first can be helpful. You may also want to consider going on a guided hike in a new area to get a feel for the terrain and to learn a few things from your experienced guide.

Once you’re comfortable, consider hiking on a new to you, well-established,  and populated trail. Some popular trails have maps at intersections (but always bring your own!), and there is often comfort in seeing others around. From here, the possibilities to increase your adventure and push your comfort zone are endless.

2: Know Your Trail

One of the most important aspects of hiking alone is researching your route. The depth of this research may vary depending on the types and lengths of trails you choose. No matter the trail, be sure to note the general direction you will be traveling, the length of the route, possible exits, turnaround options, the type of terrain you’ll encounter, and important features or landmarks such as rivers, intersecting trails, and more. 

Part of knowing your trail is also knowing what you may encounter. This may include wildlife, flora and fauna, exposure, closures, and more. When it comes to wildlife, be sure to inform yourself about the various animals and how to respond if you encounter them. For example, hiking in areas with Grizzy Bears usually means you will need to carry bear spray and know how to use it. Some areas may also have seasonal closures due to conditions, wildlife breeding/nesting patterns, or areas to avoid to due to damage or erosion. No matter the reason, check online, at state park offices, or wherever is needed to get the information you need to prepare for what’s ahead.

3: Carry a Navigation Tool

Some trails have maps for users at the trailhead entrance; some have occasional maps throughout the trail system. However, many trails have no markers or directions for where you are or where the trail goes. Consider using a paper map with a compass, a GPS device, or other technology to navigate as needed. 


There are many tools available online and via phone applications to help with navigation. Some common resources include Gaia GPS, All Trails, or Hiking Project. If you like gadgets, many smartwatches now offer GPS maps and safety features that allow you to retrace your steps to your starting location. Other options (especially for hikers who venture into more remote territory) worth exploring are handheld GPS devices, satellite phones, and other safety gadgets such as the ones offered by Garmin.

Photo by Annie Spratt on Unsplash

4: Tell Someone Where You’re Going

Sometimes in life, things don’t go as planned, no matter how much you prepare. Therefore, it is imperative that you tell a close, trusted, and available friend or family member about your plan. Be sure to tell them which trail you will be on, the intended direction and length of travel, as well as the approximate time you should return home and contact them. 

The goal, of course, is that this is a backup and never needed. It may seem simple; however, this easy step in planning may just be the one thing that saves your life or gets you the help you need if the unexpected happens.

5: Carry The 10 Essentials

The 10 essentials are made up of various emergency and first aid items. They include navigation items (discussed above), sun protection, insulation and clothing layers, illumination, first aid supplies, fire-starting equipment, repair kit and tools, food/nutrition, hydration, and emergency shelter. 

These are items that, if you need them, you do not want to be caught without them! These items make all the difference when it comes to the safety of hiking alone. Hiking has potential risks, but many of these risks can be mitigated and prepared for with the above items. The degree to which you carry some of these items may vary based on a number of factors specific to your hike, so again, do your research.

6: Know The Weather 

When you are outside, mother nature is in control. Be sure to look up the weather patterns for the area you are hiking. Of course, be sure to look at the weather forecast for the day you plan to hike, but also consider the weather patterns of the previous days to get a better picture of the trail conditions. For example, a week’s worth of rain before your trip may mean muddy conditions and partially flooded trails.

Additionally, mountains can have unique weather patterns such as afternoon storms in the summer, snow, changes in cloud cover, or wind. Therefore, the weather can vary dramatically at different elevations, and it may be challenging to get an accurate forecast. For example, if you are going up to hike at elevation, the forecast and weather patterns may be different up high than from a town or city below. If you plan to hike in the winter or at elevation where there can be winter conditions, be sure to check out Broadmoor’s tips for safely hiking in the winter

Photo by Davide Sacchet on Unsplash

7: Know Your Limits 

 Everyone has different abilities. This spectrum of capabilities can vary from outdoor knowledge, fitness, weather, or time limits. You may want to ask yourself: what am I hoping to get out of this hike? Have I done a comparable hike before? Is this within my knowledge or fitness abilities? Is this within my risk tolerance (distance, technical difficulty, conditions, exposure/ hights)?

A fun aspect of hiking for many people is pushing your own limits. But remember, doing this a little bit at a time is okay. Don’t overwhelm yourself or put yourself at risk by getting too far out of your limits. Trust what feels right to you both before and during your hike, and make sure to listen to your body. Make hiking alone an activity you can return to, love, and enjoy. 

So, is it safe to hike alone? Yes. And by keeping the tips above in mind, hiking alone can be a safe activity and may just open up a whole new world of possibilities.

Tips for Hiking on Muddy Terrain

Spring hiking in Colorado Springs, or just about anywhere in Colorado, is synonymous with mud hiking. Many of us ask the question, can you hike in the mud? The answer is a resounding yes, but there are a lot of particular tips for hiking in the mud that comes in handy to help any user get the most out of their time on the trail. 

Just because the trails are muddy doesn’t mean you have to stay at home and settle into couch life. Getting out is entirely possible! Learning how to manage mud season takes some adjustment time, but it gives you a whole new world of places to hike in the springtime. Mud season isn’t going to stop showing up, so it’s time to adapt. 

Photo by Caspar Rae on Unsplash

Pick the right trail

The best move for hiking in the mud is to do a hefty amount of research and preparation. Some trails will stay wamps throughout mud season, and others may be in better condition than others. If you pick the right trail, you may not even encounter much mud on the hike. 

To pick the right trail, head online and look into certain trail conditions. Some trails will be better positioned to drain quicker or dry out faster from the sun. South-facing trails, for example, get a huge amount of sun and will be much more likely to provide a solid, less muddy, trail surface. 

The internet is another great resource for discovering trail conditions in the spring. Many hikers head out and report back to different social media groups, where they will describe what the trail looks like throughout the season. You’ll likely find others have gone out and checked before you have even considered going out, so use the information they’ve provided to save yourself some time. 

Head out early

As the temperatures rise, ice turns to mud. If you can, getting out on the trails earlier in the morning means that the mud is likely to be a bit more firm and stable to hike on. Further on in the day, you’ll find yourself trekking through deeper and softer mud. 

Heading out early also gives you a jump on the crowds of people that are all trying to get outside after a long winter. Trails tend to deteriorate throughout the day as use increases. If you get out early, you’ll find the trail in the most pristine condition that it will be on that day.

Choose to get muddy

One of the best, but hardest to follow, tips for hiking in mud is to “make the trail deeper, not wider.” This concept generally means hiking straight through the mud rather than trying to walk around it off of the trail. While this is best for the trail, it’s hard to commit to getting yourself covered in mud that can often come up and over your boots. 

Taking care of trails often means not putting yourself first. In mud season, it means accepting the mud and owning it. You’re most likely going to get muddy anyway, so commit and get really muddy. Bring some plastic bags that you can throw your boots into when you’re finished with the hike, and the car upholstery will be grateful. 

Since getting muddy is just about the only option on the menu, it’s good to learn how to clean hiking boots well. Hiking in mud season means cleaning boots more often; otherwise, the mud will work its way deep into the boots and potentially ruin them. It’s a simple process but takes a bit of time to do once the hike is over. 

Protect your feet

Cleaning your boots is one way of protecting your feet in the long term. It’s equally important to prepare for the hike, as it is to prepare for cleaning up after the hike. 

Mud is likely going to make its way to your feet. Even the most waterproof boots can struggle up against some seriously thick mud, so you need to be prepared for the likelihood of getting wet feet. In mud season, it’s necessary to bring along a couple of extra pairs of socks to throw on throughout the hike or at the end and an extra pair of clean shoes to drive home in.

If the trail is completely obliterated and covered in soupy mud, bringing boot liners is a good option for protection. Boot liners are simply plastic bags that go between your boots and socks as a completely waterproof barrier. They aren’t comfortable, but they’re effective. 

Wet feet can be more than uncomfortable; they can be dangerous and painful if they stay wet long enough. Go prepared and knowledgeable about what to do when your feet get wet on the trail or at least have a quick exit to the car. 

Bring the right gear

On top of simple plastic bags, a couple of other pieces of gear will help make hiking in the mud more accessible. 

For starters, gaiters are a great addition to hiking in the mud and are perfect for spring hiking in Colorado Springs, as you may encounter some snow along the way. Gaiters are like sleeves for your ankles that strap over your boots and fasten around your calf. They function to keep anything from getting inside your boots, even when you get above the top of the boot. 

Gaiters will help you to keep anything from getting inside your boots, but they won’t help you when the mud makes you slide around like walking on ice. This is where a solid set of trekking poles comes in handy. 

Bringing trekking poles will give you a better sense of balance in the mud. You can take great care without them, but the moment your feet slip, you’ll look like a frosted chocolate cake rather than a happy hiker. Trekking poles add more contact points with the ground and improve your balance.