How to Clean and Maintain Hiking Boots

There comes a time in every hiker’s journey when they finally decide to invest in a pair of quality hiking boots. Once they are worn in and fit comfortably, you want to be able to keep them as long as possible. We’ll go over how to clean your hiking boots after each adventure as well as longer-term maintenance that will extend the life of your favorite hikers.

How Often Should I Clean My Hiking Boots

Keeping your hiking boots clean will improve their lifespan and ensure a safe and comfortable hike every time you hit the trail. There are different considerations for cleaning the soles versus the rest of the boot. It is a good idea to clean the tops of your hiking boots any time they get dirty. Dirt and debris can deteriorate the waterproofing of the material and lead the boots to degrade faster. Cleaning the bottoms of your boots after every hike is not necessary; however, you will want to get the muck out when it starts impacting your hike.

Why You Should Clean Your Hiking Boots after Every Hike

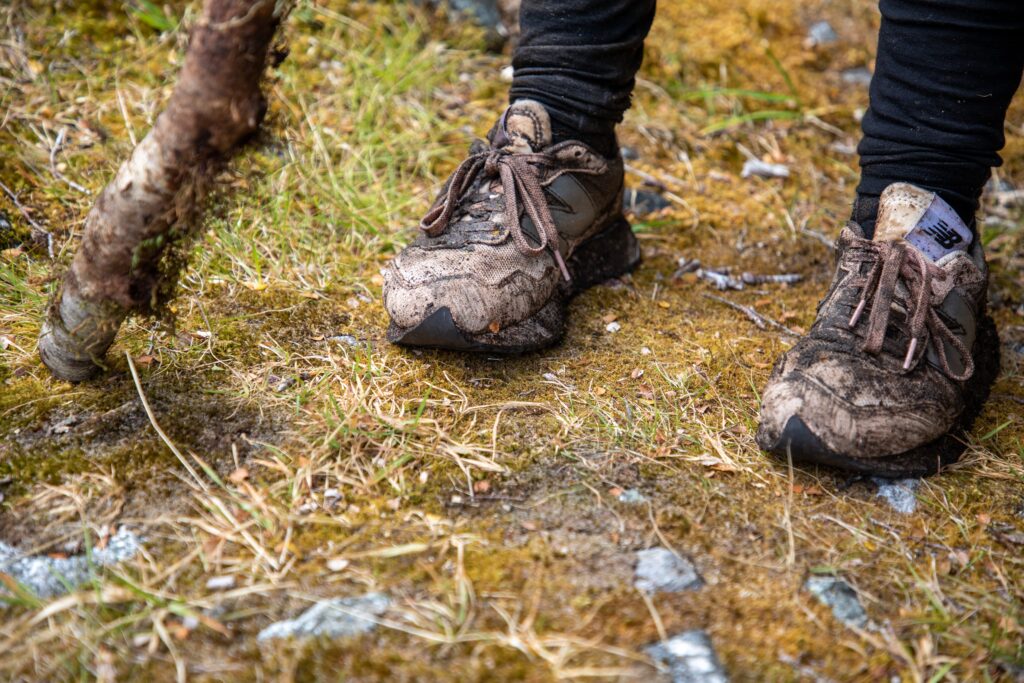
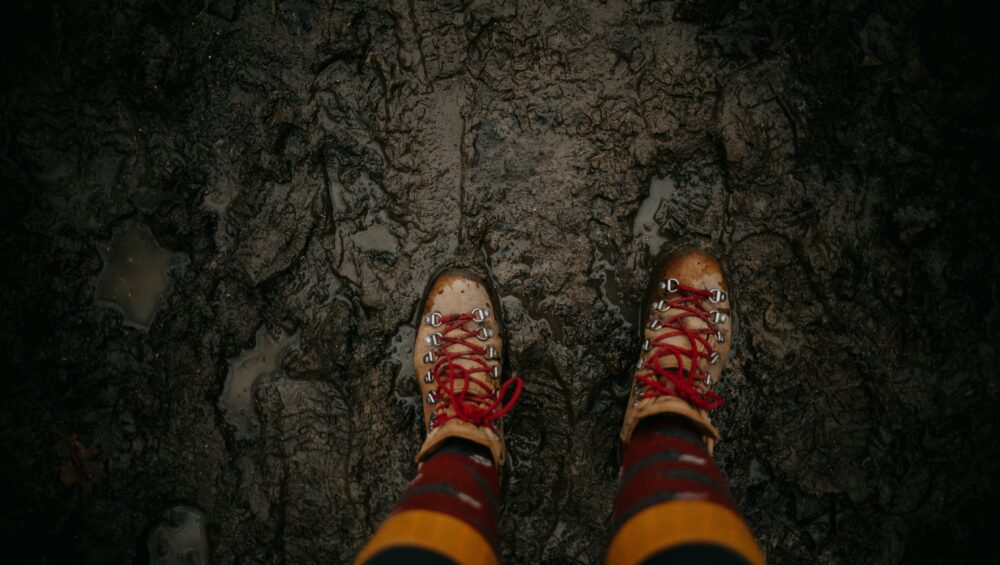
Although it may be tedious, you really should give your hiking boots a cleaning every time you get mud or dirt on them. You especially want to look out for debris near the laces. Every seam in your hikers – notably in the tongue and the eyelets for the laces – is susceptible to getting small particles of dirt stuck in there. 

As you continue hiking with dirty boots, the debris rubs on the material and breaks it down. This will first affect the boots’ waterproofing, but over time, you may see the material break down or tear. To ensure your boots will last as long as possible, you need to take care to clean them frequently. Especially if you are hiking in muddy terrain, be sure to give your hiking boots a deep clean when you get home. 

Why You Should Clean the Soles of Hiking Boots Between Hikes

The bottoms of your hikers are very durable, and caked-on mud won’t impact the material. However, there are two instances in which you will want to get the dirt out and have clean boots. First, if there is a lot of dried mud in your hikers, they will not have proper traction. When they start getting slippery or uncomfortable to walk on, you will know it’s time to clean that dirt out. 

Second, if you are hiking in different locations, it is important not to track in mud. Microscopic invasive species can live in the soil or muck on your boots, and you don’t want to spread these dangerous species around different areas. Cleaning your boots between hikes can protect the land and make sure you leave no trace on your hike

Photo by Liisa Tervinen

How to Deep Clean Hiking Boots

Giving your hiking boots a deep clean doesn’t need to take more than an hour. This simple process is well worth it in the long run to keep your hikers in good shape and save you money on replacements. The first step is to take the laces off and remove the insole. You can wash these separately with some dish soap and warm water. 

Cleaning the material of your hiking boots will require a brush, maybe an old toothbrush, to get rid of dirt and get into the nooks and crannies of the material. Especially for nubuck leather, do not scrub too hard as you can damage the material. 

If you do not have a special shoe-cleaning solution, you can use dishwashing soap. Do not use detergent or bar soap, as additives in these products can be harmful to the boots. You will need to thoroughly rinse the boots off after cleaning. Some materials can be submerged in water, while others (nubuck and some synthetics) can only get damp. In these cases, sponging the material with warm water will be best.

How to Prepare Your Hiking Boots for the Season

Once a year, it is a good idea to give your boots a deep clean and re-apply waterproofing treatment and/or conditioner to the material. Before you start, it is important to know what material your boots are made from. 

What Are the Different Materials of Hiking Boots

There are three main materials used for hiking boots, and maintenance varies for each type. Mostly any quality pair of hiking boots will be from one of these three materials as they are the best for providing waterproofing and durability.

The three main materials for hiking boots are leather, full-grain or nubuck, and synthetic. Nubuck leather is sort of like suede and generally has similar care instructions to synthetic materials. The main difference in caring for nubuck leather is that it should not be submerged in water, only damp. 

If you don’t know what kind of hikers you have, you can look up the brand online and find out. If you have a care guide for your hiking boots, you should refer to that. Always be sure to test a new cleaning product on a small, inconspicuous part of your boots before applying it fully. 

How to Waterproof Hiking Boots

Waterproofing your boots at least once a year will keep your feet cozy and dry and ensure the boots stay in shape longer. Waterproofing hiking boots does not take as long as you might think. After a thorough cleaning, you can generally apply waterproofing treatments while the boots are still wet. Read up on how to waterproof hiking boots for more details on caring for boots of different materials.

Conditioning Leather Hiking Boots

If you have full-grain leather boots, you do not need to apply a waterproofing treatment as full-grain leather is naturally waterproof. Instead, you just need to condition the material once a year to keep it looking its best and functioning properly. This will keep the boots from drying out and cracking, which will ruin their waterproofing and generally require replacements sooner. When conditioning leather, be sure to follow the instructions exactly. Using too much conditioner can cause the leather to be too soft, which will impact the boots’ sturdiness. 
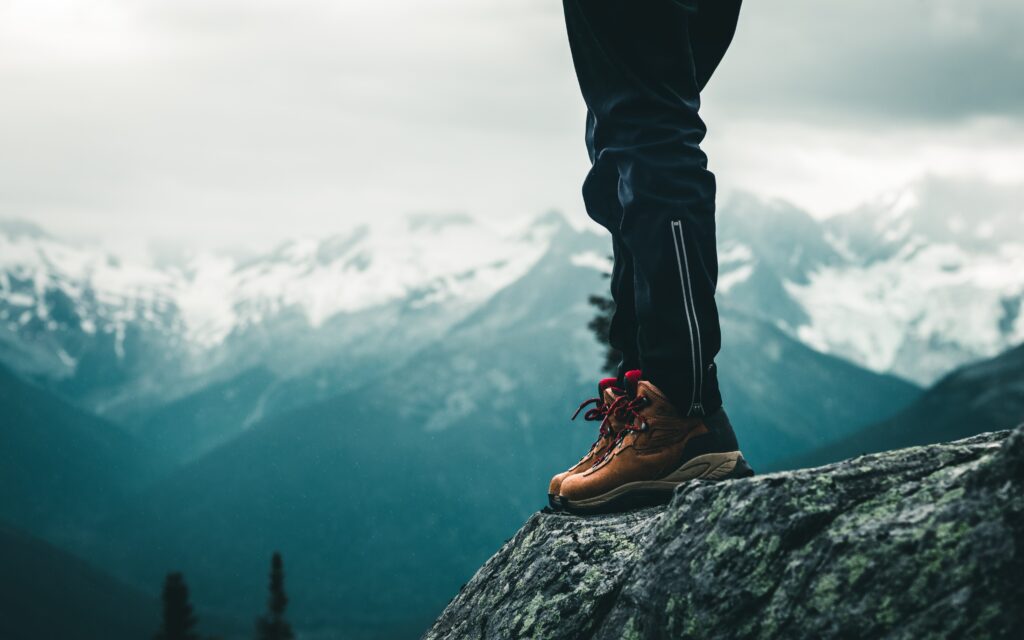
Photo by Ali Kazal on Unsplash

How to Get Your Hiking Boots Dry

Once you’ve given your boots a deep clean, you need to let them dry thoroughly before wearing them again. First, take the insoles out to dry separately. Next, you can use a fan if you need to dry your boots a little quicker, but do not leave them too close to a heater or a campfire. Extremely high heat can break down the waterproofing agents and prematurely age leather. You also do not want to leave them exposed to high sun, as this can also discolor and age leather. 

Because it does take time for hikers to dry all the way, be sure to plan ahead! Don’t save your boot maintenance until the day before your big trip. Finally, it is especially important to ensure your hikers are all the way dry before storing them for the season. Store them in a dry location (maybe not the basement) to protect them from mold forming. If your boots do smell moldy, a simple concoction of four parts water and one part vinegar will do the trick.

Final Thoughts

With these simple steps, you can ensure your boots will last longer and keep your feet protected from the elements. Getting a quality pair of hiking boots can be costly, but if you take care of your investment, you can make sure to get your money’s worth. Happy hiking!

How To Waterproof Your Hiking Boots 

Don’t you just love the snowy season in the Rockies? As you plan some awesome winter activities, one essential piece of gear you’ll need is waterproof boots. Winter hiking boots, that is boots that are waterproof and insulated, are key for staying warm during your time outdoors. If you don’t have waterproof hiking boots (or if your pair has gotten leaky), no worries! It’s easy to apply a waterproof treatment to any pair of hikers. Follow this step-by-step (no pun intended) guide to waterproofing boots so you can stay warm and enjoy the winter wonderland.

How can I tell when I should waterproof my hiking boots?

Waterproof hiking boots don’t stay waterproof forever. The treatment deteriorates over time and will leave your hikers vulnerable to wet conditions. Instead of getting a new pair, you can prolong their lifespan with a simple waterproofing. 

Aside from an unpleasant surprise mid-hike, how will you know when it’s time? You can get a sense of your boots’ waterproof capabilities with a simple test. Grab a spray bottle or put a boot under a trickle of water from the faucet. If you look closely, you should see the water droplets beading up before falling off your boot. If they soak into the boot rather than bead against the fabric, it’s time to reapply your waterproofing treatment.

How often should I give my hiking boots a waterproof treatment?

The frequency of waterproofing treatments depends on how often you use the boots. The waterproofing will go faster if you wear the boots regularly for long and rough hikes. It can also deteriorate faster when you clean the boots. It’s a good idea to apply this waterproofing treatment at the beginning of the season, before a particularly big hike, or after a deep cleaning. Treating your hiking boots at least once a year will keep them in good shape so your feet stay dry on the trail.

Which waterproofing treatment is best for my boots?

When you decide you are ready to waterproof your hiking boots, you’ll immediately be overwhelmed by the number of choices. There are sprays, waxes, and liquid forms of waterproofing treatments that are either wax- or water-based. You will want to choose what’s best based on the material of your boots. (More on the proper treatment for each material is below.)

One important thing to keep in mind here is that solid waxes have become less popular for waterproofing (See liquid wax below). This is because it can limit the ability of adhesives to stick to the material in the event that you need to have the boots re-soled.

Photo by Wes Hicks on Unsplash

How to Waterproof Your Hiking Boots

Step One: Clean Your Boots

The first thing you need to do before you waterproof your boots is clean them well. Any leftover dirt or grime will keep the waterproofing treatment from thoroughly adhering to your boots. To give your hiking boots a deep clean, first remove the laces and insoles (if removable). Start by brushing away dirt with a toothbrush or any brush with soft bristles. Then, use a mild soap or boot cleaner if you have it to scrub any dirt out of the seams, creases, and tongue. 

If any dirt is really stubborn, you may need to soak your boots in warm water to release the grime. After you give them a good scrub, you will rinse them with warm water anyway, so don’t be afraid of getting them wet. (Do not soak nubuck material – they are allowed to be “damp.”) 

You also may not need to dry them, as most waterproofing treatments work better with wet boots. When you are ready to dry them, you can towel them off and then put crumbled newspaper in the boots to absorb moisture faster. 

Step Two: Apply the Waterproofing Treatment

Below is an overview of a few ways to apply common waterproofing treatments to different hiking boot materials. Be sure to follow the instructions provided by the waterproofing treatment. The process may take time, but it is important to do it correctly so you do not ruin your boots. 

Waterproof Treatments for Leather Hiking Boots

Full-grain leather hiking boots are durable and naturally waterproof. They do not typically have an additional treatment and instead rely on the natural waterproof abilities of the leather. Waxes are the best ways to treat leather, support their waterproofing, and improve their lifespan. As opposed to solid wax, which you need to heat up, liquid wax is a faster and better alternative. 

Both waterproofing treatments should be applied to wet leather, as the water helps the treatment get into the leather better. Liquid wax treatments come with a sponge applicator, and you can work solid wax in with gloved fingers. You will want to buff the leather and repeat the process a couple of times before letting the shoes dry fully. 

Waterproof Treatments for Nubuck Hiking Boots

Unlike full-grain leather, nubuck is a soft material, sort of like suede leather. If your hiking boots have this material, you will need to be more cautious not to scrub too hard or use a treatment that will decolor or ruin the softness.

Additionally, nubuck should not be submerged in water: instead, the boots are allowed to be damp for applying the waterproofing treatment. Most nubuck waterproofing treatments are water-based, and you can find a liquid or a spray. Liquid can be applied liberally as you can wipe the excess off afterward. For a spray application, you will want to do two or three coats to ensure you do not miss an area.

Waterproof Treatments for Synthetic Hiking Boots

Synthetic hiking boots will likely be treated similarly to nubuck material. However, be sure to check the instructions to see if the material should be damp or really wet before application. Sprays tend to be the most popular for waterproofing synthetic materials, and they are easy to find. While you’re at it, you can waterproof your sneakers, backpack, and even a damaged tent.

Step Three: Drying Your Boots

After applying the waterproofing treatment, you need to let your hiking boots dry fully before use. If they get scuffed up or dirty mid-process, the treatment may not take as well. There are a few important things to keep in mind when you go to dry your hiking boots. First, too high temperatures, either next to a fire or in direct sunlight, can age leather too quickly and mess with adhesives. You will want to leave them in a dry, warm environment after toweling off excess moisture. Crumpled up newspaper will help, but it will still take a few days to dry fully. 

This is why you need to plan ahead and not try to waterproof your hiking boots the day before a big trip. Taking care of your gear will help it last longer and keep you safer and happier on the trail. Whether you’re trekking through snow or getting caught hiking in the rain, waterproof hiking boots are a lifesaver all season long. With a quick waterproofing treatment, you can make old gear like-new again and ensure a fun and dry time on trail. Happy hiking!

PLBs vs. Messengers – What You Need to Know For Hiking

As we enter the warmer months, you are surely excited to get back in the saddle and hit the trails. Beginner cyclists and mountain bikers need to be aware that you will need more than just a helmet and water bottle. There are a few biking tools you should carry with you at all times. A simple bike repair kit can keep you from a serious inconvenience on the trail. We’ll go over the essential bike maintenance tools so you can assemble a basic bike repair kit for your trip.

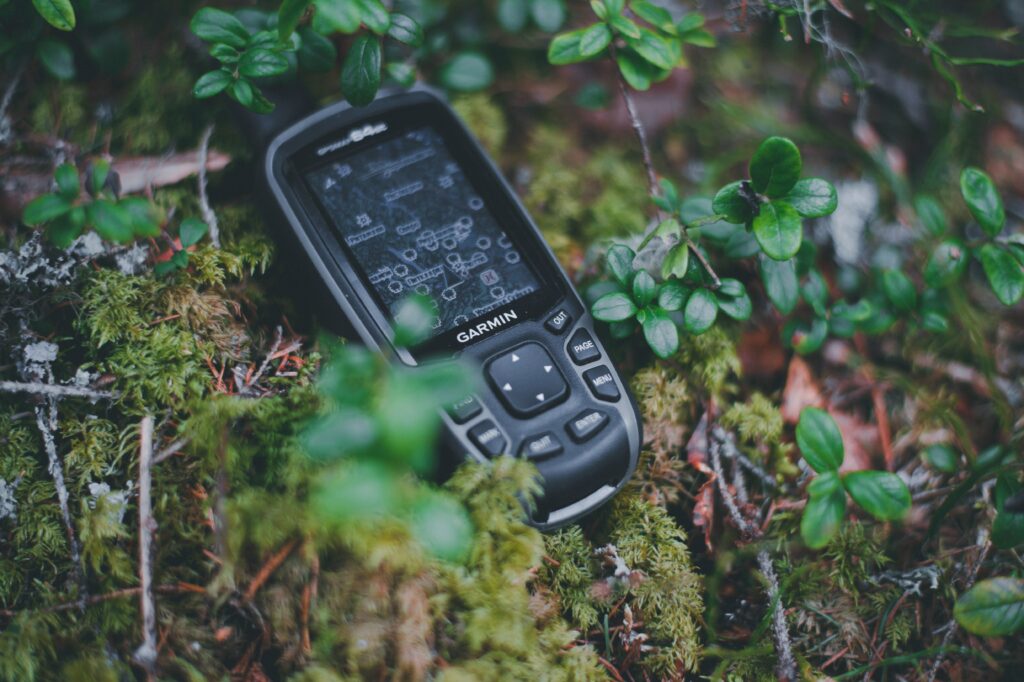
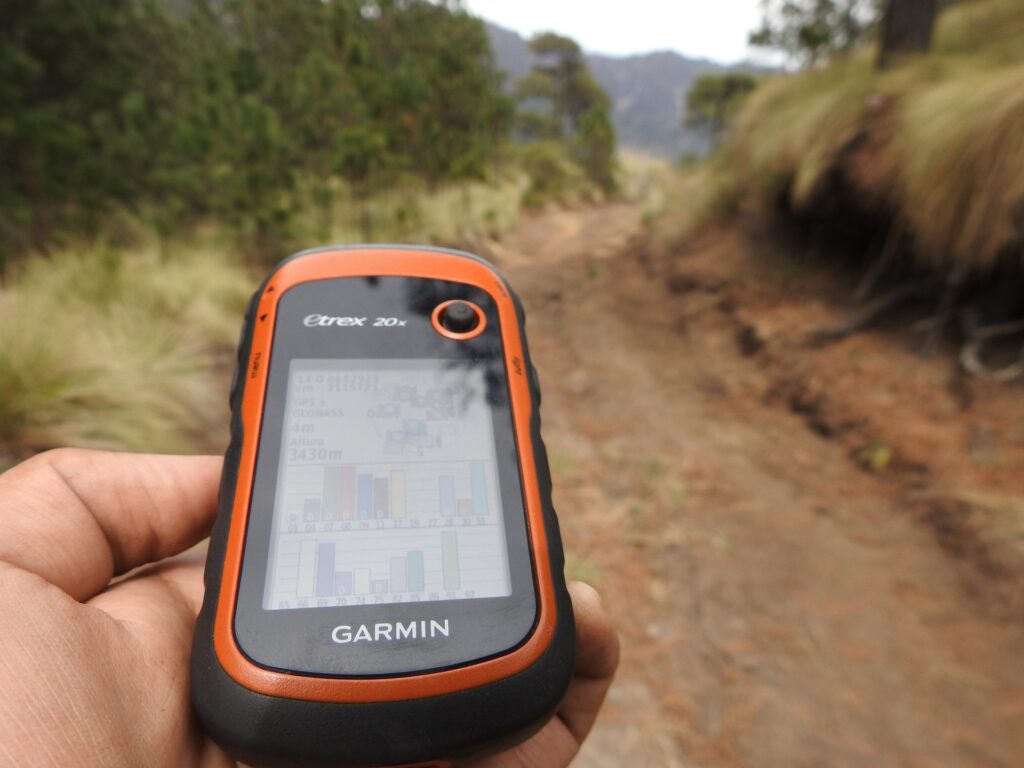
Are you considering getting an emergency beacon or messaging device? These are both great pieces of safety equipment to have if you are a serious hiker. While it is nice to unplug and be in nature, limited connectivity is a serious risk in the event of an emergency. A satellite-connected device can literally be a lifesaver if you need to send a distress signal. If you are looking to learn more about both and figure out which to get, we’ve got a complete breakdown of PLBs vs Satellite Messengers right here.

What are Personal Locator Beacons?

Personal Locator Beacons (PLBs, also called emergency beacons) are the more simple of the two devices. PLBs solely have the capability of sending your location to authorities. Unlike satellite messengers, they do not allow you to send messages to anyone else. Finally, because of their simplicity, once the distress signal is activated, there is no way to recall it.

How do PLBs work?

An emergency hiking beacon is very easy to use. If you find yourself lost in the woods or in an emergency and need to send a distress signal, you simply point the antenna up and turn the device on. This automatically activates the signal, which gets transmitted via satellite to local search and rescue operations. They will then have your exact location via GPS. Because PLBs need to be registered with the authorities, they will also be able to see whatever personal information you provide, such as emergency contact numbers and important medical conditions. Many PLBs also have regular and infrared strobe lighting to assist rescuers in finding you.


How long do PLB batteries last?

Personal Locator Beacons use long-lasting lithium batteries. Because they remain dormant until you turn the device on, it should last for up to five years. These batteries are required to be extra strong so that once turned on, the beacon remains strong for up to 24 hours. Unfortunately, they do need to be mailed back to the manufacturer in order to replace the battery, and this process can be expensive.

What are good Personal Locator Beacon brands?

ACR Electronics is a popular brand for both PLBs and Satellite Messengers. Their products are durable and highly rated, if not a little expensive. Ocean Spray and SpotX are two other brands of emergency beacons to consider.

What are Satellite Messengers?

Satellite Messengers are more capable devices, and as expected, can be more expensive. Not only do they provide the same functionality as PLBs, but they also have the ability to send and receive messages to friends and family. Some models allow communication with rescuers, which also makes it possible to cancel a distress signal.

How do Satellite Messengers work?

Satellite Messengers are similar to personal locator beacons but with more features. Satellite messengers allow users to text anyone, like family and friends. Some models also have color display screens, GPS navigation, and weather reports. They may also have Bluetooth capability to connect to your cell phone or fitness watch. As expected, these added features mean that the prices of satellite messengers vs PLBs are much higher in some instances.

How long do Satellite Messenger batteries last?

Unlike PLBs, satellite messengers have easily rechargeable batteries. Depending on the brand and model, the battery life when turned on may be up to a week, and asleep or in “expedition mode” up to three weeks. These longer battery-life models are a great option for extended backpacking trips.

Why do Satellite Messengers require subscription plans?

Because satellite messengers have more robust features and communication abilities than the simplicity of emergency beacons, they do require users to pay for a monthly subscription. This can be a major expense and is one reason many people opt for the more simple emergency beacons. That said, if you spend a lot of time in remote areas with limited or no cell reception, you may find it worth it to have GPS navigation and be able to communicate with your loved ones.

What are good brands of Satellite Messengers?

There are a lot of options on the market for satellite messengers, and the prices vary considerably based on the display, capabilities, and more. Depending on what features you want and what subscription you are willing to pay for, you can narrow your choices down to a few good options. The most popular Satellite Messengers are available by Garmin, ZOLEO, and SpotX.

Why can’t I just use my phone?

Many people are perfectly fine having just a cell phone on a short day hike. However, if you’ve hiked enough, you have surely experienced a drop in signal somewhere along the way. For serious hikers who like to take multi-day trips or hike miles from civilization, a cell phone will not be good enough. Cell signals can be unpredictable, and your phone could get water damaged, lose battery, or break in an emergency. PLBs and satellite messengers are much more durable than cell phones, more rugged, and typically waterproof to a certain depth. The peace of mind that comes with having a sure-fire form of communication can be worth it for many hikers.

When should I send a distress signal?

It is important that all hikers prepare well for their journeys. This includes packing all the essential safety gear including fire starters, emergency shelter, and first aid supplies. Distress signals should only be sent in true emergencies. It would be appropriate to use search and rescue services if your life is at risk or if you are unable to get back to safety on your own. Keep in mind that many states have penalties for frivolous use of rescue services, so take all the measures possible to prepare against emergencies. This includes not hiking in dangerous weather conditions, on unmarked trails, or in areas that have been closed off by park officials.

Can I hike alone?

If you are wondering if it is safe to hike alone, the answer is sort of. There are certain times when it would not be safe to hike alone, such as in bad weather, at night, or in an area with dangerous animals. If you do want to hike alone, it can be helpful to start small on a trail you know. Building up to longer solo hikes will help you feel more comfortable on the trail. The most important things to do when hiking alone are to pack all essential gear, carry multiple forms of navigation, and be sure to tell someone your planned route.

Final Thoughts

Personal Locator Beacons and Satellite Messengers are two helpful pieces of safety equipment for avid hikers. If you are looking for this extra peace of mind and trying to decide on a PLB vs a Satellite Messenger, consider the different features you would like and the costs. Either is a much safer option than just hiking with a cell phone, so you really can’t go wrong. Happy hiking!

How to Wear a Hiking Backpack

Are you looking forward to your first backpacking trip? Or maybe you’ve been on the trail and are wondering why your back hurts so much. A poorly fitting backpack can be a real hazard, causing back and hip pain, setting you off balance, and turning a beautiful hike into a miserable slog. 

In this article, we will set you up for success with three important steps: backpack fitting tips, how to properly pack a hiking backpack, and the right way to wear a heavy hiking backpack. Once you have these pieces sorted out, you will be ready to check out some of the best hikes near Colorado Springs with confidence and comfort.

Hiking Backpack Fitting Tips

The easiest way to get a backpack that fits well is to go to an outdoor equipment store where you can try some on with expert guidance. If you are buying a pack online or getting one from a friend, you might not have access to a professional opinion. But don’t worry: you can easily confirm on your own if a pack is a good fit for you.

The first thing you will do is measure your torso and hipbelt (not the same as your pants size!) and choose a pack that fits these dimensions. Whatever site you buy from will offer tips for taking these measurements, and be sure to look at the pack’s sizing guide, as different brands will vary. 

The Many Straps of a Pack, or How to Properly Wear a Hiking Backpack

Once you have your backpack in hand, you will see that there are plenty of adjustments to make. The torso size is key because too short a pack will strain your muscles and too big a pack will destabilize you. When you have that proper torso size, you can move to the hipbelt, which is the most important part of the backpack to adjust. 

Photo by lucas Favre on Unsplash

The Hipbelt

The pads of the hipbelt should sit high on your hips, around where your ‘love handles’ would be. Shrug your shoulders and tighten the hipbelt here. Your hips do a lot of the work in carrying the weight of a backpack, so if you find your shoulders hurting during a hike, you probably need to readjust the hipbelt. 

You do not want this to be too tight that it hurts or too loose that it slips down. It should be snug in order to stay affixed in place while you hike. If you find yourself with bruises (called hip rot) or a rash on the hip, it is probably because there is too much movement of the hipbelt.

The Shoulder Straps

Once the hipbelt is in place, you can use the shoulder straps to make adjustments to get the pack to sit snugly against your body. It is a good idea to do this initial adjustment with a bit of weight, say ten pounds, in the pack. If it is totally empty, you may not get a good feel for how the weight will feel on your shoulders and hip.

Load Lifters and Sternum Strap

There are still a few more straps on the pack, namely the load lifters and the sternum strap. The load lifters are small straps that go from the top of the pack frame to the shoulder straps. When properly tightened to about a 45-degree angle from the pack, these straps bring the load closer to your body, which makes it easier to carry with the pack’s center of gravity closer to your own. The sternum strap should sit about an inch below your collarbones and be just tight enough to keep the shoulder straps off your armpits.

Make sure you do not overtighten any of these straps. If you do, you will feel tension, in your neck as the load lifters pull your head back or in your chest as the sternum strap pulls your body inward. You want the shoulder straps to be snug, but they should not pinch your armpits or restrict your arm movements at all.

Photo by Ali Kazal on Unsplash

How to Properly Pack a Hiking Backpack

You might not realize it matters, but there are actually ergonomic reasons that you should pack in a specific way. This mostly concerns where the backpack’s center of gravity is and how you can bring it closest to your sturdiest parts.

The best place to put heavy gear is in the middle of a hiking backpack. The bottom of the pack is great for bulky items like sleeping bags and pads and maybe your pajamas. Heavy items down here, though, will make the pack sag, and for back safety, you should avoid letting it hang lower than four inches below your waist. Throw these bulky light items in first, especially ones you won’t need to access until camp, and then pack the heavier items like cooking gear and food next. Weighting the core middle area of the pack will help you feel stable on the trail.

Finally, the top of the pack is for trail essentials like your rain jacket, first aid kit, and supplies for water filtration and toilet usage. You don’t want to put anything too heavy up here, as it will throw off your balance and cause unnecessary tension. Hiking backpacks also have plenty of strap pockets and loops for storing headlamps, bug spray, navigation tools, high-calorie snacks, and other small essentials that you might want to access on the move.

How to Adjust a Hiking Backpack on the Trail

Lean Forward

Because the backpack’s weight is mostly behind you, leaning forward slightly will help you feel more balanced. Especially while going up or downhill, be aware of how the backpack’s position can change how heavy it feels. Try making slight adjustments to the straps and backpack’s positioning as you walk so you can learn to identify these stressors and improve your comfort on the trail. If you are wondering if trekking poles are worth it, they can certainly help in this situation to disperse weight better. 

Photo by A.Z on Unsplash

Avoid Load Fatigue

One helpful way to give yourself a rest as you continue hiking is to alternate between backpack positions. It is common to take a few minutes with a hip-heavy load, where you loosen the shoulder straps slightly and give your upper body a rest. Then you can switch, tightening the shoulder straps back up and loosening the hipbelt a little. You don’t want the pack to be in danger of falling off or affecting your ability to walk, but a few moments of small adjustments can help you recover mid-hike and avoid muscle fatigue.

Rest

It is so important to take breaks along your hike. Not only for water and snacks but also to give your body a rest. Even if you are only taking a short water break, you should take the pack off and shake out your shoulders. Take a moment to assess how you are feeling and if there are any sore places on your body that you need to address. If you ignore pain, it will likely only get worse, so pay attention to what your body needs and make changes.

With these backpack fitting tips, you should be ready to hit the trail and conquer Colorado’s beautiful peaks. Make sure you listen to your body, pack smart, and stay safe. If you are looking for a little extra guidance as you begin your hiking journey, check out one of these scenic guided hiking tours around Colorado Springs. Happy hiking!

How to Keep Your Feet Warm While Hiking

If you are hoping to hit the trails this winter, you will need to know how to keep your feet warm while hiking. With treacherous temperatures and feet of snowfall not uncommon in the area, warm boots and warm socks are essential pieces of hiking gear here in Colorado. 


We’ve got some of the best fall hikes near Colorado Springs, so let’s dive into the proper gear for your feet and tips for keeping warm so you can get out there and enjoy.

Photo by Oziel Gómez on Unsplash

Gear Necessities for Staying Warm on a Hike

Sock Strategy for Cold-Weather Hiking

In order to keep your feet happy and warm on a hike, you need to wear multiple layers and consider all factors. The first and most important way to keep your feet warm is to keep them dry. Therefore, a moisture-wicking base layer needs to be the first thing you put on your feet. These thin moisture-wicking socks will keep your feet dry no matter how sweaty they get. 

The second layer is insulation. You can wear thick wool socks, which come in different weights (lightweight, midweight, or heavyweight) depending on how cold you are anticipating temperatures will go. If you own insulated hiking boots, these can be worn with just a thinner lightweight wool sock. 

When you are purchasing insulating socks for hiking, there are a few things to keep in mind. In terms of comfort, you want to find socks that fit a little looser. This will help them fit well over your moisture-wicking layer and make sure that your feet are not being squeezed at all. In terms of value, investing in quality socks will definitely make your life easier in the long run. Wool socks tend to be expensive, but they are the best option here as cotton holds moisture and does not insulate as well for the same thickness. 

The Best Boots for Cold-Weather Hiking

The final layer is the boot, and its main job is protection. A good hiking boot protects you from all sorts of injuries, rolling an ankle, stepping on something sharp, and hopefully, preventing frostbite. As noted, insulated hiking boots are a great option for folks who often hike in colder weather or find themselves standing around a lot while on a hike. 

Another must for Colorado hikers is waterproof hiking boots. Many people do not like their boots to be waterproof because it limits breathability. However, if you are hiking in winter or changing elevation substantially, there is a good chance you will come across snow. There is nothing worse than getting your boots wet, from rainy weather or a water crossing, when you are on a hike. If your feet do not have time to dry, you will be risking frostbite, blisters, and surely general discomfort. Even having snow land on your boot can be dangerous, as your body heat will melt it and allow the water to seep in through the tongue. On a very cold day, you could watch your boots freeze up, thus ending your hike.

You may wonder how to fit multiple pairs of thick socks in your hiking boots. When hiking in cold weather, you need to size up on boots. This will allow room for the socks without compressing your feet. You should aim to be able to wiggle your toes in the boots. If you do go for insulated hiking boots, the sizing will understandably vary as well, so it is helpful to go to a physical store to figure out what size will work for you. 

Tips and Tricks for Keeping Your Feet Warm While Hiking

Be Prepared: Watch the Weather

Before you head out on your cold-weather hike, be sure to check the weather and trail conditions. It is easy to learn how to check trail conditions for hiking safety, and it will save you a disappointing and potentially dangerous hike. 

What to Pack to Keep Your Feet Warm

In addition to the warm socks and warm hiking boots already discussed, there are a few specific items that should go in your daypack for your feet. It is always a good practice to have a first aid kit, a blister kit, and in winter weather, chemical warmers for your hands and feet. These will allow you to warm back up in an emergency. You could also consider getting thermal insoles to redirect your body heat back up if you do not have insulated boots. Finally, you should always pack an extra pair of socks: you never know when you will need them, and at the very least, putting on clean socks at the end of the day will be a great reward for your hard work.

Don’t Put Your Boots On Too Early


It is always good to have a second pair of shoes, in case of emergency and for comfort in the car or at the campsite. When you are getting ready for your hike, changing into your boots should be one of the last things you do. This way, your feet will not get sweaty in those waterproof boots before you even get going. 

Don’t Lace Your Hiking Boots Too Tight

The reason that it is so important to have enough wiggle room in your shoes, literally, is because compressing your feet can lead to frostbite. When you are cold, the blood vessels closest to the skin and out in your limbs constrict in order to keep your core at the proper temperature. If you were to tie your shoes too tight, you are only further cutting off blood flow. This will make your feet feel colder sooner, and it can worsen symptoms of frostbite. 

Keep Your Core Warm

This feels obvious, but because your body prioritizes core temperature, your feet will be the first to get cold if you aren’t dressed warmly enough. Therefore, one of the best ways to ensure your feet stay warm while hiking is to make sure the rest of you stays warm, too.  

Get Your Feet off the Ground

The cold, hard ground is going to be one of the coldest places you can step. Even in the snow, the reflection of the sun’s rays makes the ground slightly warmer. When you take a water break or rest on your hike, try to stand on a rock or a tree trunk instead of the ground below. You will find the ground saps the heat from your idle feet faster than anything else.

Always Be Willing to Turn Around

One of the best winter hiking tips (that I believe is applicable year-round) is to always be willing to turn around. If you feel yourself getting too cold, if the trail conditions have changed, or if the weather is taking a turn for the worse, you should head back. The risk of frostbite or other injuries is not worth it.

Photo by Greg Rakozy on Unsplash

How to Warm Your Feet Back Up After Hiking

Get Dry

As keeping your feet dry is one of the most important tips for staying warm, it should be obvious that drying your feet off would be the first step for warming back up if your feet do get cold while hiking. Let your feet air dry for twenty minutes before putting warm socks on. This will make sure your skin is thoroughly dry to prevent blisters. This is especially true if you got your feet wet from something more than sweat, say wading through a river or hiking in a rainstorm.

It can be hard to let your feet dry out properly if it is cold outside. You can dry them off with a towel and then cover them loosely in a blanket or sit inside your tent. This will give them a little space to dry off without getting too cold in the process. 

Go Slow

One thing people often do is try to warm up too quickly. It is tempting to jump in a hot bath when you are cold, but if your toes are cold to the bone, it is not a good idea to try to warm up too quickly. If you’ve done it before, you know it is very painful. The transition from very cold to even tepid can be painful and actually harmful to your vascular system, sending cold blood to the heart.

Rather than shock your system with a quick transition, you can reacclimate to the warmth slowly. If you are camping and building a fire, take a seat far away and get closer as you warm up. Let your feet tell you if you get too close too fast. If you want to warm up with water, make sure you start with colder water and warm it up slowly with your feet.

Skin-to-Skin Contact

The best way to warm up cold feet is with skin-to-skin contact. Use your hands or thighs (sitting cross-legged) to warm your ankles and feet. If your skin is truly frozen, you should not massage or rub it as you can break the skin, but just hold it there to let heat transfer. Or, even better, if there is someone with you who can help, warm breath and skin-to-skin contact with someone else’s warmer body areas like the torso, thighs, and armpits are quick ways to safely warm skin.

If you are looking for some fun and rewarding hiking destinations this season, check out our Guided Hikes near Colorado Springs. You will get expert advice from a certified guide and plenty more real-world experience hiking in the great outdoors in colder weather. 

How to Clean Your Sleeping Bag

A sleeping bag is a vital piece of equipment for anyone who ventures into the outdoors, especially since it’s part of the essential gear you need for camping. But it can also be a spendy investment. Maintaining, storing, and washing your sleeping bag is essential to get the most use out of it. We’ve compiled all the information you need below to help you clean your sleeping bag. 

Photo by Felix M. Dorn on Unsplash

General Care

Sleeping bags should not need washing for many years when properly tended to. The best way to prolong the time between washes is to take good care of your sleeping bag in the first place. Some tips to help maintain cleanliness include:

  • You get what you put in: Keep a clean pair of clothes to sleep in. Try to keep yourself clean as well. That means removing oil, dirt, sunscreen, and bug spray that can permeate into the bag. The cleaner the items are in the bag (you), the greater likelihood your sleeping bag will stay clean too.
  • Liner: A sleeping bag liner is a single-layer enclosed sheet you sleep in inside your bag. The liner serves as a barrier between your body and the bag. It should be easy to remove and should be washed regularly. Liners are slipped inside a bag, not attached.
  • Off the floor: Keeping your bag off of the ground will help keep dirt, pine needles, and other debris out and off of your bag. This does not include your sleeping pad which serves as a barrier between your bag and the ground.
  • Dry it out: Lay your sleeping bag to dry the day after every use. Our bodies produce moisture that gets trapped in our bags from our breathing, sweat, or the environment’s humidity. When camping, try to find a dry spot on a tarp or maybe over a clean log and give the material a chance to dry and breathe. Laying out your sleeping bag prevents mold from forming in your bag.

Be Gentle

Treat your bag with care. Take your time with zippers, gently put the sleeping bag away, and mind where you place them. Most bags are best stored loosely in a well-vented bag or hanging environment. Compression stuff sacs are helpful for compact travel but are not recommended for long-term storage as they compress the material and wear down the fill. Over time, this compression ultimately impacts your bag’s warmth and comfort. Additionally, tight storage can trap smells and moisture, leaving you with a pleasant experience the next time you use it!

Washing

The first factor to consider when cleaning your sleeping bag is how much of your sleeping bag needs cleaning. The second factor to consider is whether you have a down or synthetic bag. The third is whether you have access to a machine wash or if you will need to hand wash. Consider a total wash if you notice a general browning color, overall grime, or an overall smell. For smaller messes or stains, simple spot treatment of the impacted area is fast and effective. 

Spot Cleaning

Often, only a few areas of a sleeping bag need cleaning. To spot clean, use a gentle soap mixed with water and lightly brush or rub the dirty area with the cleaning solution. Do your best to keep the cleaning solution on the exterior material only and not saturate the bag’s fill. Once you have spent some time cleaning, wipe the spot with a wet cloth and leave it to dry.

Photo by Ivana Cajina on Unsplash

Full Wash

Most new sleeping bags come with wash instructions which you can find on the tag. This is the best method to follow when cleaning your bag. If there are no instructions, consider the following techniques and remember that no matter the form, cleaning your sleeping bag takes time and patience:

Machine Wash

  • Device: The best way to machine wash a sleeping bag is to use a front-loading washing machine. Do not use a top loader, as the bag may become damaged and tangled around the center bar. If you do not have access to such as machine, consider going to a laundromat.
  • Soap: If you are machine washing a down sleeping bag, use special soap that is friendly on down material. If your fill is synthetic, you can use a regular detergent, but a technical gear-specific detergent will be best. Nikwax makes different detergents for both down and synthetic fill.
  • Means: Some suggest fully unzipping your bag before loading it into the washing machine, so the upper doesn’t pull apart or catch in the wash. Another option is to turn your bag inside out with the zipper fully closed. Wash your sleeping bag in warm water on a gentle cycle. The sleeping bag may need two or more rinse cycles. It is ready to dry if the bag is wet but not holding large amounts of water. Then be sure to gently squeeze any excess moisture out of the bag as you remove it from the wash.
  • Drying: Use a large dryer if possible; the more room in the dryer, the better the fill can expand when drying. Synthetics will often dry faster. Bags with down fill may take several drying cycles. Set the dryer to tumble on a low heat setting. Consider using tennis balls or other dryer aids to break up condensed pockets of fill towards the end of the cycle or when it is mostly dry.

Hand Wash

  • Device: Fill your bathtub or a similarly large tub with warm or cool water.
  • Soap: Use the same material-specific soap listed above and read the instructions for the recommended amount. When hand washing, it can be more difficult to rinse the soap out, so starting with a smaller amount than recommended may be beneficial, and slowly adding more as you go.
  • Means: Lay the bag in the water and gently rub and massage the bag. Next, soak the bag for around thirty minutes or until it is fully saturated. Rinse your bag with clean water (you may do this multiple times) until the soap is out. Before hanging to dry, gently squeeze excess water out of the bag. It can be helpful to work from one end to the other squeezing section by section.
  • Drying: Follow the directions above. If a dryer is unavailable, lay the sleeping bag on a clean surface or hang it up to dry. Use a location out of direct sunlight and with low humidity. Once it has started to dry, you may need to manually unclump or fluff the fill in your bag to ensure it dries thoroughly.

Final Thoughts

Have a new sleeping bag that you are excited to test out? Autumn is the ideal time to hike and then cozy up in your sleeping bag under the stars! For some spectacular colors and views, check out the best fall hikes near Colorado Springs. While it is safe to hike alone, if you are looking for some expertise, guided hikes through Broadmoor Outfitters are a perfect way to learn about and get familiar with a new area or trail.