Rock Climbing Safety for Outdoor Climbing

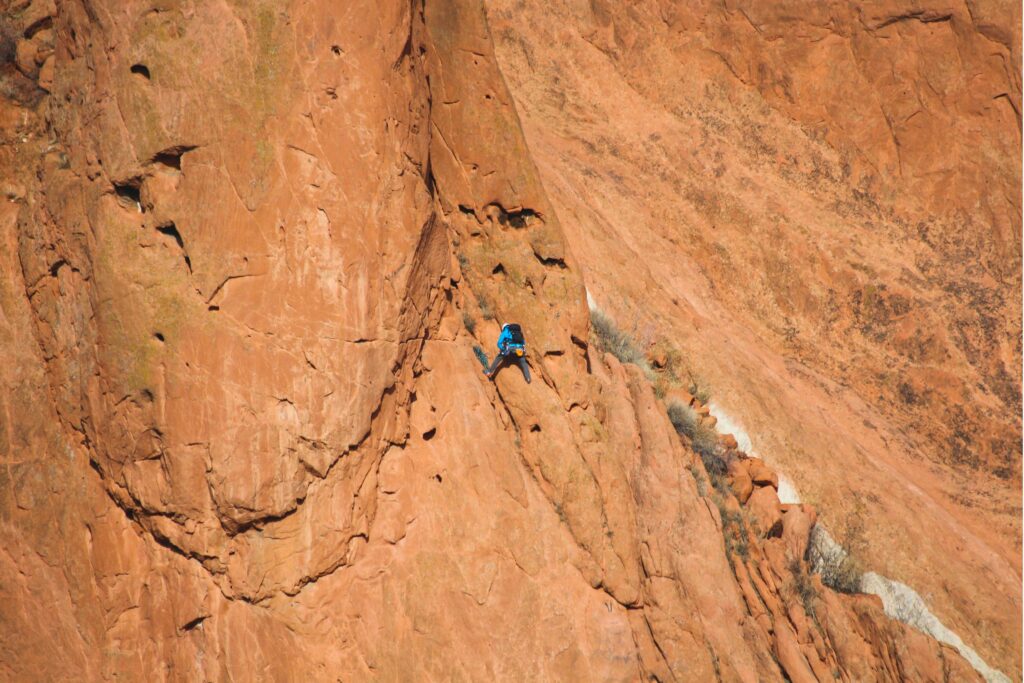
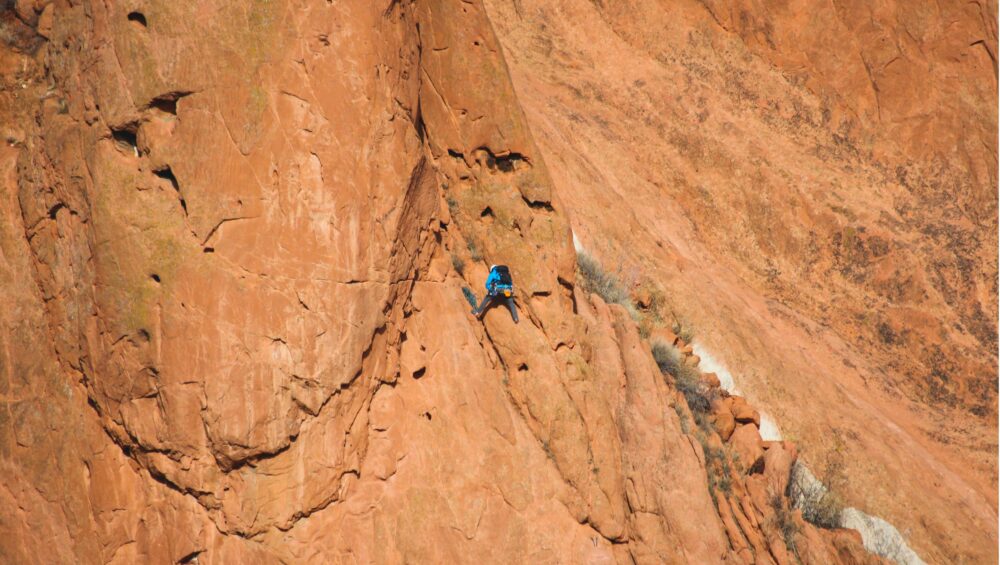
No matter your skill level or knowledge base, rock climbing is an inherently dangerous sport. Yes, risk can be minimized but never eliminated. 

That’s why establishing a base of knowledge and know-how when it comes to outdoor climbing is imperative to help you have the safest outdoor climbing experience possible. 

It is better to be more prepared and well equipped to handle any situation when it comes to outdoor climbing. If you’re new to climbing, the safest way to get outside is to hire a guide or take an instructional course to teach you the ropes.

Photo by Jon Hieb on Unsplash

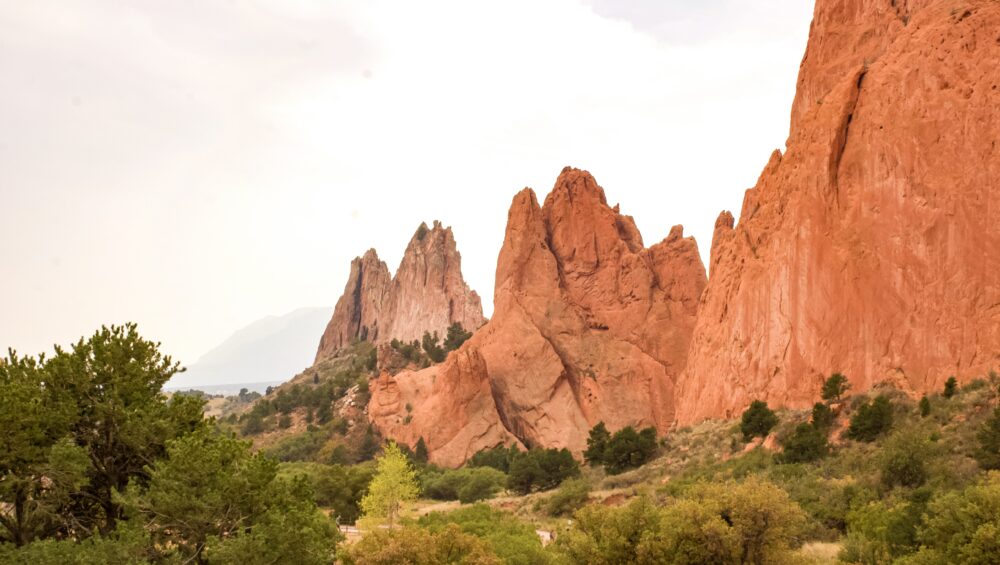
Dangers of outdoor rock climbing 

What’s more is that most rock climbing accidents and deaths are due to human error of some kind, not a gear failure. That means that most of the dangers involved in outdoor climbing are under our control, and we can do our due diligence to prevent them. 

Things like 

  • knowing how to use your safety gear properly, 
  • learning how to land safely when bouldering,
  • doing your safety checks,
  • being aware of climbing and weather conditions, and
  • climbing within your skill level is somewhat within your control as a climber. 

There are always natural risks, such as falling rocks, sudden weather changes (common in the mountains), or gear failure that can cause severe injury or even death. 

But rock climbers are far more likely to experience a minor injury versus a serious injury in their climbing career. These will be things like scraped knees or elbows from the rock wall or maybe a sprained ankle from landing on the edge of a crash pad. 

Most of these minor injuries tend to be reported by sport climbers, trad climbers, or boulderers. So, if you are venturing into outdoor climbing in pursuit of top-roping, your risk has already decreased because you won’t be lead climbing or bouldering.

Minimize risk when climbing outdoors with these safety tips

Severe injuries and minor injuries can be minimized with the proper knowledge and attention. Here are our top tips to improve your level of outdoor climbing safety. 

1. Climb within your ability level

It is great to get outside and push grades, but this should be done in a controlled manner. It is one thing to go out to the crag and push grades with a group of experienced climbers, and it is something else to jump from lead climbing in a gym to trad climbing a multi-pitch. 

We aren’t saying that you should never challenge yourself when climbing outdoors, but be aware of your physical boundaries and technical knowledge. 

In some cases, you may be strong enough to climb something, but you may lack the technical knowledge (i.e., how to build a trad anchor or clean a sport anchor) to do it safely. To overcome these barriers, enroll in an instructional class on anchor building, climbing technique, or climb with more experienced people. 

You can also hire a personal trainer to help you build up your climbing endurance if you’re preparing for a big climb and want to be physically prepared. 

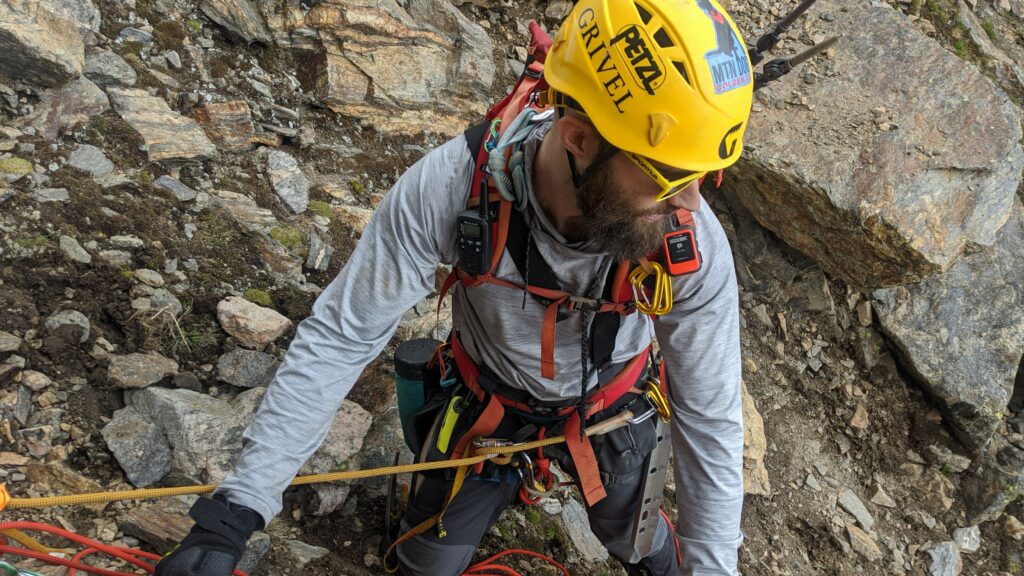
2. Have the proper safety equipment (and know how to use it!)

You need to know the gear necessary to complete a climb safely when you head outside. This knowledge can be found on online resources like Mountain Project or guidebooks for the area you plan to climb. These resources also provide you with approach information, and if you use online platforms, they may also provide weather updates.

Knowing what you need before you go can save you a lot of time, trouble, and potentially an accident. Just having the safety gear will only get you so far, though. You need to know how to use it too!

If you’ve climbed in a gym before, you likely already know how to wear your harness and tie a few knots. But do you know how to clip draws when sport climbing to avoid back clipping or z-clipping?

Can you build a toprope anchor using your own gear?

Do you know how to place solid gear?

You need to ask yourself these types of questions when you are investing in gear and when you are heading outside to climb. There are several resources to learn how to do these things, such as articles online, videos, books, courses, and friends. 

Simply taking the time to practice these skills under the supervision of someone who already knows the ins and outs of climbing safety will help you feel more confident when climbing outdoors, and it will be much safer when you go on your own. 

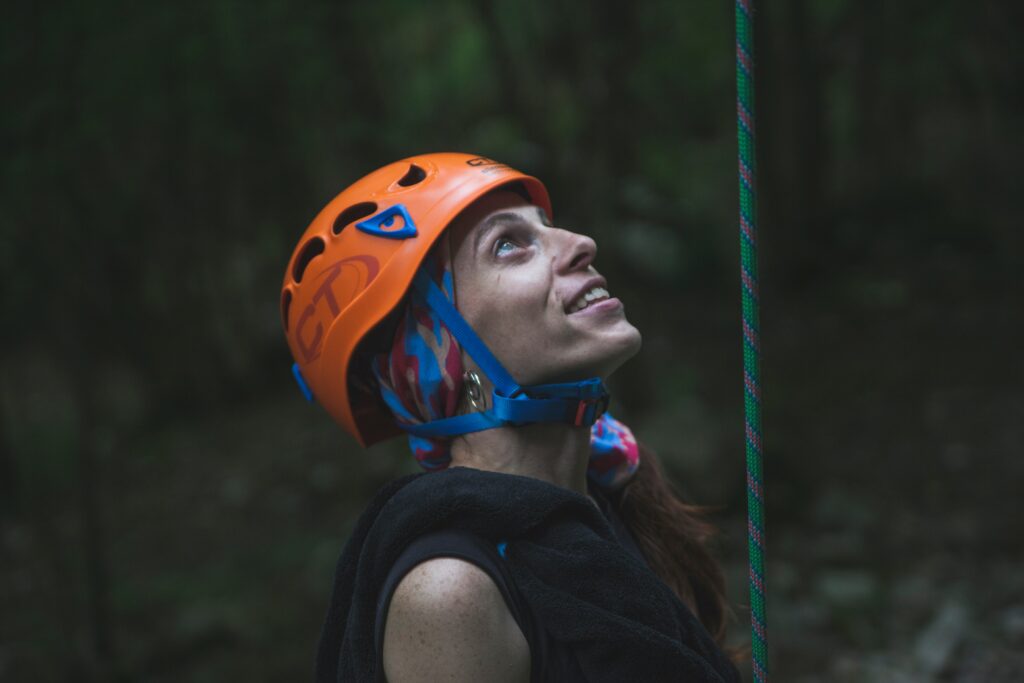
Other safety gear to always use outdoors: helmets.

Helmets should ALWAYS be worn by both the climber and belayer.

3. Understand belay systems and knots

A big part of knowing how to use your safety gear is knowing how to belay correctly and tie your knots. On top of that, always do safety checks for your climber and belayer. Even if you are experienced as a climber, a safety check can save your life. We are all human, and humans make mistakes. Double-checking helps us catch those mistakes before it is too late.

Lead belaying and toprope belaying differ, so know how to do both if you plan to climb in both styles. 

There are a few ways to tie into your harness as the climber. The most common way is to use the figure-eight follow-through knot. Know how to tie this knot with proficiency and perform checks on your partner. 

Other knots should be learned and practiced for anchor building, self-rescue, and other climbing skills. 

Knowing how to tie knots is essential. Take the time to learn about anchor systems and how to clean anchors. While sport climbing tends to be less technical than trad climbing, plenty of accidents occur when cleaning anchors due to a lack of knowledge and know-how. 

4. Have experience or climb with someone who does 

If you read the above tips and were thoroughly confused, then the best tip to apply is this one: climb with someone more experienced so they can teach you best practices for outdoor climbing safety. 

You don’t necessarily need to book a guided trip with a professional or enroll in an instructional course if you have a knowledgeable friend. Still, the benefit of booking with a certified climbing guide is that they’re professionally trained. 

They’ve not only done these things themselves, but they’ve gone through classes to learn best practices and how to teach rock climbing safety to people of all skill levels.

In the end, while some risk in rock climbing is left up to nature, a lot of it is up to you. With the proper education, practice, and safety equipment, you can minimize some risks.

Not sure if you’re ready to climb outside on your own yet? Hire a guide!

Best Beginners Rock Climbing in Colorado Springs, CO

The Centennial State is a paradise for any outdoor enthusiast, with seemingly endless options for recreational activities for residents and visitors alike. While each corner of the state has its own brand of exciting outdoor opportunities, Colorado Springs is conveniently located to offer access to just about any activity you could want to pursue in the Rocky Mountains.

From world-class hiking and fishing to mountain biking, skiing, and rock climbing for those more fueled by adrenaline, The Springs boasts unrivaled access to it all. If you have always wanted to try rock climbing but were unsure where to go, some of the best beginner climbing in Colorado is right here in our backyard.

Many of the best places to climb near Colorado Springs are very beginner-friendly while simultaneously offering terrain to excite even the most experienced climbers in your party.  

Photo by Intricate Explorer on Unsplash

What to Look for in a Beginner’s Climbing Area

If you are new to the sport, seek out guided rock climbing in Colorado Springs to safely learn about rock climbing. If you want to give it a shot on your own – or perhaps are taking out a friend for their first time – here are a few things to consider when identifying beginner climbing in Colorado Springs:

The Approach

Avid rock climbers know that some of the most rewarding climbs may require many hours – or perhaps even an overnight – on a trail to access the routes they seek to climb. When looking where to climb near Colorado Springs for beginners, consider crags that require a minimal approach to access.  

Type of Climbing

There are a variety of types of rock climbing ranging from beginner-friendly to expert.  

Bouldering is performed on small rock formations – often boulders – without the use of ropes or harnesses. Routes generally do not get too high off the ground, and crash pads help protect from a fall. Bouldering is a beginner-friendly style of climbing but often requires considerable strength to navigate the more dynamic moves.  

If you are hoping to use ropes and harnesses, top rope accessible routes are the most beginner-friendly options available. When top roping, the rope runs from the climber through anchors at the top of the route and back down to a belayer at the bottom. This offers the most protection should the climber fall or need a break during the climb. 

Sport climbing utilizes preplaced bolts in the rock, which a climber clips with a quickdraw on their way up the wall for periodic protection. This type of climbing is more consequential, as coming off the wall will usually result in a larger fall. 

Traditional climbing, or trad climbing, requires climbers to place gear and protection as they navigate a route and remove all gear upon completion. Leading a trad climb is not recommended for beginners.  

Ratings

When seeking beginner climbing in Colorado, checking route ratings is imperative. Using the Yosemite Decimal System, ropes are recommended for all 5th class climbing. Beginner rock climbs then fall between 5.0 – 5.8 in rating, and climbing areas with many routes in that range are great for novice rock climbers. Bouldering uses the V Scale, with beginner routes ranging from V0 – V3.

Photo by Alexis Gethin on Unsplash

Best Beginner Climbing Areas in Colorado Springs

Red Rock Canyon Open Space

Location: 10 Minutes from Downtown

Type of Climbing: Mostly sport climbing with some top rope options available 

Recommended Routes: Head to The Whale for the biggest selection of beginner sport routes

This young park located just outside of downtown Colorado Springs is owned by the city and managed by a dedicated team that aims to protect and preserve this natural and recreational asset for many generations. With nearly 100 unique routes between the east and west canyon walls, Red Rock has one of the best selections of beginner and moderate routes in the region. 

Given its proximity to Colorado Springs, Red Rock Canyon Open Space is a favorite among locals and visitors alike. Not only is the park virtually located in town, but most of its climbing areas boast incredibly easy access as well. Whether you have a full day to explore or just a morning or afternoon, Red Rock Canyon Open Space is undeniably one of the best places to climb near Colorado Springs. 

Shelf Road

Location: North of Canon City

Type of Climbing: Mostly sport climbing with accessible anchors to set up top rope routes

Recommended Routes: The best beginner routes can be found at  The Bank and Cactus Cliff 

If you were to ask a local where to climb near Colorado Springs, they would likely point you to Shelf Road. Located just a little over an hour southwest of Colorado Springs, this climbing hotspot has well over 1,000 unique routes to explore. Climbers from around the world come here to test their mettle, but there are many beginner-friendly routes at Shelf Road as well. While sport climbing is the modus operandi, many of the bolted anchors can be used to set up a top rope with relative ease. 

As a bonus, many of the walls on Shelf Road boast very friendly approaches, and the quiet and beautiful backdrop is worth a visit alone. Coupled with excellent camping options nearby, Shelf Road has quickly become one of Colorado’s premier climbing destinations. 

Garden of the Gods

Location: Off of US Highway 24

Type of Climbing: Mostly traditional and sport with some quality bouldering and a few top rope options

Recommended Routes: 

Big Sky (5.7 Sport) and New Era (5.7 Trad, 2 pitches) at Kindergarten Rock

The Prow (V0+) and West Face Left (V2) at The Snake Pit Area

We would be remiss to discuss rock climbing in Colorado Springs and not mention Garden of the Gods. This is the area’s most famous destination. In addition to over two miles of hiking trails, ample road and mountain biking options, and easy access right out of town, this National Natural Landmark is also a great place to go rock climbing.

While not as beginner-friendly as the other places on our list, the conglomerate sandstone, and limestone formations beckon to be climbed. Routes range from easy bouldering problems to complex traditional climbing routes. With just a little sleuthing, you can find something for everyone.  

No matter your outdoor interests, The Centennial State has you covered. If this is the year you decide to give rock climbing a try, some of the best beginner climbing in Colorado is located right here in Colorado Springs. Explore the area on your own or with the best guided rock climbing in Colorado Springs, and prepare to rope up and have the time of your life. 

Should I Book a Mountain Bike Tour or Rent a Mountain Bike?

Headed out to Colorado Springs for a family vacation? Or are you traveling solo and looking to pack as much outdoor activity into your trip as possible? Perhaps you’re a nature lover and want to spend some time leisurely exploring the Garden of the Gods, Red Rock Canyon, or Ute Valley Springs. No matter where you fall in these categories, mountain biking is a fantastic way to make the most of your time in world-renowned Colorado Springs! 

Now, your adventure boils down to two options:

A mountain biking tour in Colorado Springs

Or, 

A mountain bike rental in Colorado Springs 

On a bike tour, you’ll have various trails to choose from and get to do your exploring with a knowledgeable guide. On the other hand, if you rent a bike, you’ll have free reign over your trip length and can hit the trail without a guide. 

At Broadmoor Outfitters, you’ve got both options! The main points to consider when deciding are skill level, budget, and interests. This article will help you decide which route to choose so your mountain biking in adventure in Colorado Springs is a wonderful experience.

So, let’s dive into what to consider when deciding on a mountain bike tour vs. mountain bike rental.

Skill Level

For people who can ride a bike but aren’t super skilled at navigating curves and rocks, a mountain bike tour in Colorado Springs, CO is definitely the way to go. 

Did a young family member recently ditch their training wheels? Our bike tour is perfect for families with children. Our tour guides are happy to speak with you about your comfort on a bicycle in order to fine-tune the tour to suit everyone’s unique needs. Your guide will also factor in how long you want to ride, and they’ll be able to navigate you back to “base” easily if anyone decides they’re done with the ride early.

Photo by Darcy Lawrey from Pexels

For athletic or even semi-athletic folks who are looking to pack in as much scenery as possible or can comfortably work up a sweat, a mountain bike rental might be the way to go. 

The rental option can also be ideal for families who have children that are close in age and riding level. It can be a fun and unique bonding experience for families to decide which trails to explore, navigate the trails together, and even choose when to take breaks for water and snacks.

Cost

Mountain biking in Colorado Springs is something anyone can enjoy on any budget. No matter how much you’re able to spend, there’s an experience for you. Here are some items to keep in mind as you consider your budget.

 How much time do you want to spend mountain biking? If it’s just one item on a long list of adventures you’re preparing to go on at Broadmoor Outfitters, you should go with a mountain bike tour.

Image by Fabricio Macedo FGMsp from Pixabay

Seeing as you’ll have lots to do and only want to spend a few hours on a bike, a guided tour is a cost-effective way to optimize your time. You pay for a few hours of riding versus renting a bike for an entire day when you plan to use it only for a short time. Your guide will help you make the most out of your trip. Then, you’ll have plenty of time left in the day for other activities. 

If mountain biking is your thing and you want to dedicate a day – or even more – to biking, then consider mountain bike rentals in Colorado Springs, CO. When renting, you’ll have a whole day or more to ride your bike to multiple areas of your choosing. You won’t pay for a guide, and you’ll have total freedom to make it an epic and unforgettable ride.

Interests

What do you want out of your trip and, specifically, this mountain bike ride?

If the purpose of your trip is to spend some solo time in nature, and you enjoy looking at trail maps and selecting your route, you’ll enjoy mountain bike rentals in Colorado Springs, CO. Just make sure you’re comfortable with navigating the area and, of course, follow all safety protocols. 


If your goal is to relax and let someone else do the planning, consider mountain bike tours in Colorado Springs, CO. We’ll take all the fuss out of figuring out which trail is perfect for you and your family. That way, all you’ll have to do is show up and enjoy the ride!

Image by Fabricio Macedo FGMsp from Pixabay

Bringing it Together 

Mountain Bike Tour in Colorado Springs

Pros

  • Efficient method to see the beautiful sights.
  • Stress-free! It’s already planned out.
  • There’s a guide with you – you won’t get lost, and you’ll have someone who knows the area in case of an emergency.
  • The trail is well-maintained. 

Cons:

  • The tour may not cover the area you want to see. 
  • Can only ride for a few hours or the duration of the tour

Mountain Bike Rental in Colorado Springs

Pros: 

  • Total control over where to ride. 
  • You can rent the bike for a whole day or more. 
  • Great for people looking to ride for exercise. 

Cons: 

  • It may be difficult to transport bike(s) depending on where you plan to ride. 
  • The trail may not be maintained/easily navigable. 

Still not sure? Don’t worry; you can’t choose wrong! The main characteristic that both mountain bike tours and mountain bike rentals have in common is that they’re a great way to experience nature and make memories that’ll last a lifetime. Have any questions before making your decision? Feel free to contact us and we’ll help you pick the perfect activity for your trip.

Beginners Guide to Stand Up Paddleboarding

Beginners Guide to Stand Up Paddleboarding

If you’ve ever watched people gracefully paddling on water and wondered how to stand up paddleboard, you’ve come to the right place. Stand up paddleboarding is a fun way to enjoy the outdoors, and it’s easy for beginners to learn. Check out our stand up paddleboarding tips below, and when you’re ready to join us, book your spot in our Stand Up Paddleboard Tour in Colorado Springs.

What Is Stand Up Paddleboarding

Stand up paddleboarding involves standing on a paddleboard, which is not unlike a surfboard, and using a paddle to propel yourself across the water. Unlike surfing, however, these boards are wide and stable, so it’s easier to stay upright. Beginner paddleboards are usually 10’6” long and 31” wide. They are easy to maneuver and don’t require as much balance as you might think. Plus, the benefits of learning how to stand up paddleboard are totally worth the potential of falling off in front of your kids.

Image by ivabalk from Pixabay

There are plenty of benefits to this fun watersport. First, stand up paddleboarding is an excellent full-body workout, using core muscles for balance and paddling. Second, it’s a great way to enjoy the beauty that Colorado Springs has to offer. You can paddleboard on a river, ocean, or – as we do here – a lake. Since you are standing, you can easily take in the sights while relaxing on the water. Finally, it’s a fun social activity for friends and families. This is an excellent adventure for older kids to tackle alone, and little ones can stand on a board with a parent.

Gear Needed for Stand Up Paddleboarding

Your Paddleboard 

There are three required pieces of equipment for learning how to stand up paddleboard, and we provide them all on our tours. The first is a paddleboard, and we use only high-quality and reliable boards. These solid boards with slip-proof coating are ideal stand up paddleboards for beginners to learn on. All boards come with a velcro leash to secure around your ankle. This prevents the board from drifting away if (and when) you tackle a tumble into the water. 

The Paddle 

The second is a paddle, and our lightweight paddles are comfortable to use. The paddles are adjustable and should be nine or ten inches taller than you. One simple trick for sizing your paddle is to raise your hand straight up above your head and put the paddle handle in your palm. When you can comfortably grip the paddle from this position, that’s the perfect height for you. It’s easy to learn how to use the paddle to navigate through the water, and our Stand Up Paddleboarding Tour in Colorado Springs covers this and other techniques. 

Personal Flotation Device (PFD)

The third piece of gear is a personal flotation device (PFD), which is essential while paddleboarding. A PFD allows you to stay safe while paddleboarding over deeper waters, and it also makes it easier to remount the paddleboard from the water. PFDs come in multiple sizes for adults and children, so be sure to get one that fits snugly without being restrictive. 

Finally, let’s talk about clothing. If it’s cold, you may want a wet suit or rash guard. You can also wear water shoes to keep your feet warm while paddleboarding. Make sure to pick shoes that will stay on (flip flops are sure to get lost) and won’t slip on wet surfaces. In warmer weather, don’t forget to lather up with sunscreen before hitting the water.

Image by Dimitris Vetsikas from Pixabay

Stand Up Paddleboarding Tips and Techniques 

When you first get on the water, you’ll do so from a kneeling position. Having your center of gravity a little lower keeps you more balanced and prevents falling in shallow waters. You can stay kneeling or sitting the whole time, but then you wouldn’t be stand up paddleboarding. What’s the fun in that? So the first thing you need to learn about how to stand up paddleboard is, well, standing up!

Standing Up on Your Paddleboard

The key to standing up on a paddleboard is to go slowly from kneeling, to squatting, to standing. When you stand from a kneeling position on solid ground, you move all your body weight to one foot and then the other. If you tried this on a paddleboard, you would tip over and end up in the water. This is an easy enough mistake to make, but it’s also avoidable if you know the proper technique!

Photo by Elise Bunting from Pexels

To maintain your balance, first move into a low squat to keep your center of gravity closer to the paddleboard. It’s easiest to put down your paddle first – across the paddleboard in front of you. Then, place a hand (or both) on the board while you move into a squat. Place your foot in the same place your knee just left to ensure balance and stability in your stance. 

Once you’ve made it to a low squat, you can stand straight up. Don’t forget to bring the paddle with you! Now standing, make sure your feet are hip-width apart with your toes facing forward. Keep your knees bent and engage your core for balance. This is especially important while paddling, which is next on the list.

How to Paddle a Stand Up Paddleboard

First, let’s go over the proper technique for holding a paddle. If the paddle is to the right of your board, your left hand should be on top, holding the T-grip in your fist. Place your right hand a few feet down the shaft. To keep the paddleboard moving straight, switch sides every few strokes. When you do this, also change your hand positions so the opposite hand is always on top. 

The Forward Stroke 

Let’s start moving with a forward stroke. Both of your arms should be fully extended, with your top arm parallel to the board and your bottom arm at a forty-five-degree angle. The angle of the paddle blade should point away from you. Bury the whole blade in the water to get maximum power with each stroke. Be sure to pull your paddle back as far as you can; try to get your body past the paddle before you take it out of the water for the next stroke.

Image by thelester from Pixabay

Reverse Stroke 

Once you’ve got the forward stroke down, you can also do a reverse stroke. As the name implies, it’s just the forward stroke backward with the paddle starting next to or slightly behind you. Make sure to bend your knees and engage your core! Doing so provides stability and power as well as protecting your back from injury in this twisted position. You’ll most often use the reverse stroke for stopping or slowing down.

The Sweep Stroke – For Turning 

The last aspect to paddling a stand up paddleboard for beginners is the sweep stroke. This stroke allows you to turn quickly, even when your board is standing still. Start by placing the paddle near the nose of your board with the blade perpendicular to the paddleboard. Then, using your legs and hips for power, sweep the paddle in a semicircle backward towards the tail of your board. This motion will cause you to turn away from the paddle. If you do a reverse stroke, starting at the tail and sweeping toward the nose, you will turn toward the paddle. 

This technique gives you a couple of options for turning in the water. If you want to turn to the right, for example, you can do a sweep stroke on the left side of the board or a reverse sweep on the right.

How to Get Back on a Stand Up Paddleboard from the Water

The last of our stand up paddleboard tips, especially important for beginners, is how to get back onto a board after you’ve fallen in the water. The first step is to locate your paddle and place it across the nose of your paddleboard. If it has drifted too far away, you’ll need to get back on your stand up paddleboard first (since you’re connected via leash) and paddle with your hands to retrieve it.

Join an intro to paddleboarding class today!

Why Visit The Garden of the Gods

Why Visit Garden of the Gods?

Consider visiting Garden of the Gods with all the recent discussions on social distancing and getting out for some fresh air. Hiking, rock climbing, Jeep, and Segway tours are just a few of the recreational activities to enjoy during your visit.

Welcome to Garden of the Gods

Formerly known as Red Rock Corral, Garde of the Gods in Colorado Springs, Colorado, offer up some impressive geological features. Unique rock formations that have evolved over the early years have created some remarkable hogbacks, such as the Kissing Camel and Cathedral Valley.

The most visited public park in Colorado Springs is undoubtedly Garden of the Gods, attracting over two million outdoor enthusiasts every year.

What to do at Garden of the Gods

Rock Climbing

During your visit to Garden of the Gods, gear up and hit the rocks. Rock climbing is extremely popular here thanks to the steep rock formations. Should you be a beginner, consider trying out Cowboy Boot Crack.

More daring climbs include Anaconda, Triple Exposure, and Scarecrow. Watch out for the deception of the routes and always remember safety. All climbers that wish to traverse the rocks of Garden of the Gods need an annual permit. The yearly application is on the City of Colorado Springs website.

Climbers must also adhere to the Technical Climbing Regulations and Guidelines. Safety measures include proper equipment, having two or more in your party, and not staining chalk. There is also no climbing after rain or snow, as the rocks become unstable after they are wet.

Hiking

Lace-up your best pair of hiking boots and enjoy the 1.5-mile Perkins Central Garden Trail. This trail is excellent for wildlife viewing, walking, running, is paved, wheelchair accessible, welcomes dogs on a leash, and is open all year round.

Perkins Central Garden Trail starts at the North Parking Lot and leads you across Garden of the God’s gigantic and beautiful red rocks.

Should you be looking for longer trails, consider any of the twenty trails that are available when you visit Garden of the Gods. Any of these trails are excellent for social distancing and exercise.

Jeep and Segway Tours

Hook up with one of the local companies that provide jeep and Segway tours through Garden of the Gods. Enjoy checking out Cheyenne Canyon, waterfalls, spectacular views, and historical districts. Take in the flora, fauna, and geology the park has to offer.

Electric Bike Tours

Enjoy the magnificent beauty of Garden of the Gods and conquer the hills easily with an electric bike rental. Hook up with a group for a bike tour or venture out on your self-guided tour when you pick up a rental.

Mountain Biking

Load up your mountain bike and venture out onto a designated mountain bike trail when you visit Garden of the Gods. Hikers also utilize these trails, and equestrian riders, so watch out for them

Remember to abide by Garden of the God’s regulations for mountain biking as you are enjoying your day. Stay on the trail, be sure to dismount from your bike when you see a horse coming towards you, watch for wildlife, pack out what you pack in, control that speed, and most of all, have FUN!

Conclusion

Social distancing, along with exercise, is natural when you visit Garden of the Gods. Going out into the fresh air and enjoying all the park has to offer is a win-win situation.

For more information, or to plan your trip to Garden of the Gods, contact Broadmoor Outfitters for all your planning needs.