Falconry, the ancient art of hunting with birds of prey, offers a unique opportunity to connect with nature and witness the remarkable relationship between humans and raptors. In this blog, we’ll explore the exhilaration of the falconry experience in the wild, a journey that promises both educational insights and unforgettable adventures.

The Fascinating History of Falconry
Dating back over 4,000 years, falconry has its roots in the ancient cultures of the Middle East and Asia. This captivating practice melds tradition with the thrill of the hunt, offering participants a glimpse into the past while engaging with the present natural environment. Originally, falconry was a status symbol among the nobility. In Medieval Europe, only the elite could afford the time, resources, and expertise required to train birds of prey, thus earning it the moniker ‘The Sport of Kings’ historical status symbol.
The Mongolian Empire is known for its robust practice of falconry, where it served not only as a pastime but also as a practical means of hunting for food. This tradition has been passed down through generations, integrating into the very essence of these cultures ancient art of falconry. As the practice spread across continents, it brought with it diverse techniques and varying cultural significance.
In modern times, falconry has evolved into a global practice that attracts enthusiasts from all walks of life. Diverse locales like the plains of North America, the hills of Scotland, and the deserts of Arabia each offer unique challenges and prey, demonstrating the adaptability and timelessness of this remarkable tradition. Whether driven by historical fascination or the sheer joy of skillful hunting, participants find themselves deeply engrossed in the nuances of this global legacy.
Understanding the Bond Between Human and Bird
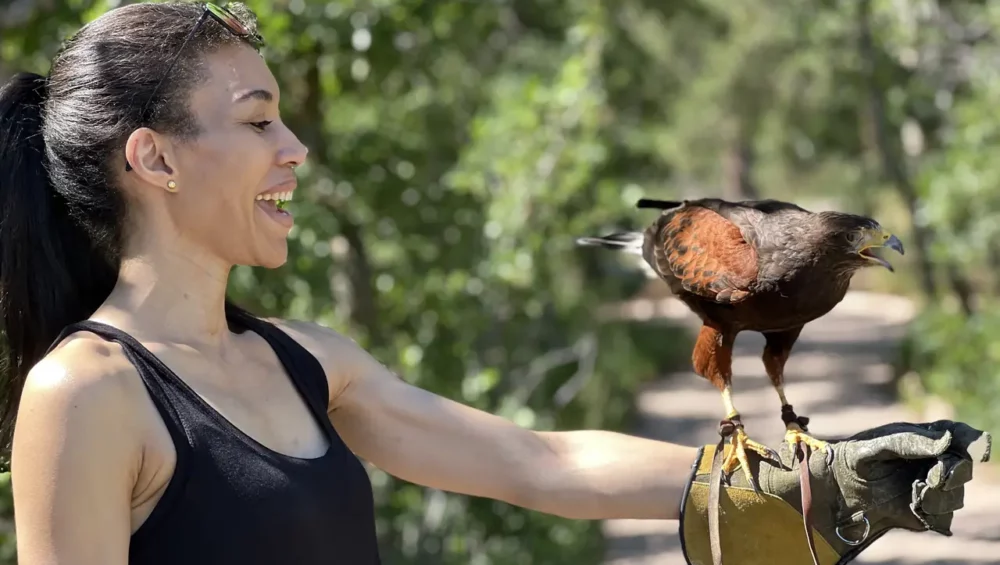
The falconry experience is much more than a display of skill; it is a testament to the deep connection and mutual respect between humans and raptors. This section delves into how this relationship is forged and the trust required to successfully practice falconry. At the core of falconry lies a profound understanding of the behavioral nuances of birds of prey. Handlers must interpret and respond to various cues, fostering an environment of trust and cooperation.
Unlike domesticated animals, raptors chosen for falconry remain inherently wild, so the falconer must earn its trust rather than impose control. This mutual relationship is a balance of instinct and learned behavior, where the handler guides the hunting instincts of the bird while respecting its autonomy. The partnership is solidified through careful training and consistent reinforcement, with falconers keenly aware that their avian partners could choose independence at any moment if not adequately cared for.
Through consistent interactions, the falconer becomes attuned to the moods and health of the bird, able to anticipate its needs and actions. Hand signals, vocal prompts, and even the way the falconer moves play integral roles. The knowledge and intimacy shared with these majestic creatures provide a glimpse into a world where man and nature successfully collaborate in the hunt. This relationship underscores the traditional and modern significance of falconry as a harmonious dance between human intelligence and the raw power of nature see falconry as a unique form of hunting.
Learning the Basics: What to Expect
For newcomers, understanding the basics of falconry is crucial. This portion covers what participants can expect during their introduction to the sport, including training techniques, handling the birds, and essential gear. The initial phase, often through programs like the Falconry Beginners Lesson at Broadmoor Outfitters, is designed to offer hands-on experience under professional supervision, ensuring both safety and education.
Beginners learn about the history, biology, and behaviors of birds of prey. They are introduced to equipment such as gloves, leashes, and jesses — each essential for handling and training. The teaching sessions frequently start in a controlled environment where participants can safely practice the techniques of summoning, launching, and engaging with the birds. These foundational experiences are imperative, offering beginners a taste of a falconer’s expertise and opening up the rewarding challenge of skillful interaction.
The importance of patience and observation is emphasized from the start. Like any form of wildlife interaction, falconry demands respect and attentiveness. Newcomers are taught to read the subtle cues of their birds, deciphering signals that indicate readiness for flight, hunger, and even stress. These lessons are deeply rewarding and lay the groundwork for more detailed and involved practices in advanced falconry. As participants gain confidence and skill, they can transition to more interactive lessons that offer exhilarating adventures in the wild.
Experiencing the Hunt: Thrill in the Wild
Nothing compares to the exhilaration of watching a bird of prey soar into the sky on a hunt. This section describes the excitement and unpredictability of participating in a falconry hunt, where every moment brings a new perspective on the natural world. When the falcon takes flight, there is a palpable shift, a sense of anticipation mixed with awe as it ascends against the vast canvas of the sky. Each swoop and dive weaves a narrative of ancient hunting, showcasing the raptor’s grace and ferocity.
Participants in a falconry hunt are involved in every aspect of the pursuit. Whether scaring up game or directing the raptor’s path, the engagement in this primal dance is profound. The excitement lies not only in witnessing the bird’s success but in the entire process — from the quiet stalking to the sudden burst of action as the prey is locked in the raptor’s sights. It’s an adventure that allows participants to feel a connection with the cycles of life, sharpened by adrenaline and admiration for their avian counterpart.
A falconry hunt can occur in various terrains, each offering its unique challenges and rewards. Whether trailing through woodlands or traversing open fields, the unpredictability of wildlife and the environment adds layers of intrigue to each outing. This vibrant and immersive experience not only highlights the agility and intelligence of the birds but also the critical role of the falconer in guiding and facilitating the hunt. These shared experiences forge a deeper bond with nature and instill a renewed appreciation for the wild.
The Ethical Considerations of Falconry
Responsible falconry respects the delicate balance of ecosystems. Here, we explore the ethical aspects practitioners must consider, such as conservation efforts and sustainable practices, ensuring the welfare of both the birds and the environment. Falconers often play a critical role in the conservation of certain raptor species, providing assistance in survival and contributing to biodiversity through educational outreach and citizen science.
The significance of falconry extends beyond recreation, as ethical hunters strive to maintain natural populations and habitats. Conservation-oriented falconry can help raptors survive their first precarious year in the wild, as experienced hunters raise and then release young birds back into their natural environments conservation role of falconry.
The unique relationship between falconer and bird raises important ethical questions about human intervention in the natural world. Falconers must operate within strict legal and ethical frameworks that protect the welfare of the birds and ensure they are treated with the dignity they deserve. Thus, prospective falconers are required to learn about wildlife laws and undertake rigorous training to align with these standards. Ethical falconry not only preserves the tradition but also honors the majestic creatures at its core, fostering a future where humans collaborate with nature for mutual benefit.
Embark on Your Falconry Adventure
Embracing the falconry experience in the wild not only deepens our appreciation for these magnificent creatures but also enriches our understanding of nature’s delicate balance. Whether you’re a wildlife enthusiast or a curious traveler, falconry is sure to offer an inspiring and thrilling adventure.